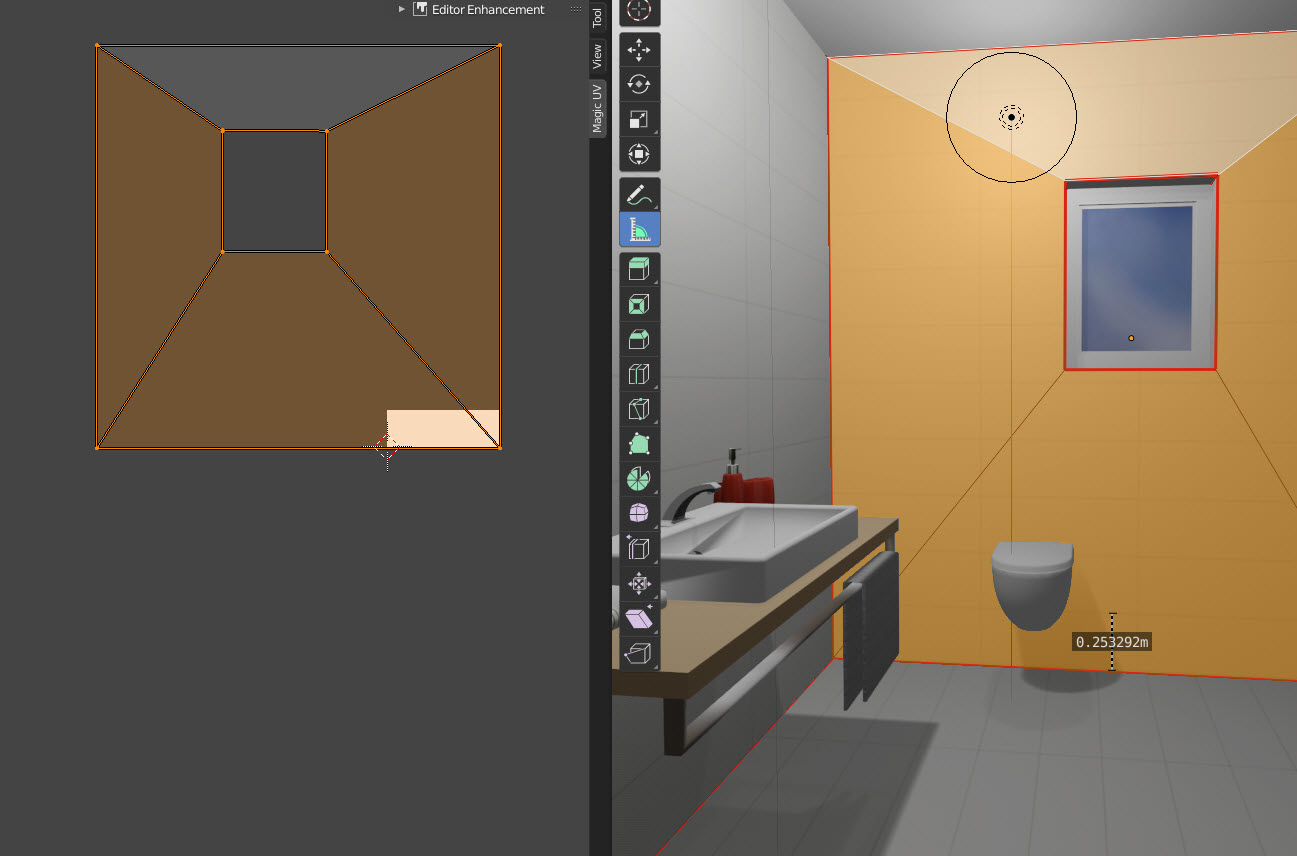
So, i'm working at a bathroom and my main problem is with tiles. My tile is 25cm x 75 cm how cand I apply exact measurement of my tiles to fit the walls. Let's sey I can hardly apply exact uv mapping on one wall, but is more hard to fit the other walls at the same measurement.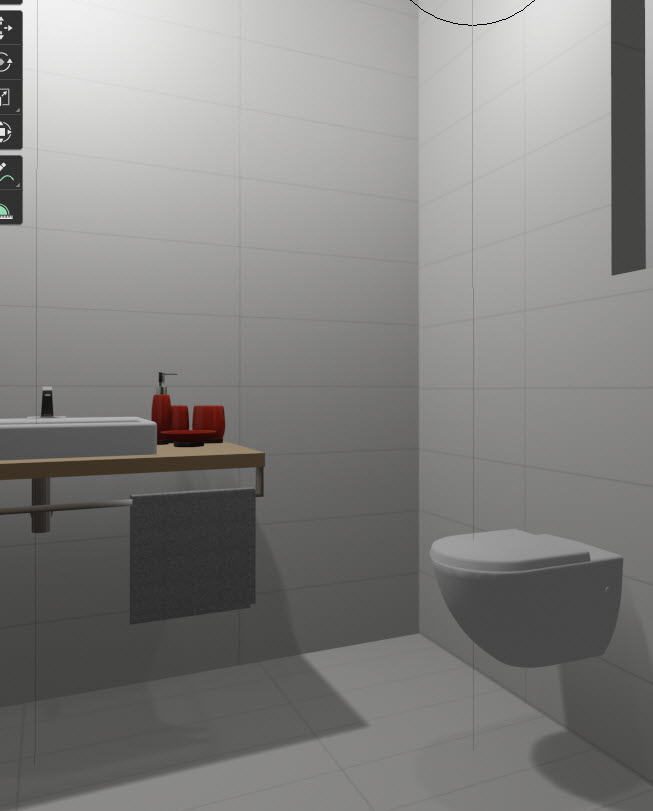
1 Answer
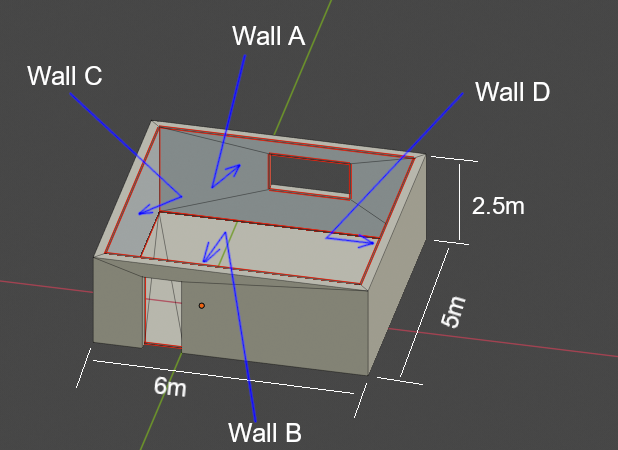
The room to tile with 75cm x 25cm tiles:
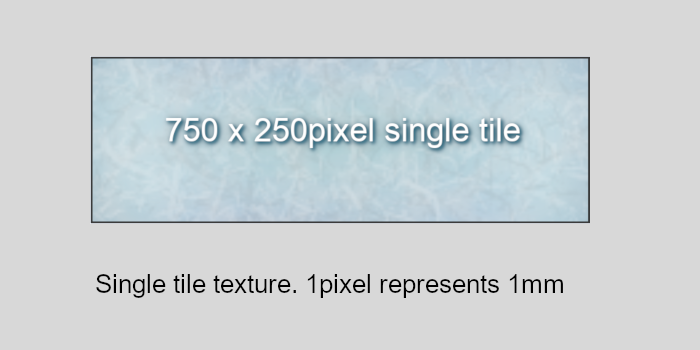
1: Create or resize a tile texture.
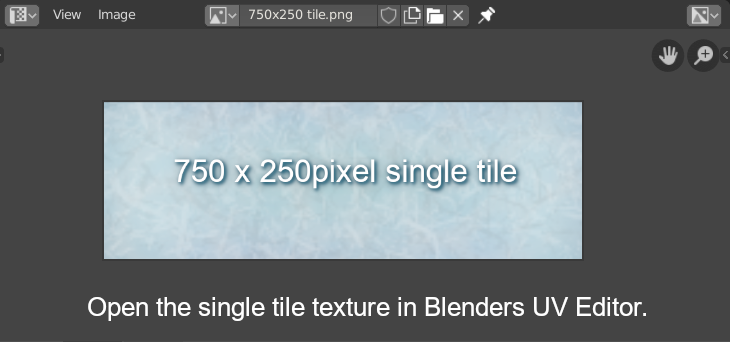
It should have the same proportions as the 75cm x 25cm tile, thats to say 75/25 = 3:1. To keep things simple I like the idea of having 1pixel to 1mm. In the example below the tile texture size is 750px x 250px.
2: Open this texture in Blenders UV Editor:
3: Next is to UV unwrap the four walls A, B, C and D.
Before doing this it may make things easier if all all the surfaces that are not going to be tiled (UV unwrapped) are hidden (H key). Doing this will make it easier to select each of the remaining walls.
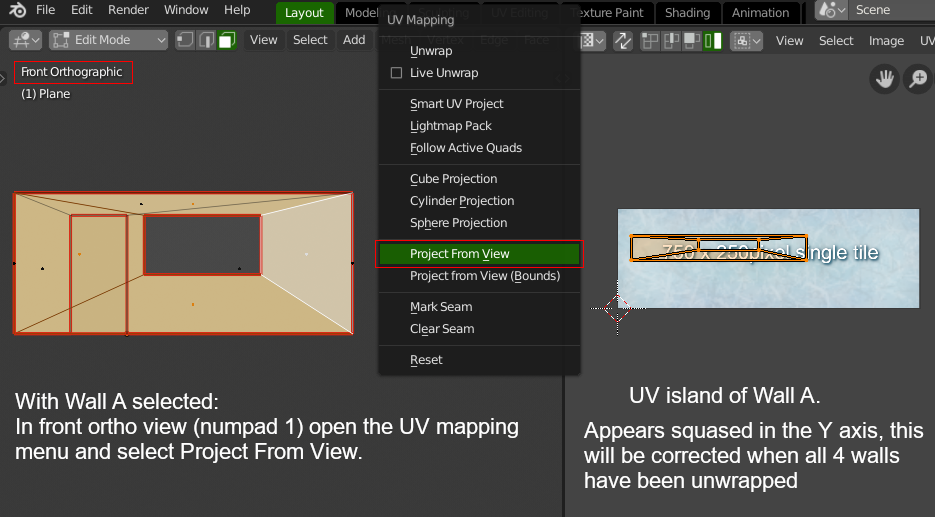
Select Wall A and in orthographic front view (numpad 1) UV unwrap using the Project from View option.
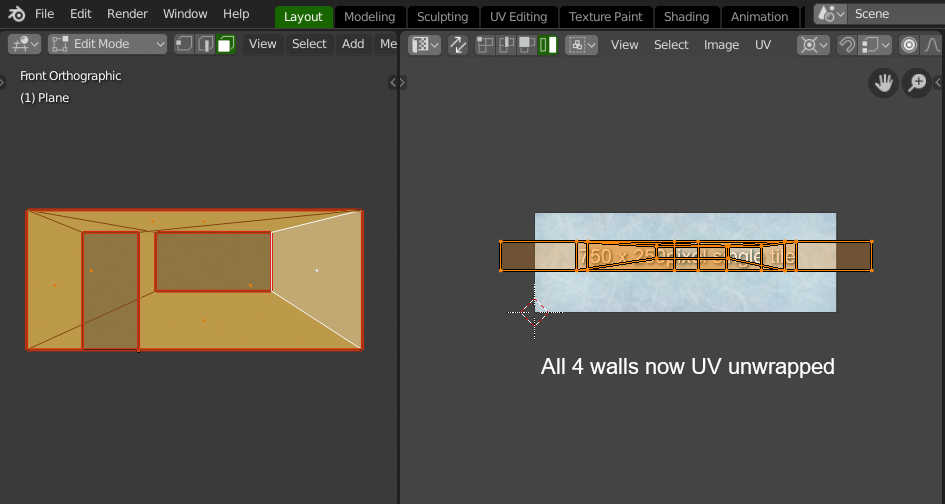
4: Hide wall A. Switch to the Back view (CTRL + 1), select Wall B and again UV unwrap using Project From View.
Repeat for walls C and D. It is very important that you do not change the zoom in or out when selecting before each unwrap.
5: Unhide the Walls (Alt H)
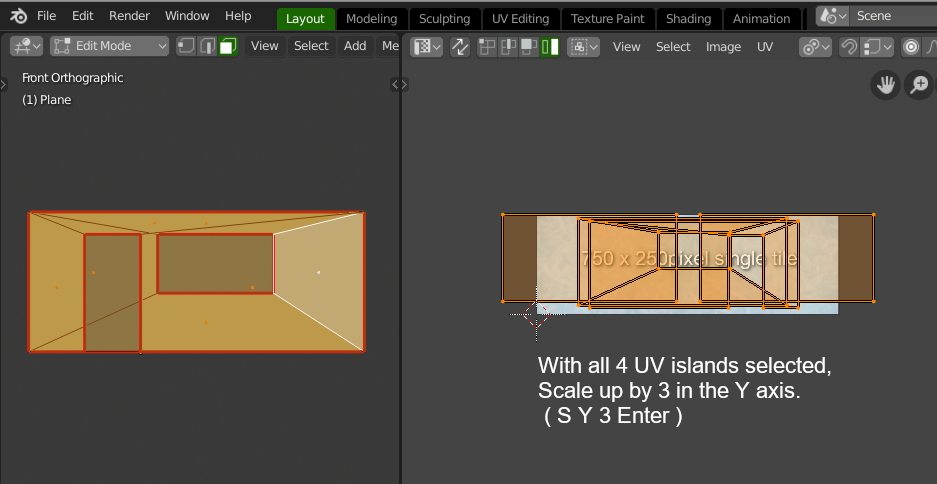
With the four walls selected, in the UV editor the four islands may appear squashed in the Y axis so to correct this select all four islands and scale up by 3.
6: Next we need to get the lower left corner of each wall island snapped to the lower left-hand corner of the UV space. This is done for two reasons, a) to have all the walls lower edges aligned and b) so that they can be all scaled up together from the same single point. (X=0 Y=0).
In the UV menu enable the Constrain to Bounds option then select each island in turn and drag it down so that its lower left corner is snapped at X=0 Y=0.
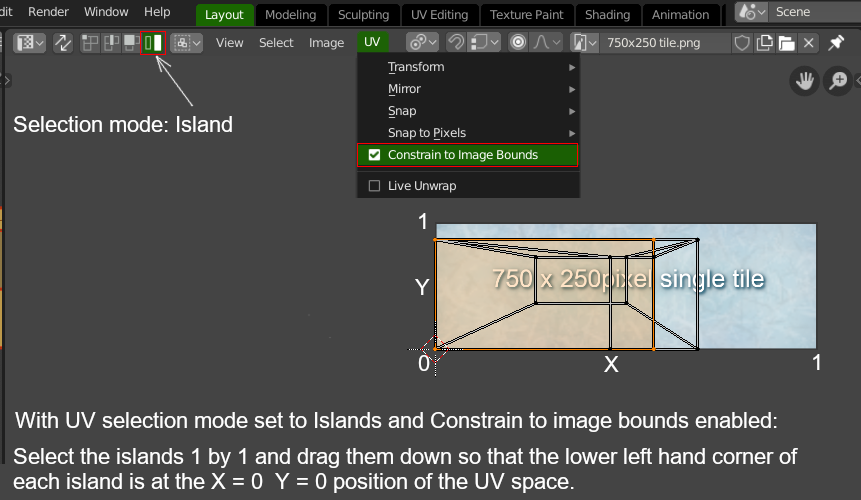
7: Uncheck the Constrain to Bounds.
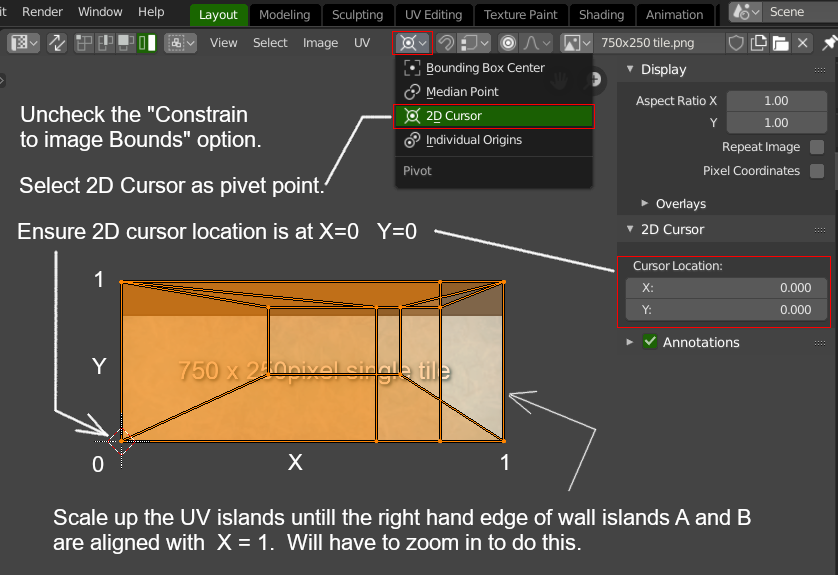
Assign pivot point to 2D cursor and check that the 2D cursor is at X=0 Y=0. Select all four islands and scale them up until the right-hand edge of the Wall A is aligned with the right-hand edge of the UV space (X=1).
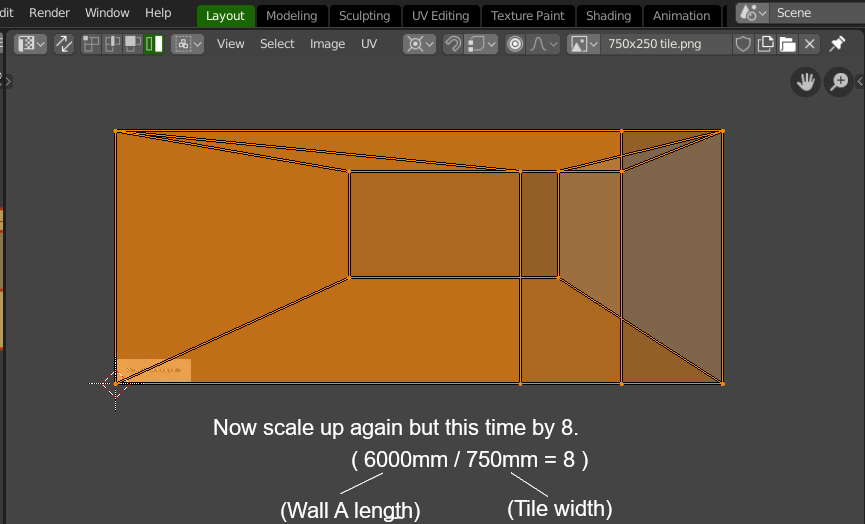
8: Now we are ready to do the final scaling. The length of Wall A divided by the length of the tile 6000mm/750mm = 8.
With the pivot point (origin of the scaling) still using the 2D cursor and all four islands still selected scale them up together by a factor of 8.
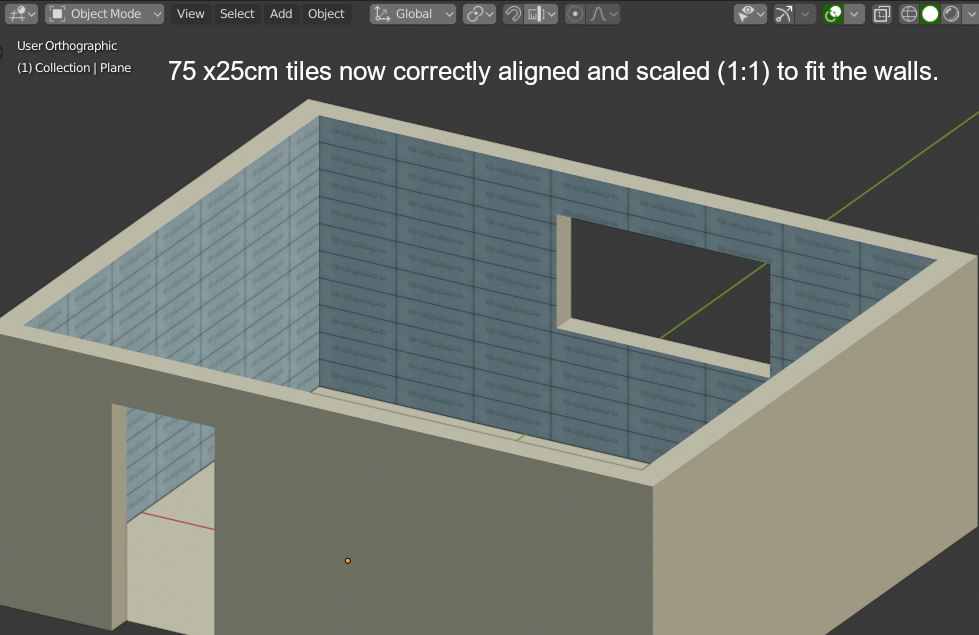
Now when the tile texture is applied to all four walls it should be correctly aligned and correctly scaled.
Another way to do this could be to use the Mapping node in the Node editor, adjusting the X and Y values to suit. In this case the UV Unwrapping (mapping) method would be Project from View (Bounds).
Because the length of Walls A and B are not the same as Walls C and D the scale of Y value would be different. This would mean having to use two different materials.
