0
$\begingroup$

I'm using Blender 2.8 and trying to create a simple animation, a jumping lamp. I was using the auto keyframing. After I had a few keyframes I noticed that one movement was too slow, so I wanted to move all keyframes after frame 40 a bit closer to the previous ones.

I can't seem to move the keyframes on the "Lamp RigAction" row. If I box select all the frames I want to move and move using G key, the Lamp RigAction keyframes remain in place. If I delete all and then play, most of the animation is still there, the jump itself (but the movements of the lamp shade seem to have been deleted).

I'm a beginner and don't know what's going on. But I would like to know so I can adjust my future animations.

Screenshot from blender

$\endgroup$
2

1 Answer 1

1
$\begingroup$

First of all be sure to perform keyframes edits in pose mode, not in edit mode or object mode.

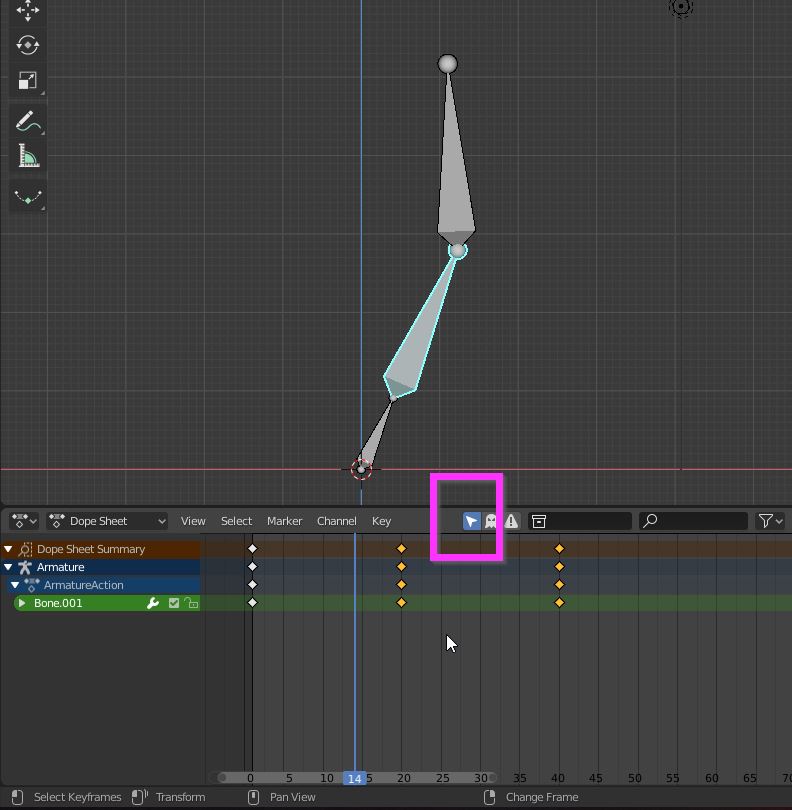
As you have got this little arrow on, the dopesheet shows (and select) only keyframes of selected bones.

So, if you want to move only bones keyframes, in pose mode select all bones which you want to move, set the time cursor on frame 40, Ctrl click on the right side of the time cursor: this will select all keyframes after 40. Then press G and the amount of frames you need, then Enter.

If some of the keyframes are not bones of the rig, disable the little arrow and box select all keyframes you need to move.

enter image description here

If you click on the left every keyframe before the timeline will be selected.

$\endgroup$
1
  • $\begingroup$ Thanks! I clicked the arrow and then more stuff appeared and I could move around the keyframes. And now, even if I click the arrow again, I can still move the keyframes. The Lamp RigAction row (yellow for some reason in my pic) is no longer locked as it was before. $\endgroup$
    – Juri
    Commented May 1, 2019 at 11:04

You must log in to answer this question.

Not the answer you're looking for? Browse other questions tagged .