2
$\begingroup$

I am completely new to blender, and I feel like the procedure should be simple but I'm just not finding instructions for it (so I apologize if it's a silly question). I have a video where the audio had a lot of noise. I was able to create a separate audio file and reduce the noise with Audacity. What I'd like to do now is replace the original audio in the video for the cleaned up version. Is there an option to mute the video while adding an audio file? Do I need to worry about synchronizing the two? (I hope not, since they should both be the exact same length, but I don't know...)

Thanks in advance!

$\endgroup$
1
  • $\begingroup$ According to my experience, when you add a video in Blender, original audio is automatically muted, and for example if you created a VFX, added that VFX to your video. rendered it and now want to add an external audio, you have to add a audio file to synchronize with your animation/video/VFX. By default their is no sound coming with video! $\endgroup$
    – Yash
    Commented Feb 27, 2019 at 6:19

1 Answer 1

2
$\begingroup$

I've never used the video editing feature of Blender but I gave myself a try at seeing this question.

This is the same process as other non-linear video editing program, you can delete/mute the original sound track and import your denoised one.

Firstly go to video editing layout in Blender. enter image description here

Import your video/audio file at here.
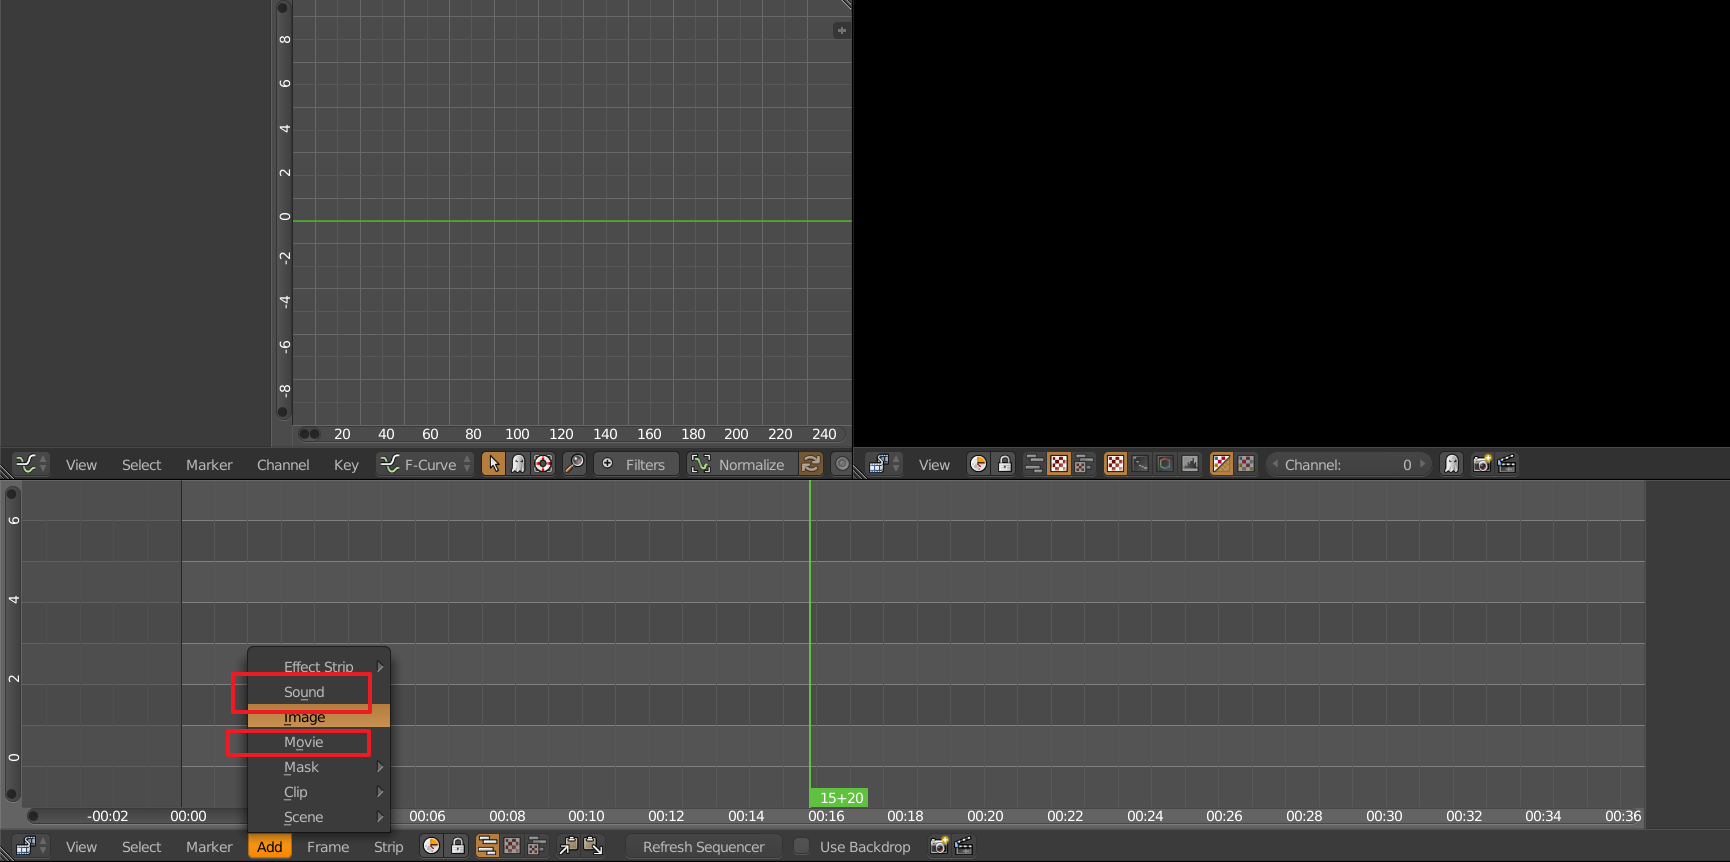
enter image description here

You can press "G" to move its position. "Shift" for precise slower transformation.
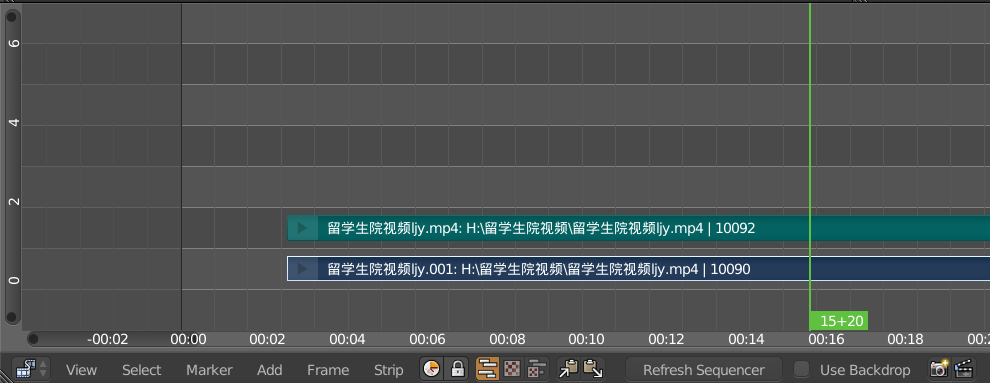
enter image description here

So here's the video track, combined with audio and image frames. Then delete the audio track imported from your video by pressing X or "Delete".

Import your denoised audio, and shift the new audio track to the same starting frame to make both sync.

Preview your work by "Alt+A", remember to change the end frame number larger than your imported one.

Then go to Properties panel:
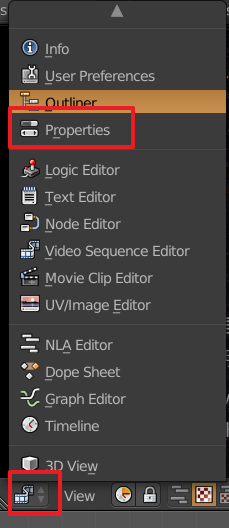
enter image description here

Go to output tab and change the format to "FFmpeg video" to use the MPEG encoder so that you can output it as an MP4 video in acceptable file size.
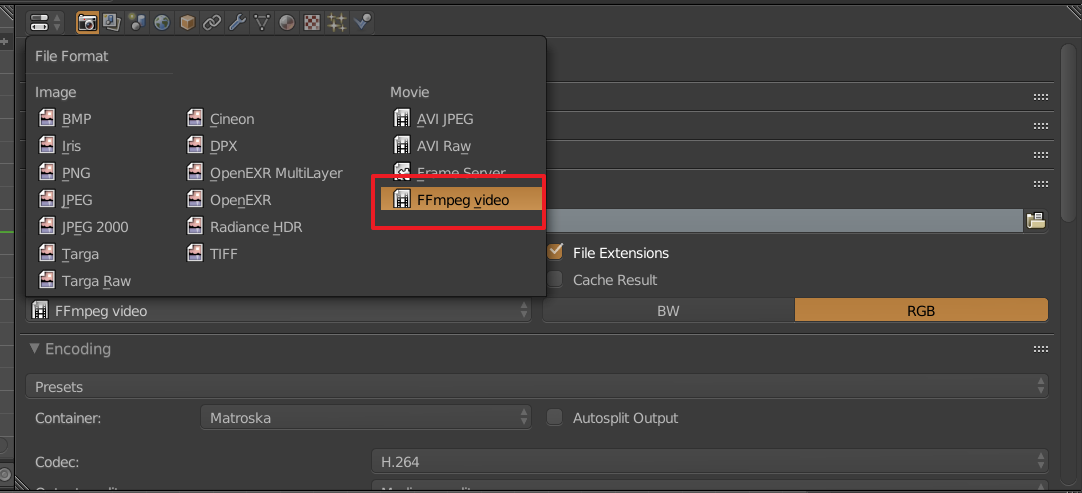
enter image description here

Then go to "Video Sequence Editor" panel and start rendering with "flim clapper" button.

enter image description here

In conclusion, the process is easy and clear: remove the original audio track, import your processed one, and render it! All you have to learn is about the Blender flexible UI layout and operation based on shortcuts.

Enjoy!

$\endgroup$

You must log in to answer this question.

Not the answer you're looking for? Browse other questions tagged .