It was probably asked a lot but I need help with my rig.
When I move one of the arm, the dress move with it, but it doesn't affect the jacket. I don't get it. Thanks in advance. Here's the file is someone is willing to help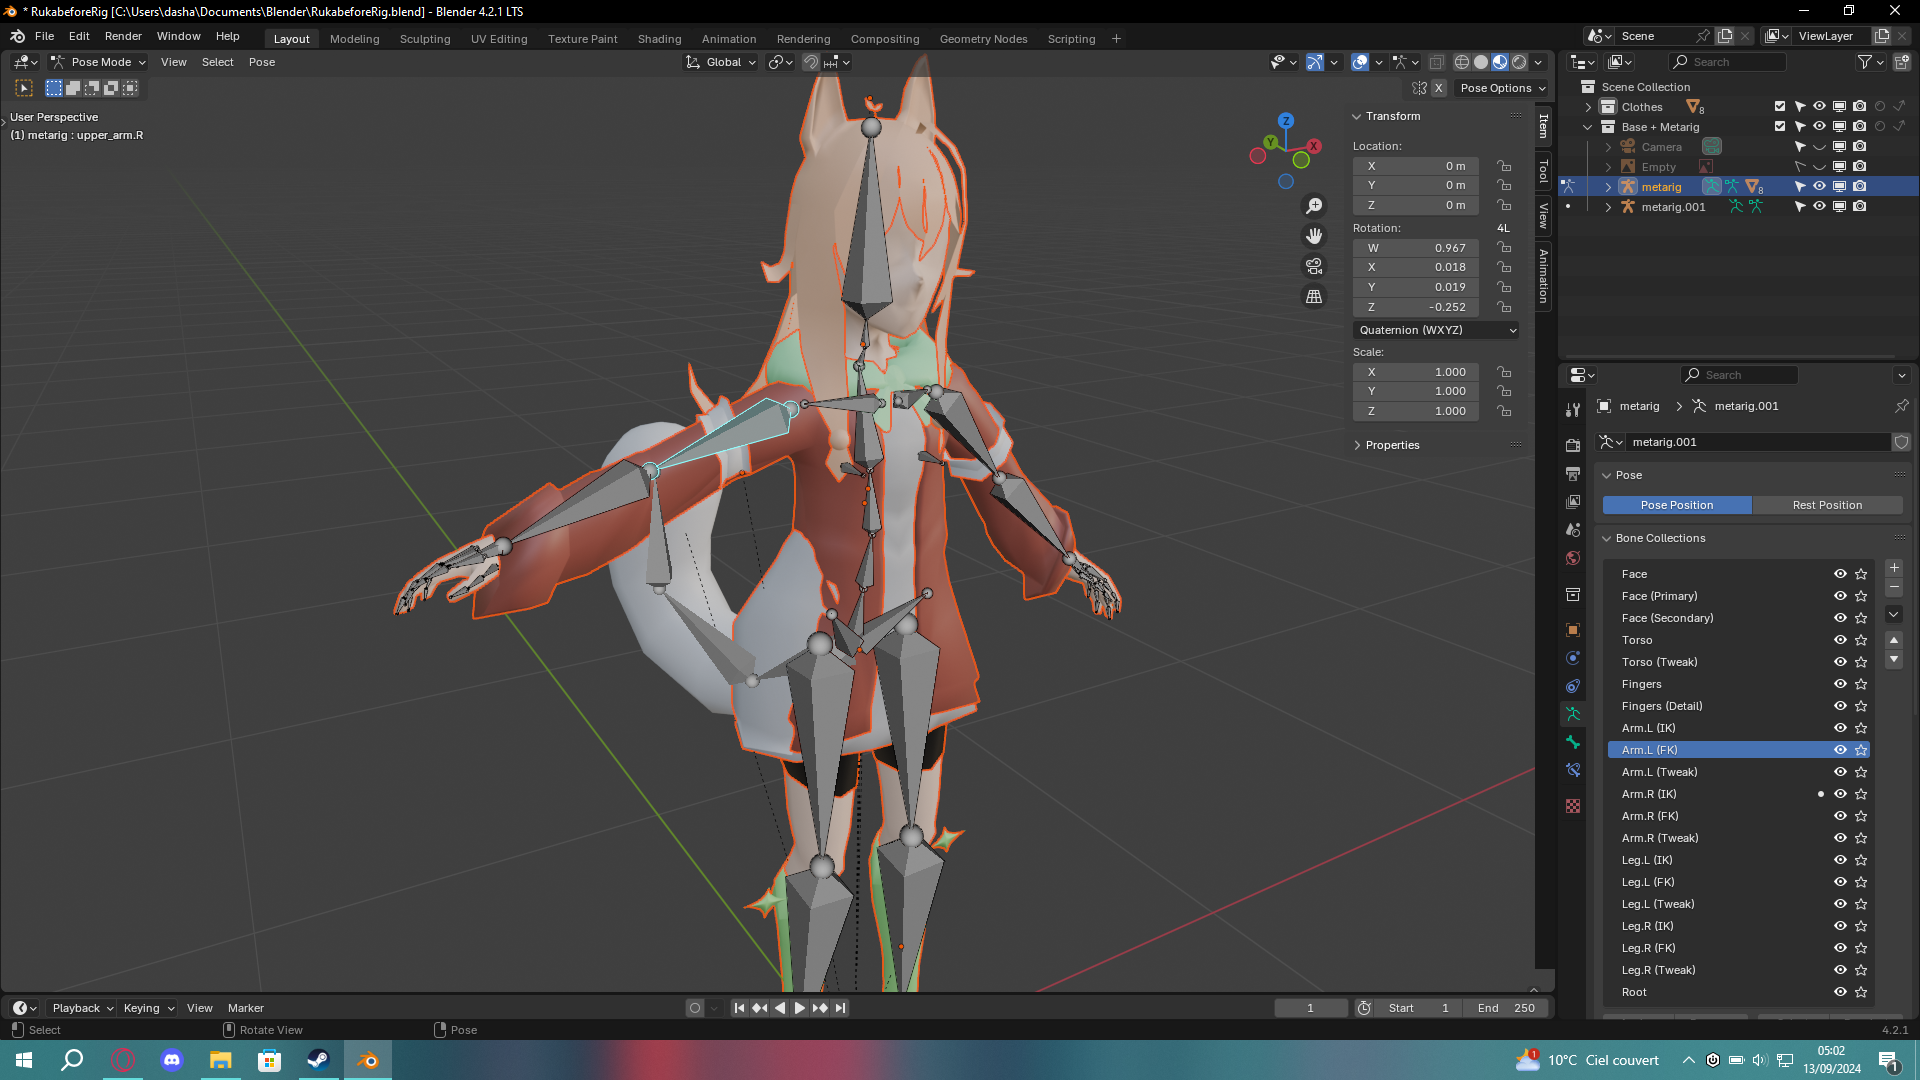
It was probably asked a lot but I need help with my rig.
When I move one of the arm, the dress move with it, but it doesn't affect the jacket. I don't get it. Thanks in advance. Here's the file is someone is willing to help
Your robe object has faces on the outside and inside. Blender doesn't handle the internal faces very well when parenting with automatic weights. What can work is if we flip the direction of these internal faces before weighting so that they are facing in the same direction as the outer faces of the robe.
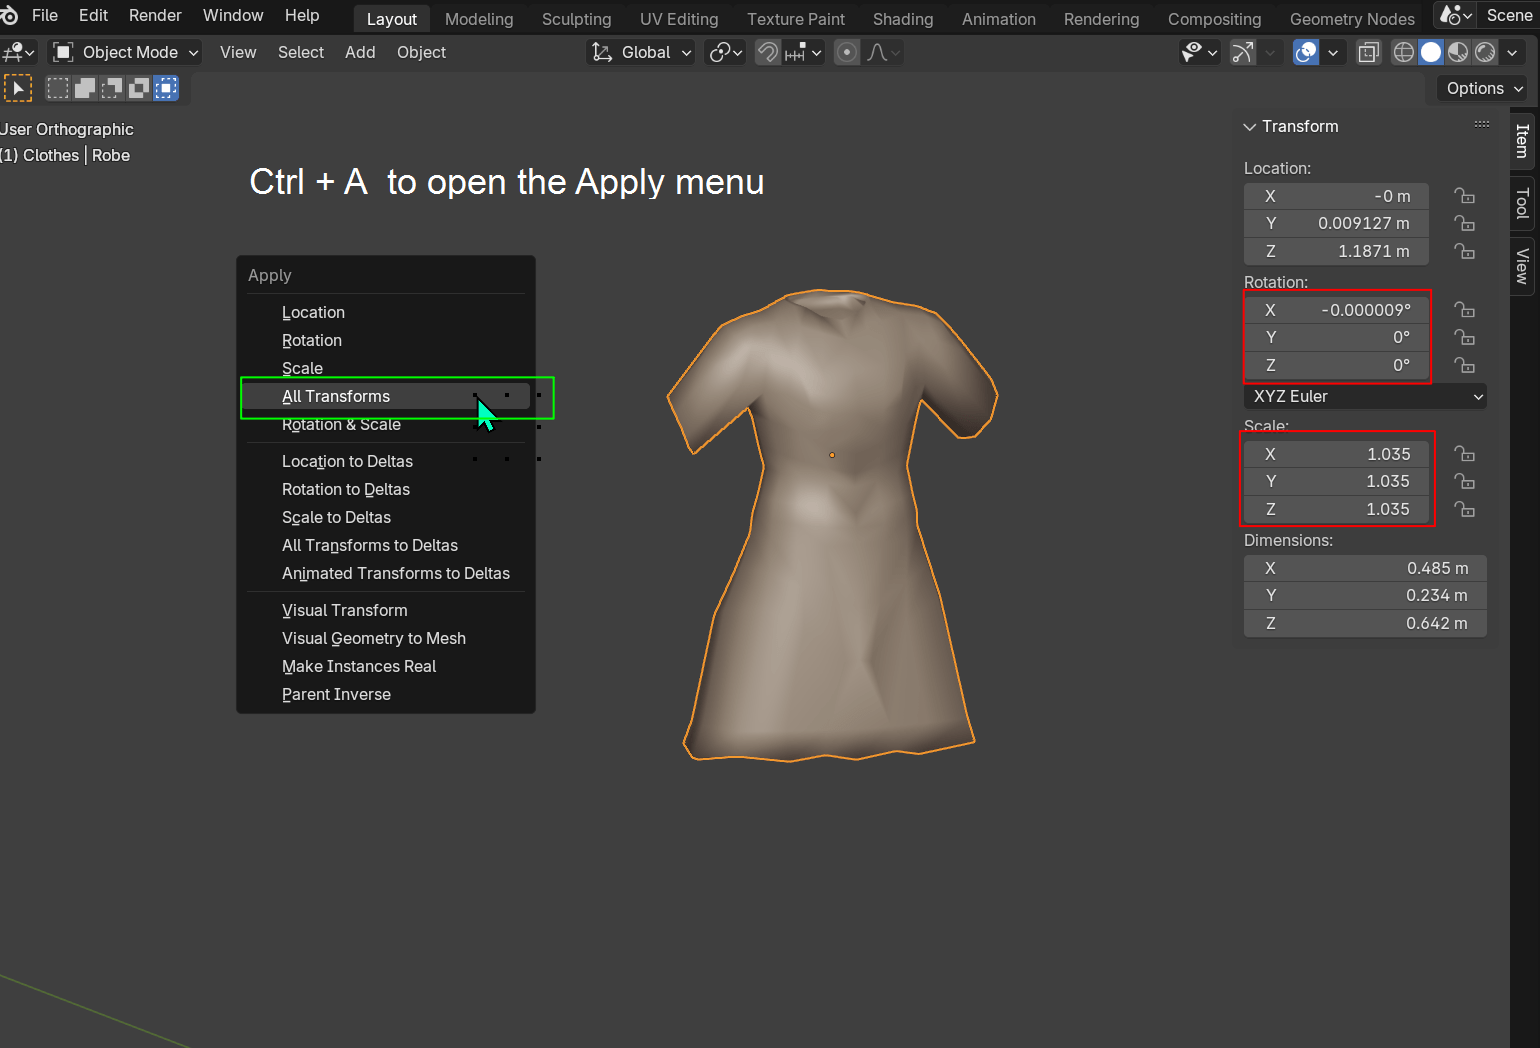
But first its probably best to apply the Rotation and Scale transforms of the robe so that Rotation X Y and Z are all at 0° and Scale X Y and Z are all at 1.00. To do this, in object mode select the robe > Ctrl A and from the Apply pop-up choose All Transforms:
We need to select all the internal faces of the robe, and for me the easiest way to do that is apply UV seams around the openings of the robe then use the Select Linked tool to select all geometry inside of the UV seams.
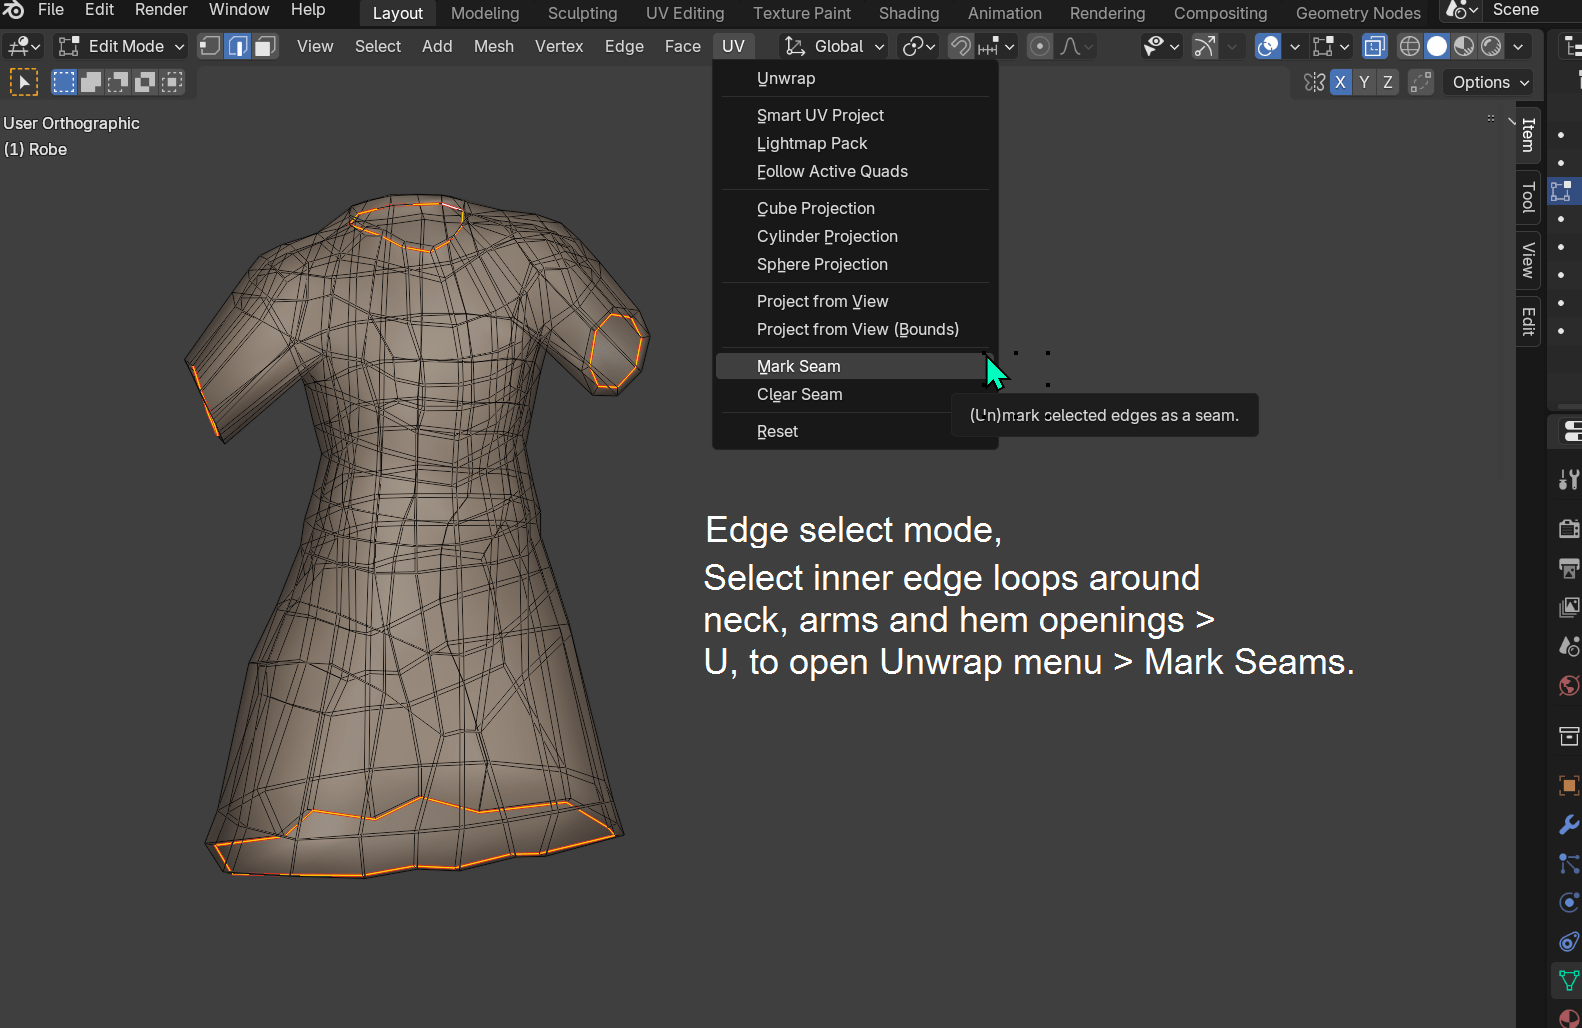
In edit mode, edge select mode, select the inner edge loops around the neck, arms and hem of the robe and with these selected hit U to open the UV Unwrap menu and select Mark Seam.
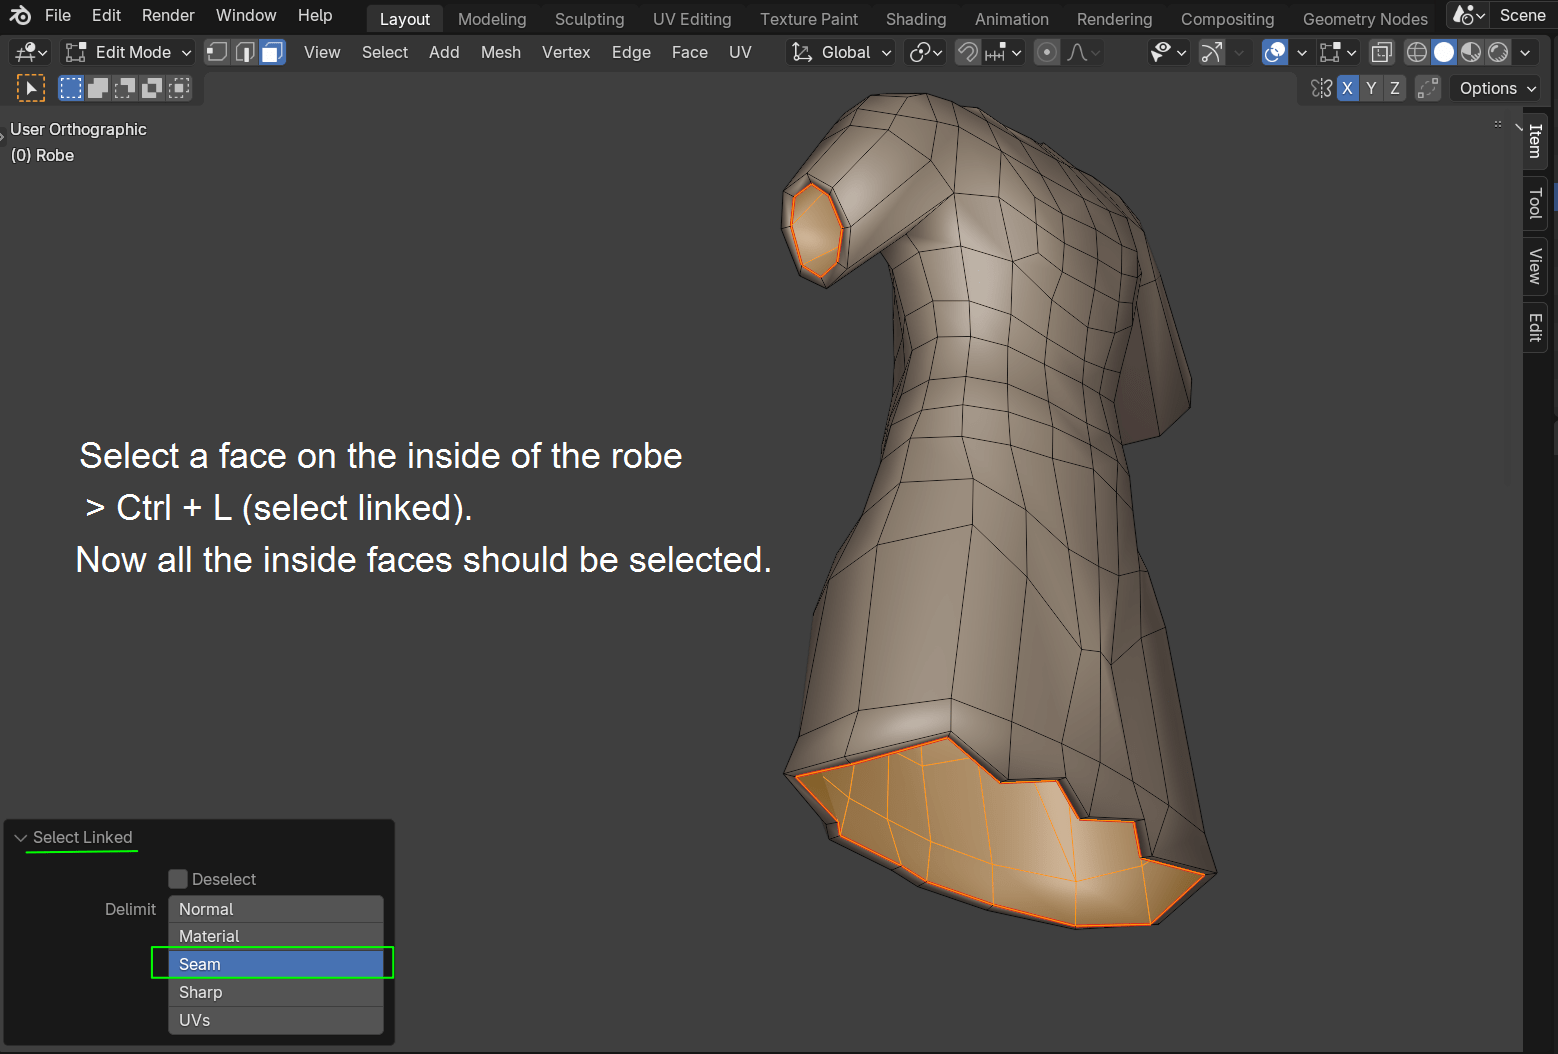
To now select all the inner faces, in Face select mode, select a single face of the interior of the robe, Ctrl L and all the interior faces bounded by the UV seams will be selected.
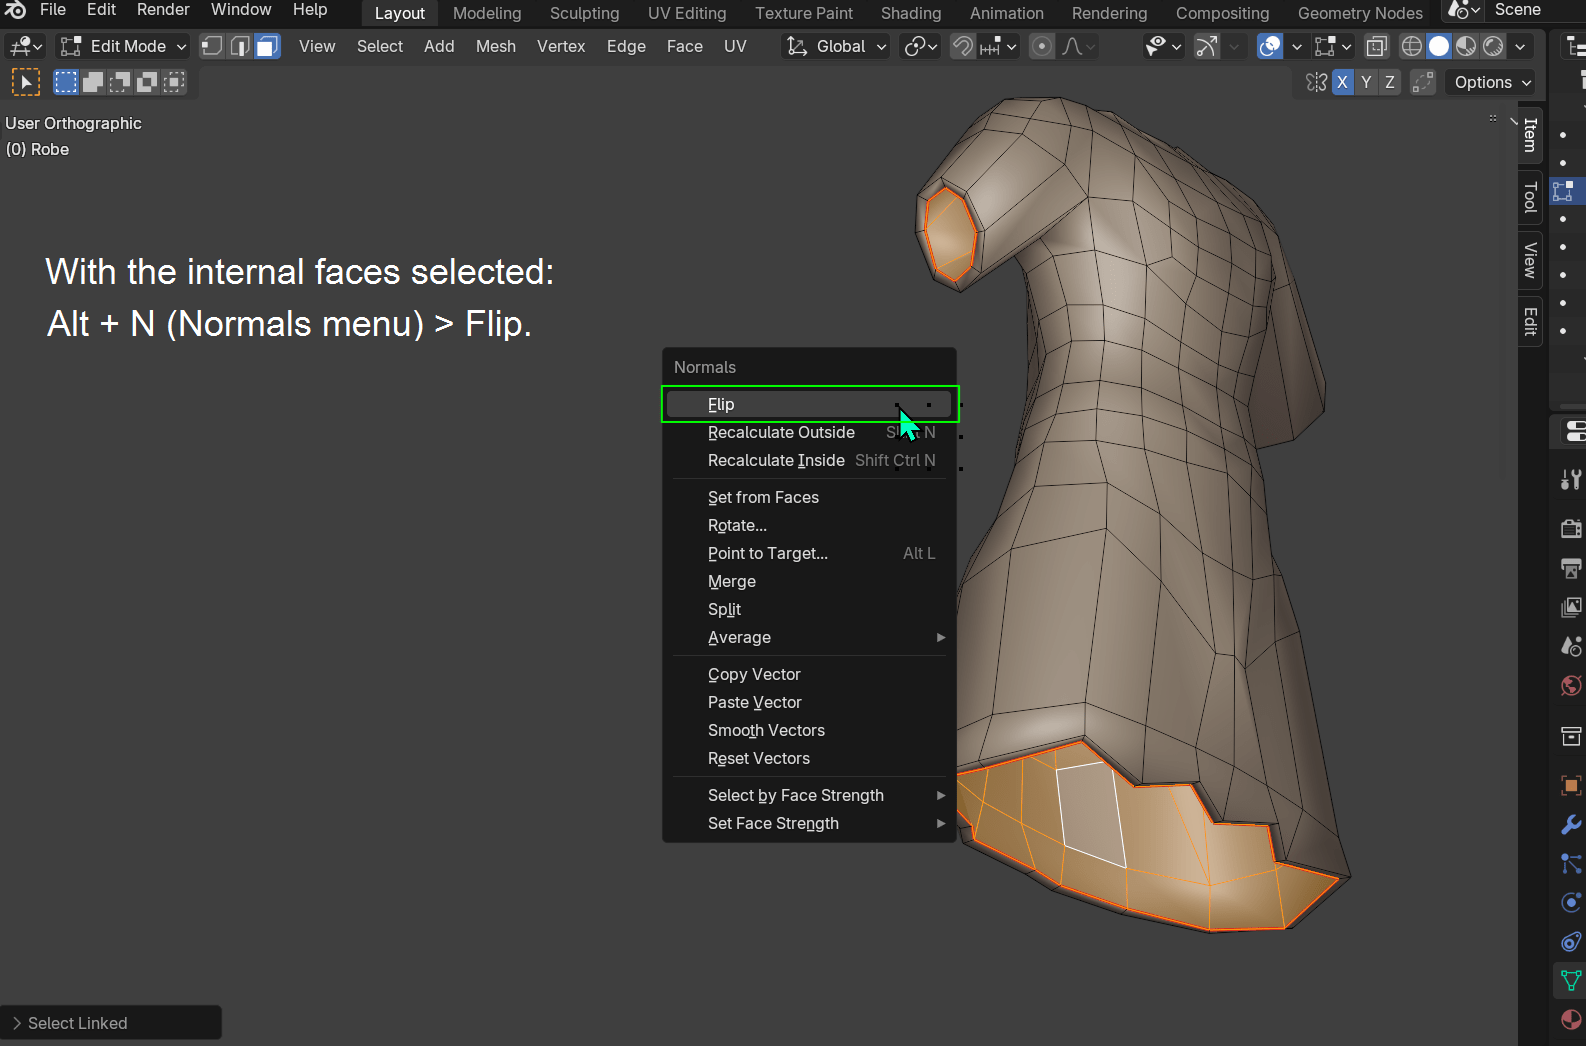
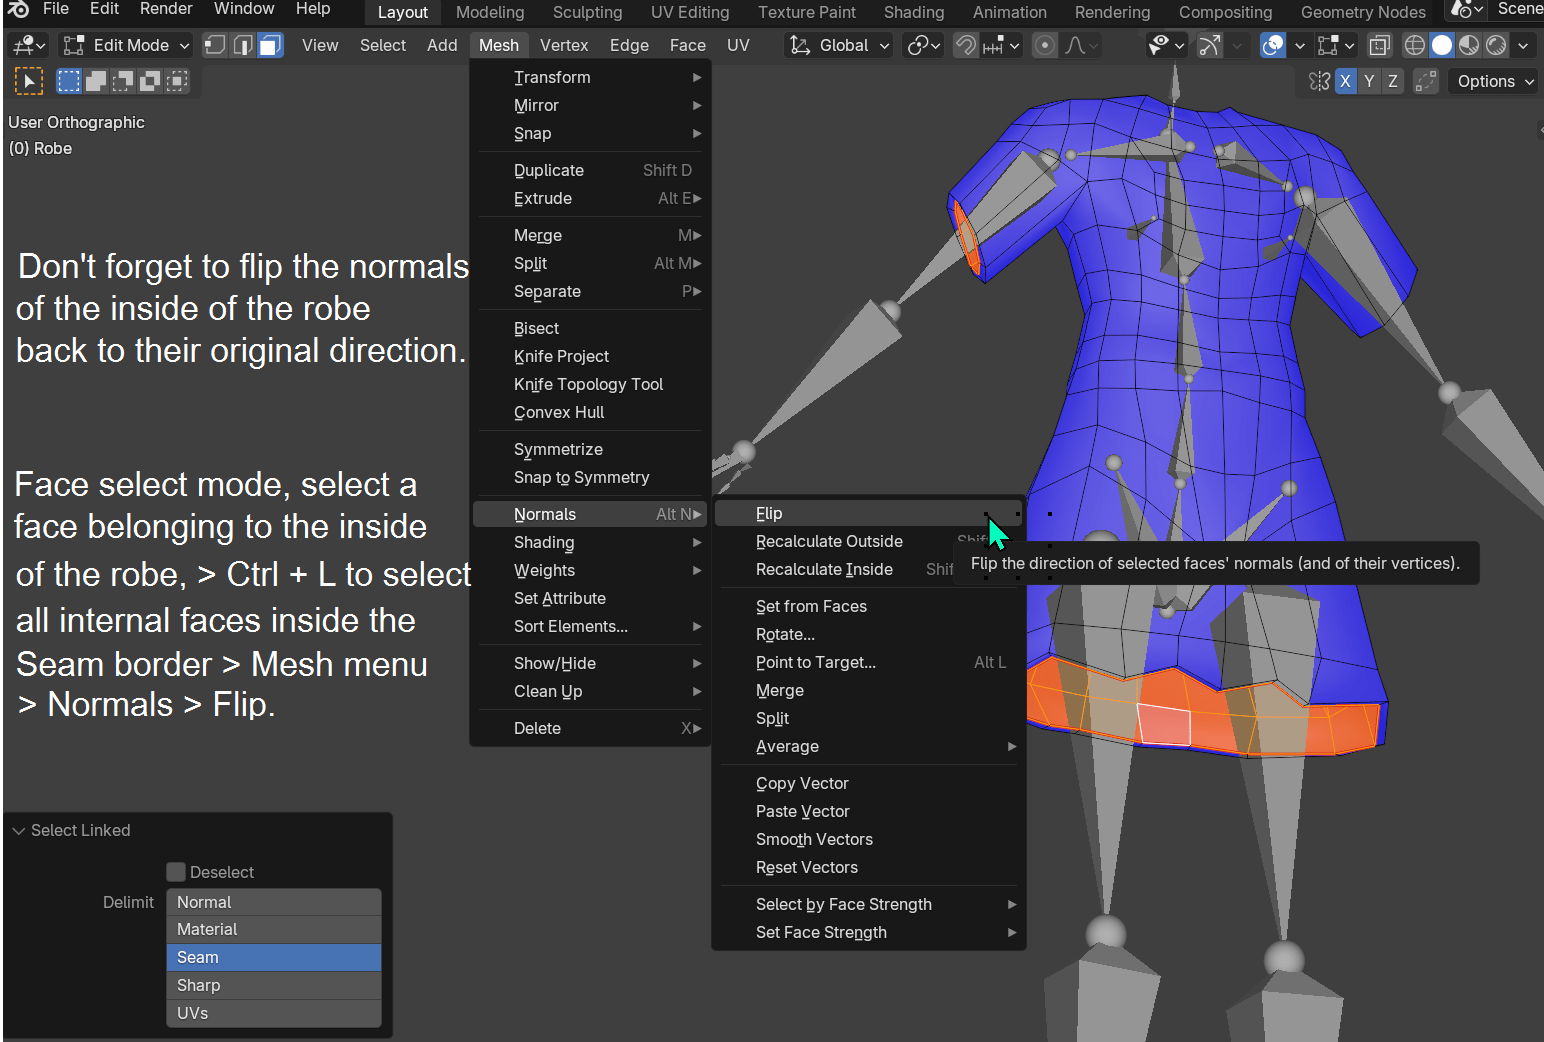
We can now invert the direction of these selected faces. Alt N will open the Normals menu, choose the Flip option.
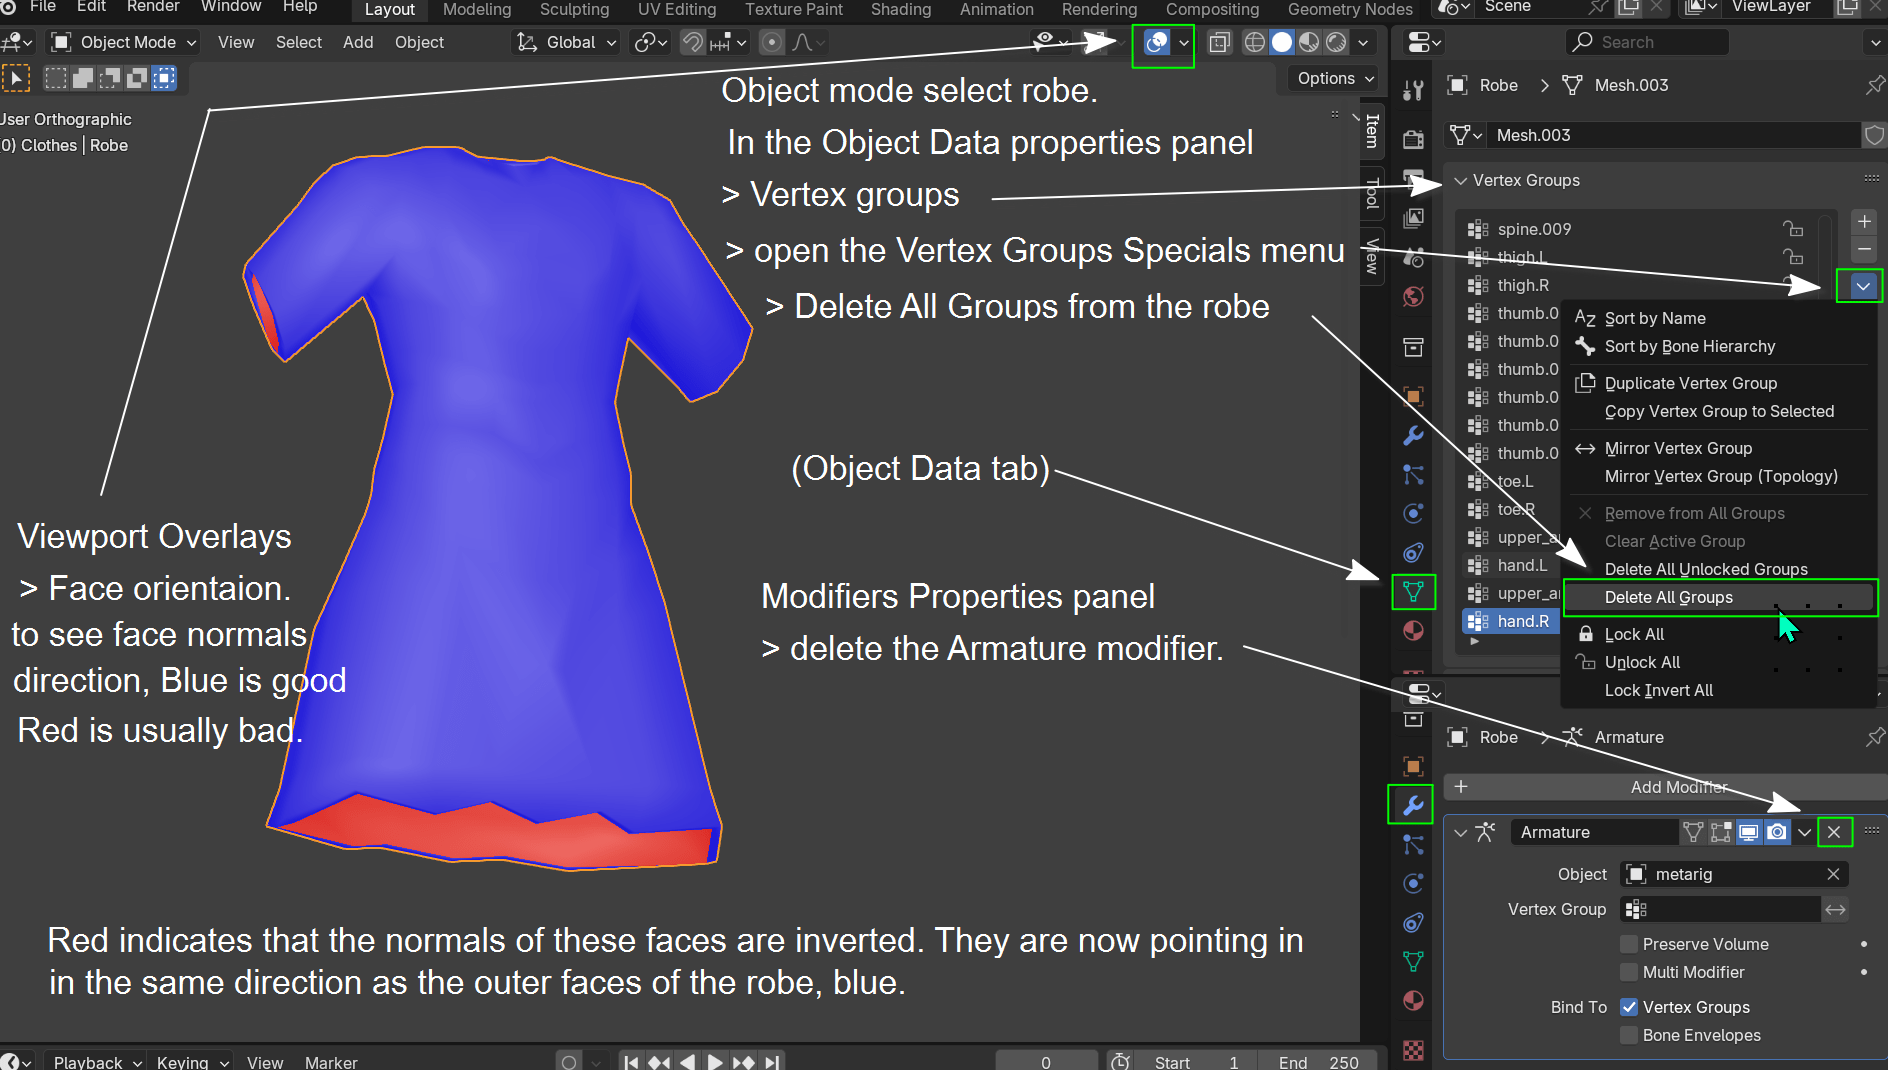
In the Viewport Overlays if we enable Face orientation we can see that the internal faces of the robe are now displayed in red. Blue indicates faces that are correctly facing outwards, red indicates faces normals facing in the wrong direction. But for us wrong direction means that they are facing in the same direction as the outer (blue) faces of the robe which is what we want :).
We now need to remove all existing vertex groups assigned to the robe and also to delete the Armature modifier. In Object mode with the robe selected,open the Object Data tab > Vertex Groups > open the Vertex Groups Specials menu (little downward facing arrow on the right hand side of the list of vertex groups) and choose the Delete All Groups option. In the Modifiers panel delete the Armature modifier.
We are now ready to parent the mesh to the armature.
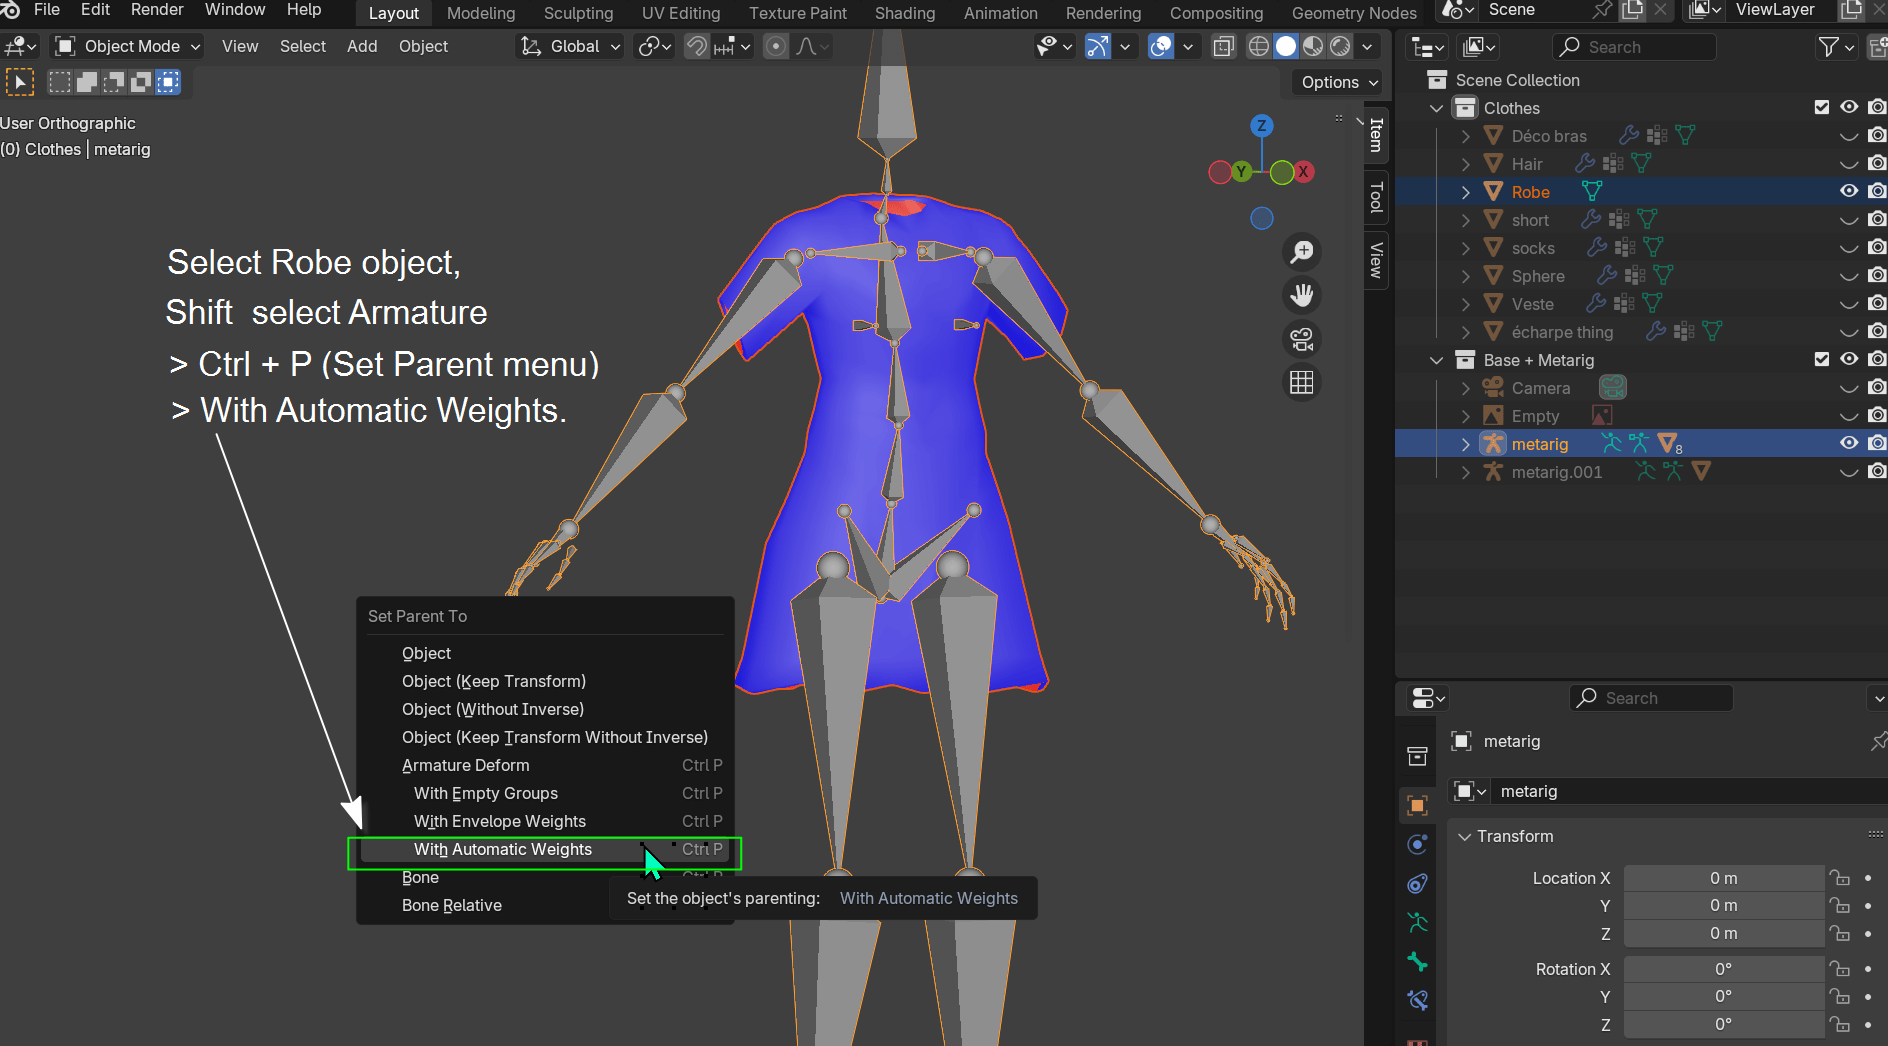
Object mode, first select the robe object then Shift
select the armature > Ctrl P > With Automatic Weights.
Pose mode we can now check how robe moves with the armature. it should now be better than before.
If we go into edit mode and select a vertex we can now see which vertex groups and weights are assigned to that vertex.
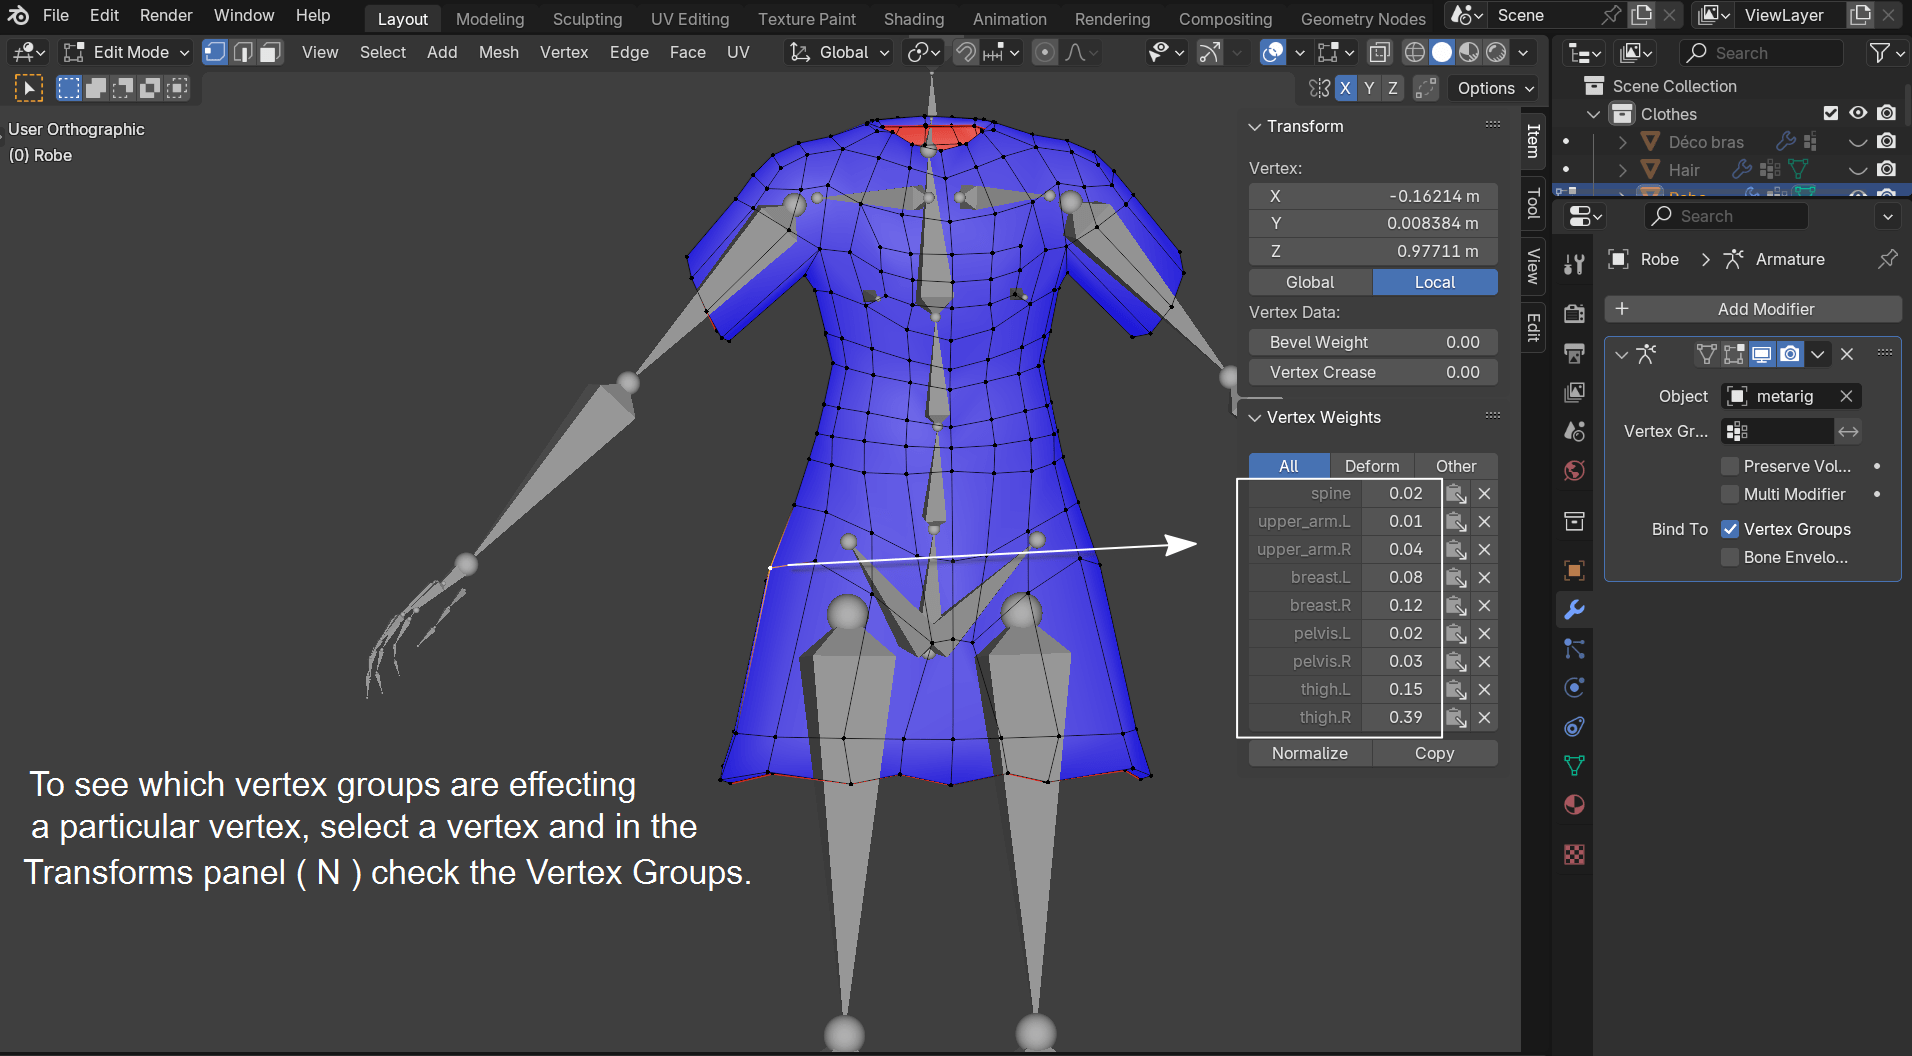
In the above screenshot notice that there are 9 vertex groups assigned to that vertex and that some like the upper_arm.L with a weight of 0.01 we don't need at all.
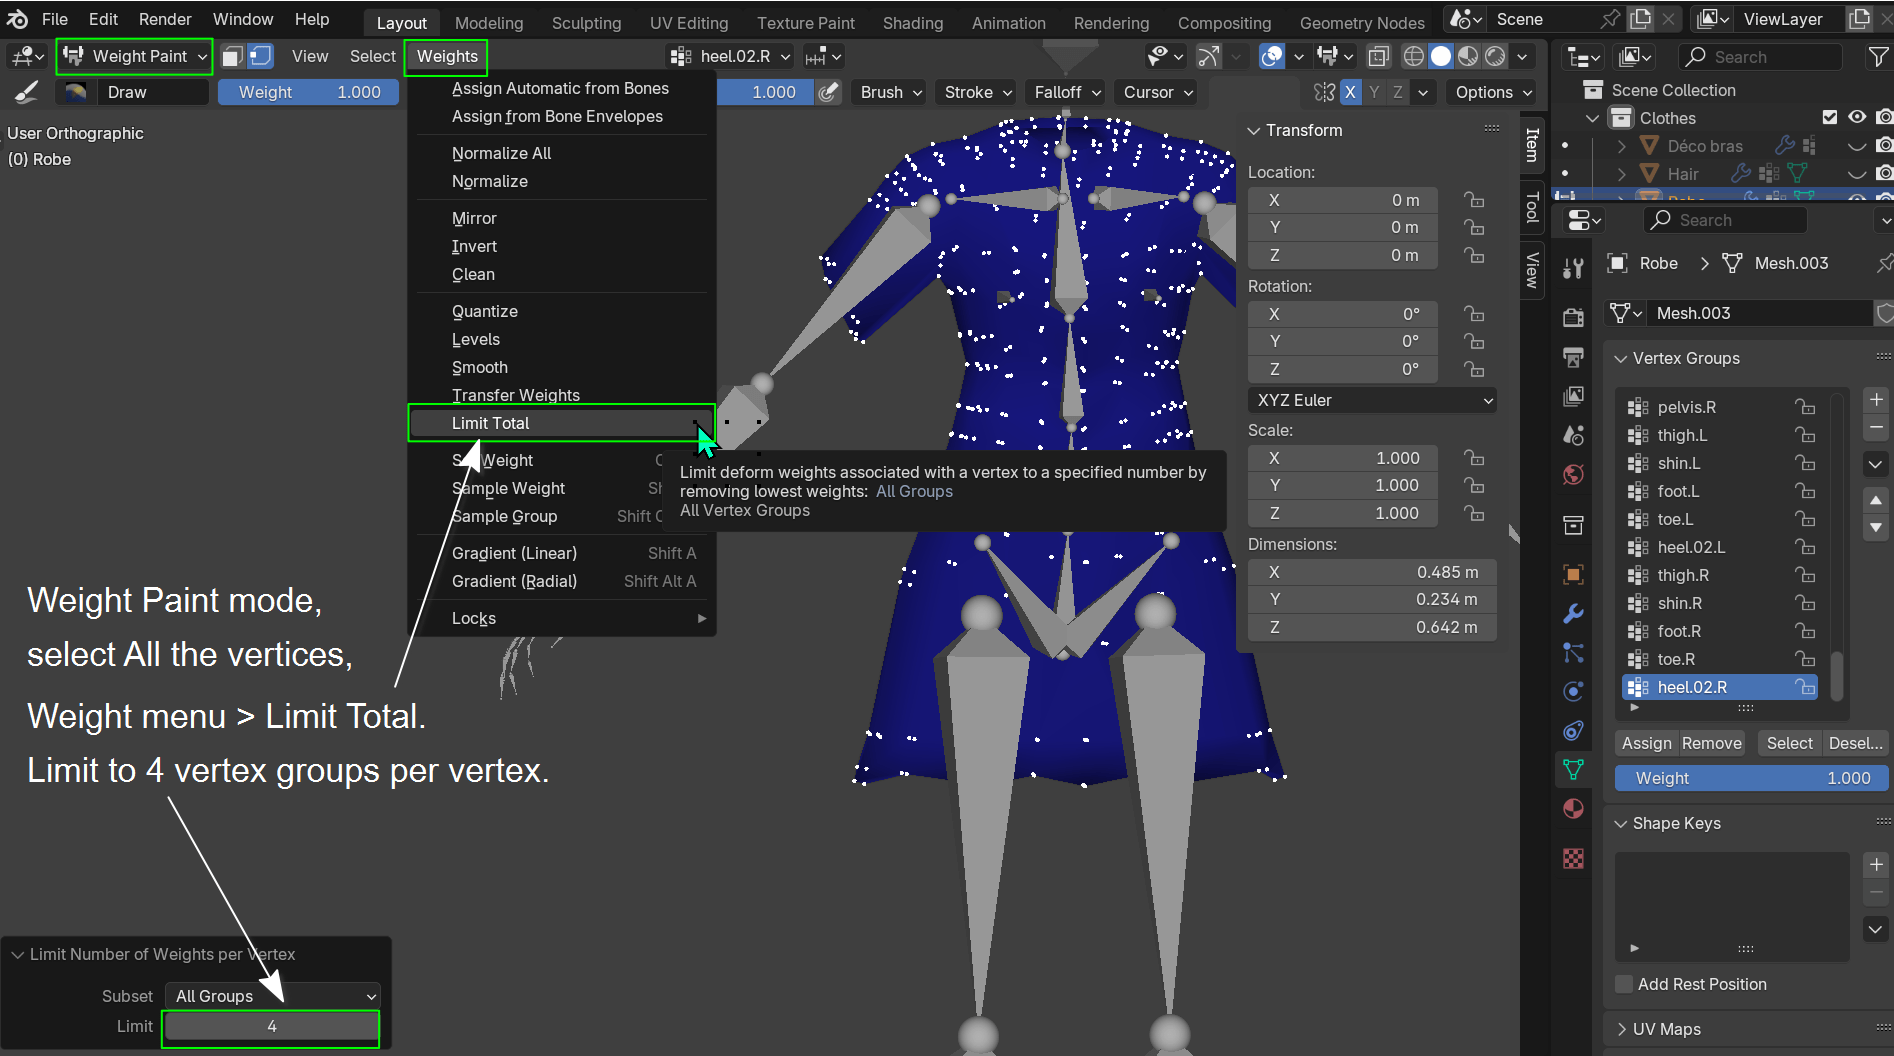
The following is a quick clean-up which will limit the number of vertex groups assigned to each vertex. Our limit will be 4 vertex groups per vertex. Only the groups with the 4 highest weights will be kept.
In Weight paint mode select all the vertices > Open the Weights menu and choose the Limit Total option. By default the limit number is 4.
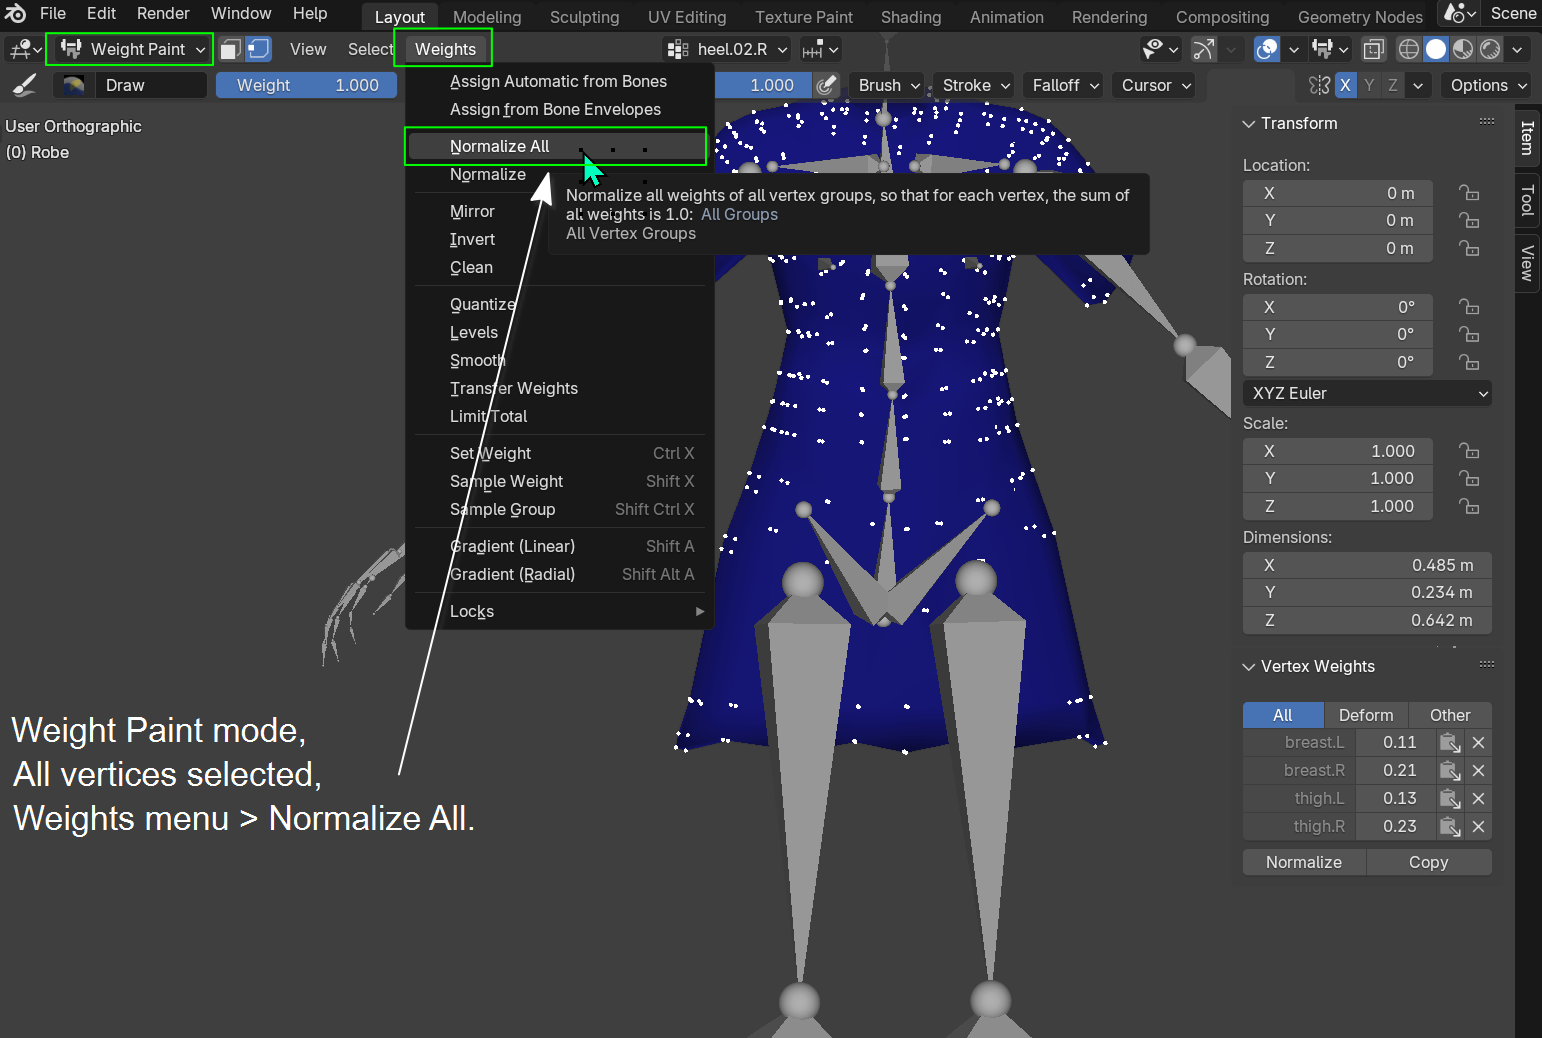
We can next make it so that the total weight of the 4 vertex groups of each vertex equals 1.00 Back in Weight paint mode wit hall the vertices selected open the Weights menu again and choose the Normalize All option.
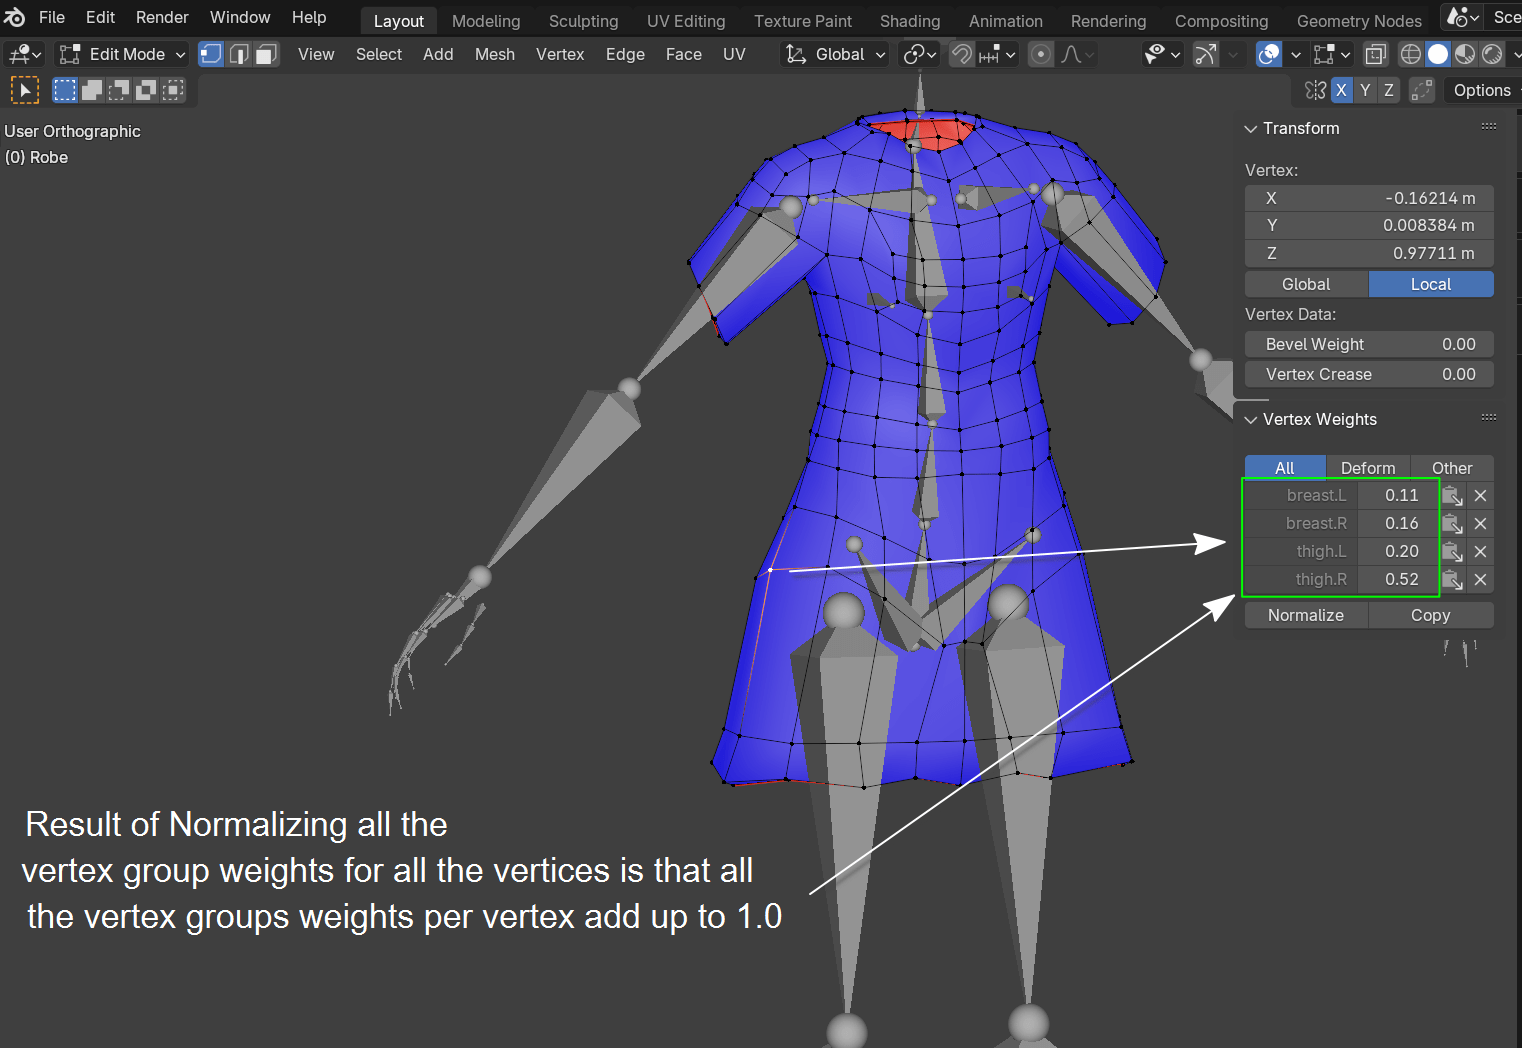
The result of Normalizing the weights for all the vertices:
Finally we need to Flip the normals of the internal faces back to how they were in the beginning:
Note: Because your character has so many layers Skin, Shorts, Robe and Vest you are always going to run into the problem of poke through when rotating the bones. These can only be fixed by either deleting the faces of the layers that will not be seen and or manually weight painting the poke through faces.
Also if you enable the Face Orientation from the Viewport Overlays menu you will notice that the deco bras and socks objects have inverted face normals which you probably want to fix. And maybe you want to Apply Scale and Rotation for some objects. ;)