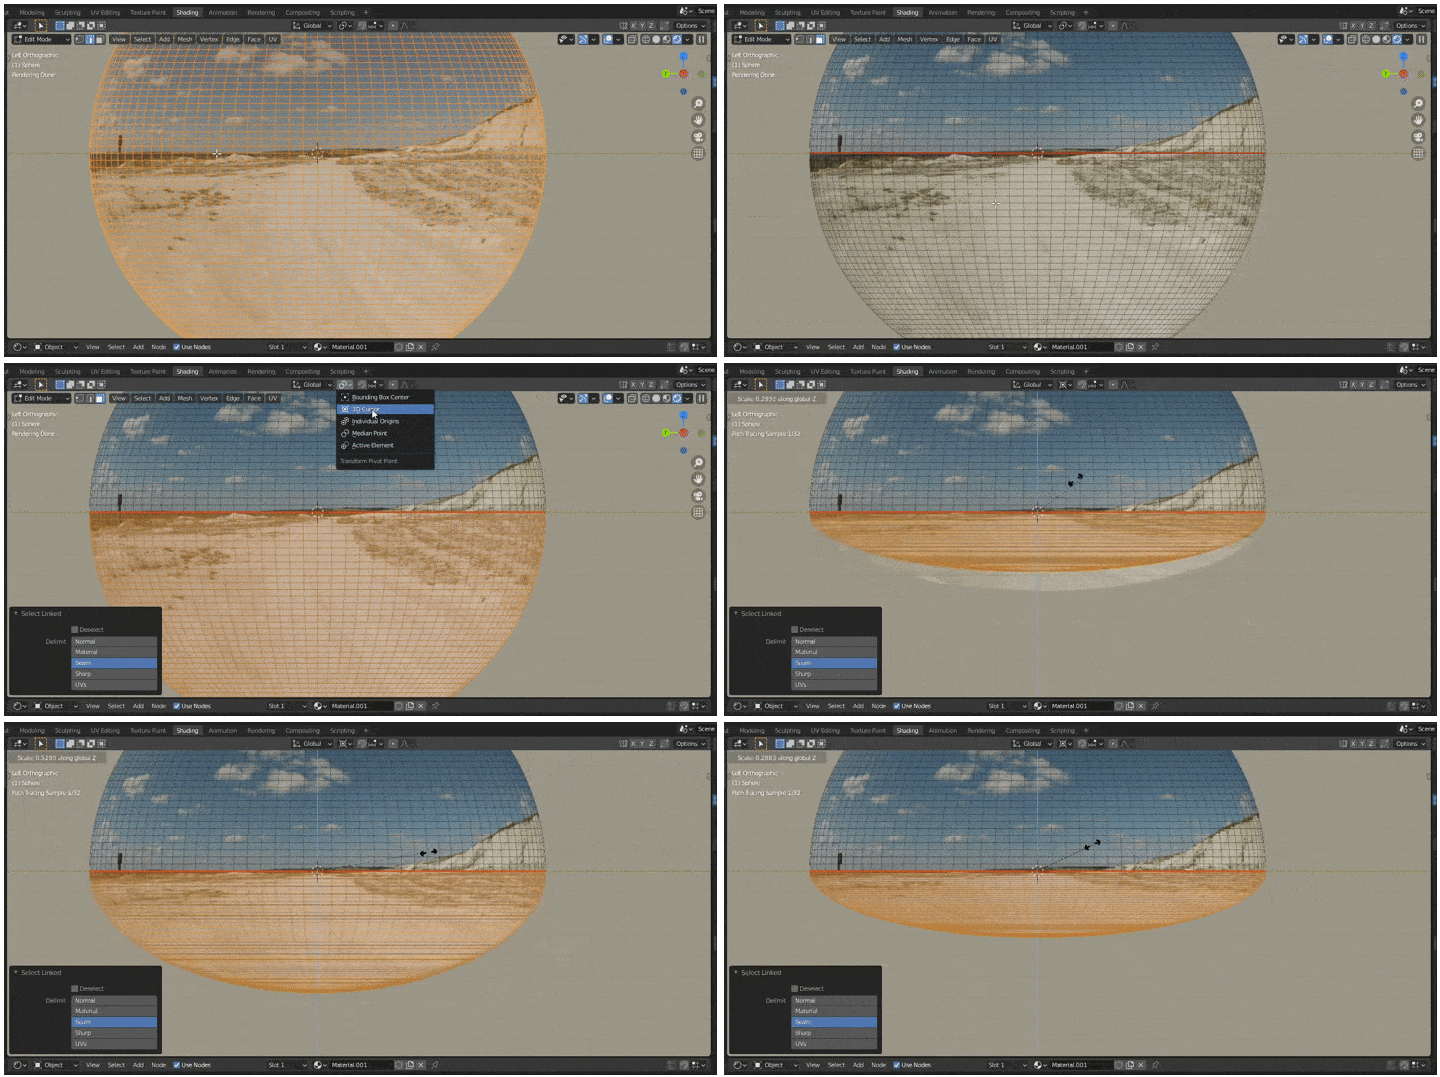
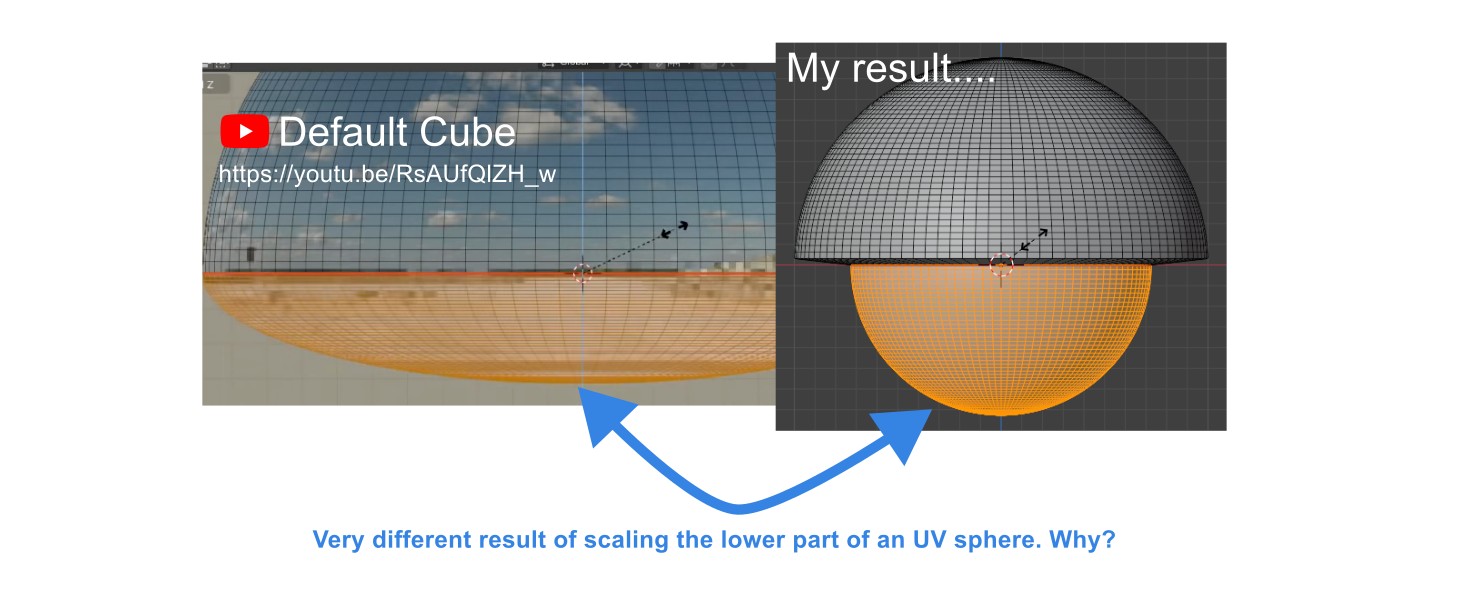
I'm following a YouTube video by Default Cube and can't figure out how to scale the lower part of a UV sphere as shown in the clip below.
The result I get is very different, and I can't figure out why. Can anyone here on the forum explain?
Here is a summary of the different steps as I understand
Object Mode:
- Launch Blender and delete everything.
- Add a UV Sphere with 100 segments and 100 rings.
Edit Mode:
- Select the equatorial line of the sphere using edge loop selection.
- Mark the seam.
- Change Select Mode to faces.
- Hover the mouse over the lower part of the UV sphere and press 'L' to select connected geometry.
- Set the Transform Pivot Point to 3D cursor.
- Press 'S' to scale.
... and the result can not be reproduced as shown in the video.


