0
$\begingroup$

I am trying to familiarize myself with Blender's animation tools (mostly timeline and dope sheet). I have created and imported a rigged character from Makehuman and imported a walking BVH animation to go along with the character. So far so good, everything works fine.

I'm trying to modify a segment of the original animation in such a way that (for instance) between frame 10 to 20, the character would rotate it's head as it walks in front of the camera, looking at it. I want to be able to select all the relevant frames (10 to 20), apply the rotation on the selected bones replacing the original keyframes with the new rotation values without having to edit frame by frame. So far, I haven't been able to find out how it works.

Any help would be appreciated.

Regards,

$\endgroup$
2
  • 2
    $\begingroup$ Hello and welcome. Please use a title that reflects the content of the question. It should be succinct, unique and identifying, and summarize what the issue is so that users can at a glance broadly understand what your post is about before opening it. Use the edit link below your post and avoid any emojis salutations or extraneous text not essential to the question. Remember, your title is the first thing potential visitors will see, and will weight heavily on their decision to open your question, which will directly affect the number of answers you might get. $\endgroup$ Commented Mar 16, 2022 at 18:43
  • $\begingroup$ you can delete all the rotation keyframes between 10 and 20, just create 2 keyframes (10 and 20) and Blender will interpolate the rotation between the 2 frames. If for some reason you need to have 10 keyframes between 10 and 20, simply bake the action (Object > Animation > Bake to Keyframes) $\endgroup$
    – moonboots
    Commented Mar 16, 2022 at 19:04

2 Answers 2

0
$\begingroup$

Select the armature then switch to Pose Mode. Select the Bone you want to adjust (in your example, the neck bone).

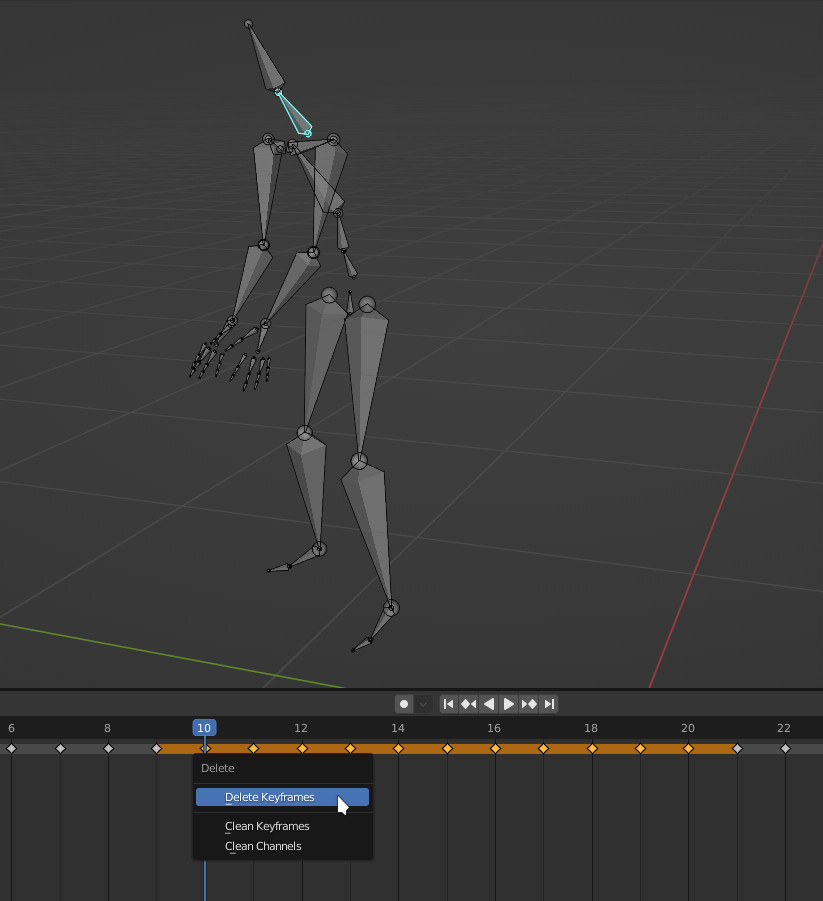
In the Dope Sheet Editor or the Timeline, select the keys you want to modify,(eg 10 to 20), then delete them. You can Box Select them with B and Delete them with X or Del. You will notice a gap in the keyframes.

enter image description here

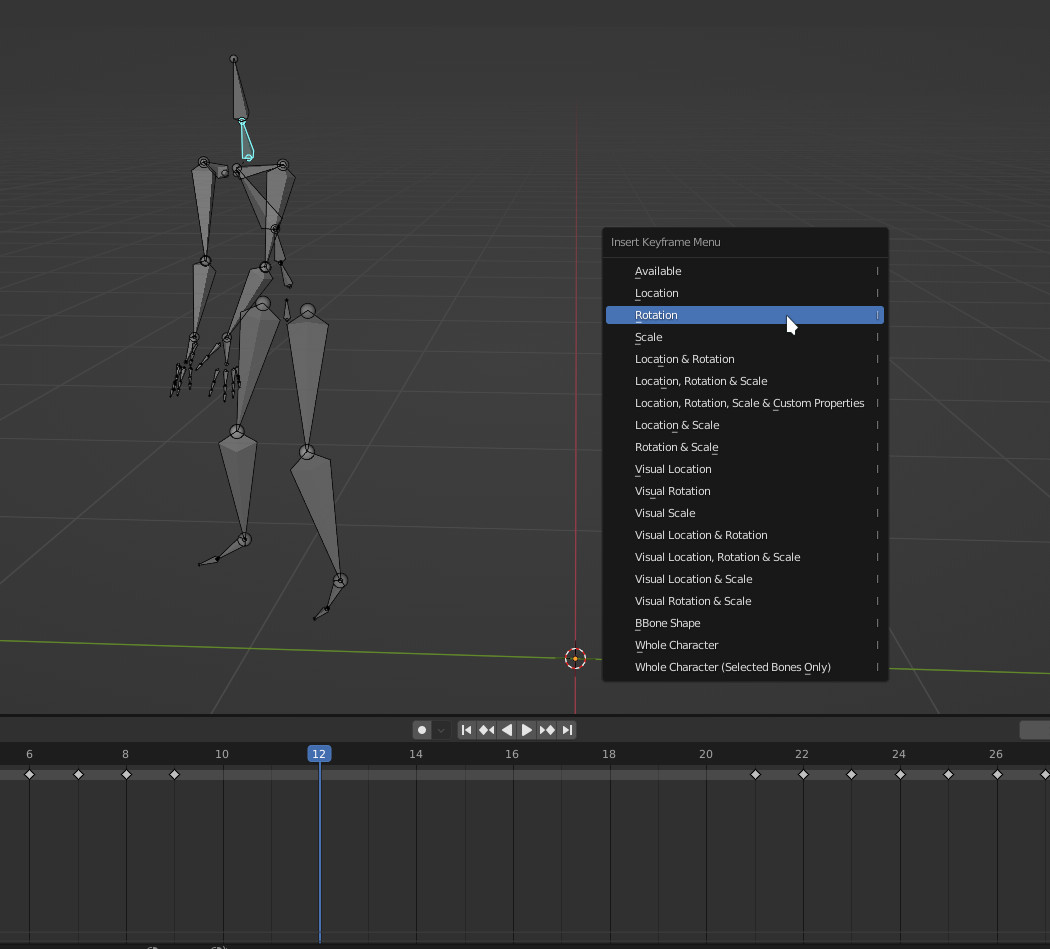
In the Viewport, on a frame near the start of the gap (eg, frame 12), rotate the neck Bone so the head looks at the camera, then insert a key (I /Rotation*).

enter image description here

In the Dope Sheet, select that keyframe, Dpulicate it (Shift+D) then slide it to a frame near the end of the gap (eg, frame 18). You should have something like this :

enter image description here

This means :

  • frame 9, the pose is like the original BVH
  • frame 9 to 12, interpolate from "original BVH" to "look at camera" : the character turns his head.
  • from 12 to 18, the bone doesn't move : the character stares at the camera.
  • from 18 to 21, interpolate from "look at camera" to "original BVH" : the character turns his head.
  • frame 21, the pose is like the original BVH
  • if you work with a BVH, i assume only the Rotation is keyed ; but in some cases, Location/Scale may be keyed too
$\endgroup$
0
$\begingroup$

enter image description here

I have tried your suggestion and it worked just fine. There is something worth mentioning however. In order for the change to be a executed, the boxes of the modified bones have to be checked in the dope sheet (see attached image). If not the original animation persist and the changes are overlooked. It's kind of odd but it is what I experienced.

$\endgroup$
1

You must log in to answer this question.

Not the answer you're looking for? Browse other questions tagged .