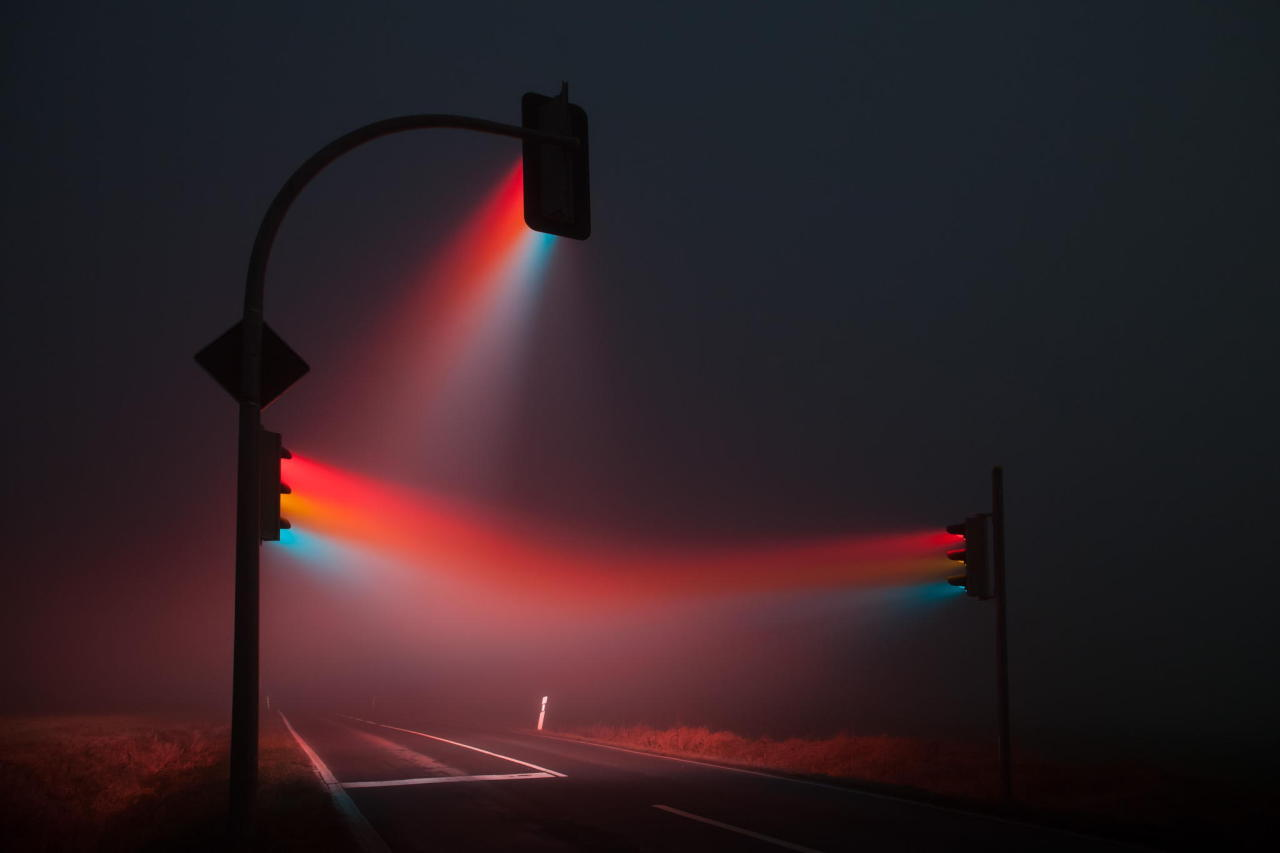
How would you recreate something like the photo below in Blender? I'm refereeing to the effect generated by the lights and the fog. I know that this effect is rather intensified/created by the exposure time of the photo being really long, despite this, could you still in Blender do something similar? (targeting Cycles and a single image render)
1 Answer
In my opinion it has nothing to do with exposure time, exposure time creates streaks when the light object is moving, which is not the case here.
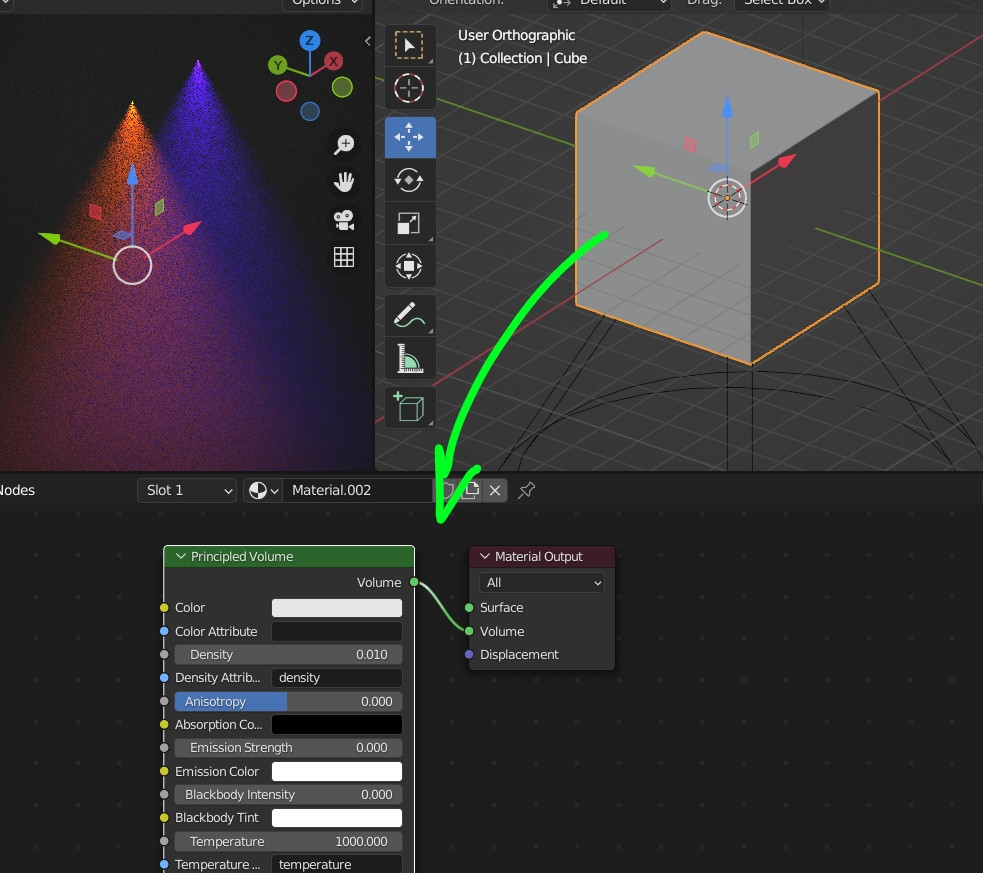
You could do it with some Spot lights within a fog, created by volumetrics: Create a cube and give it a Principled Volume node plugged into the Volume input of its Output. Keep the Density value of the Principled Volume very low. Put the spots inside the cube:
In Eevee it will need some additional tweakings: in the Render panel, increase the Sampling values, and under Volumetrics, lower down the Tile Size and increase the Samples values to have a better quality).
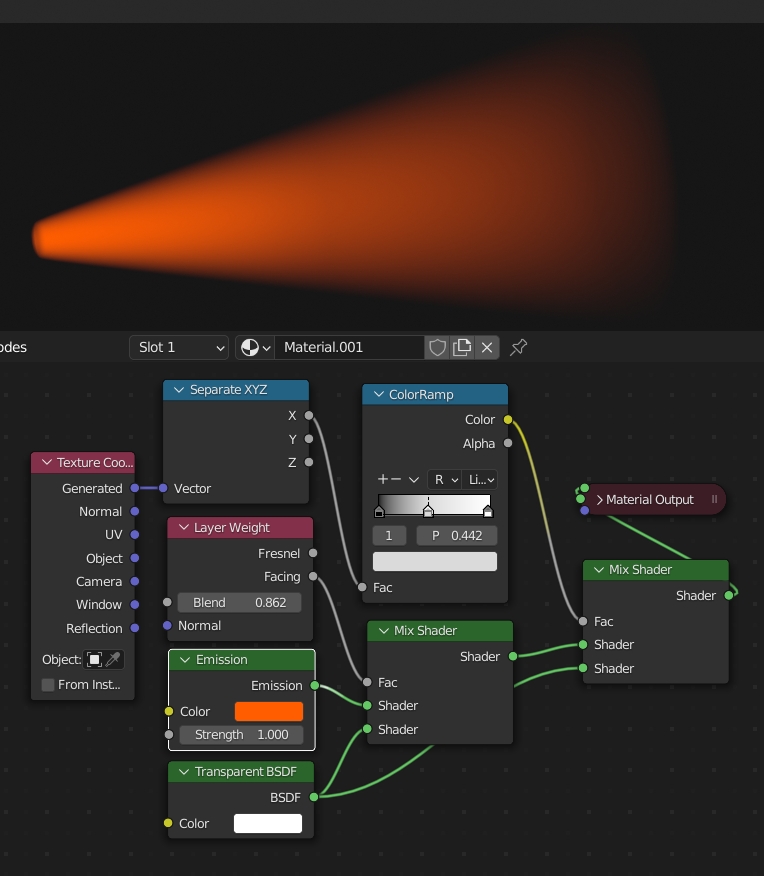
But volumetrics are heavy to calculate, if you want a lighter solution, you can create a cone for each light beam and give it the following material: Use a mix between emission and transparency with a Layer Weight as factor to create transprency on the borders, and use a Separate XYZ to create transparency on the length. In Eevee don't forget to choose Alpha Blend in the material Settings:
-
1$\begingroup$ This is great! Thank you I will give it a try! $\endgroup$– ikerdcCommented Feb 23, 2022 at 14:43
-
$\begingroup$ It might be more practical to use an Empty ➝ Cube for the volume. $\endgroup$– JoachimCommented Feb 23, 2022 at 21:01
-
$\begingroup$ @ Joachim, what do you mean? You can't give any material to an empty $\endgroup$ Commented Feb 23, 2022 at 21:02


