3
$\begingroup$

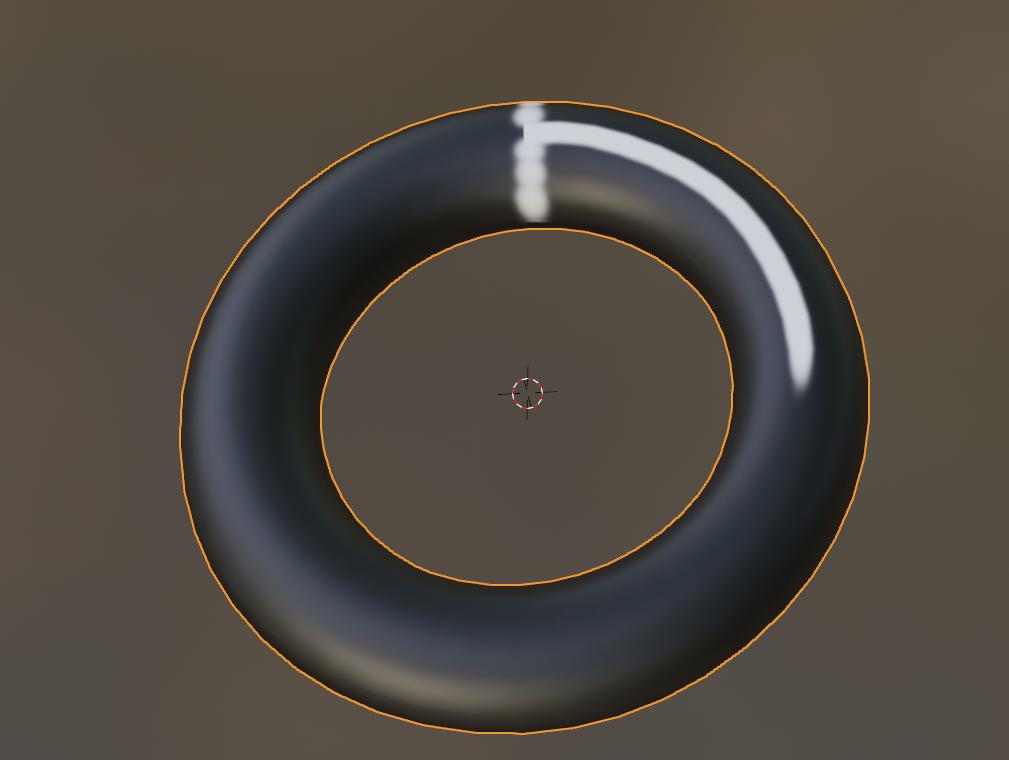
I added a Texture Image to a torus and when I started painting on the torus, I saw this undesired effect at the point where the edges of the underlying image join:

bad join

I can see this effect also in the underlying linked image (right-click on the image and open it in a new browser tab to see it at full-size where it's easier to see the issue):

linked image

The .blend file is here (I'm using Blender 2.92).

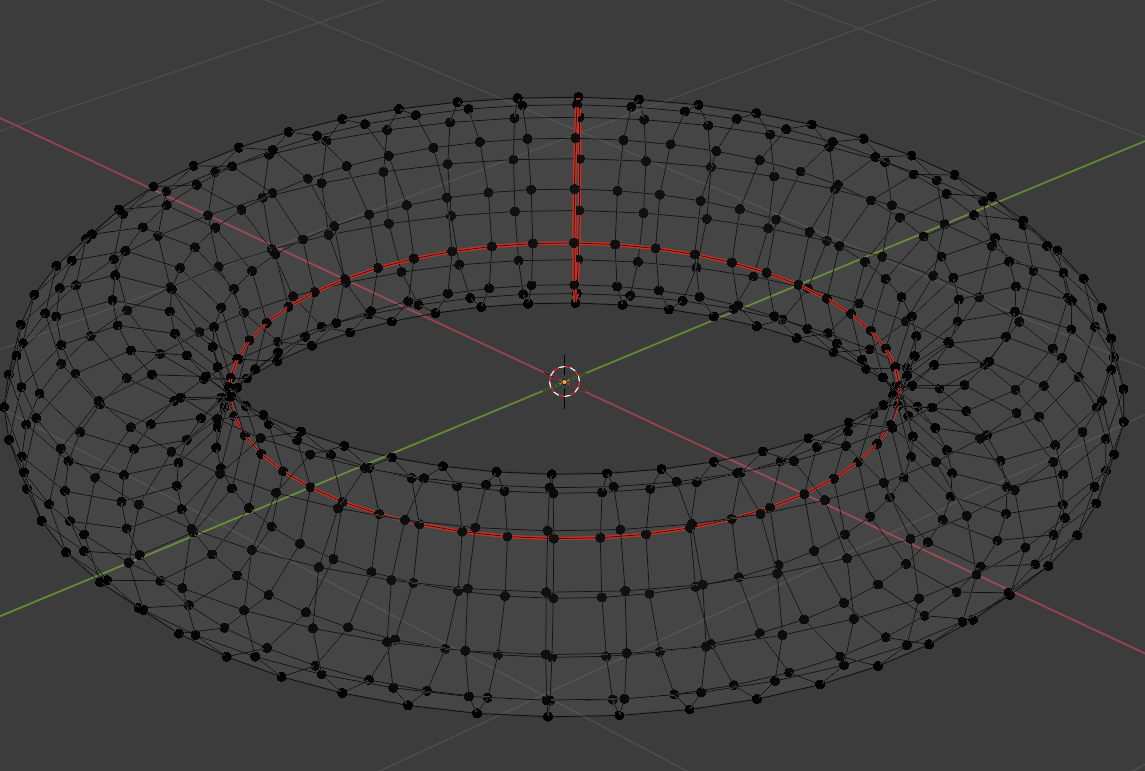
There's nothing fancy about the torus or how I linked the image. The torus has been just lightly deformed and I don't see anything unusual about the mesh at this join point:

mesh at join

I did no customization in the UV Editing workspace, in fact, I didn't go near that workspace at all.

I created the deformed torus in the Layout workspace, selected it, switched to the Texture Painting workspace. There in the Image Editor, I added a new image giving it the name "Torus_texture" and changed none of the other default image properties. I went to the Shading workspace, added a new Texture Image node, selected the "Torus_texture" and linked the node's Color output to the Base Color input of the material node for the torus. And that's it - the result has this odd anomaly shown above.

Clearly, I have done something wrong but I'd like to know what so I can correct it without starting from scratch again.

I know I've done something that introduced this issue as if I simply create a completely new undeformed torus, add a material and repeat the steps outlined above I don't see this problem:

good join

The hard edge that you see is a stroke that I drew directly on the underlying image, rather than the torus, so that I could see the join point. Here there's no odd anomaly at the join point when I draw directly on the torus.

Its .blend file is here for comparison.

$\endgroup$
5
  • 2
    $\begingroup$ you need to pack 'Torus_texture' into your blend file. If you didn't unwrap the torus, then you've got the default UV map for a Torus. I would guess that 'Torus_texture' doesn't map to it very well and you're seeing the results. To pack the texture, before you save the file, go to File->External Data and select "Pack all into .blend". $\endgroup$ Commented May 22, 2021 at 23:42
  • $\begingroup$ @MartyFouts - I really appreciate you taking the time to download my .blend file, I've updated it now so everything is packed. People's time is important and I feel really stupid about this mistake. The image was originally packed and I used "Save a Copy" to get the image that's included in this question - I thought I'd just get a copy with no associated unpacking. I should have double-checked! $\endgroup$ Commented May 23, 2021 at 10:10
  • $\begingroup$ I am using the default UV mapping - but, as shown in the third image, the mesh at the join-point is very regular - in fact, the whole torus is relatively undistorted. So I expected that unpacking into the default UV grid would be fine. If I spin around the torus mesh, I don't see any points at which the faces (if that's the right term to use when referring to a mesh) don't look like fairly regular little squares. $\endgroup$ Commented May 23, 2021 at 10:20
  • $\begingroup$ OK - I can confirm that choosing my own seams and using Follow Active Quads unwrap achieves a result without the odd join issue. It's probably good that I've learned this (I'm just starting as you might guess). Perhaps it's a waste of time asking why the default didn't do as good - I chose the two obvious seams for a torus and didn't make any adjustments after Follow Active Quads - I would have thought the default would be to do the same (and that the mild distortion applied to the original shape would have made little difference). $\endgroup$ Commented May 23, 2021 at 11:12
  • $\begingroup$ @MartyFouts - If you want to add your comment as an answer, I'll accept it. But any extra information on why the default behavior can fail (in what seems like a simple situation) would also be appreciated. $\endgroup$ Commented May 23, 2021 at 11:14

1 Answer 1

3
$\begingroup$

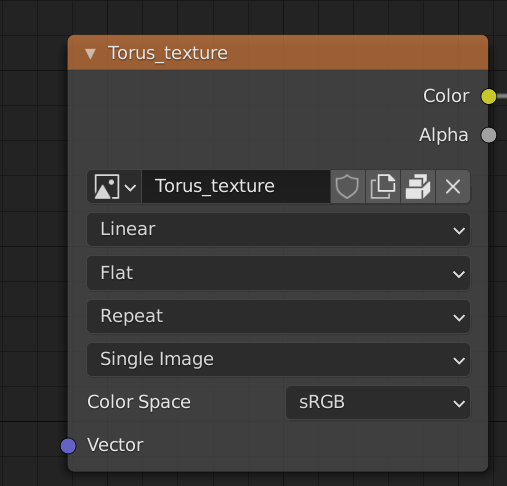
You are using the default UV Map for a torus, which should (and does work) provided you make a small change to the shader. Here's your original texture node:

Texture node with default settings selected

In this case, the interesting setting is the 2nd one

UV projection "Flat"

This flat projection produces the torus you have in your question

Torus

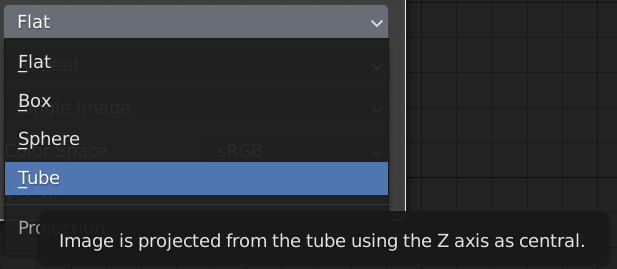
If you change the type in the drop down menu from "Flat" to "Tube"

Changing to tube UV projection

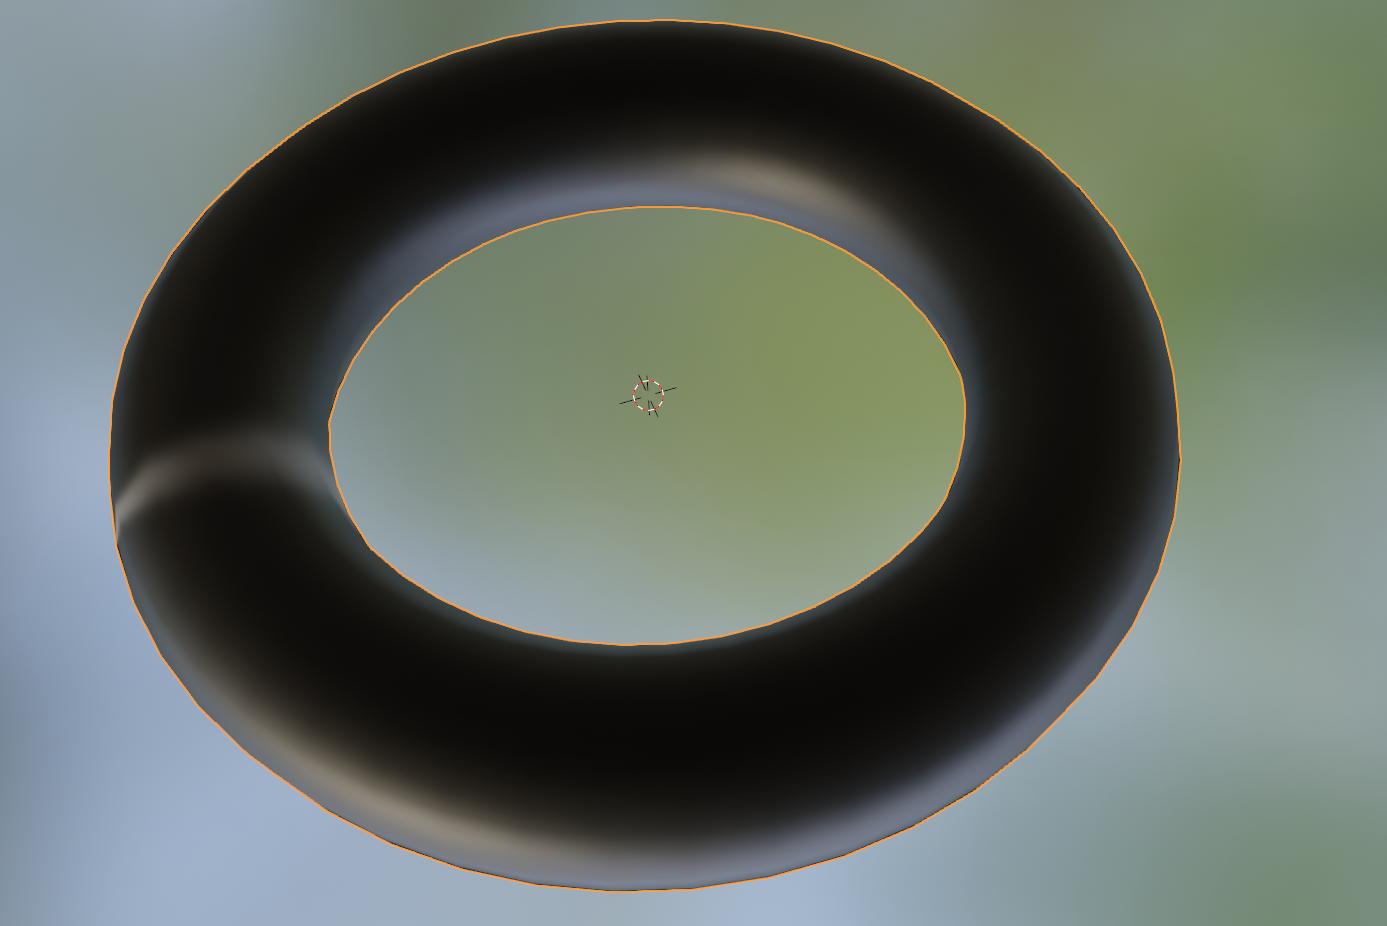
The problem goes away, but the project changes so that the UV map is on the other side of the Torus:

correct mapping but improperly placed

There ways I solve this later problem: simply reposition the torus so the part you want exposed is visible to the camera

The image texture is trying to map a 2D UV map onto a 3D object. If you give it guidance by marking seams then you've actually created a flat (almost) representation of your 3D object and "Flat" works. But if you count on the various smart UV unwrapping modes, they rely on you hinting the geometry of your object in the image texture settings.

There are a very long list of possible combinations, each requiring a slightly different approach to the settings, which is why most tutorials on UV mapping go directly to "mark seams, make flat". The problem with doing this with a Torus is that if I mark the obvious seams:

marking seams for a 'flat' unwrapping

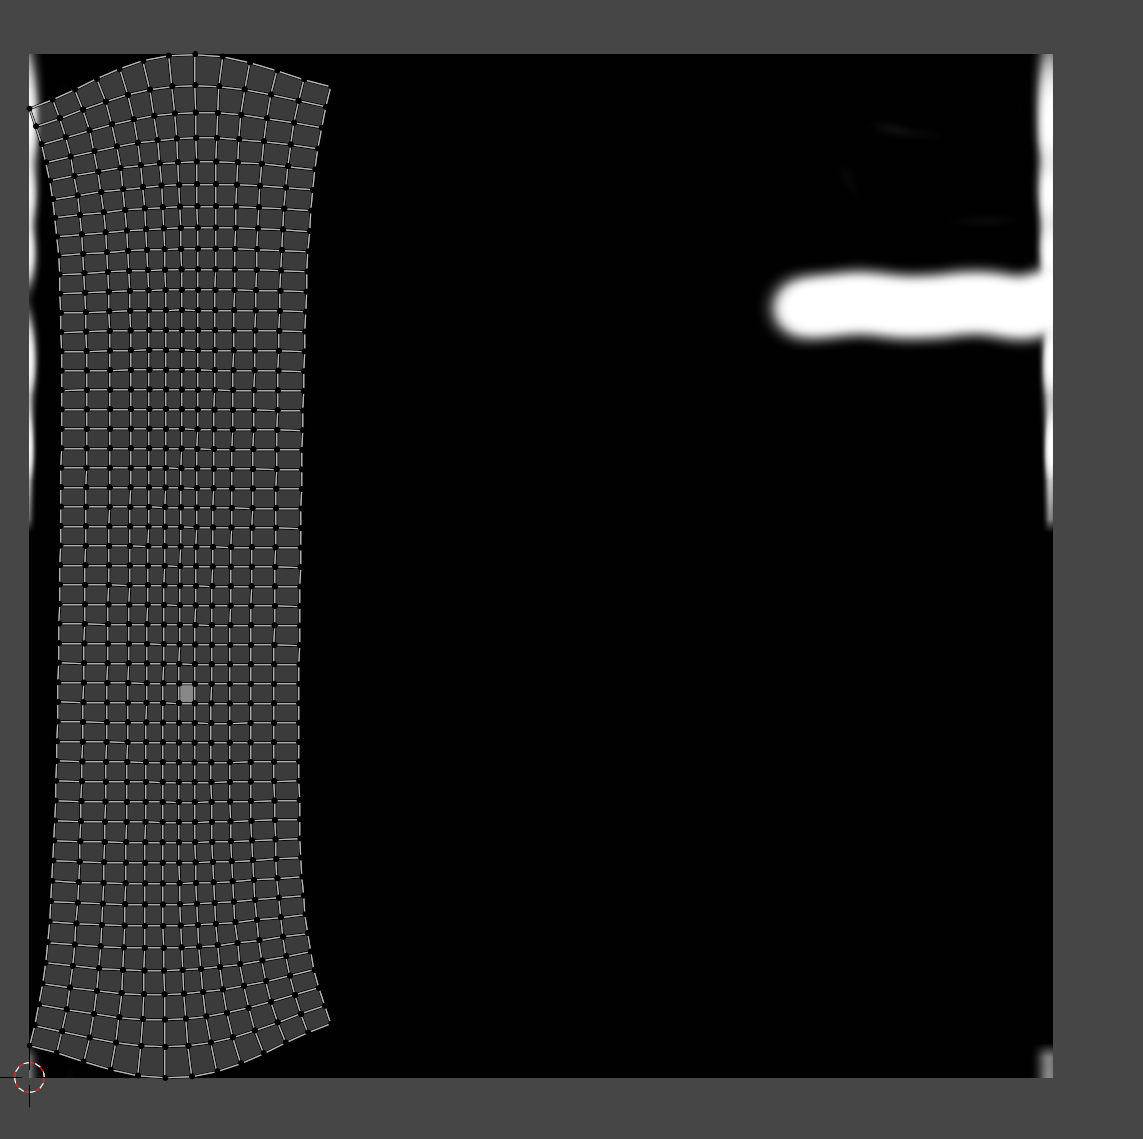
The resulting uwrap:

enter image description here

has several problems. It doesn't match you image texture. It doesn't use very much of the space available. You can cut the Torus into pieces to fix the later, but the only way to fix the former is to redo the texture painting.

This is why, by the way, the workflow for texturing is to first create the UV Map, then test it with a UV checker, and only then to create the image texture.

$\endgroup$
1
  • $\begingroup$ That's a super answer - thanks for taking the time to explain all that. $\endgroup$ Commented May 23, 2021 at 16:12

You must log in to answer this question.

Not the answer you're looking for? Browse other questions tagged .