2
$\begingroup$

Afternoon, pardon my noob question but I've only started learning in the last few days.

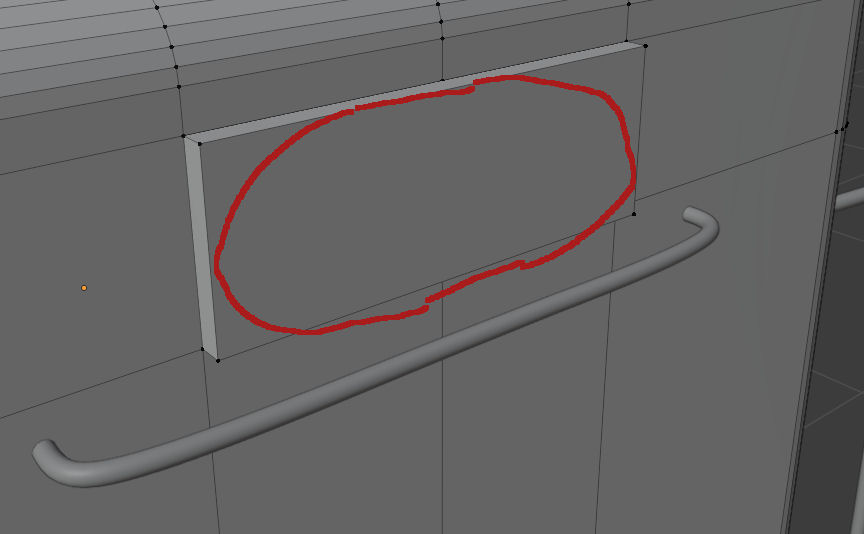
I'm looking to roll the edge of this around neatly

[Original shape1

So they're neatly curved, but not as in the bevel tool which rolls them in. Maintain the up and down sides but making them circular.

If this makes any sense

I'm working on the headlights here.

enter image description here

Tried the 'spin' tool but I think I lack the skills at the moment to get it to work right. Suggestions and some steps would be really appreciated! :)

Thanks so much.

$\endgroup$
5
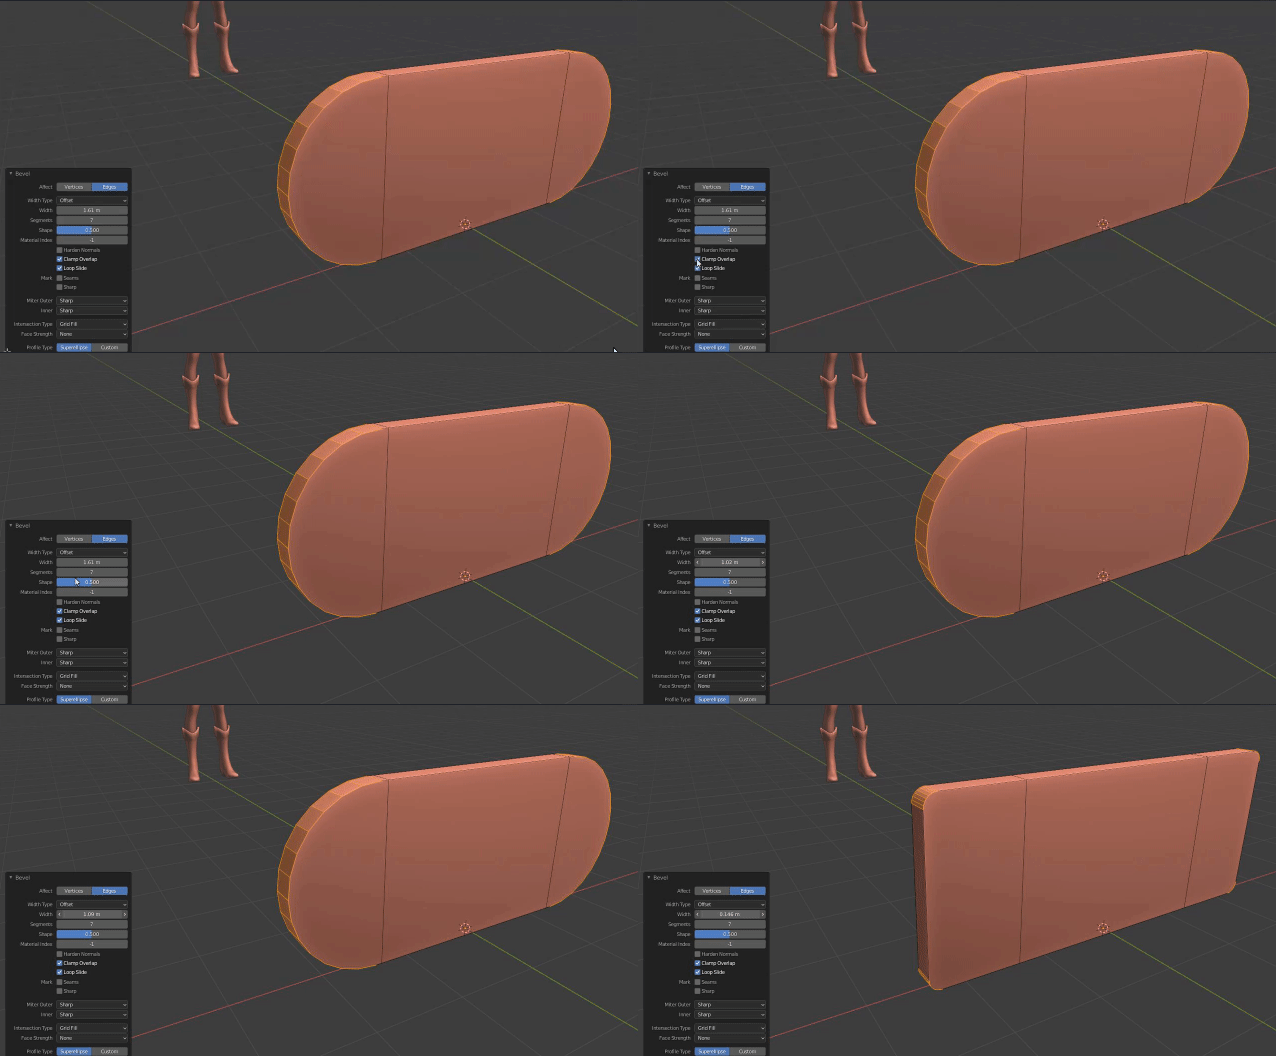
  • $\begingroup$ In edit mode press CTRL+R to add two cuts. Then select those new edges and scale them outwards on the axis that is needed until you're happy with the size. Then bevel the edges? Here's a quick demo of what I mean: gyazo.com/2ee0c086afa1340316a18c01181d3571 $\endgroup$ Commented Mar 12, 2021 at 22:54
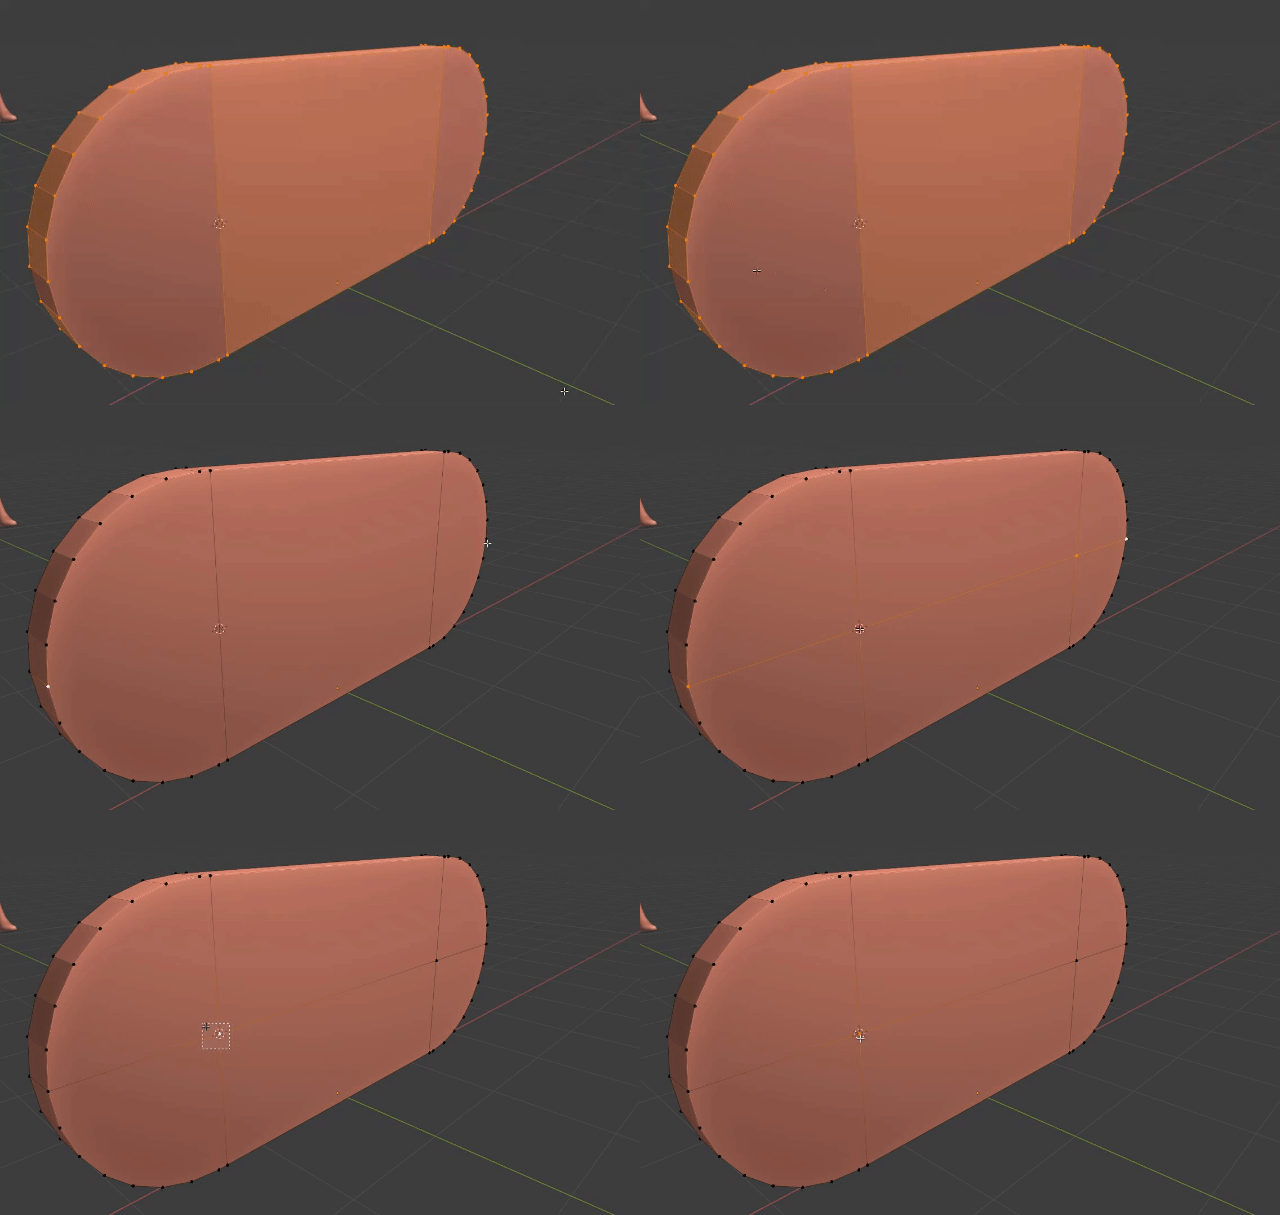
  • $\begingroup$ Some more advice.. If you want to create your circles exactly in the middle of your newly bevelled edges then simply connect the vertices like this, using J: gyazo.com/664d1a731d4e84646b2ba27b0b204ae6 This will create a vert exactly in the middle of that curve. Then snap your cursor to it by pressing SHIFT+S> Snap Cursor to Selected, then simply create a cylinder there. $\endgroup$ Commented Mar 12, 2021 at 23:03
  • $\begingroup$ Ahhh thank you so much! That is perfect! I was a little nervous asking for help that might annoy people, you know? It's simple stuff once you learn it. :) Thanks again! :) $\endgroup$
    – Bhaal
    Commented Mar 13, 2021 at 3:48
  • $\begingroup$ Never be afraid to ask okay? When I first started being a 3D model artist about 19 years ago - there weren't video tutorials and such so I had to teach myself. I know how hard it can be to want to follow your dreams but having nobody to ask yet being frustrated because you can't figure it out. I actually had people make fun of me because I was such a "noob" and wasn't as good as them. That's why I help people because I know how it feels to be in that situation and it's frustrating, it can make you want to give up. It can really harm your development. Plus it's the right thing to do ^.^ $\endgroup$ Commented Mar 13, 2021 at 5:31
  • $\begingroup$ @TheJovialBrit Feel free to post your solution as a full answer :). So others can upvote and the OP can accept it. $\endgroup$ Commented Mar 13, 2021 at 8:51

2 Answers 2

2
$\begingroup$

In edit mode press CTRL+R to add two cuts. Then select those new edges and scale them outwards on the axis that is needed until you're happy with the size. Then bevel the edges. Here's a quick demo of what I mean: EXAMPLE EXAMPLE GIF

Some more advice.. If you want to create your circles exactly in the middle of your newly bevelled edges then simply connect the vertices like this, using J: EXAMPLE EXAMPLE GIF

This will create a vert exactly in the middle of that curve. Then snap your cursor to it by pressing SHIFT+S > Snap Cursor to Selected, then simply create a cylinder there.

$\endgroup$
3
$\begingroup$

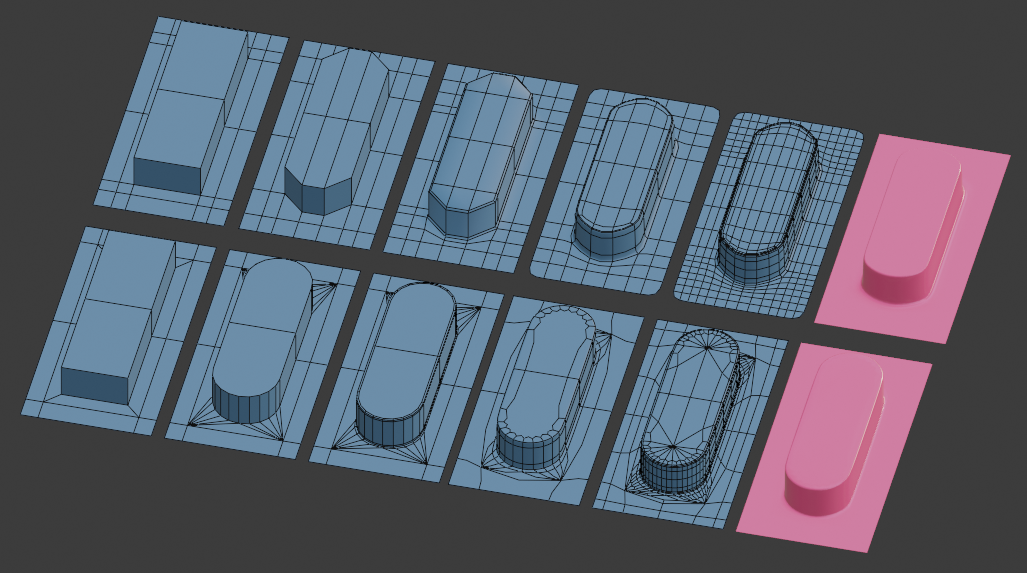
Maybe this is a good place to contrast direct modelling, where you make curved profiles yourself, and subdivision-surface modelling, where you construct a framework, and anticipate how Catmull-Clark subdivision will make curves for you.
enter image description here

Bottom Row: Direct modelling

On the bottom row, the corner-verticals are selected, and then bevelled with enough segments to give you the curve with the required resolution. (If you bevel with 'Clamp Overlap' on, and take the width as far as you can, you will get a perfect circular arc. There will be duplicate vertices where the bevels meet: you can remove those with M Merge > By Distance)

Then the sharp top and bottom edges of the extrusion are narrowly bevelled too, with a couple of segments, to give smooth-shading some guidance. Without that bevel, the smooth-shading would interpolate normals straight over the transition from the horizontal to vertical faces, with a very unnatural looking result. (You can also guide the smooth-shading by splitting the normals, with Auto Smooth.)

Advantages / Disadvantages:

Up to step 3, so far, so good, for lower-poly modelling. The geometry has a lower resolution, so you can see curves are segmented on close inspection, but the shading makes them look smooth. Long thin triangles have been created in the base plane, but so long as it is flat, so smooth-shading doesn't have to interpolate normals across those, that's fine. This is the kind of topology that Booleans, and CAD packages, often generate.

The direct approach has advantages, up to step 3: it's quick, and limits the number of edges propagating across the model. The disadvantages become apparent at step 4, if you want to use a Subdivision Surface modifier. The triangles have broken the flow of face loops. If you do need to subdivide the geometry for higher resolution, that does not play well. Also, a lot of Blender's (and other applications') tools are geared to selecting, inserting, and sliding loops of consecutive quadrilateral faces. The triangles make the model harder to adjust, further down the line.

Top Row: Subdiv. Modelling

Here, a couple of extra loops are CtrlR cut down the length of the extrusion, and the corners are scaled back to give it half-hexagon ends. Again, at step 3, the sharp edges are bevelled, to hold the normals. Some loops are cut across the extrusion, too. These are optional, but can be used to control the curvature that's generated by the Catmull-Clark subdivision modifier at step 4. Step 4 in both rows shows the result of 2 levels of subdivision, optimally displayed, and the 5th copy shows all the edges generated by the subdiv.
$\endgroup$

You must log in to answer this question.

Not the answer you're looking for? Browse other questions tagged .