0
$\begingroup$

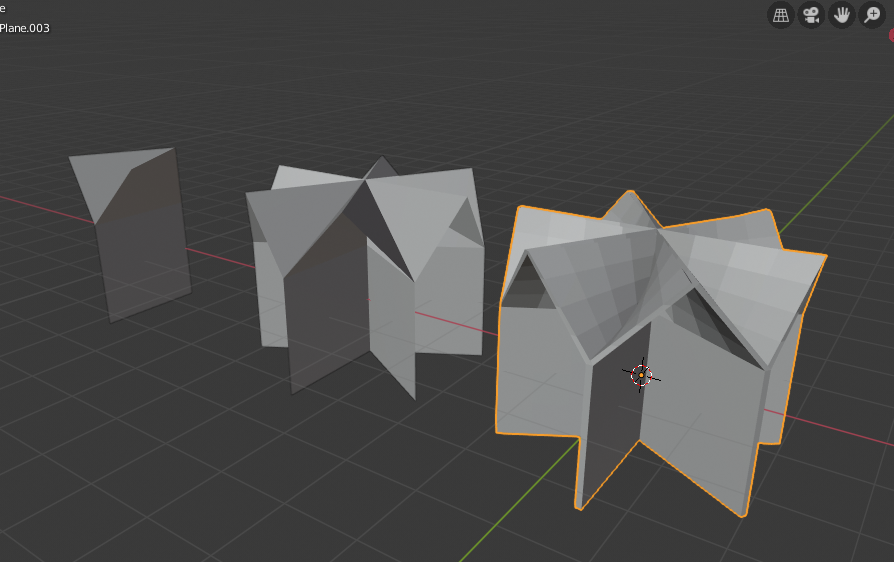
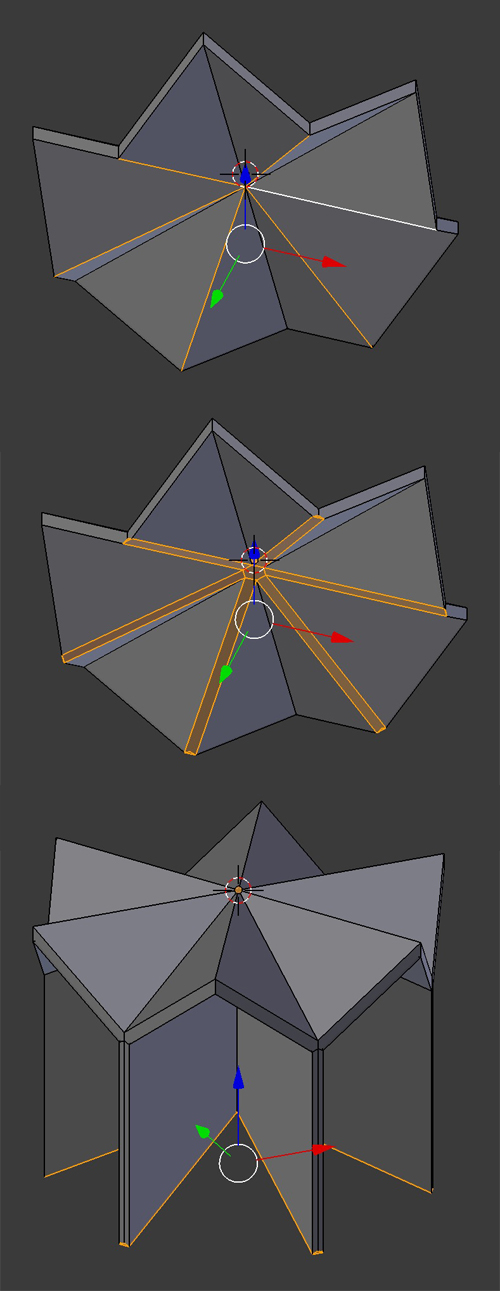
I'm currently trying to build grid structures by using planes and solidifying them. Problem is, when I use this to create hexagonal grids, the solidifying modifier does this in a way that faces of the same mesh intersect each other:

enter image description here

Above object started out as three planes which were joined to a Y-shape, then solidified.

You can see that in the middle, the upper faces actually cross each other.

Is there an easy way to clean this up in a way that…

a) …where the faces intersect each other, edges and vertices are created b) …the inner parts of the faces are removed?

To clarify, I am working with planes, because I am warping them, which works far easier than dealing with already solid meshes (hard to explain I guess… My point is that I really don't want to change my underlying workflow, if I can help it). And since I'm working on grids, where this phenomenon occurs often, having a way to automate this would be really helpfuL.

Here is a picture that better illustrates what I want to achieve (right), as well as my current workflow(File is in a comment below):

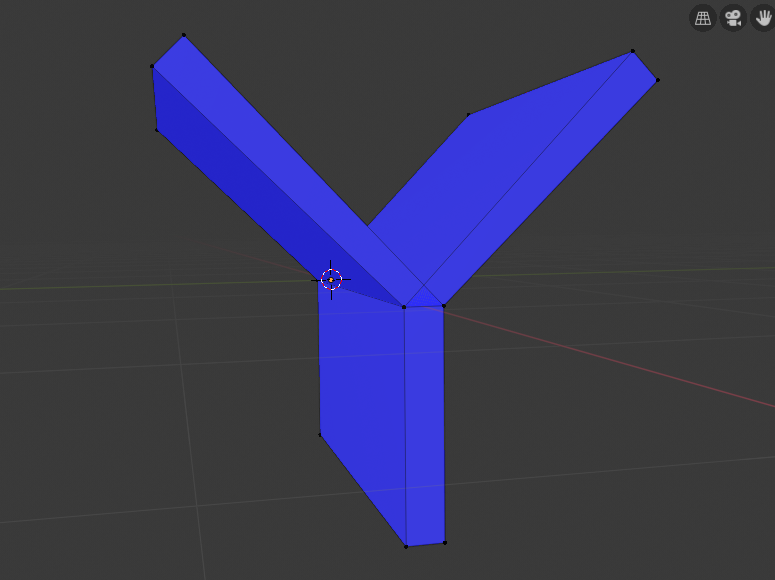
enter image description here

$\endgroup$

2 Answers 2

1
$\begingroup$

Edit: As your request has changed I give a second answer below.

Maybe you're not choosing the best way to build your object, in your case the Solidify modifier will create unwanted intersection and it will be hard to fix.

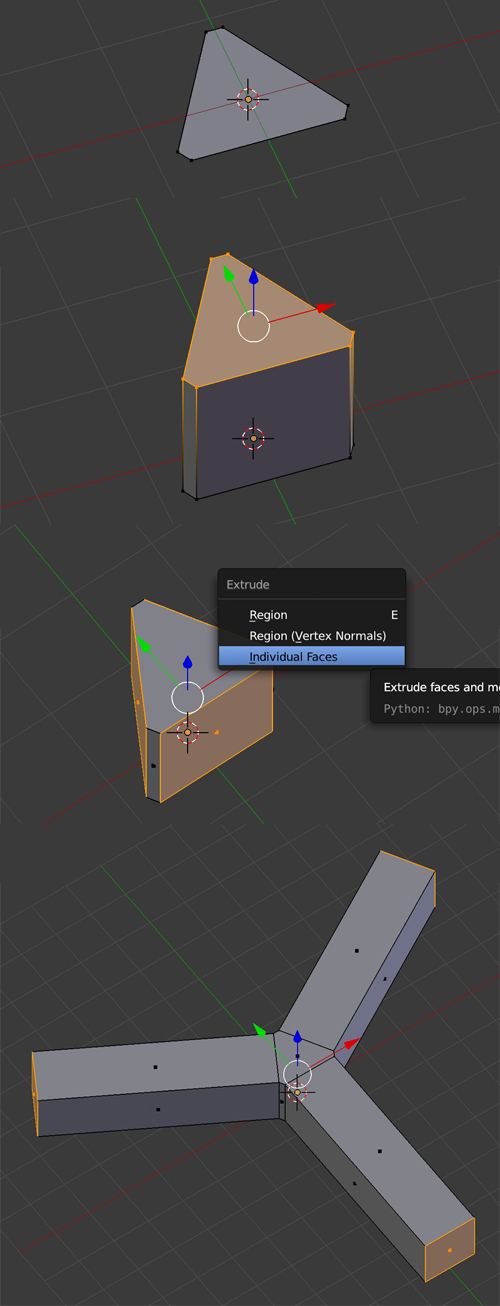
What you could do for example is begin with a triangle (3 vertices circle), extrude it up, then select the 3 faces, press AltE to extrude, choose Individual Faces and drag to extrude.

enter image description here

Second answer:

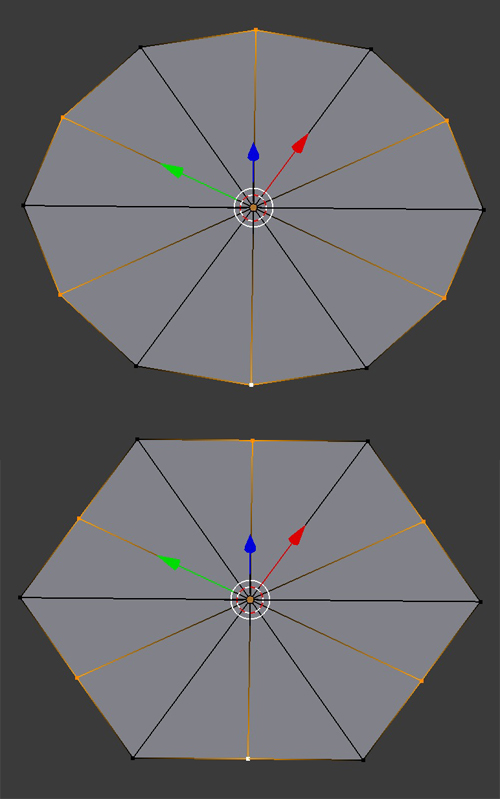
  • Create a 10 vertices circle, scale one of 2 vertices so that it makes a hexagon.

enter image description here

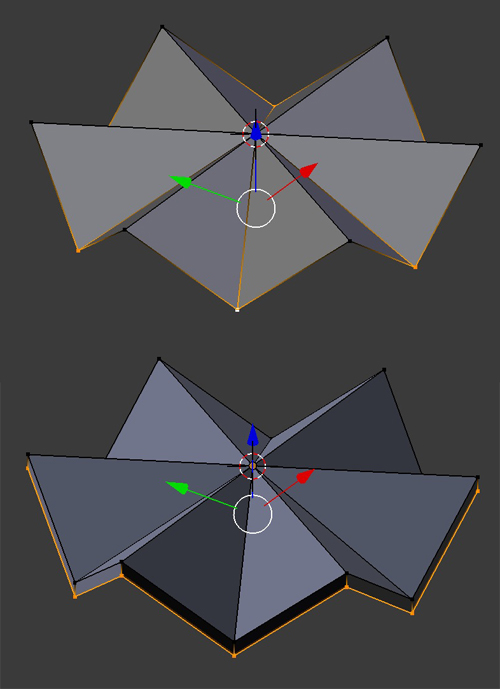
  • Move down those vertices, extrude down the whole mesh.

enter image description here

  • Select one of 2 edges underneath, bevel them, extrude down.

enter image description here

$\endgroup$
10
  • $\begingroup$ Thank you for the suggestion. You're probably right that there has to be a better way, but your approach doesn't work for me, because I want to warp the planes in three dimensions. Maybe I'll add a picture later. A friend suggested building the negative spaces, then using boolean on an object to remove them. This sounds like a pissi le approach $\endgroup$
    – tkk_tkk
    Commented Oct 23, 2019 at 14:10
  • $\begingroup$ to warp the planes in three dimensions? Yes please give more explanations, I don't see how what you've done could work better than my solution $\endgroup$
    – moonboots
    Commented Oct 23, 2019 at 14:14
  • $\begingroup$ Here you go, this illustrates my current workflow: mediafire.com/file/xkeh2a0ymead2gl/untitled_001.blend/file I assume you are right and there is an easier approach. I didn't even mention the open parts on top of the mesh... $\endgroup$
    – tkk_tkk
    Commented Oct 23, 2019 at 19:59
  • $\begingroup$ so you should have directly asked how to do the final shape, maybe edit your question with a screenshot ;) I'll try to find out $\endgroup$
    – moonboots
    Commented Oct 23, 2019 at 20:05
  • $\begingroup$ ok, edited, tell me if this is correct $\endgroup$
    – moonboots
    Commented Oct 23, 2019 at 20:27
0
$\begingroup$

…ok, after playing around with it some more, the way to go for me is to use the edge split modifier to treat the different planes as separate meshes when applying the solidify modifier.

$\endgroup$

You must log in to answer this question.

Not the answer you're looking for? Browse other questions tagged .