3
$\begingroup$

I make a terrain (ground + vegetation mesh) for an old game engine which needs all the geometry to be separated into chunks consisting of ~ 25k vertices max.

So far I use my "separate by radius" script which enters Edit mode, select faces in a given radius, separate using bpy.ops.mesh.separate(type='SELECTED') and continues until it is separated completely.

This is the original script:

import bpy
import bmesh
import time

class SeparateByRadius(bpy.types.Operator):
    bl_idname = "object.separate_by_radius"
    bl_label = "Separate by Radius"
    bl_options = {'REGISTER', 'UNDO'}

    max_diameter = bpy.props.IntProperty(name="Radius", default=0)

    def execute(self, context):

        if self.max_diameter == 0:
             return {'FINISHED'}

        context = bpy.context
        scene = context.scene

        bpy.ops.object.mode_set(mode="EDIT")

        obj = bpy.context.edit_object
        me = obj.data

        bm = bmesh.from_edit_mesh(me)

        time_start_updating = time.time()

        def separateNextChunk():

            bm.faces.ensure_lookup_table()

            if len(bm.faces) == 0:
                bpy.ops.object.mode_set(mode="OBJECT")
                bpy.ops.object.select_all(action='DESELECT')
                context.active_object.select = True
                bpy.ops.object.delete()
            else:
                active_median = bm.faces[-1].calc_center_median()

                continue_next = False

                for f in bm.faces:
                    f.select = False
                    if (f.calc_center_median()-active_median).length <= self.max_diameter / 2:
                        f.select = True
                        continue_next = True


                bpy.ops.mesh.separate(type='SELECTED')
                # Show the updates in the viewport
                # and recalculate n-gon tessellation.
                bmesh.update_edit_mesh(me, True)

                if continue_next == True:
                    separateNextChunk()

        separateNextChunk()

        print("Separated in " + str(time.time() - time_start_updating))

        return {'FINISHED'}

def register():
    bpy.utils.register_class(SeparateByRadius)


def unregister():
    bpy.utils.unregister_class(SeparateByRadius)

if __name__ == "__main__":
    register()

While it does the job, it is EXTREMELY slow - the splitting often results into ~2000 objects and this take hours to separate using this method. I suspect the reason is that we are doing modifications of the original (large) mesh by the each single separation.

I have tried to find some alternative methods that would generate the chunks without modifying the original mesh, but as I am not a Python programmer, it started to be too complex for me.

I would appreciate so much if anyone can share some specific ideas how to enhance the script to get it work noticeably faster with the same output, the requirements are:

  • separating into chunks of a given max vertex count or given area
  • splitting must use the existing mesh (no cutting)
  • UVs, materials and vertex colors must be preserved perfectly

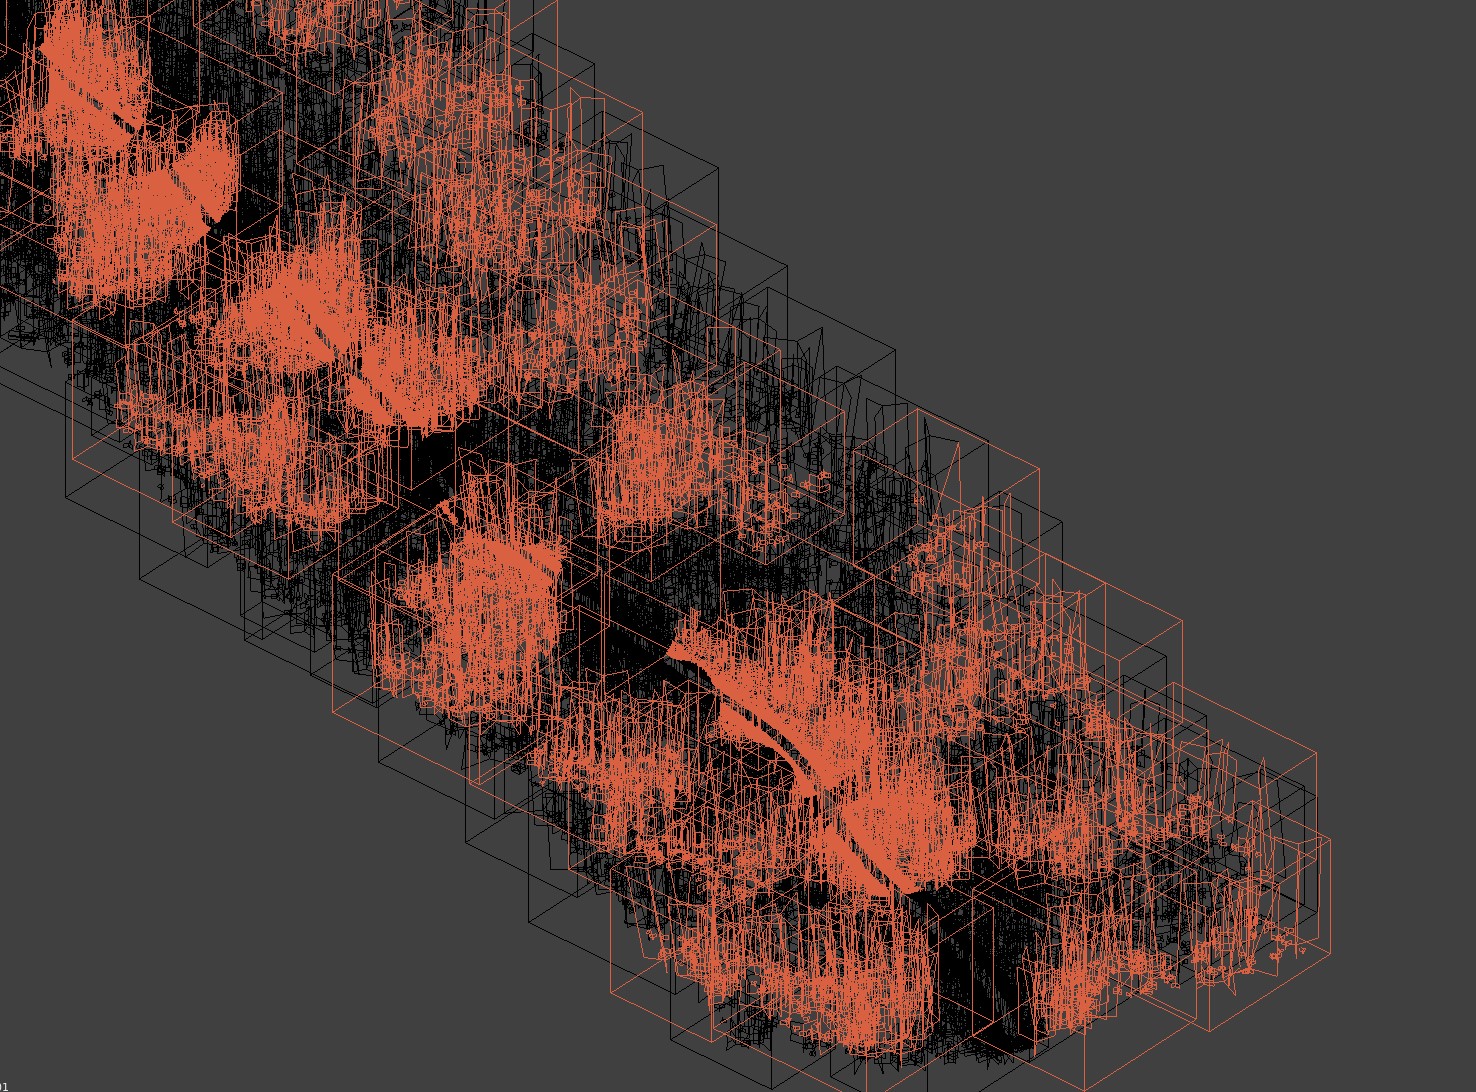
enter image description here

A .blend with the resulted mesh, just Join all the pieces to single mesh for the purpose of a script testing.

$\endgroup$
10
  • $\begingroup$ You should add a sample blend file, I think, to allow people to test eventual improvements. $\endgroup$
    – lemon
    Commented Jul 12, 2019 at 17:41
  • $\begingroup$ 1. split your mesh into a grid with a rule per face into which object it gets copied, not circle ish parts which need a lot of l2 distance checks. 2. duplicate parts of the original mesh directly in python to avoid editing the big mesh. 3. you could maybe use the seperate loose parts function $\endgroup$
    – HenrikD
    Commented Jul 12, 2019 at 17:44
  • $\begingroup$ @lemon I have attached it, thx. $\endgroup$ Commented Jul 12, 2019 at 17:54
  • 1
    $\begingroup$ the file you've uploaded is already cut, right? so join it again will make the base mesh? $\endgroup$
    – lemon
    Commented Jul 12, 2019 at 18:07
  • 1
    $\begingroup$ I've joined it again (if, see previous comment). I think you should use a dichotomy to separate the parts. Cut in half, cut the half in half, etc. The more the mesh is divided the more it is fast (doing it from Blender GUI). $\endgroup$
    – lemon
    Commented Jul 12, 2019 at 18:10

1 Answer 1

3
$\begingroup$

Divide and conquer!

I think the main point for performance is to have smallest objects as soon as possible.

For that, the idea is to use a dichotomy: split the object in half, then each half in half, etc. So cutting an object is faster at each iteration.

The following code is doing it using the bounding box of the object. Boundings are in local coordinates in Blender.

So we get the boundings. Find the spatially largest axis then cut in half on it.

Once vertices are selected, we use 'select linked' to avoid the faces or edges to be cut.

import bpy
import bmesh
import time
from mathutils import Vector


def cut_object( obj ):
    #Gets the bounds
    bounds = [b[:] for b in obj.bound_box]
    #0 is the min
    min_bounds = Vector( bounds[0] )
    #6 is opposite corner to 0
    max_bounds = Vector( bounds[6] )
    delta_bounds = max_bounds - min_bounds

    #Get the axis which corresponds to the largest area
    axis = 0
    if ( delta_bounds.x < delta_bounds.y ): axis = 1
    #Commented below as using Z axis has unwanted effects in your situation
    #if ( delta_bounds.y < delta_bounds.z ): axis = 2

    #The center is the limit    
    limit = min_bounds[axis] + 0.5 * delta_bounds[axis]

    #Set the object active
    bpy.ops.object.mode_set(mode = 'OBJECT')
    bpy.context.scene.objects.active = obj
    #Set selection mode
    bpy.ops.object.mode_set(mode="EDIT")
    bpy.ops.mesh.select_mode(type="VERT")

    #Select the wanted vertices
    bpy.ops.object.mode_set(mode = 'OBJECT')

    for v in obj.data.vertices:
        v.select = v.co[axis] < limit

    #Extend to linked parts (so wont cut the faces or edges)    
    bpy.ops.object.mode_set(mode="EDIT")
    bpy.ops.mesh.select_linked()

    #Get the selected vertex count
    selected_count = sum( 1 for v in obj.data.vertices if v.select )

    print( "Axis: " + str( axis ) )
    print( "Selected: " + str( selected_count ) + "/" + str( len( obj.data.vertices ) ) )

    result = True
    #Check that will separate something
    if selected_count == 0 or selected_count == len( obj.data.vertices ):
        result = False
    else:
        bpy.ops.mesh.separate(type='SELECTED')

    bpy.ops.object.mode_set(mode="OBJECT")

    return result

print( '-----------------' )

max_vertices = 10000
max_iterations = 20
iteration = 0

found = True

start_time = time.time()

discarded_objects = {}

while found and iteration < max_iterations:

    found = False

    #Get all objects that have more than the wanted vertex amount
    for obj in [x for x in bpy.context.scene.objects if len(x.data.vertices) > max_vertices and discarded_objects.get( x ) != True]:
        if cut_object( obj ):
            found = True
        else:
            #We can not cut it, so discard it
            discarded_objects[obj] = True

    iteration += 1            
    print( "Iteration: " + str( iteration ) + "   Objects: " + str( len( bpy.context.scene.objects ) ) )

end_time = time.time()

print( "Elapse: " + str( end_time - start_time ) )

The code is commented. So I think all is said about that.

Results

For a limit of 25k per chunk that gives 33s here.

For 10k, this is 50s.

Comments

You may prefer cutting differently. For instance defining a virtual cube surrounding the object, then cut it in half and use its part to cut the mesh.

The given code version does not included cutting along Z. It works, but is far longer when the wanted amount of vertices is low (10k for instance). The reason is we can only separate few faces at each iteration.

I'm also wondering why you need to start with such large mesh? Why the process does not allow to start from small parts instead this big one?

Here is the blend file with the script included:

Edit

Here is a version with no iteration limit and including the cut along Z.

But, practically cutting along Z won't work for small chunks (tested on 10k).

The reason is several parts of the mesh are tall and close to each other. So they can't be separated the way the algorithm works because select linked will nearly select them all and only few very small parts will be separated.

$\endgroup$
9
  • $\begingroup$ There is an error getting the largest axis in the code (and the remark about z)... will fix that when possible. $\endgroup$
    – lemon
    Commented Jul 13, 2019 at 8:35
  • $\begingroup$ Thanks so much! I am currently testing your script and it does look very promising so far! I am just not sure whether I need to tweak max_iteration setting? The script should be completely automatic and reliable everytime if possible. I am not sure if I also don't need Z axis for a case of some highly elevated terrain, but as the mesh density still spreads mainly along X,Y, it shouldn't be an issue I believe. $\endgroup$ Commented Jul 13, 2019 at 8:45
  • $\begingroup$ About the large mesh - I use particle system to generate the vegetation over the terrain, but for the export I need to join everything so I can bake AO to vertex colors and tweak it. Then I need to separate it into these chunks and also by material (this is not an issue as the built-in method is quick). Then I export each part to .X format which can be finally imported into the game editor. Now thinking - maybe if separating by material is done before the actual separation, it could maybe make the process even faster? $\endgroup$ Commented Jul 13, 2019 at 8:49
  • $\begingroup$ max_iterations is what you want (or testing purpose). Get rid of it as you need. About z, just a small error (won't have time to fix it now). But there is some limit due to the size of the faces, though, as we cannot cut them. $\endgroup$
    – lemon
    Commented Jul 13, 2019 at 8:51
  • 1
    $\begingroup$ very good work, well done! I really appreciate that you took the efford of scripting that for someone else. $\endgroup$
    – HenrikD
    Commented Jul 13, 2019 at 9:11

You must log in to answer this question.

Not the answer you're looking for? Browse other questions tagged .