I am trying to make a youtube video and in the part of the video I'm going to have a image of a face on top of my face to preserve my privacy. I tried going frame by frame with a picture that has a transparent background but somehow it didn't work.
1 Answer
You can track a point in your footage and overlay an image in the compositor.
Common practice is to blur a face, when wanting to preserve the privacy of someone in a video. I will explain this first, as it is quicker to achieve.
Bluring a moving persons face in a video
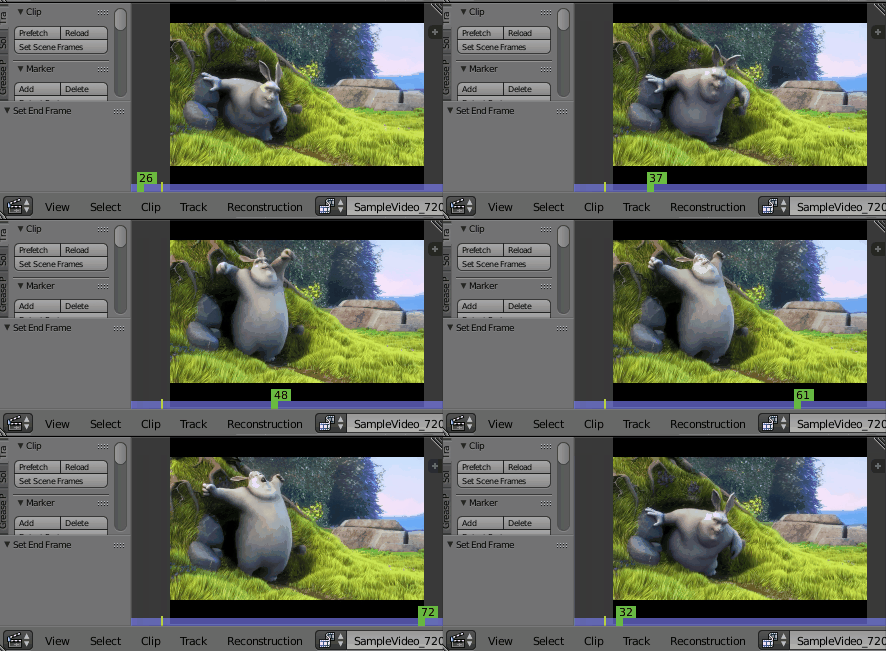
- Load the video into Blenders Movie Clip Editor. Set the scene start frame, end frame and resolution.
Go to the first frame of the scene. In the Tools Tab of the Movie Clip Editor in the Track section, set the Tracking Settings to Previous Frame. Click the Add button in the Marker section, then click on the video to add a marker. The marker should be positioned on the face you want to track. Markers can be translated, rotated and scaled. G, R, S
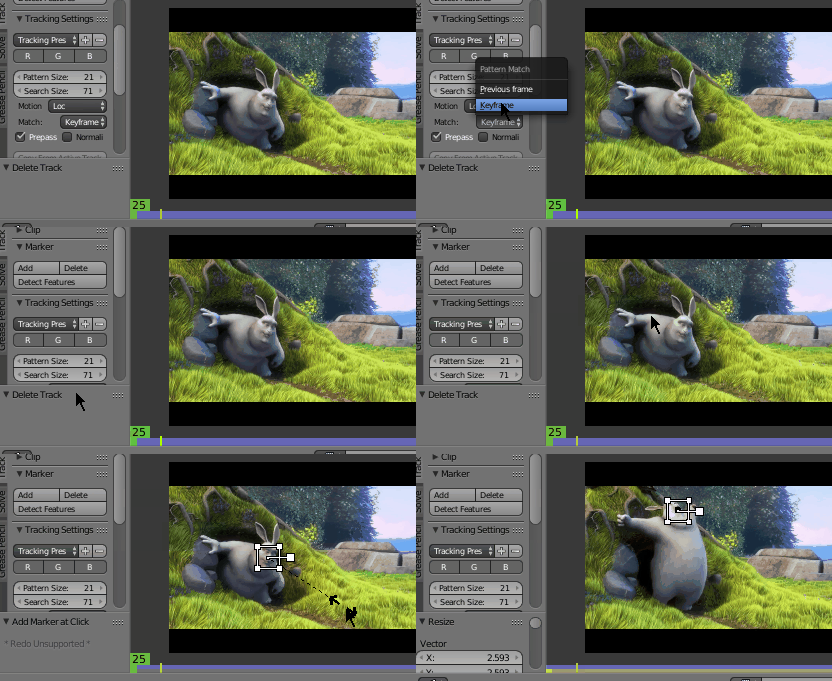
With the marker selected, press Ctrl + T to track it.
Switch to masking mode and add a new mask.

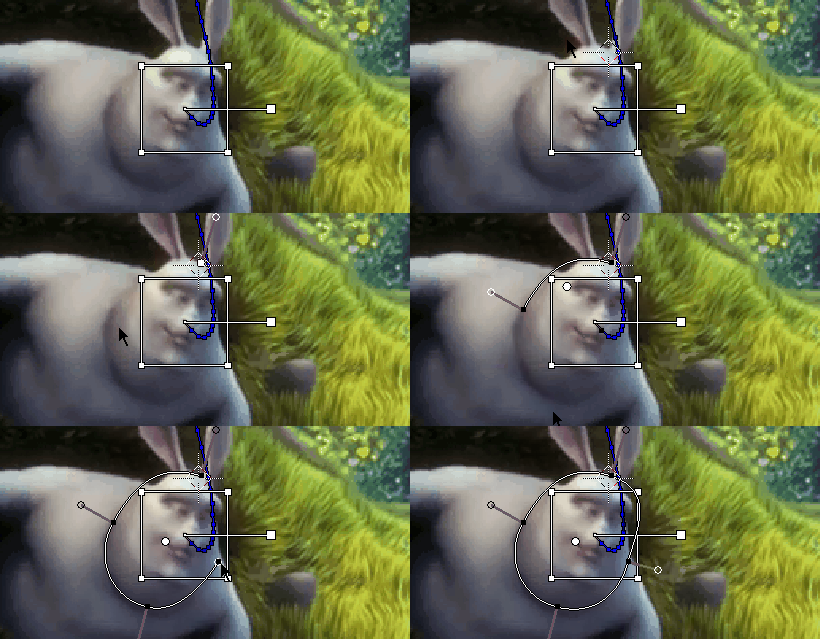
- Ctrl + click to add new masking points. Add new masking points and track the face shape, which you want to mask. To close the mask, press Alt + C. Mask points can be selected, translated, rotated and scaled as usual.
- Parent the mask points to the track by selecting the track and all the mask points and press the Parent button in the Tools menu.
[Anonymously suggested: Alternately, in case you are facing issues with track selection, click each of the mask points one after another while pressing Ctrl + P after each click. This will directly parent the mask points.]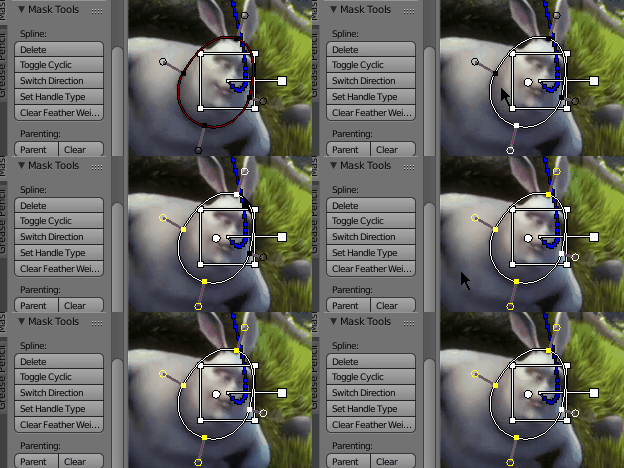
- The masked points will now follow the tracking marker. The mask can be keyframe at any frame by pressing I. This may be necessary if the shape of the face changes. Mask keyframes can be viewed and edited in the Dopesheet in Mask mode. In the example, a key is used on the start and on the end frame.

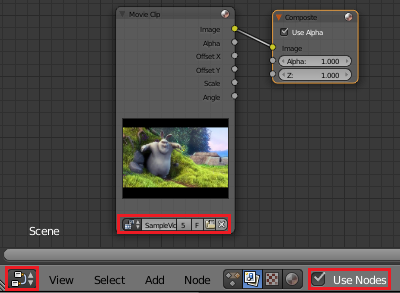
- In the node editor, go into Compositing mode and check Use Nodes. Add a Movie Clip node and load your clip.
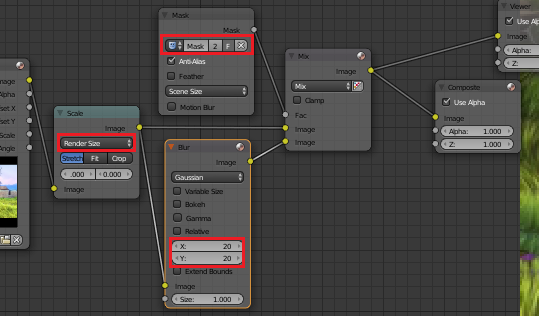
- If the scene size and the source movie clip size are different, connect the Image output of the Movie Clip node to a Scale node set to Render Size. Connect the Scale nodes output to a Blur node. Set the amount of blurring you want in the X, Y fields. Add a MixRGB node and connect it to the Scale and the Blur node. Add a Mask node and select the mask. Connect it to the Fac input of the MixRGB node.
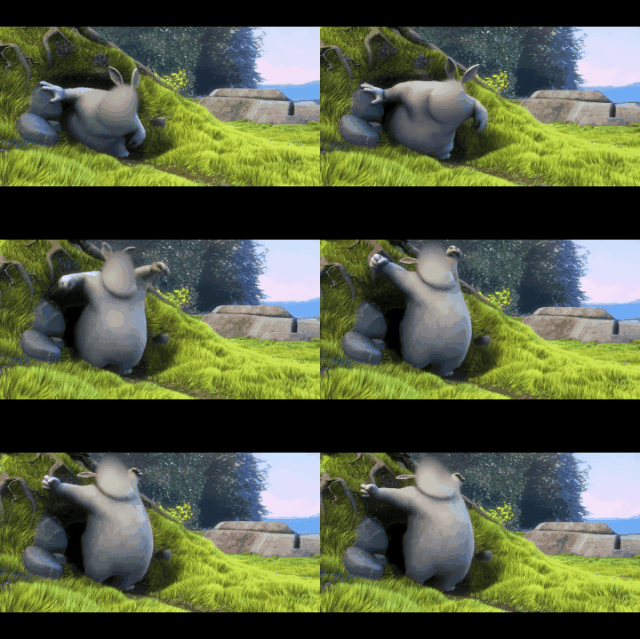
- Rendering the composite will blur the area, where the mask is.
Overlaying an image onto a moving persons face in a video
Do steps 1 - 3 as explained above.
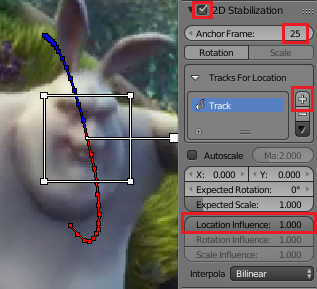
- In the properties panel of the Movie Clip Editor, check 2D Stabilization. Select the tracked marker and add it to the Tracks for Location.
- In compositor add an Image node and load the image, which you want to lay over the face. Add a Transform node to be able to position it later. Add a Stabilize 2D node and select the video which we used in the Movie Clip Editor. Check Invert. Since the Stabilization works in the space of the movie clip, we need to bring the smiley image into the Movie Clip space. To do this, add a Set Alpha node and connect it to the Movie Clip. Set the Alpha value to 0. Add an Alpha Over node and connect it to the Set Alpha and the Transform node. Append the Stabilize 2D node after the Alpha Over. After the stabilization the smiley image follow the track in the correct space. Add an Alpha Over node and connect it to the Movie Clip node and the Stabilize 2D node.
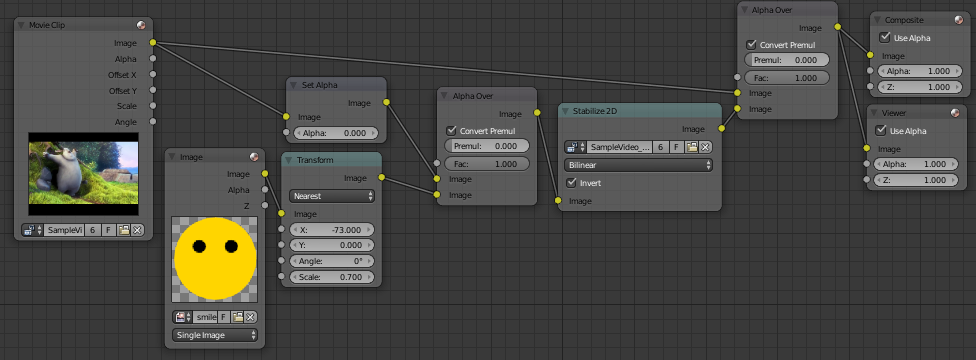
- Rendering this will overlay the smiley image ontop of the movie clip. The smiley image is matched moved with the stabilization node.

-
$\begingroup$ How do you get from 6/7 to step 8? $\endgroup$– saifulCommented Jun 21, 2017 at 5:56
-
$\begingroup$ This answer is amazing. I never would have figured out that I needed to get the coordinate space to be the same, let alone using a Set Alpha and Over Alpha to achieve it. $\endgroup$– ChouserCommented Nov 24, 2022 at 23:20
