4
$\begingroup$

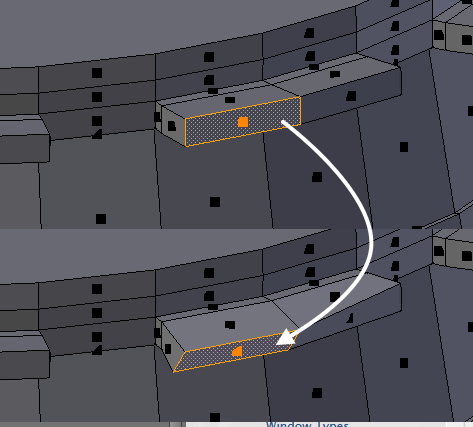
I am trying to rotate a face downwards so that it looks like this: enter image description here

I have not been able to do this by the R and any Shift+Z or X, Y or Y command. This is just a fake screenshot where I moved the vertices manually, to demonstrate what it should look like.

Thank you.

I have uploaded the model here: http://www.pasteall.org/blend/37734

$\endgroup$
5
  • 2
    $\begingroup$ Try to change transform orientation to normal and hit R, Y, Y $\endgroup$
    – Denis
    Commented Aug 25, 2015 at 18:04
  • $\begingroup$ with the selected faces use G (grab) and move it down over the Z-axis, then select the edges on the bottom and scale over the x and y (shift + Z) $\endgroup$
    – gladys
    Commented Aug 25, 2015 at 18:14
  • $\begingroup$ @Denis Thanks, this is the solution. However, it does not work when I have multiple faces selected at the same time. Do you also have a solution for this? $\endgroup$
    – tmighty
    Commented Aug 25, 2015 at 18:21
  • $\begingroup$ @tmighty Yes you can switch Pivot Point to Individual origins to achieve that $\endgroup$
    – Denis
    Commented Aug 25, 2015 at 18:31
  • $\begingroup$ Somewhat related: blender.stackexchange.com/q/21248/599 $\endgroup$
    – gandalf3
    Commented Aug 25, 2015 at 18:33

3 Answers 3

2
$\begingroup$

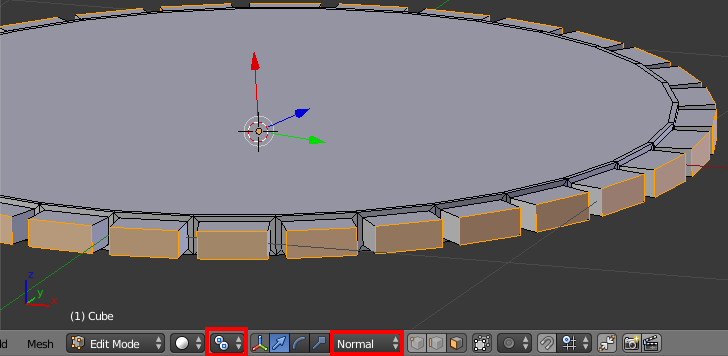
Select the faces you want to rotate, Change Pivot Point to Individual Origins, Transform Orientation to Normal and hit RYY to rotate the faces

enter image description here

$\endgroup$
9
$\begingroup$

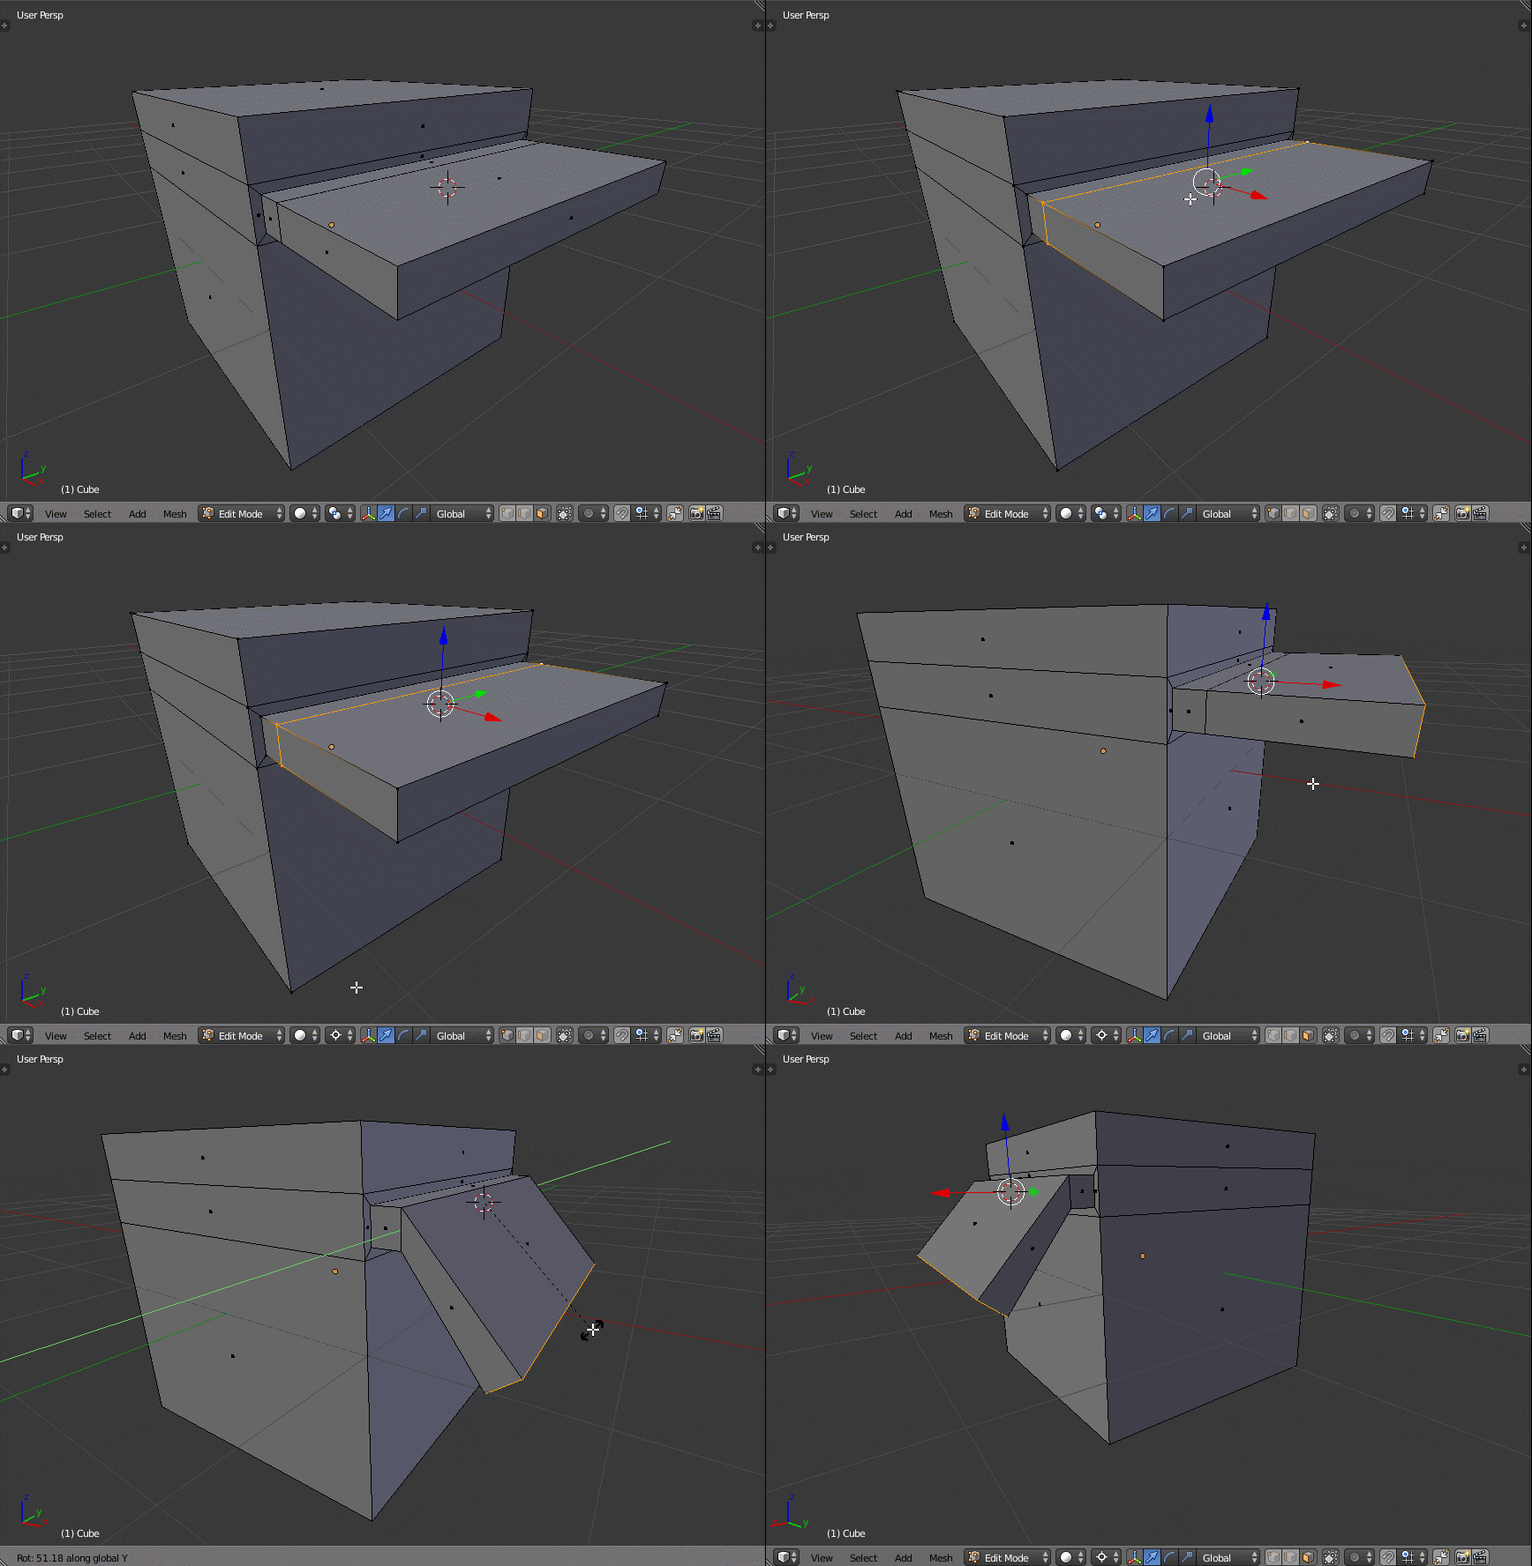
Rotate using the 3D cursor as a pivot

With Shift+S you can snap the cursor to the geometry. Than set the Pivot to 3D cursor and rotate on the wanted axis.

enter image description here

$\endgroup$
2
  • $\begingroup$ I think you mean [Shift]+[S]. $\endgroup$
    – PGmath
    Commented Aug 25, 2015 at 18:34
  • 1
    $\begingroup$ @PGmath Sorry, wrong letter! I'll fix it. $\endgroup$
    – Carlo
    Commented Aug 25, 2015 at 18:37
0
$\begingroup$

One way to accomplish what you wish is to use vertex select mode, and select the vertex at the joint between the tab and the body of the barrel nearest the arrowhead in the lower image of the screenshot, and shown as selected in the screenshot below:

[enter image description here]
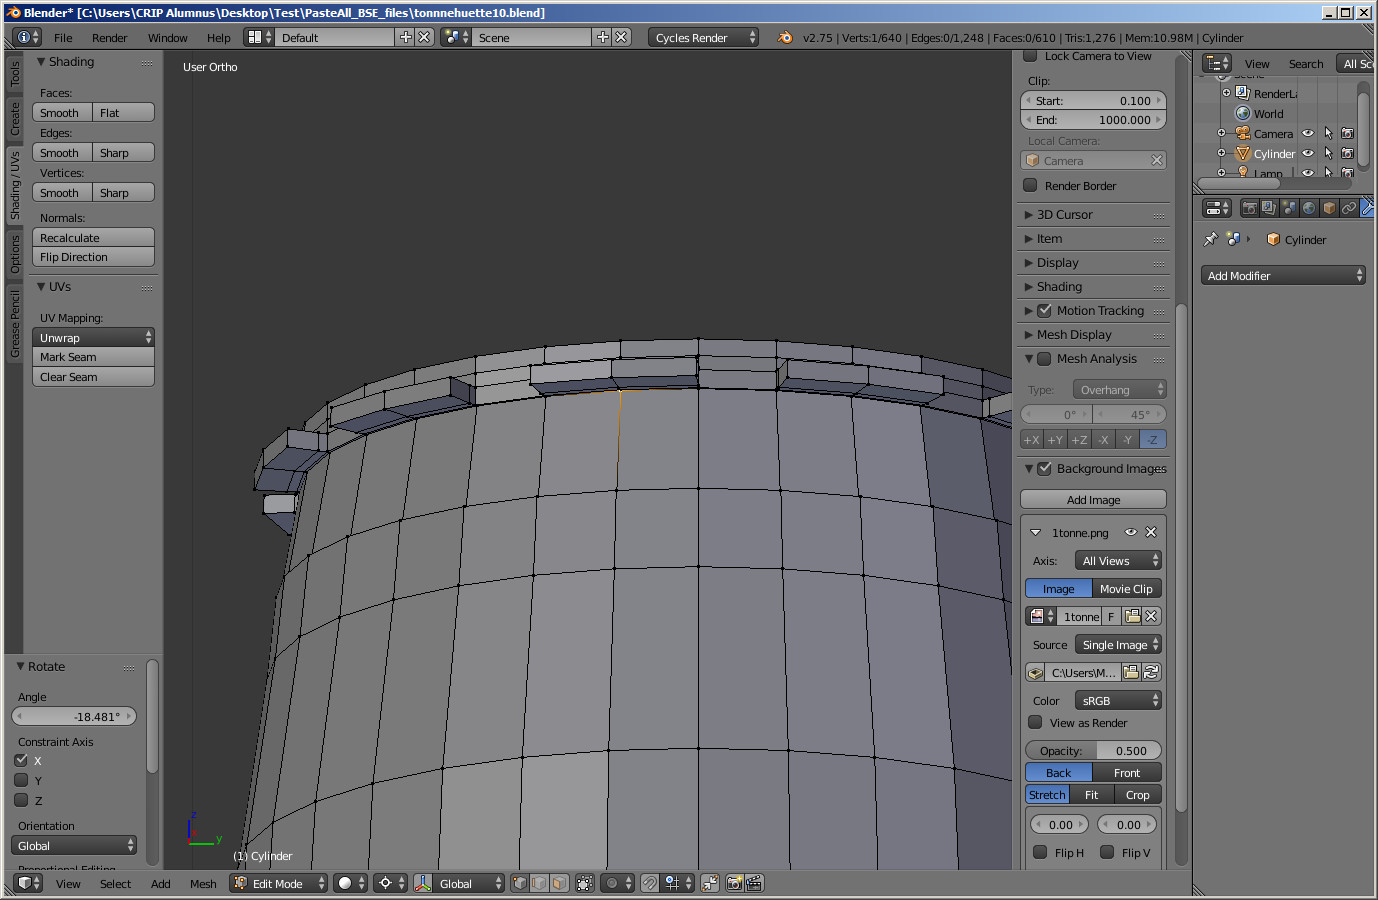
Next, using the "cursor to selected" option of the snap tool (SHFT - S, relocate the 3D cursor to that vertex, and change the pivot point to 3D cursor. Then making sure the barrel is rotated so the line between the center of the barrel and the tab you want to rotate is parallel with a major axis (X or Y), select the two faces you want to rotate, and rotate them along the perpendicular axis. You may need to rotate the barrel to fix the additional tabs.

Alternatively, you might adjust your workflow so that you create three staves of the barrel, including two with the tabs rotated, and one without a tab, and apply the array modifier to the mesh to create the rest of the body of the barrel. This will be quicker than moving each of the tabs individually.
$\endgroup$

You must log in to answer this question.

Not the answer you're looking for? Browse other questions tagged .