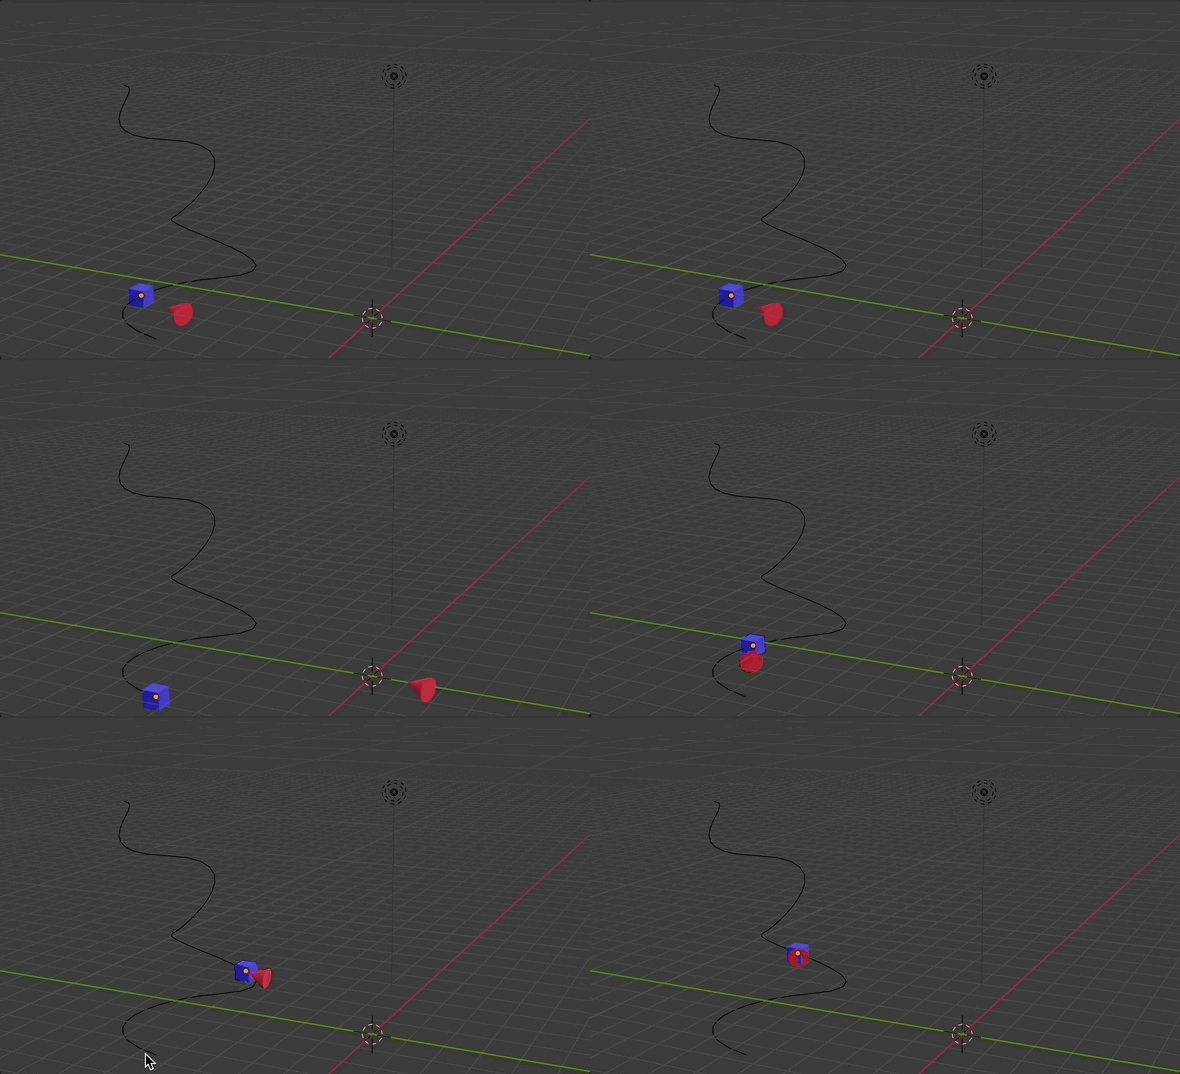
I want to make objects track another sort of like how battleships track each other. Its not really parenting, as one objects direction would always point towards the other. For a 2D demonstration, its like the gifs in https://mathworld.wolfram.com/PursuitCurve.html. I do not know a lot of python coding, but I would not mind learning how to do it. I have tried to use geometry nodes, however, I could not figure out how to get it working...
-
$\begingroup$ if you agree to use constraint, you can use a Track To or a Damped Track to make the object point towards the other one $\endgroup$– moonbootsCommented Oct 29, 2022 at 6:55
-
$\begingroup$ I would say this question can possibly be answered with Geometry Nodes if we know the exact setup. There is the possibility to realize this intention, if the path of the object to follow is predefined and somehow detectable as a curve. Please complete your question with your blend file: blend-exchange.com. Thank you! $\endgroup$– quellenform ♦Commented Oct 29, 2022 at 10:06
-
$\begingroup$ would you mind using a animation nodes solution? (it's a free great add-on) $\endgroup$– ChrisCommented Oct 29, 2022 at 14:46
-
1$\begingroup$ Related $\endgroup$– Markus von BroadyCommented Oct 29, 2022 at 16:22
1 Answer
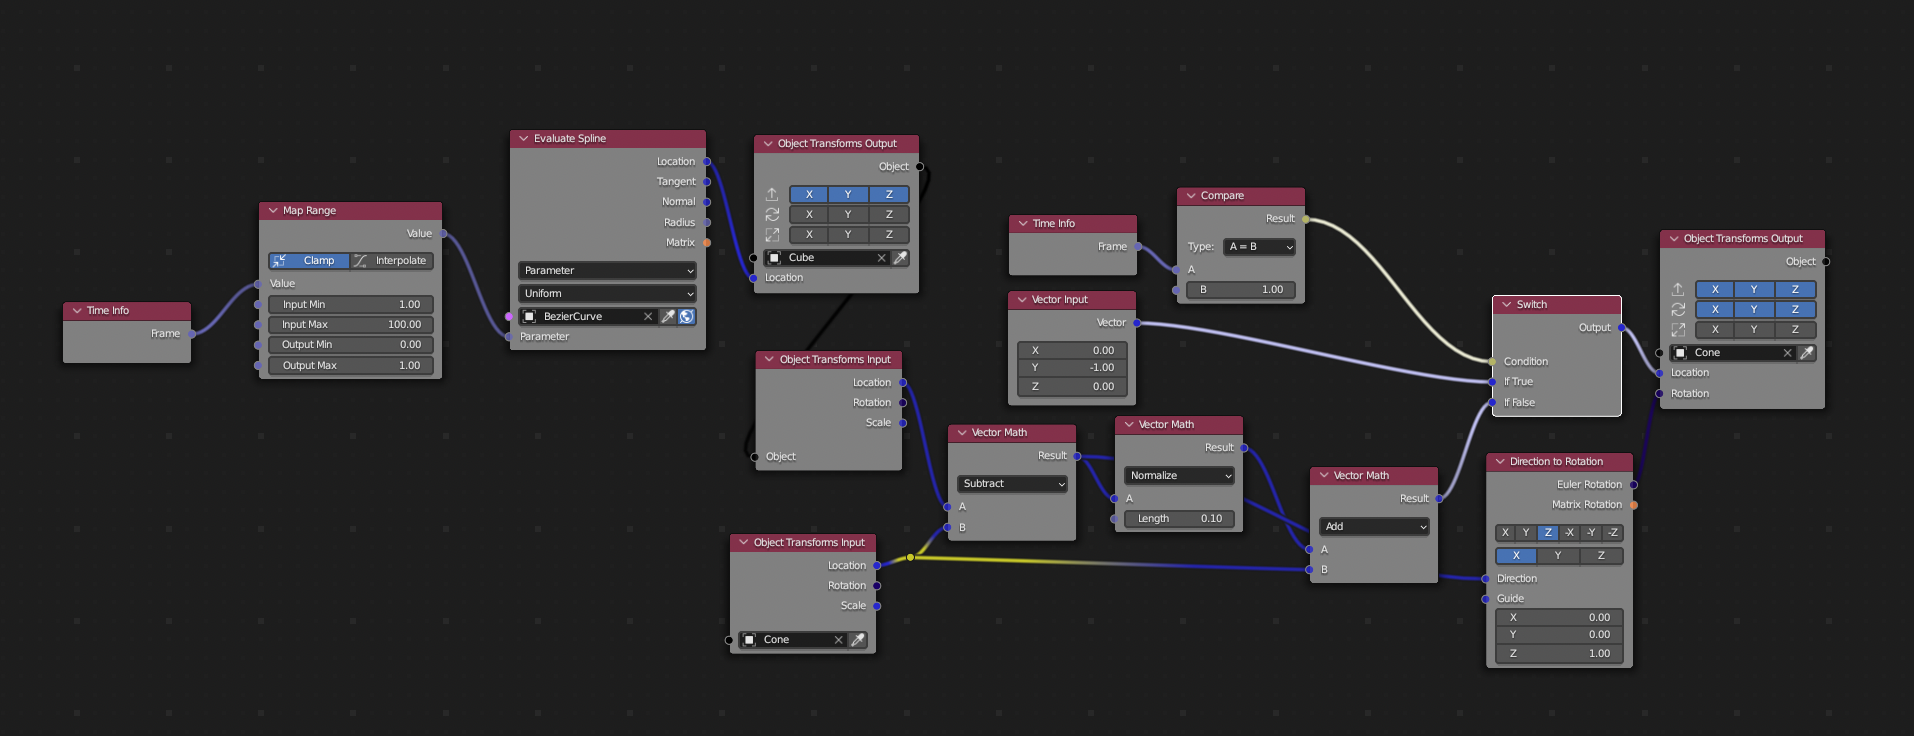
I hope a solution with animation nodes (is a free and amazing add-on and still can do a lot more than geometry nodes) is ok, so with this node setup:
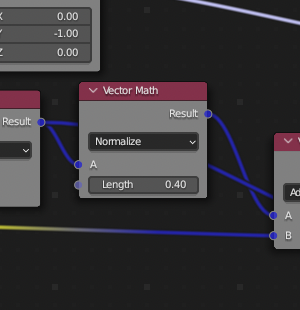
with this node:
you can change the speed of the "follower".
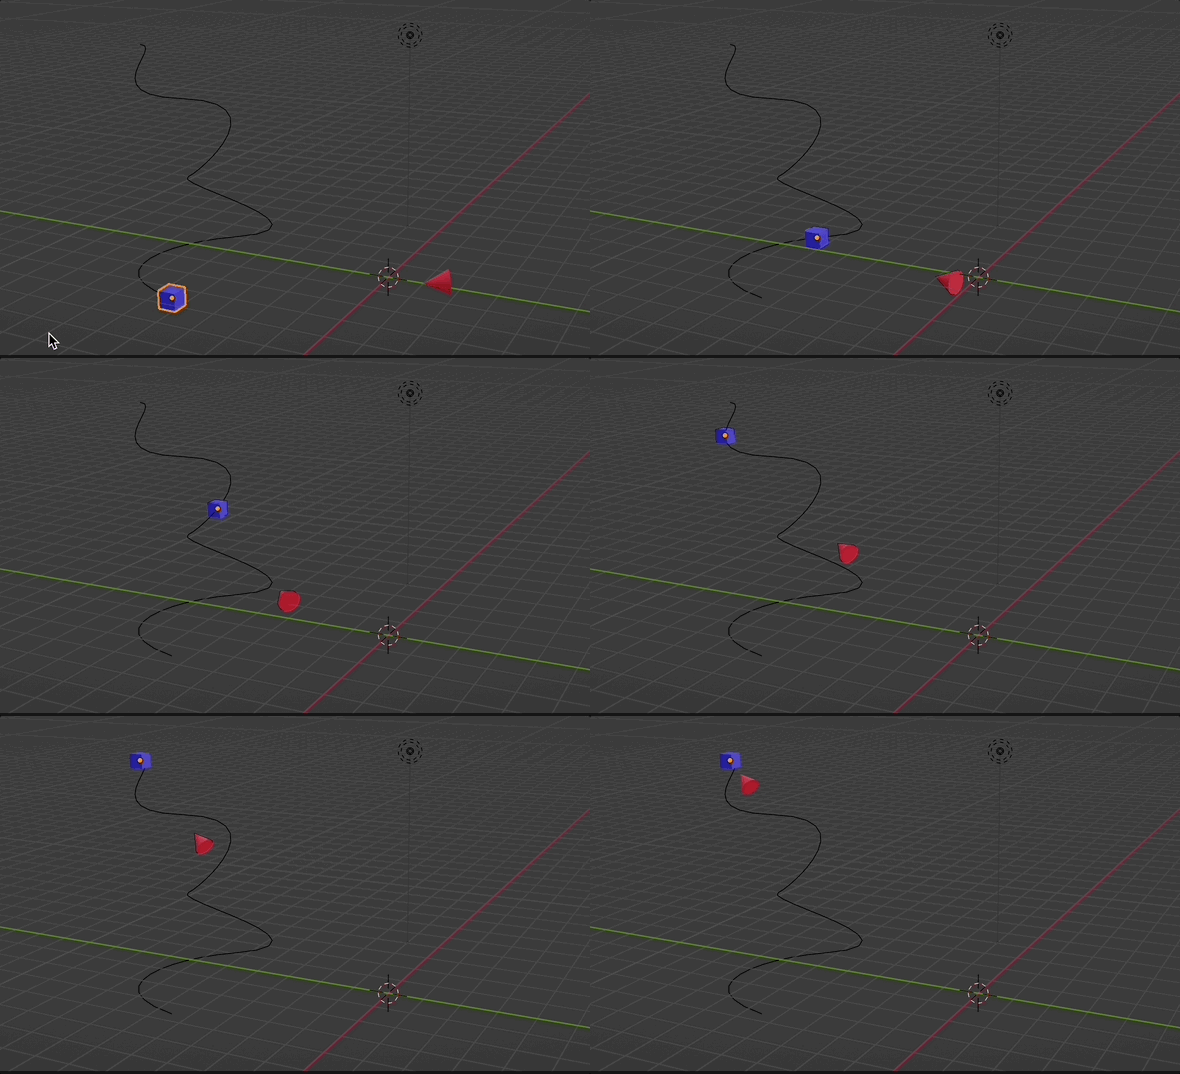
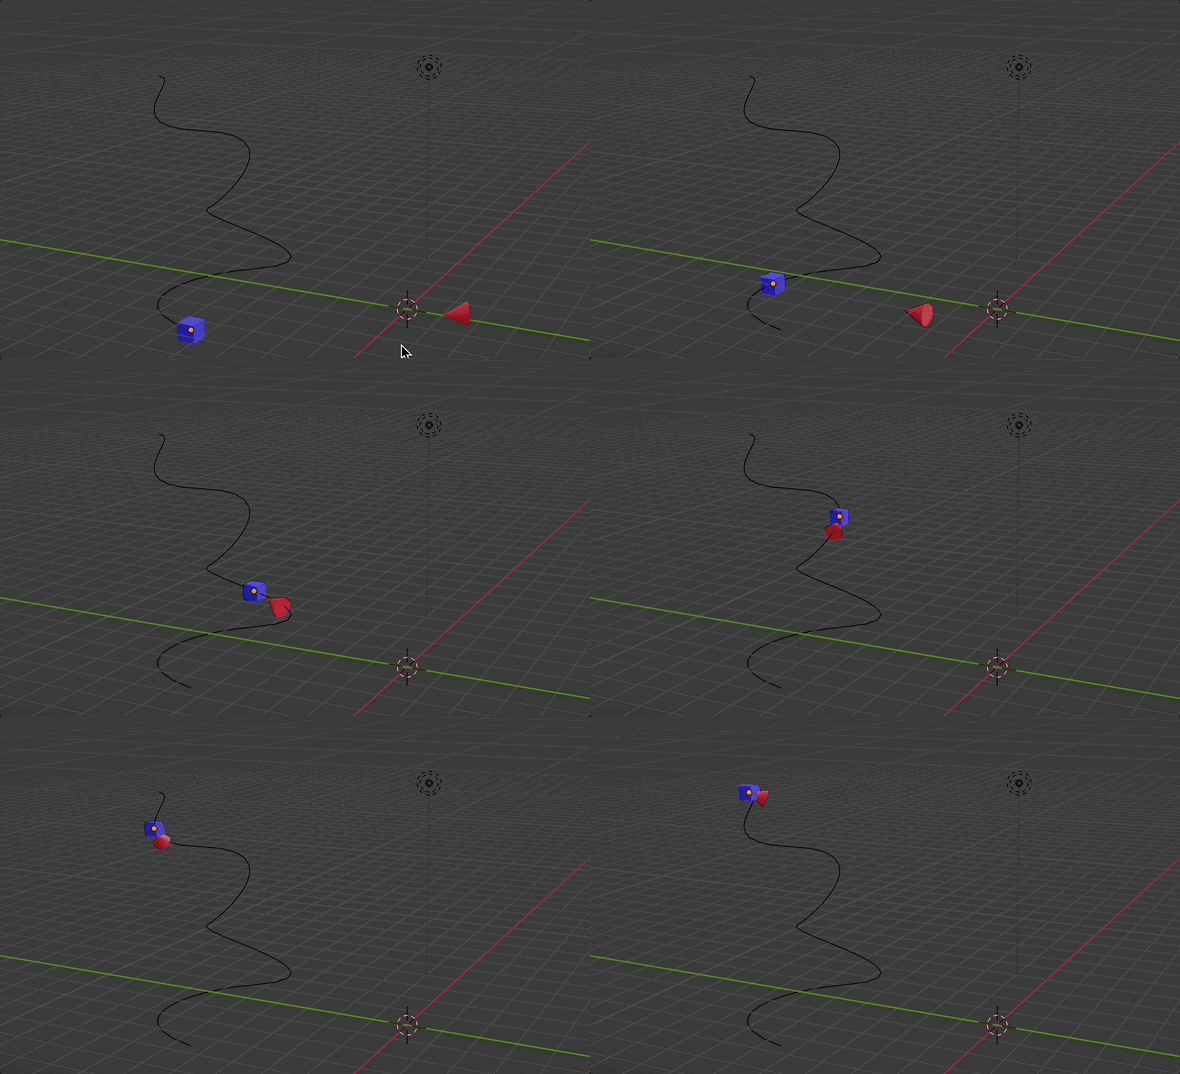
you get this (slow speed):
moderate speed:
fast:
I use the compare node to reset the animation. In combination with the switch node AN sets the start point for the cone to 0,-1,0 so that it restarts always at the same point. This only happens on frame 1, on every other frame the "normal" "follow object calculation" will be executed.
You can try out yourself what happens if you just plug in the vector math output node of "add" to the location of "object transform output". You will see, that the starting point of cone is "on" the cube (at least if you have set execution "always" in the node tree). That's because AN executes the nodetree permanently and not per frame. Of course you can change that behaviour.
Now to "your" blend file:
i am not totally sure why this happens. But...that's why i moved my object on the curve via AN too, then it works.
Just delete your follow path constraint and use the same nodes i did: Time info, map range, evaluate spline and transform output. These four nodes replace the follow path constraint.
-
$\begingroup$ This is perfect! I tried using this setup, but I removed the curve and simply used my mouse to control the position of the cube. However, I realized that when the cube is stationary the cone's movement starts to look jumpy and is not smooth. Also, when I try to constrain the cube's motion to a curve by using the "follow path" constraint, the cone stays at the origin and does not move. Lastly, can you please explain why we are comparing the # of frames to 1, and why we need a "switch" node? THANK YOU SO MUCH! THIS HAS BEEN EXTREMELY USEFUL! $\endgroup$ Commented Nov 1, 2022 at 2:40
-
$\begingroup$ I have included the blender file for your convenience. $\endgroup$ Commented Nov 1, 2022 at 2:49


