1
$\begingroup$

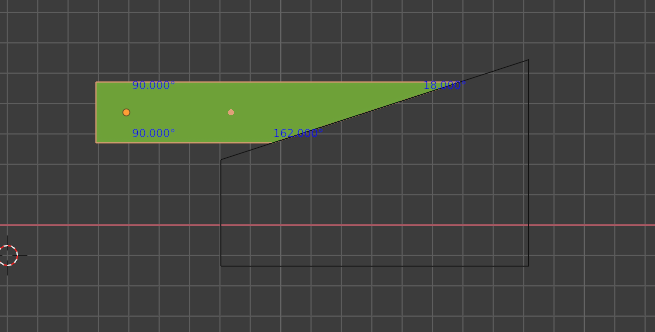
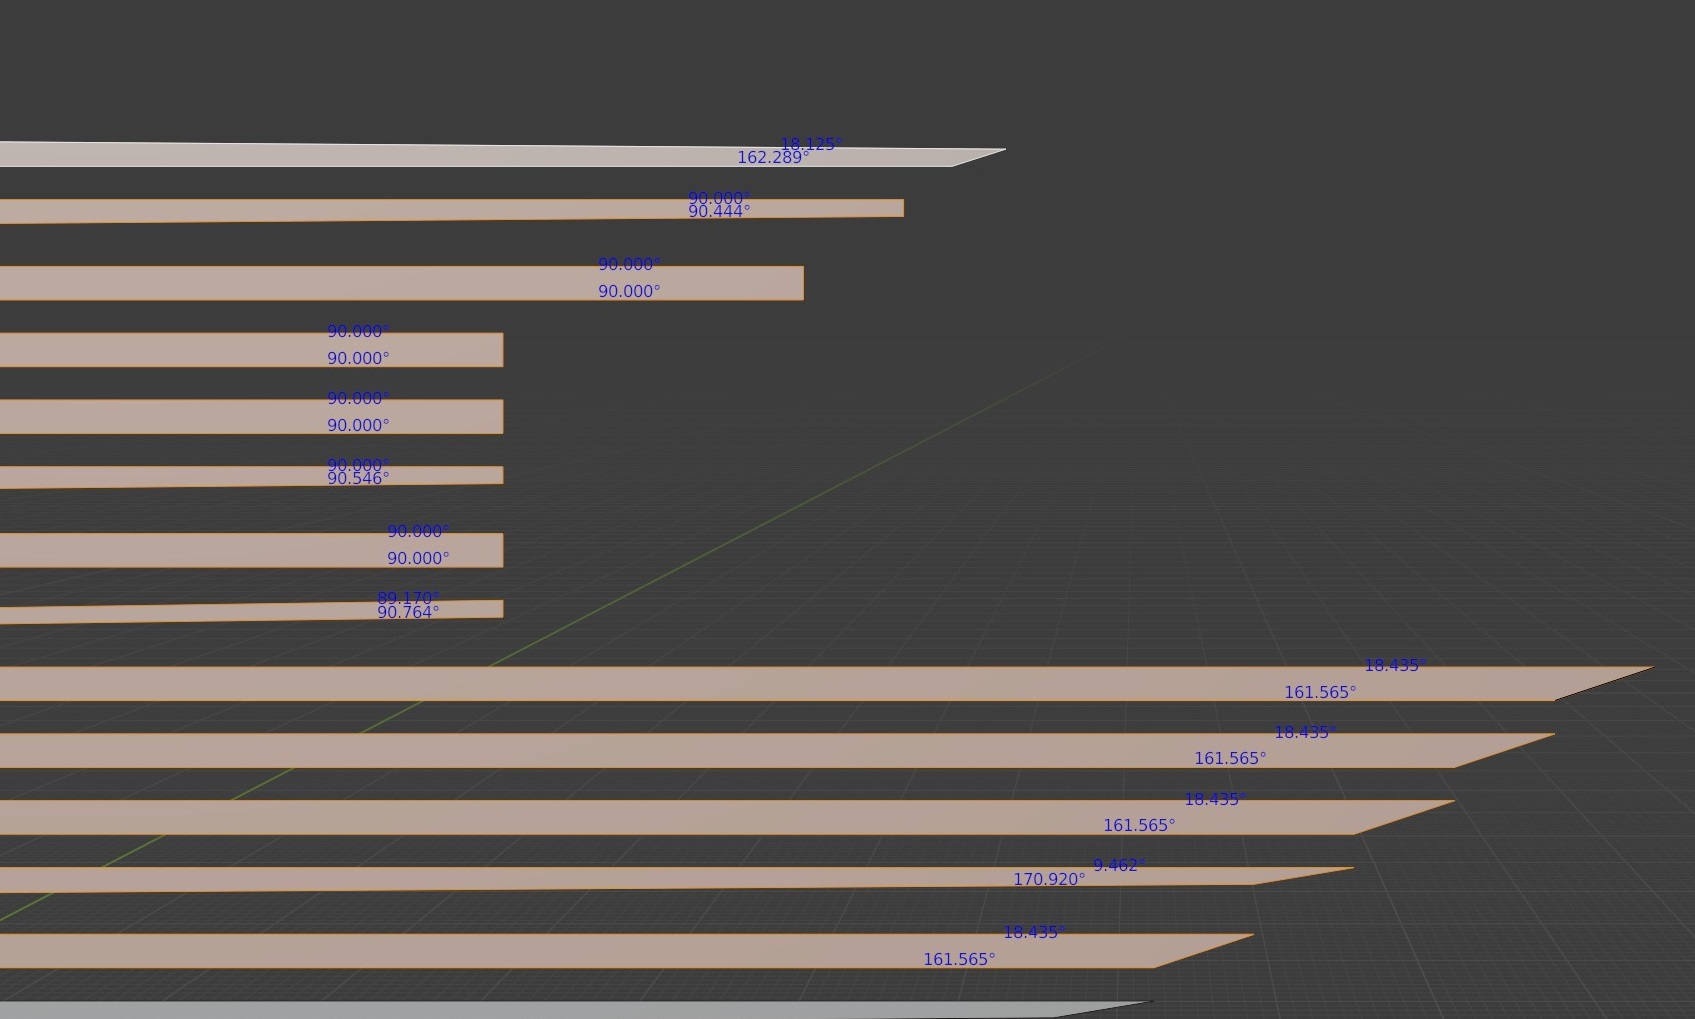
I have googled a lot in the past hour and am not really finding a good answer (I was initially trying to do this Straighten Vertices Along a Line but I have planes at different lenghts and do not want them to be pulled and ruining my design) As you can see the Planes at the bottom, 162 degrees is my goal and I am individually moving vertices and measuring the angle with M, Measure tool, this is getting tedious as I have MANY more to do.

Is there an easy-button to select all Bottom right Edges and set it to measure at Angle 162 degrees ?

Image showing Planes and Angles

$\endgroup$
3
  • $\begingroup$ Hello :). Perhaps the Shear tool is what you're looking for. $\endgroup$ Commented Nov 2, 2020 at 5:47
  • 4
    $\begingroup$ a workaround may be to use a rectangle to cut the ends with a boolean modifier, $\endgroup$ Commented Nov 2, 2020 at 7:09
  • $\begingroup$ blender.stackexchange.com/questions/69961/… $\endgroup$
    – batFINGER
    Commented Nov 2, 2020 at 19:29

1 Answer 1

0
$\begingroup$

If you need it to be totally exact you will need at least one addon (I suggest TinyCad, as it is one of the included addons) and it is a multiple step process.

First you need to construct an edge that has the appropriate angle. This isn't too difficult - Starting from a right angled plane, select one corner vertex and place the 3d cursor at that vertex (most easily by using shift-S cursor to selected).
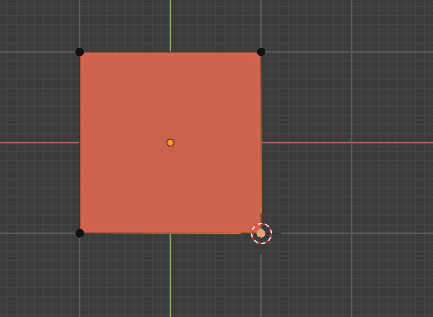
Image showing example at step 1

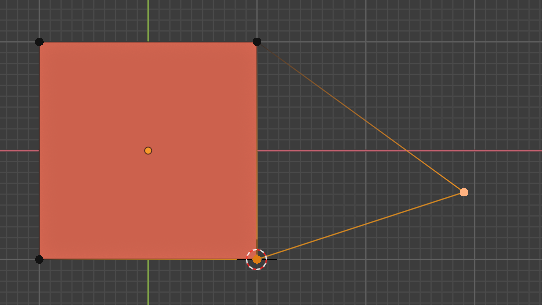
Change the transform pivot point to 3d cursor. Extrude the other corner vertex (the top right one, in your examples) and cancel the modal move that happens after extrusion so that it returns to its original position. Then rotate it and type the angle you want to rotate by - it will rotate around the cursor, creating the correct angle. Remember that there's a 90 degree angle at the corresponding corner already, so you probably want to enter (162-90 = 72) as the numerical rotation. Image showing example at step 2
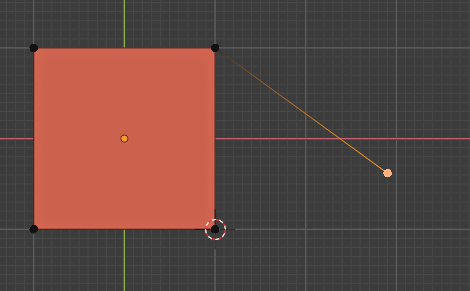
Connect the extruded vertex and the unmoved vert at the cursor (hotkey 'F') - you will now have an edge that forms the proper angle. Image showing example at step 3
The angle is now correct (here is an image showing that - but it is unnecessary to do this in practice, it's just to prove the angle is exact)
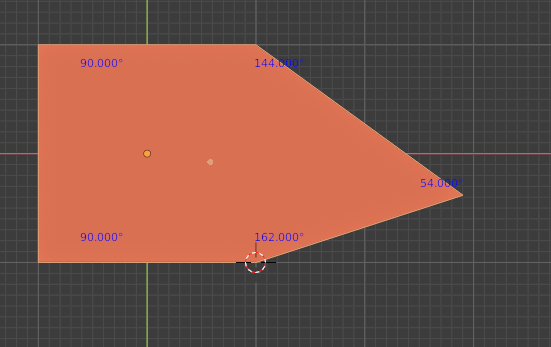
Image showing exact 162 degree angle

The edge is of course the wrong length and does not extend to the original top edge. Select the new edge, and the original horizontal edge. Example of which edges to select
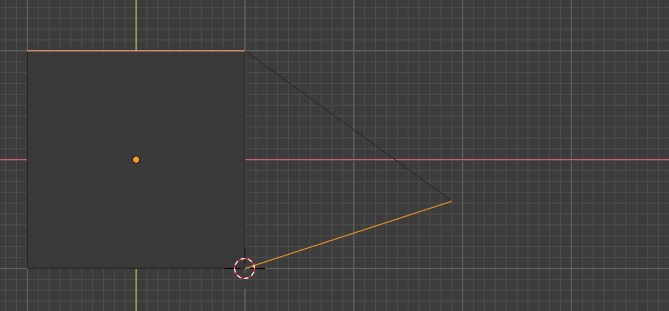
Perform an edge intersection calculation (context menu, then 'T', then 'V' if you're using TinyCad) and you should now have appropriate edges for the face you want. Image showing the intersection after step 5
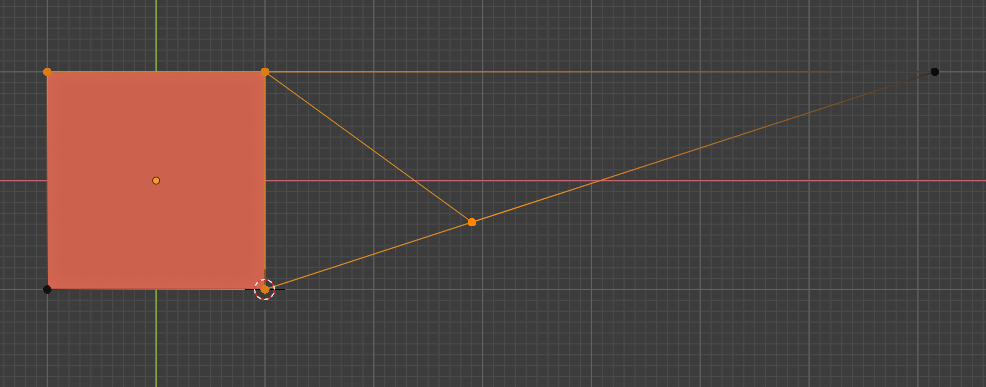
Now select the vertices one at a time and use vertex slide (G, then G again by default) to slide the vertices onto each other to remove the additional unnecessary edge. If you have auto-merge vertices turned on they will merge, or if not, you should merge by distance now to remove the excess verts and unify the face. The final result
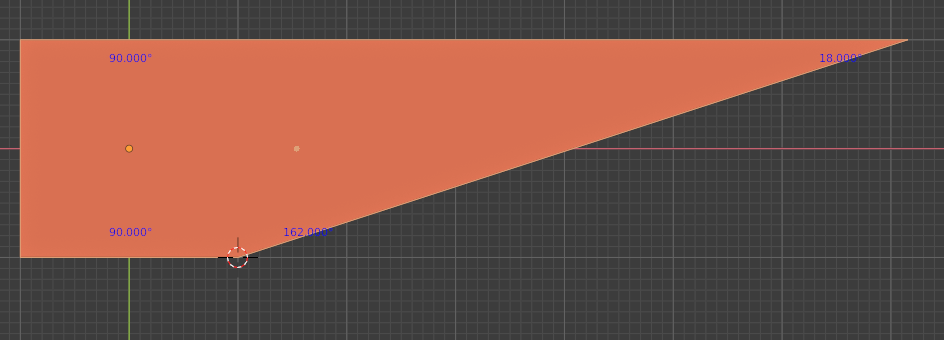
And you're done! But you have a lot of these to do, and this took ages - so I recommend you take a duplicate of this finished one, make it bigger, and slice the appropriate angle out of a plane using a boolean difference. You may have to thicken these template objects as the boolean engine does not like intersecting zero width objects.
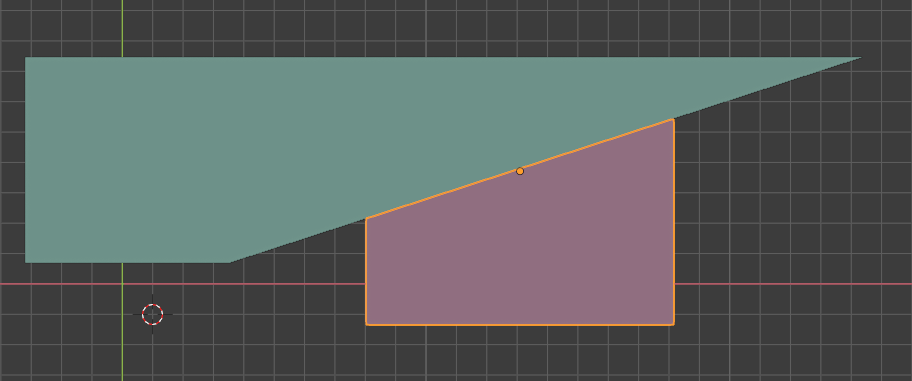
Example of boolean template

This means you can now use the plane as a boolean cutter on each of your other objects in turn to far more quickly produce the correct angled cut, which is amusingly how I think it's typically done in woodworking as well - measure one, then use it as a template.
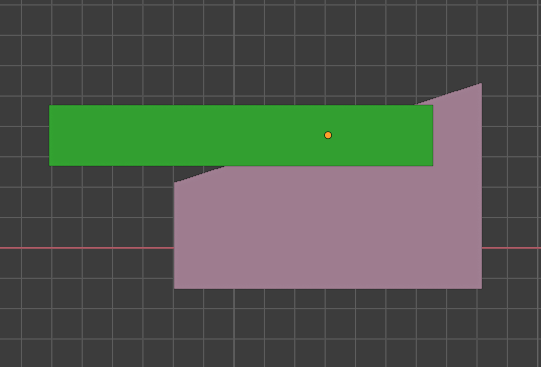
Before template cut

After template cut

$\endgroup$
3
  • $\begingroup$ this is amazing. thank you very much, I will test this when I get home. Thanks! $\endgroup$
    – HyeVltg3
    Commented Nov 2, 2020 at 16:29
  • $\begingroup$ Hi @Ben thanks for this help but I spent a lot of time on the bit at the beginning, where you need to Rotate the Extruded Vertex, When I Set Cursor to Bottom-R vert > Select top-R corner vert > E > cancel to prevent moving vert > R > "72" > nothing happens, I would assume the vertex rotated, but I do not understand how you got the edge and the vert at that position in Image2, Nothing really happens when I rotate a Vertex. After trying for too long, I gave up and just made the shape manually and thanks to your idea about Boolean Modifier, I did not know you could do this with this modifier. $\endgroup$
    – HyeVltg3
    Commented Nov 3, 2020 at 5:01
  • $\begingroup$ @HyeVltg3 What's probably happening is you haven't set your pivot point to the 3d cursor - that might be partially my fault, I called it 'transform origin' but blender uses the term pivot point, so it's rotating the vertex... around itself. That would indeed do nothing. If you set it to pivot around the 3d cursor it should work. More information on pivot points (along with some excellent examples of why you would want to change it, and how) can be found in blender's own manual: docs.blender.org/manual/en/2.80/scene_layout/object/editing/… $\endgroup$
    – Ben
    Commented Nov 3, 2020 at 16:39

You must log in to answer this question.

Not the answer you're looking for? Browse other questions tagged .