4
$\begingroup$

I'm creating an Earth and it looks amazing! But the atmosphere still has sharp edges. I've created the glow but have had to make a transparent sphere around the earth to create another effect to symbolize distance. However, although this looks brilliant, I want the outer edges of the atmosphere/sphere to be blurred or feathered slightly. I don't know how to do this. I've tried in the compositor and shader, plus I don't want to use cycles as it will ruin all my current settings. Is there any way to blur a specific mesh/material in the shader, compositor or material panels without it effecting the nodes for everything else?

Here's a rendered image to help you out. From a different angle it looks great but it's just the atmosphere that ruins this angle: enter image description here
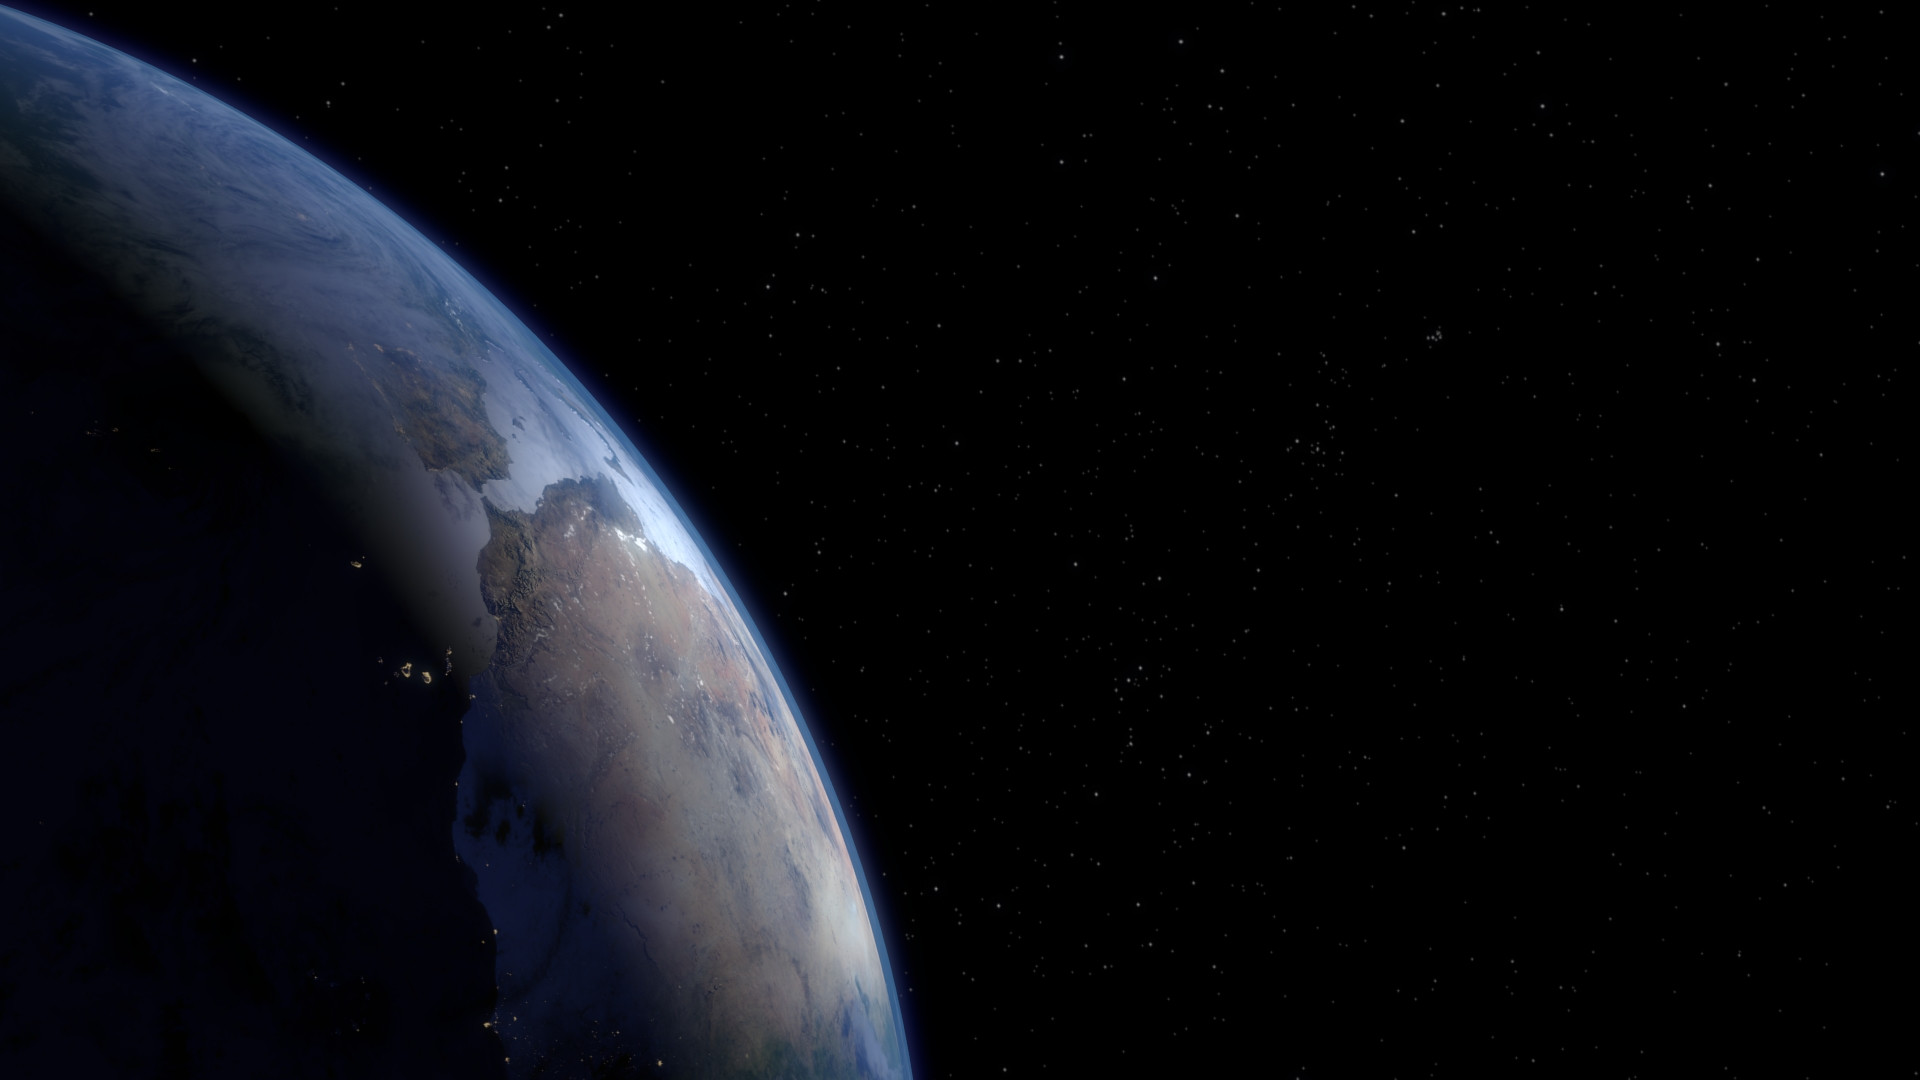
Also, does anyone know how to darken the blue land of the night light map? It's very unrealistic to be seeing the land at night but I can't remember how I did it last time. Thanks in advance!!

$\endgroup$

2 Answers 2

4
$\begingroup$

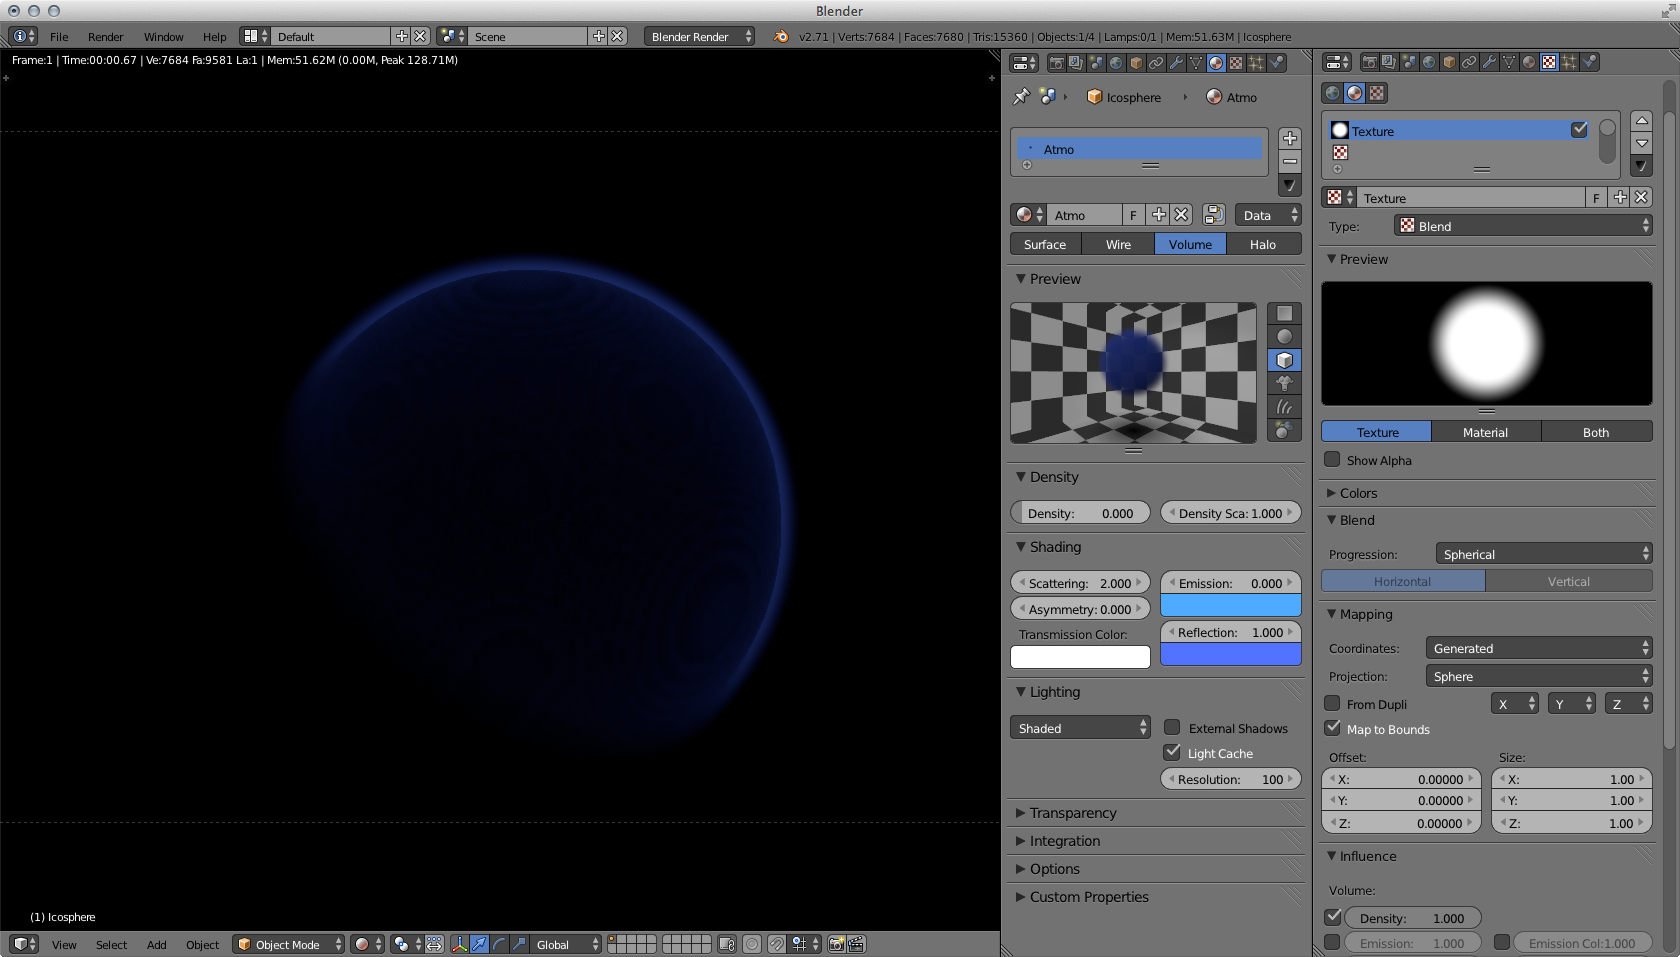
This does not answer your question directly, but consider this as an alternatively way to implement a more realistic atmosphere effect. (With Blender Render)

Basically, you want to use the volume material type on a sphere, this gives you much more control over the density of the atmosphere, and you can tweak the density and colour without fussing around with blurring or nodes.

The following screenshot has all the settings you need to generate the atmosphere.

enter image description here

Blend File

$\endgroup$
5
  • $\begingroup$ Would I apply this to my Atmosphere UV Sphere? $\endgroup$
    – Stewie
    Commented Jul 30, 2014 at 20:47
  • $\begingroup$ Yes. Apply it to a spherical mesh. $\endgroup$
    – Mike Pan
    Commented Jul 30, 2014 at 21:03
  • $\begingroup$ Are you sure that's all the settings? Mine looks very different from this haha $\endgroup$
    – Stewie
    Commented Jul 31, 2014 at 8:44
  • $\begingroup$ What does yours look like? Post a blend file? $\endgroup$
    – Mike Pan
    Commented Jul 31, 2014 at 21:05
  • $\begingroup$ Ahh, I managed to get it working. It was just too small so you couldn't really see it behind the Earth. It's not a bad effect, I'll try messing around with it to get a nice thin bright white to blue transition. This is brilliant though thank you! $\endgroup$
    – Stewie
    Commented Aug 1, 2014 at 9:05
3
$\begingroup$

You can use the object and material index passes to get a black and white mask of a particular object or material.

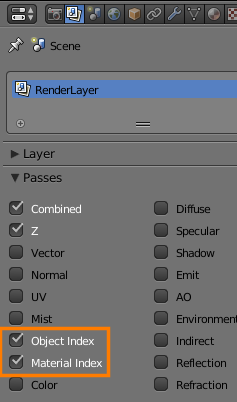
  1. Enable the passes in Render layers > Passes:

    enter image description here

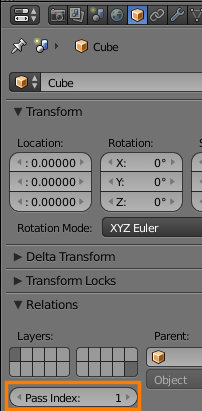
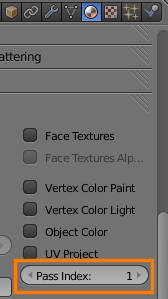
  2. Give the material or object you want to blur a unique pass index value, in Materials > Options for materials and Object > Relations for objects:

    enter image description here enter image description here

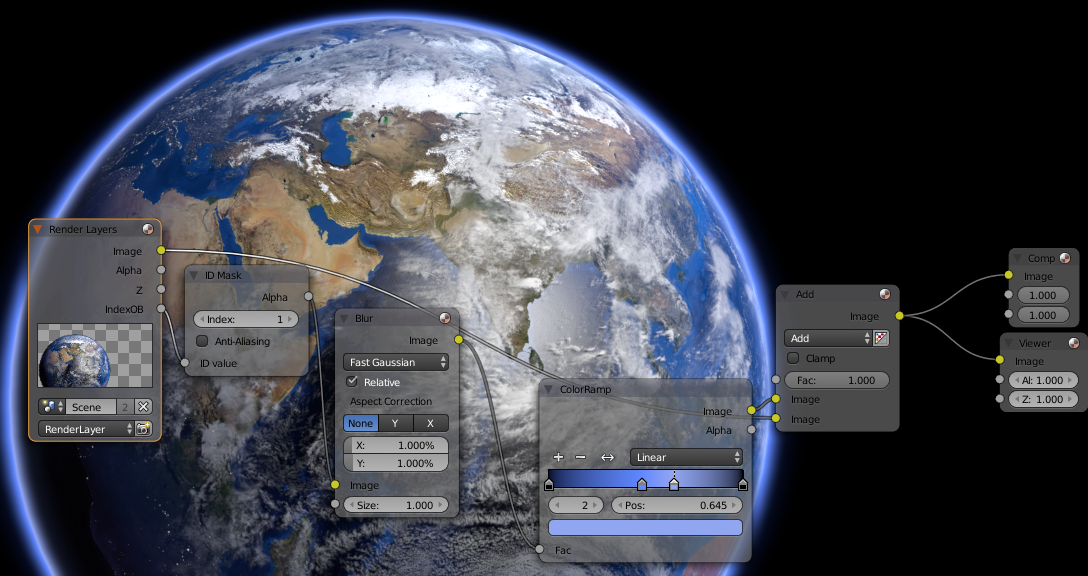
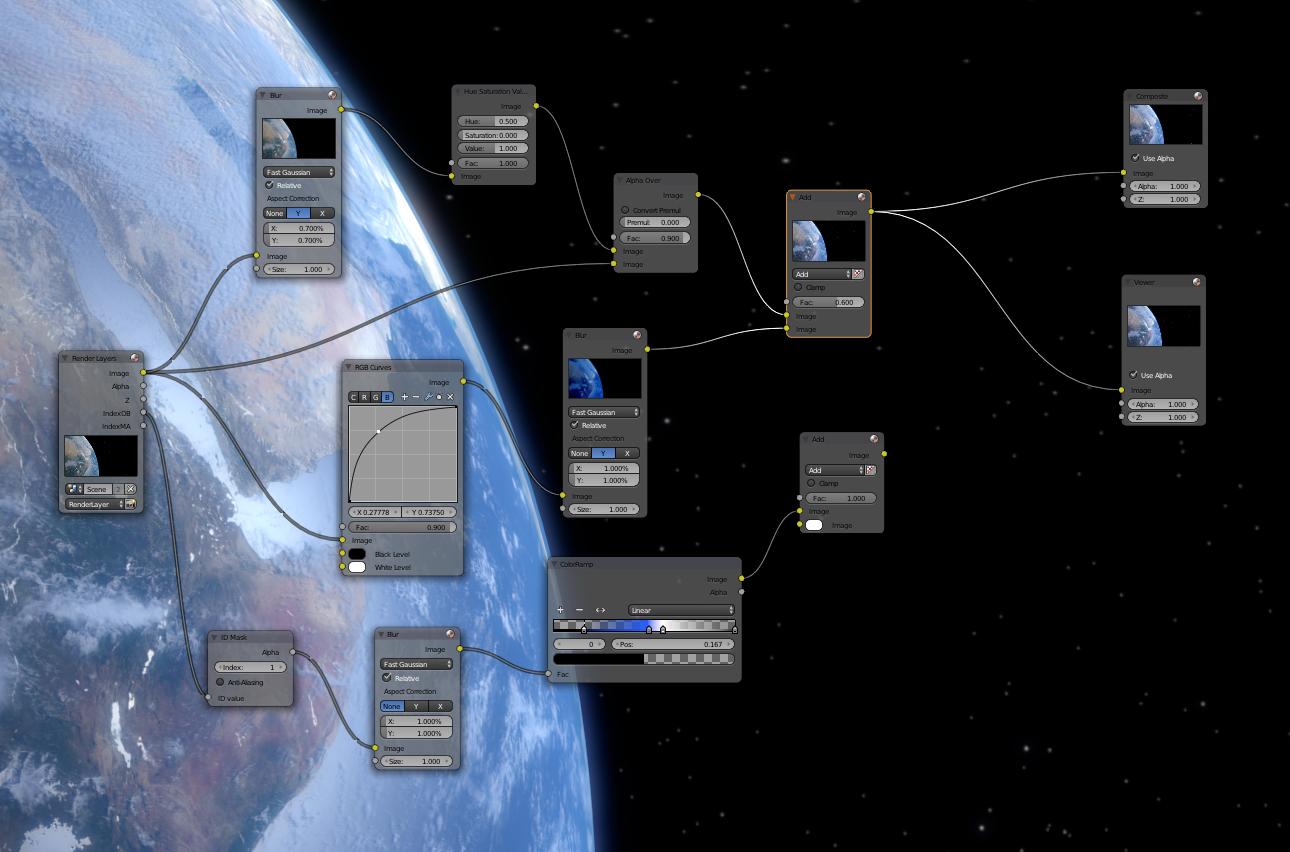
  3. Use the mask to separate and blur that object/material. In this example I blurred the mask, mapped some colors to it with the color ramp node (making sure the part where the planet was is black), and added it back to the main image:

    enter image description here

enter image description here

How would I link these?

$\endgroup$
5
  • $\begingroup$ @Stewie Isn't that what you want? Or have I misread your question? $\endgroup$
    – gandalf3
    Commented Jul 30, 2014 at 20:14
  • $\begingroup$ Thanks for the reply but this hasn't worked. I'm not trying to create a mask to create an atmosphere, the problem's trying to make a mesh blurred or have feathered edges. I'd send some more pictures but it wont let me here. Basically I've created 3 layers/UV Spheres (Earth, Clouds, Atmosphere). The atmosphere UVSphere is transparent so that it can only be seen when nearing the edges of Earth. This gives you the nice, blue distance effect. Unfortunately the very edges of this Sphere is sharp like any. I just want to soften/feather the edge so as to blend it in better from all angles. $\endgroup$
    – Stewie
    Commented Jul 30, 2014 at 20:17
  • $\begingroup$ @Stewie There's no way to "blur" a mesh. You can only blur the pixels after the image is rendered. However in this case you might be able to use a volume material to get a nice effect. $\endgroup$
    – gandalf3
    Commented Jul 30, 2014 at 20:23
  • $\begingroup$ How would I combine these then? Is there something that can link 2 paths together? (I've added the screenshot to your answer as can't post pictures here) $\endgroup$
    – Stewie
    Commented Aug 1, 2014 at 11:39
  • $\begingroup$ @Stewie Try connecting the output of the selected mix node into the empty input of the mix node below it. $\endgroup$
    – gandalf3
    Commented Aug 1, 2014 at 19:48

You must log in to answer this question.

Not the answer you're looking for? Browse other questions tagged .