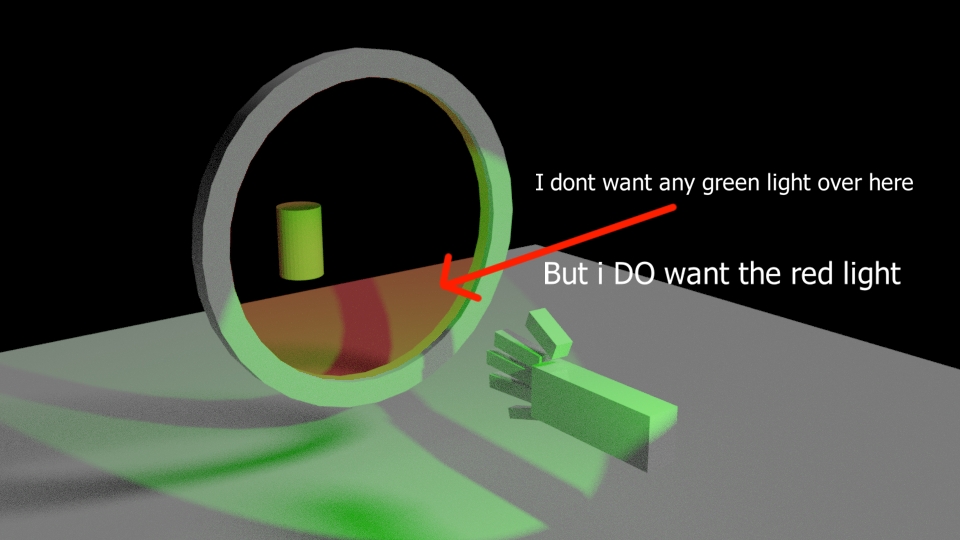
I'm trying to create an effect where a material/object will block out a specific lamp, but not any others
3 Answers
You can achieve this with Light Paths by detecting which lamp is being used for a Shadow Ray and change the material's shader between opaque and transparent.
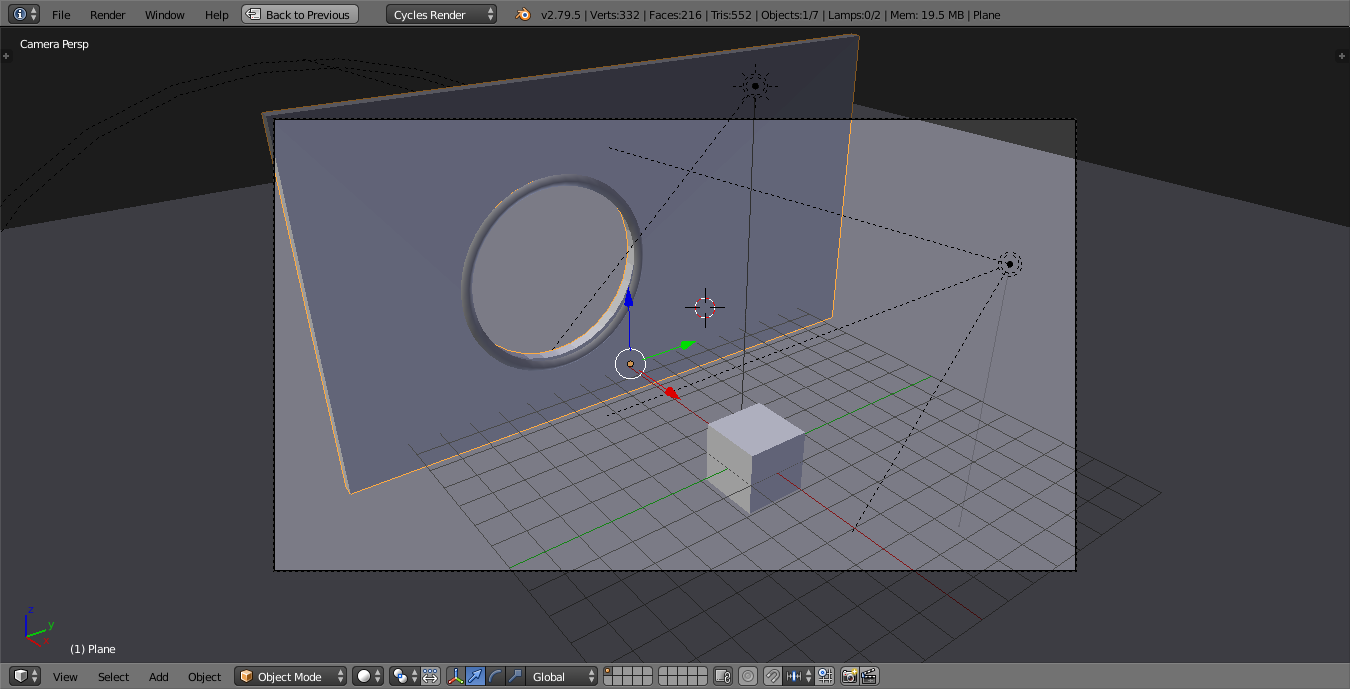
I set up a scene similar to your example :
This consists of a 'wall' with a circular opening (with a solid border to the opening), a Spot lamp (green) and a Sun lamp (red). If I understand your question correctly you're looking to make the 'wall' be invisible to the camera but still block light from the green spot lamp - but allow the light from the sun through.
Blender essentially renders the scene by tracing rays from the camera out into the scene until they interact with a mesh. At this point blender 'bounces' the ray and also checks which lamps would be visible from that point. The Light Path node allows us to determine which of these rays is currently being calculated. For example, by mixing the material between a Diffuse shader and a Transparent shader based on the 'Is Camera Ray' property we can make it invisible to the camera and yet visible for other interactions - for example, a reflection or for the determining of shadows.
Additionally, we can use the Geometry node's Incoming property to determine the direction in which the ray has arrived at that surface point.
In order to make an object effectively invisible to just a single lamp we can calculate the direction of the lamp in relation to the point on the surface of the mesh and compare that to the direction of the Incoming ray - if the two match (or are close enough) we can deduce that that ray originated from that particular lamp, and decide whether to consider it for shadows or not.
To achieve this we first need to get the coordinates of the lamp - either by manually copying and pasting the coordinates into a Combine XYZ mode (fine if the lamp isn't going to move in the scene) or by way of Drivers - so that if the lamp moves the coordinates in the material are similarly updated.
We also need to be able to transform the Object coordinates into World coordinates (the object location and the Incoming vector are both in World coordinates). This can be done using the Vector Transform node which is described in How is the vector transform node used
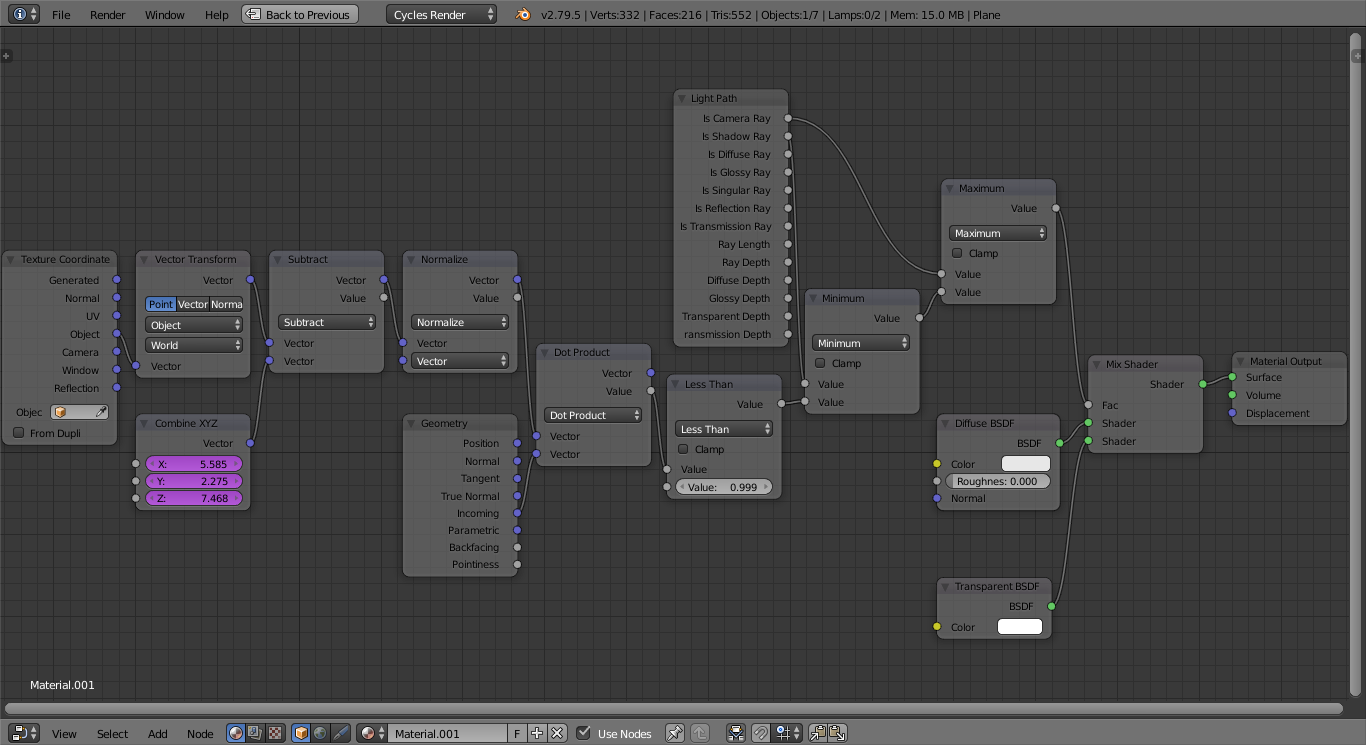
Here's the material :
This takes the Object coordinate of the point being considered on the surface and uses the Vector Transform to convert it into World-space coordinates (convert from Object to World). The Combine XYZ captures the location of the lamp (using Drivers - hence the purple fields) and this is subtracted from the location of the surface point - resulting in a vector of the direction of the lamp from that surface point. The Dot Product is used to compare the direction of the calculated vector with the Incoming ray - with both vectors being 1 unit in length (which is what the Normalize vector math node is doing), the result of the Dot Product will be purely dependent on how close in direction the two vectors are - if very close to 1.0 they are in (almost) the same direction, but anything less than 0.999 means they are not in the same direction. The Minimum and Maximum then simply combine the 'direction', Is Camera Ray and Is Shadow ray in a way that gets the desired behaviour (ie, if 'direction is the lamp' and 'is shadow ray' or 'is camera ray' then make it transparent).
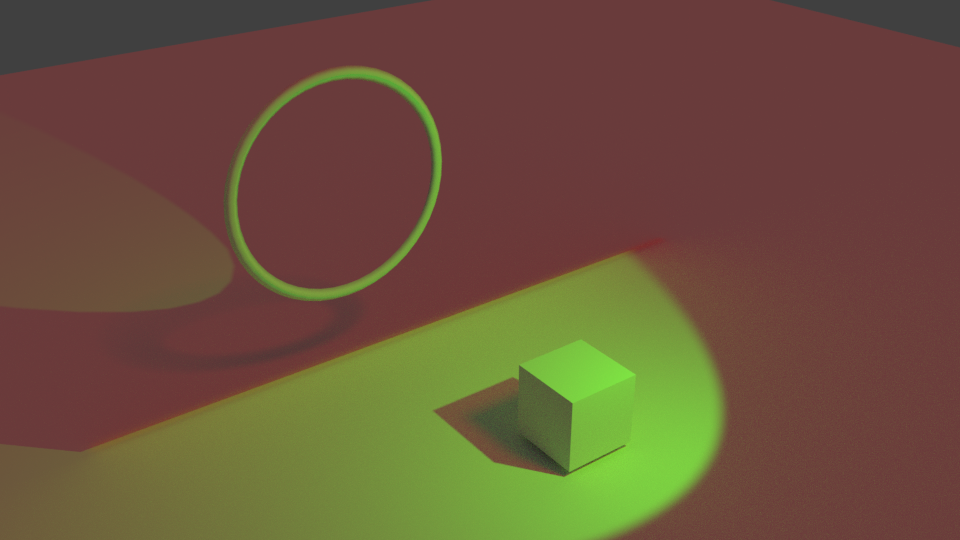
This produces the following result :
-
2$\begingroup$ Awsome! thanks for your help man this is exactly what i was looking for! $\endgroup$– MaruxCommented Jul 20, 2018 at 17:27
Sun is an Omni-luminescence source which spreads its light in all the direction. try using a spotlight to light up specific areas and leaving the areas where you don't want that light to come.
With cycles, you can control the light that passes through an object by using a refraction node.
The colour you choose for the refraction node determines how much of each primary colour passes through the object.
With 100% red, only the red light will pass through, with 100% green, only the green passes. If you have 100% red and 100% blue then no green passes through.
The IOR value distorts the light rays the same as the glass shader, set it to 1.0 to remove the distortion.
Note that refraction is part of the scenes caustics, so like using a glass shader you will need enough samples or configure denoising to get a clean result.


