2
$\begingroup$

Firstly, I clearly have taken on something for which I don't have enough blender knowledge, but as I have spent so much time practising to get to this point, I don't want to give in.

I have made a movie recording of a flight in a simulator called DCS World, and want to try and do a 360 movie of a flight. I have set the simulator to display as a box projector with 6 square panels in one video. The video is much smaller in length and resolution than what I will need, but I will record in higher quality, better side-matches etc, when I grasp how I can complete this.

In Blender, I have set the camera as panoramic equirectangular and put the camera inside a cube. I am using cycles render as the panoramic camera options are not available in Blender render. I have UV unwrapped the cube and added the video texture to the cube. If I view the cube in 3D View with material, I can see my the video texture on each of the sides as I would expect. However, if I try to render this as a single image, I only see the front panel, same for as a video. Is there anything I should be looking out for?

The video even though only about 5 seconds long is huge, but I can dropbox it and the blend file if anyone wants to take a look, and point me in the right direction.

Kindest regards

Andy

$\endgroup$
5
  • $\begingroup$ The blend file may well be helpful, especially if the video could be cut down to a couple of frames or even a still. Possibly more important are your material node setup and your uv map (superimposed on the video) . . . maybe post some screenshots of those first? Also maybe what the render looks like? $\endgroup$
    – risingfall
    Commented Feb 16, 2018 at 1:33
  • $\begingroup$ I have taken a screen shot of the video and enclosed this and the blend in a dropbox folder. Here is the link to this... dropbox.com/sh/46wav9jg4d5cklo/AAAzTRxWkDA4RvWGPG1ZUQeba?dl=0 I really dont know what I am doing :) $\endgroup$
    – Andy
    Commented Feb 16, 2018 at 16:29
  • $\begingroup$ Thanks. I think it's encouraged to add things like screenshots directly to the question using the image button functionality so it's available for future interested people. You might have provided the wrong blend file, the one you provided contains just a set of cockpit panel shapes and the camera setup is not like you describe. $\endgroup$
    – risingfall
    Commented Feb 16, 2018 at 16:36
  • $\begingroup$ OOps. That is my next project... I have added the correct blend file now dropbox.com/sh/46wav9jg4d5cklo/AAAzTRxWkDA4RvWGPG1ZUQeba?dl=0 $\endgroup$
    – Andy
    Commented Feb 16, 2018 at 16:43
  • $\begingroup$ This is what I wish to achieve... youtube.com/watch?v=M3DJRyL3zV0 $\endgroup$
    – Andy
    Commented Feb 16, 2018 at 16:57

1 Answer 1

1
$\begingroup$

It is hard to say for sure without the video file, but based on what you provided the answer is pretty simple: your camera is not actually positioned inside the cube. It is positioned outside the cube, and therefore it's just rendering the face of the cube that's visible to it.

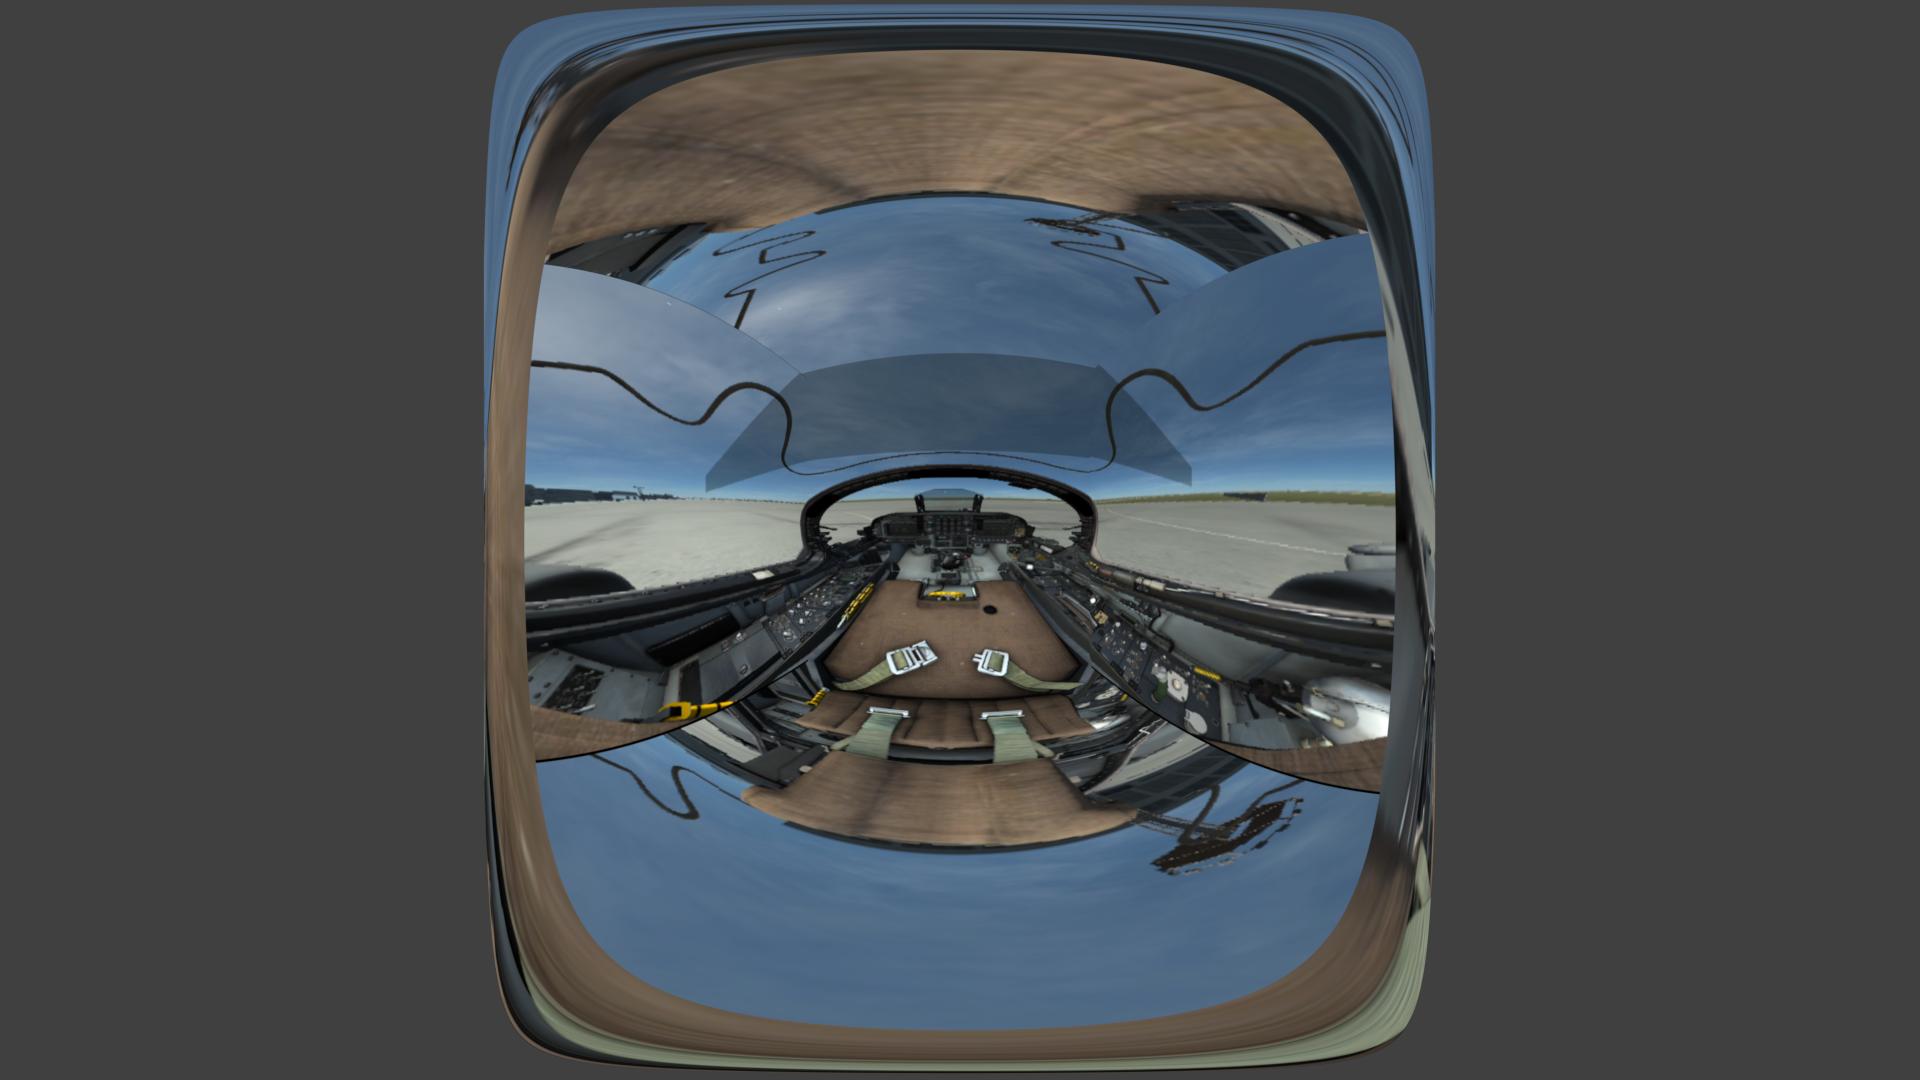
I made a few minor changes to your file: I repositioned the camera to inside the cube; rotated it 180 degrees to face the "middle" of the image; played with your cube's UV map to get it to fit the still you provided; and changed the material to an emission shader for visibility. This was my render:

cockpit render

Is this the type of thing you had in mind?

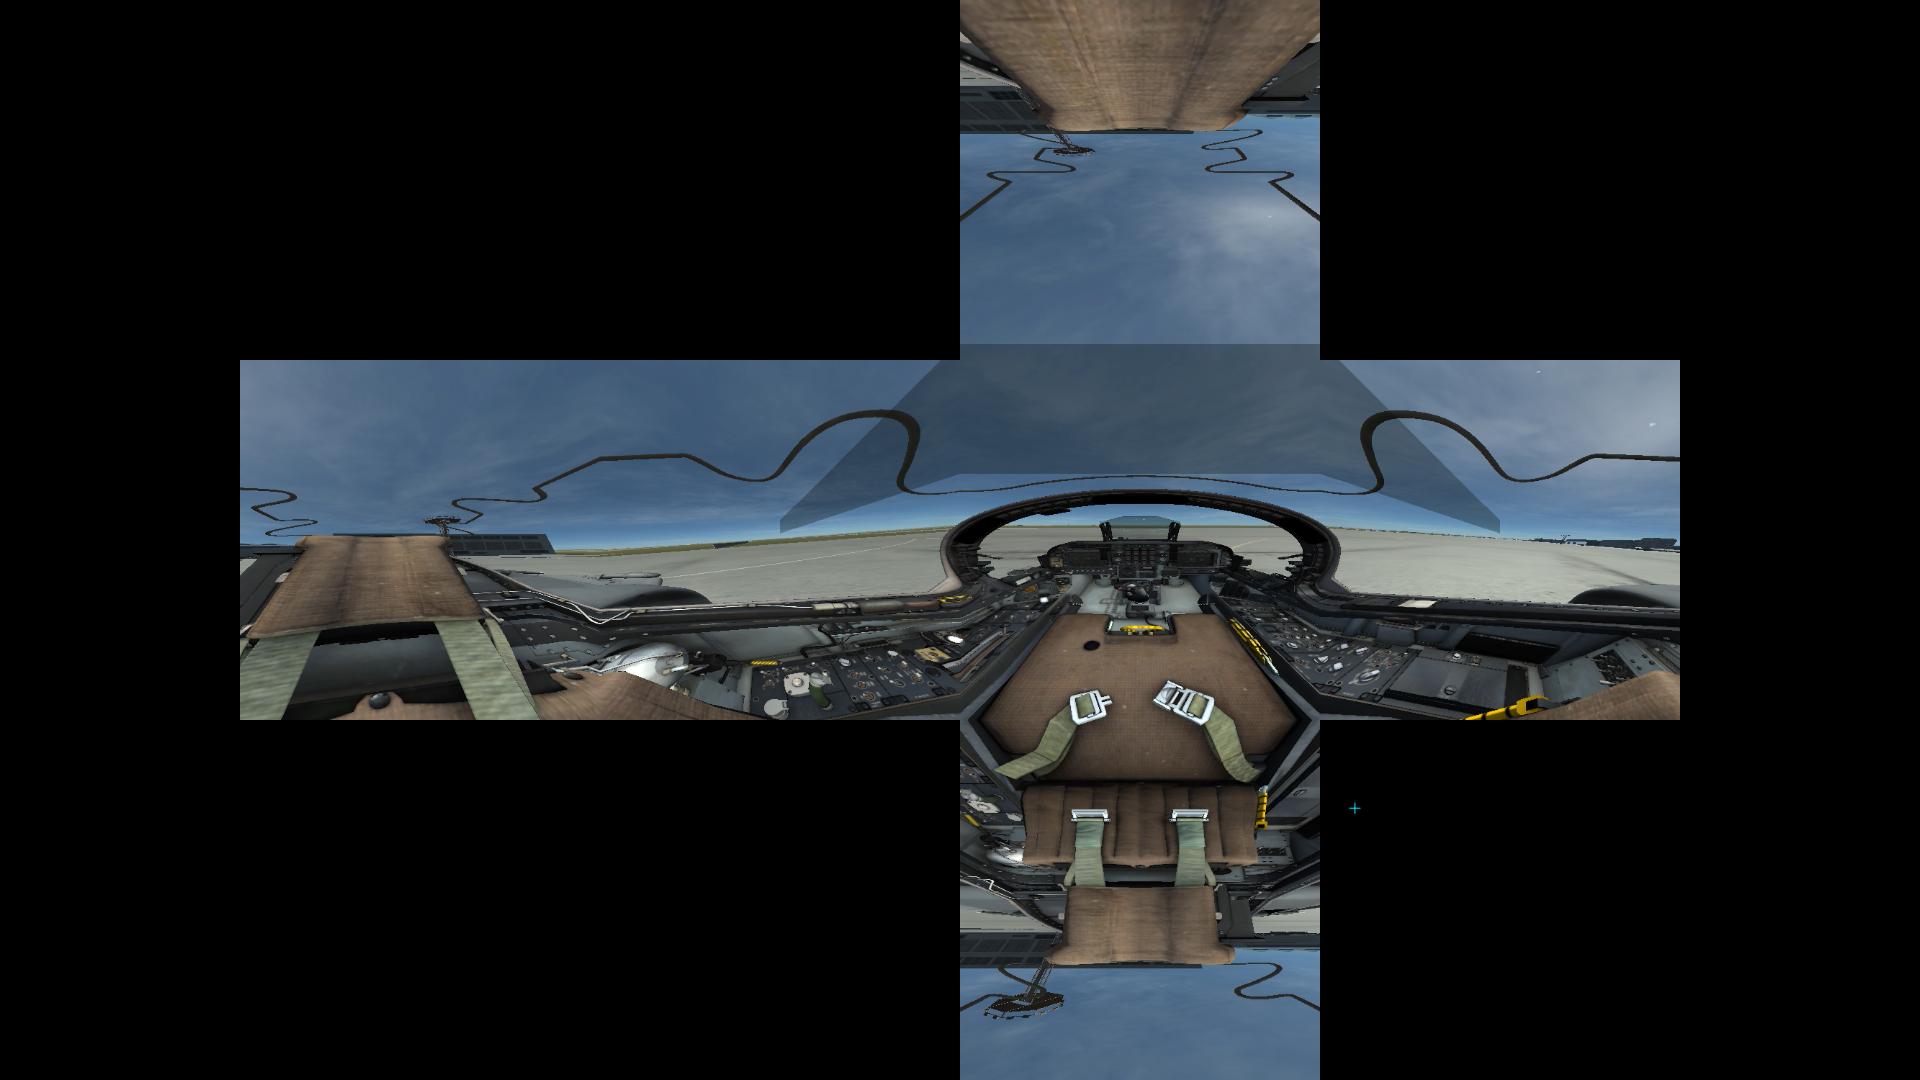
Edit: since the cockpit still was not posted in the question I am including it here for reference.

cockpit box projection

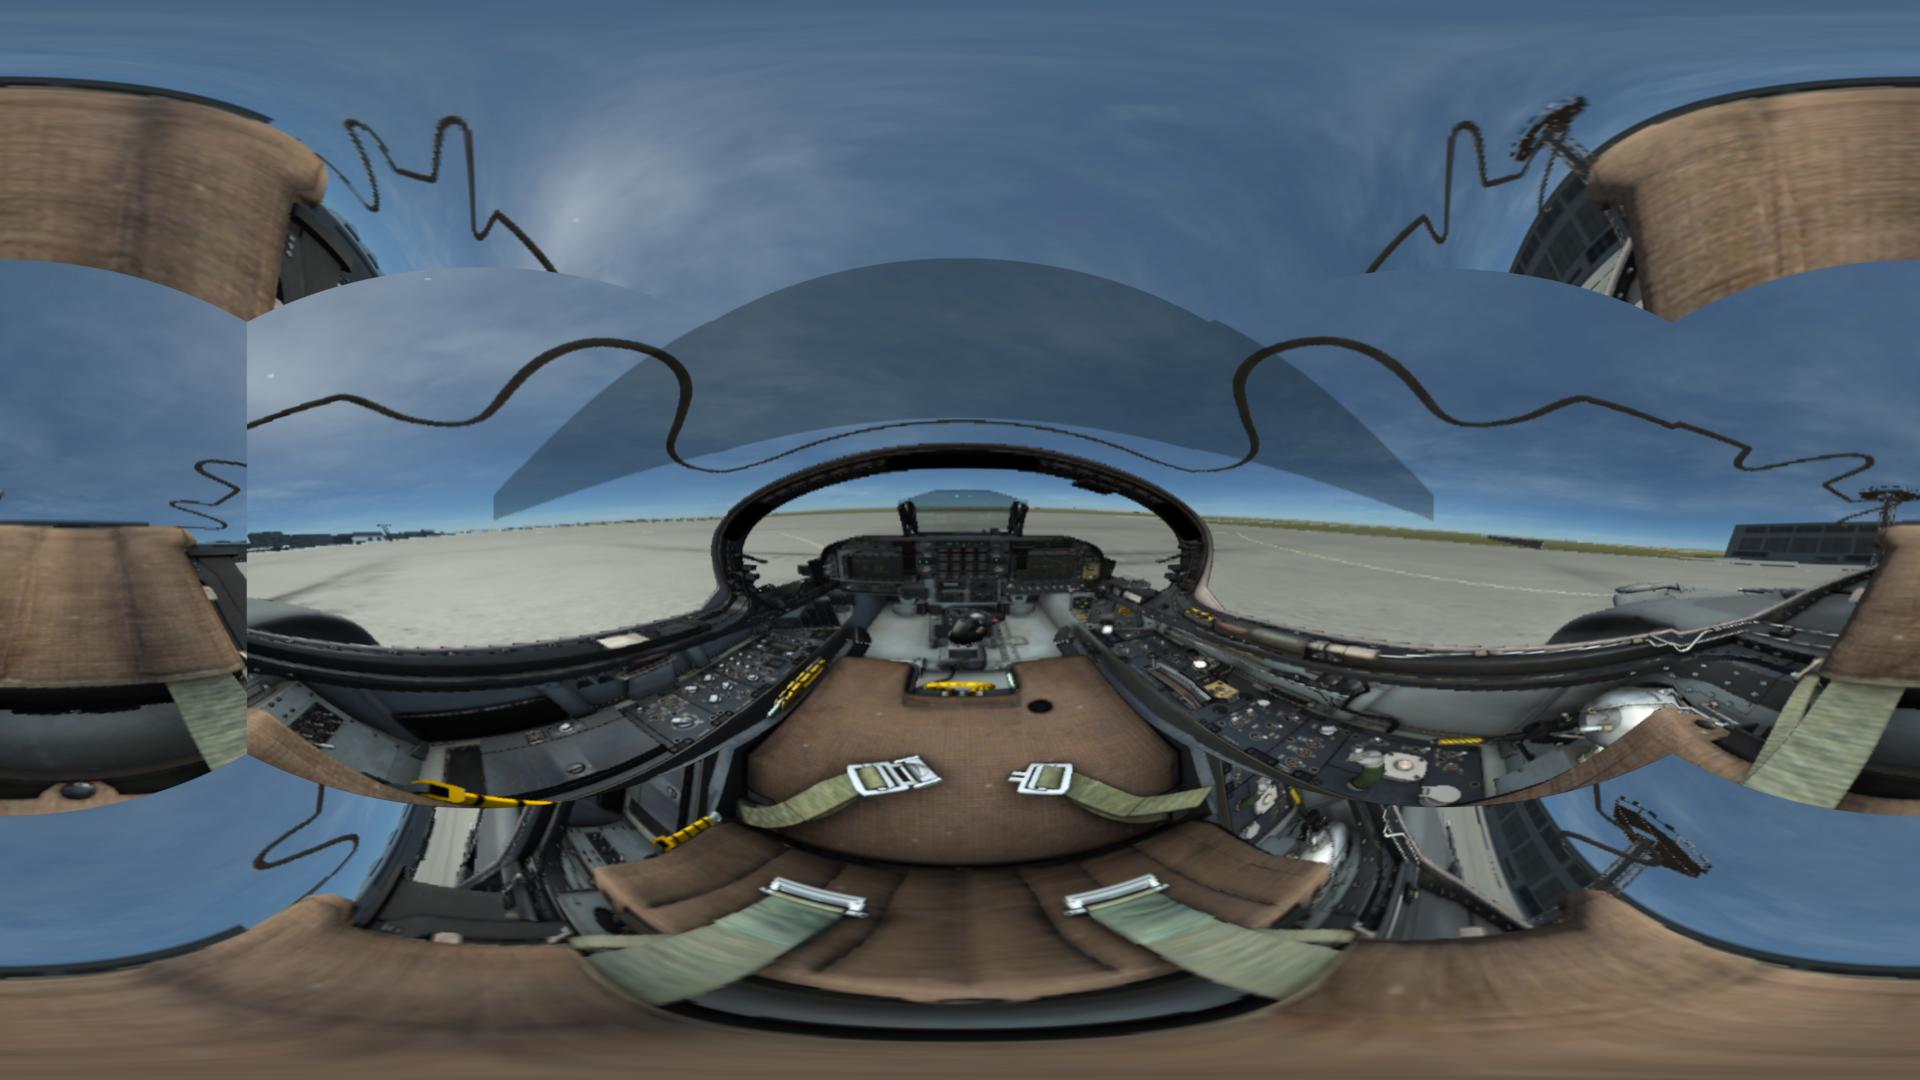
with some further tweaking, I got the render to look like this:

alternative cockpit render

It is important that the camera be centered within the cube, you can align the objects by using the Object-->Transform-->Align Objects command.

There are some discontinuities in the image, a few may have to do with my lack of precision in adjusting the UVs, but I think most of them come from the fact that your sample image does not wrap perfectly. The panel to the top of the center is screwed up somehow, for example it includes additional images of those windshield seams. Also the seam where the leftmost and rightmost edges join doesn't seem to be a perfect fit.

$\endgroup$
6
  • $\begingroup$ Hi thanks for your help with this. I was hoping to achieve this... youtube.com/watch?v=M3DJRyL3zV0. If you look at the thumb nail for the video it is full screen. I dont know how to explain, but I think I need to transpose the cubed UVmap to a cylinder, whihc I would somehow flatten out. $\endgroup$
    – Andy
    Commented Feb 16, 2018 at 17:11
  • $\begingroup$ I think your concept is mostly solid but getting the box projection of your recording to be seamless may be a challenge. Let me know if my update helps. $\endgroup$
    – risingfall
    Commented Feb 16, 2018 at 18:12
  • $\begingroup$ Wow, I do believe that is exactly what I am after. It is not your lack of imprecision, obviously I need to grab my in game screens correctly. So I was almost there, but had the camera position incorrect? $\endgroup$
    – Andy
    Commented Feb 16, 2018 at 18:52
  • $\begingroup$ Basically. You will need to make sure your UV map lines up correctly with your video, and I suggest using an emission shader for visibility (you don't want to be mucking around with lights and shadows I suspect) but I think that's pretty much it. $\endgroup$
    – risingfall
    Commented Feb 16, 2018 at 19:53
  • $\begingroup$ I redid the source video as it was incorrect. It is still not perfect FOV for each window, but this is the best fit I can get... thanks again for your help.... youtube.com/watch?v=qvdqyVPeGJo&feature=youtu.be $\endgroup$
    – Andy
    Commented Feb 19, 2018 at 20:19

You must log in to answer this question.

Not the answer you're looking for? Browse other questions tagged .