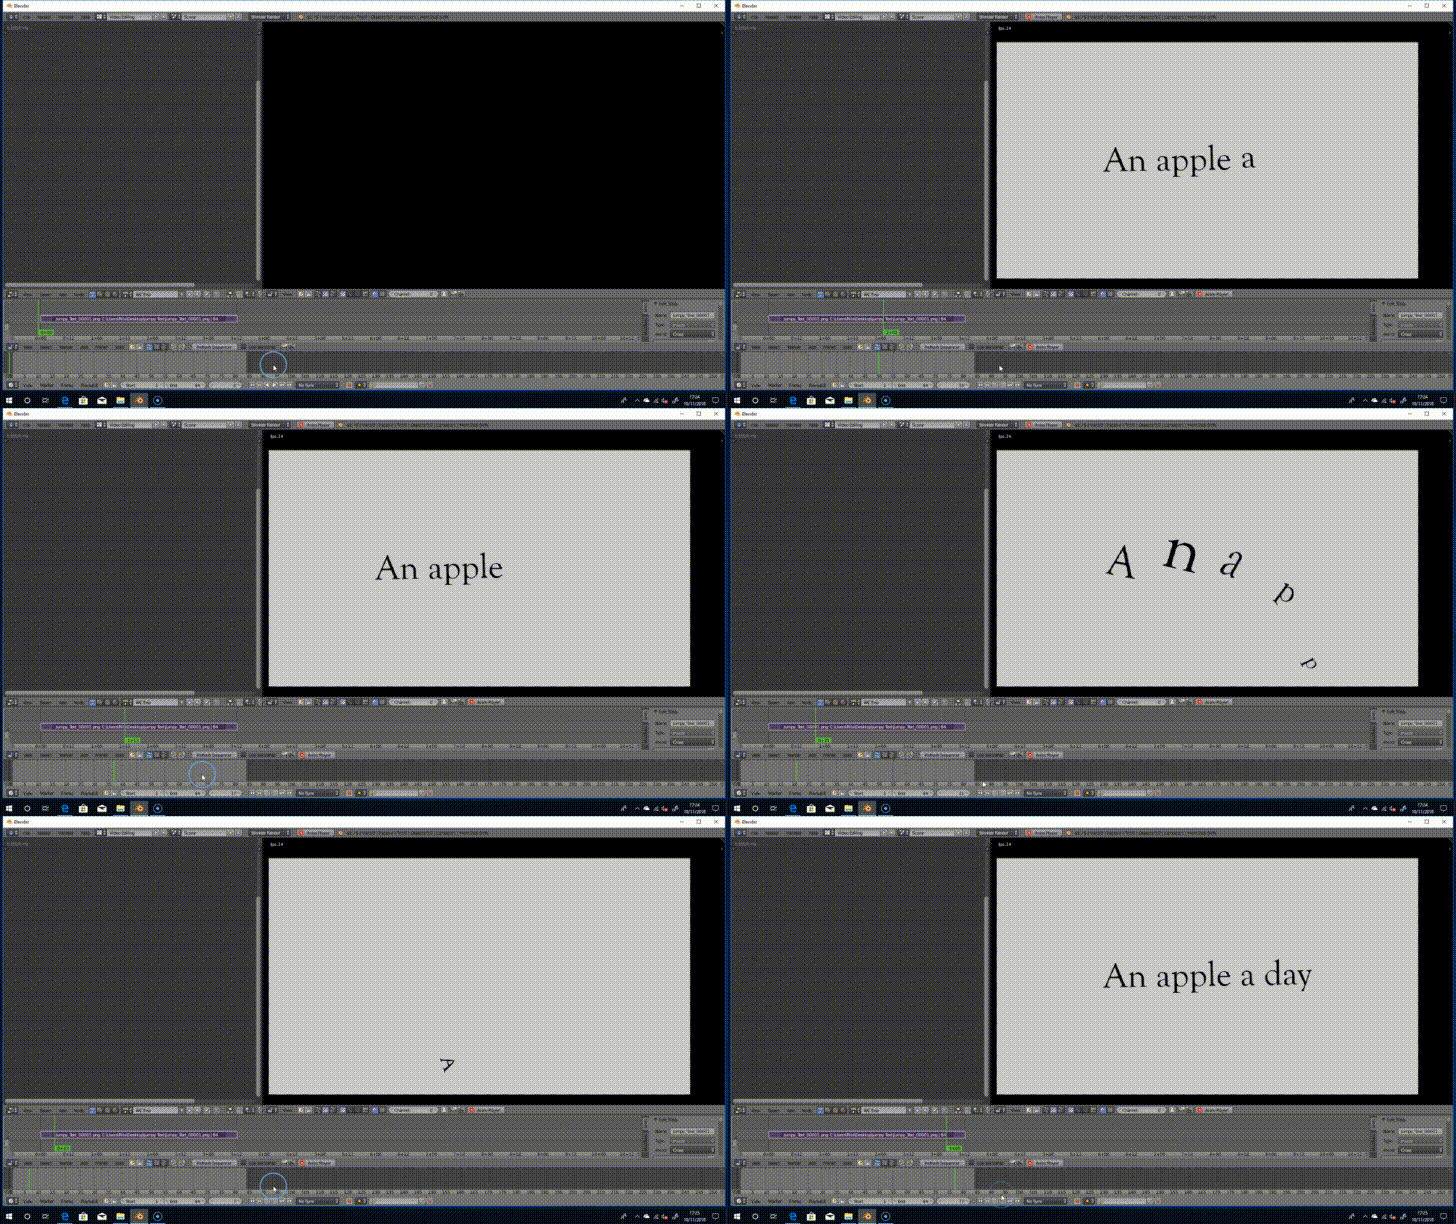
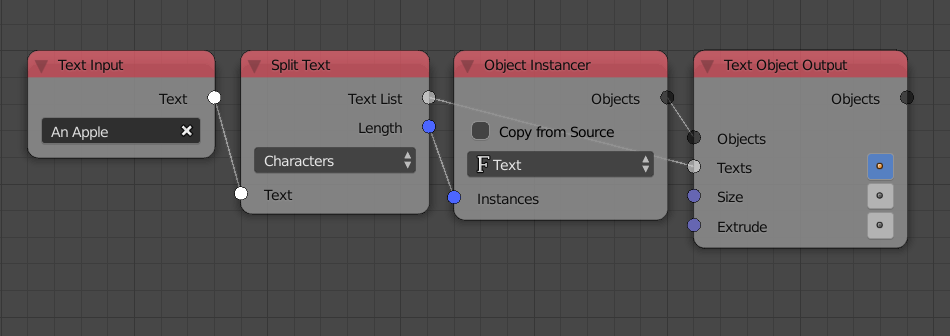
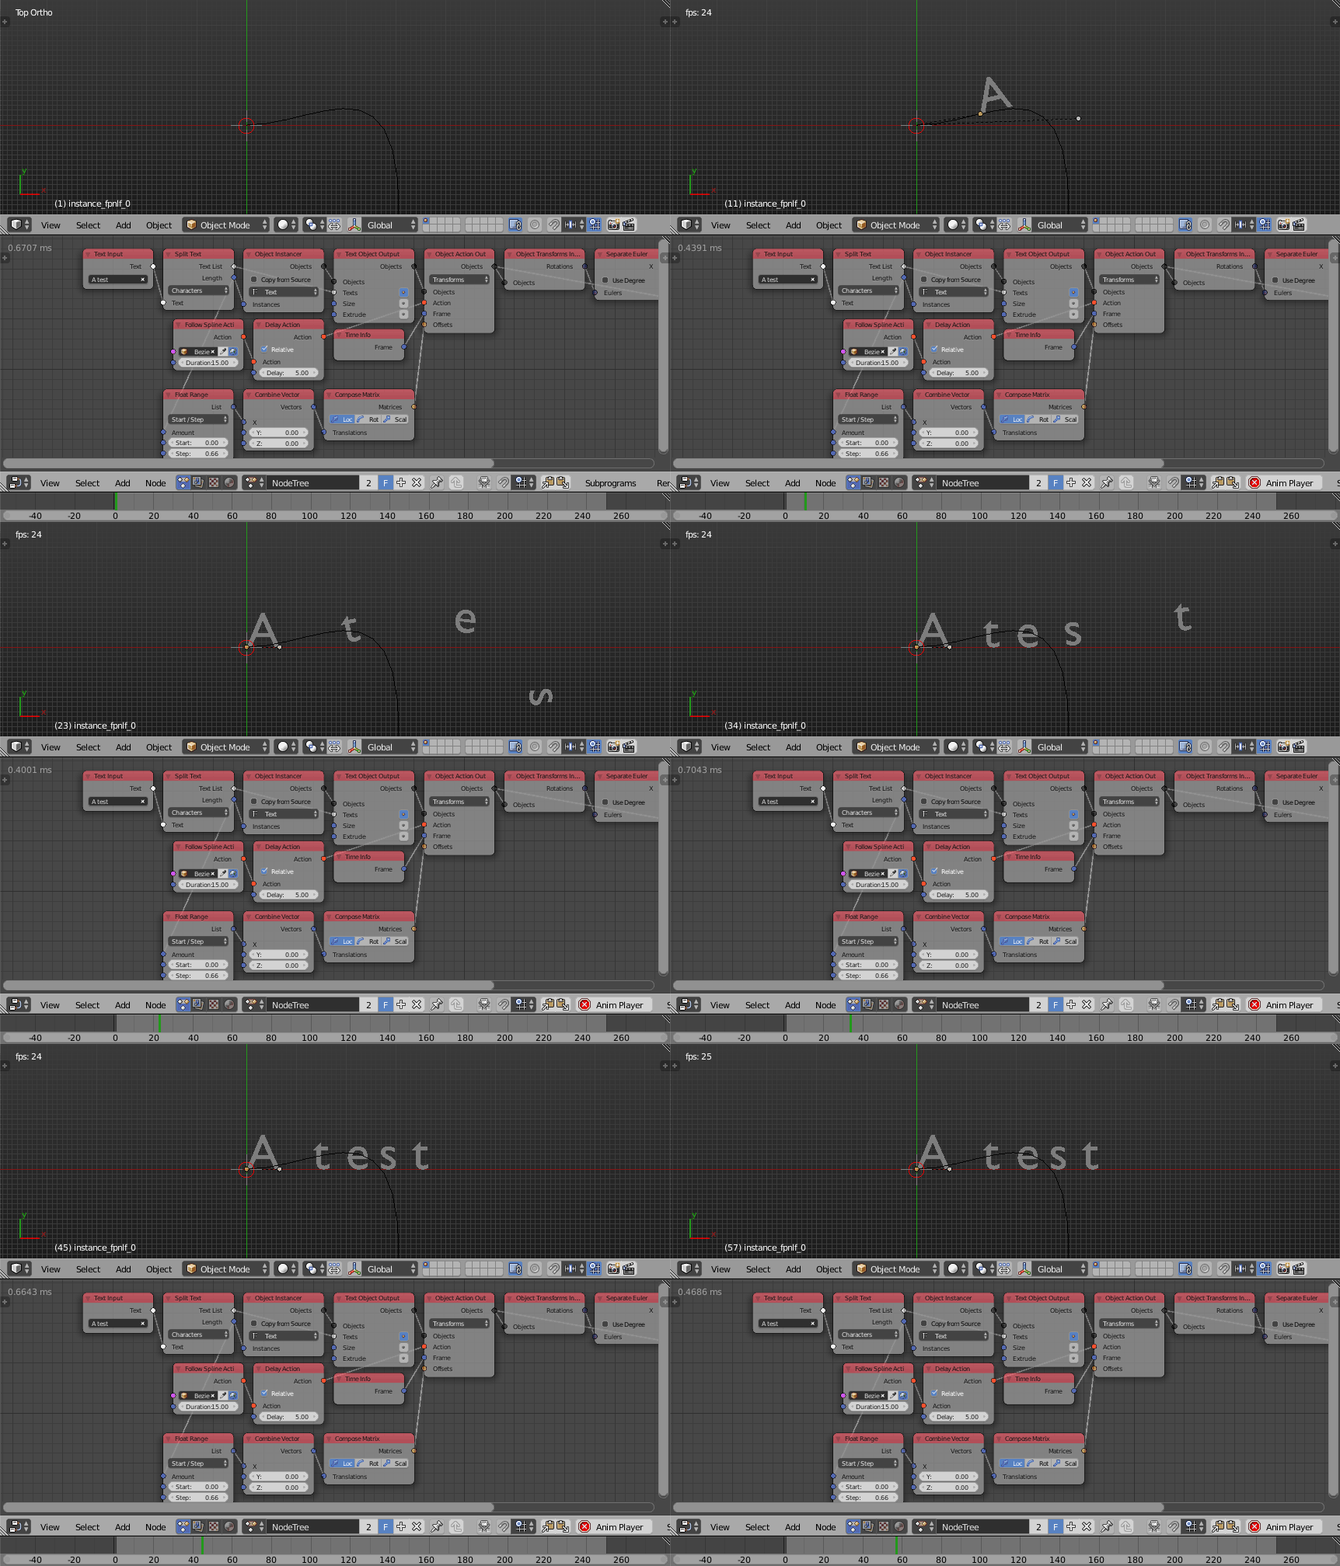
The first thing to do is create a text object for each character as follows:

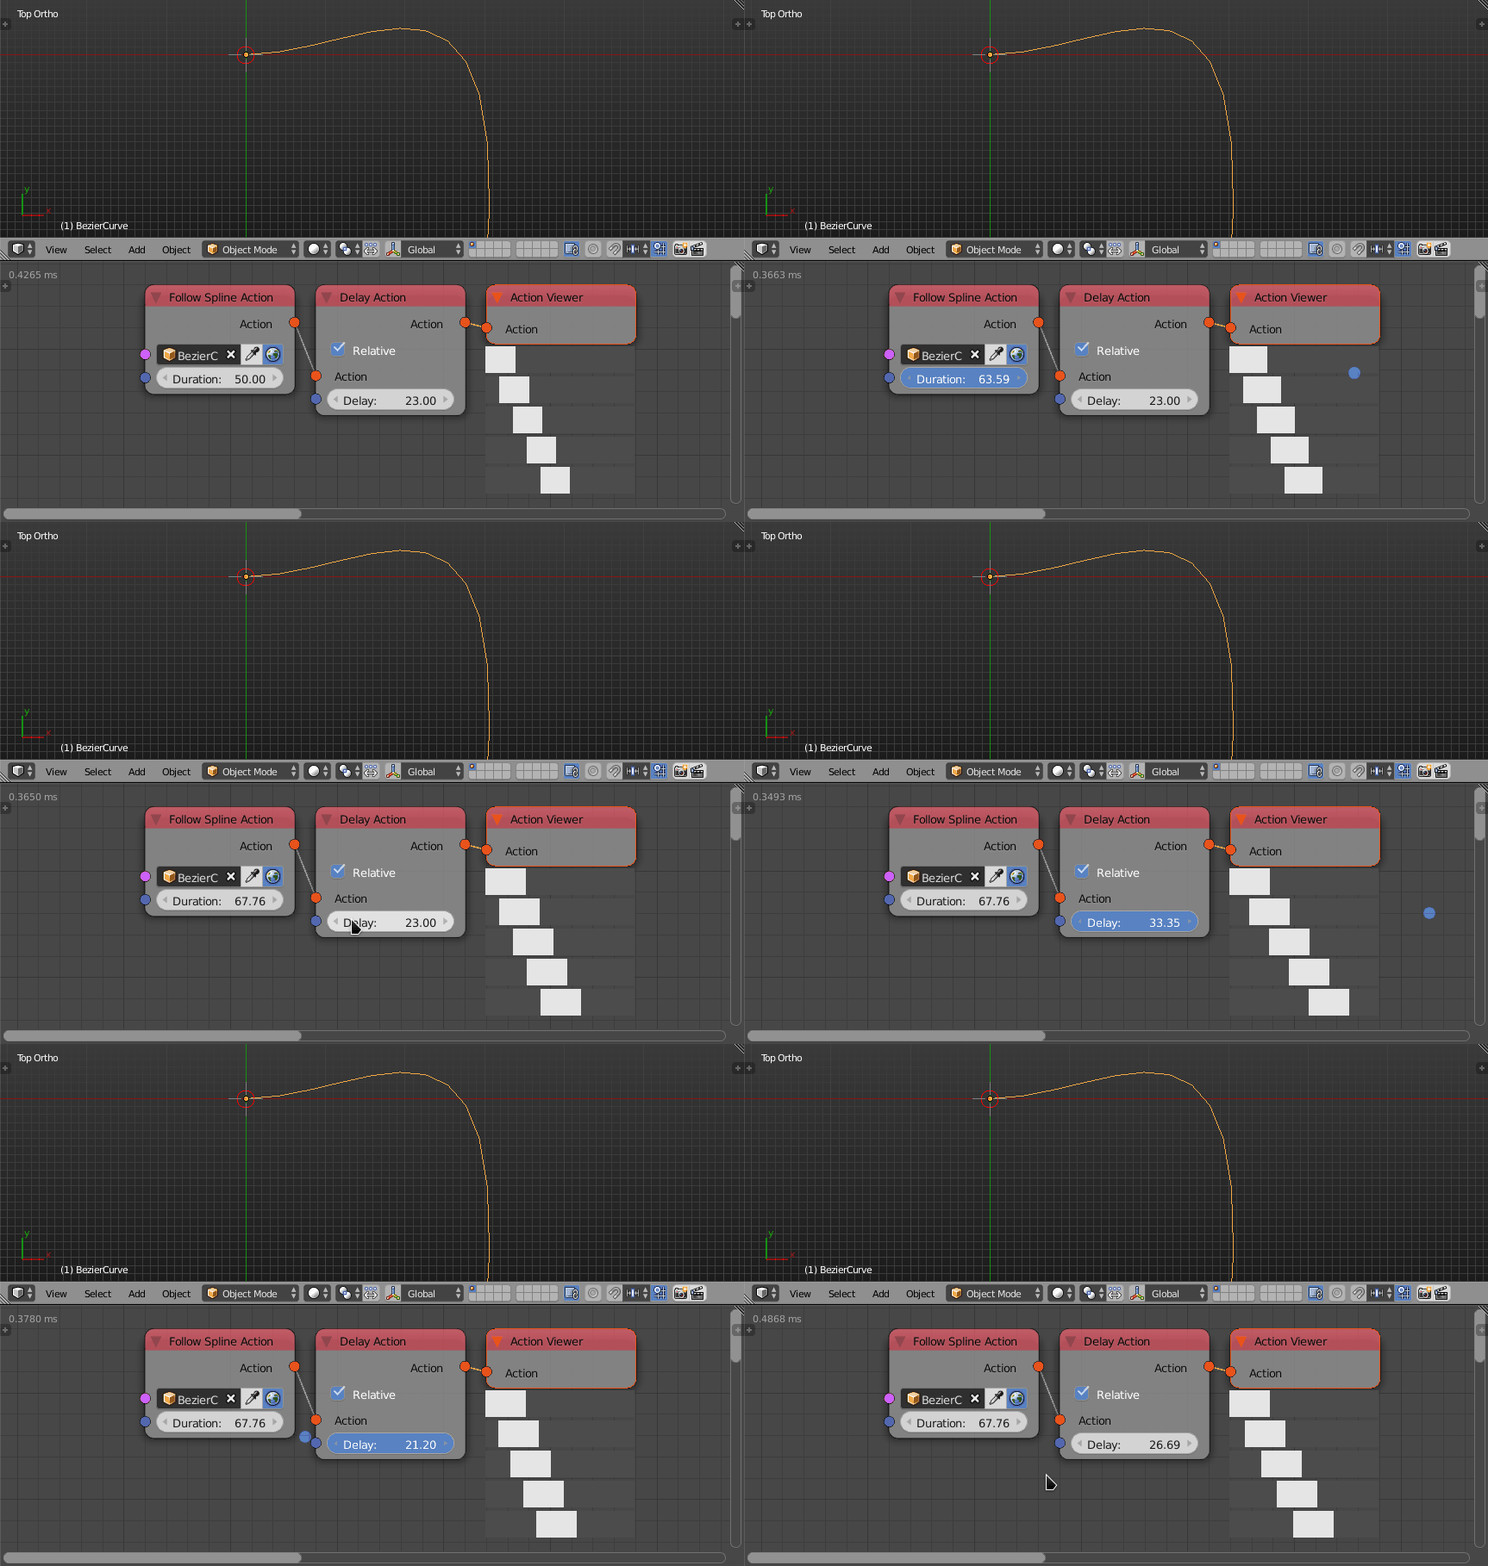
Next, create a spline that roughly represents the path that the characters will take. Then create a follow-spline-action out of that spline using the Follow Spline Action node, then delay the action by some frames. The Action Viewer node can be used to visualize how this action will play out, where each row represents one of the characters, the start of the white block determine the time at which the follow spline animation will start and the end of the white block determine the time at which the follow spline animation will end. As you can see, the delay node offsets the animation of each character by some amount while the duration controls the duration of the animation:

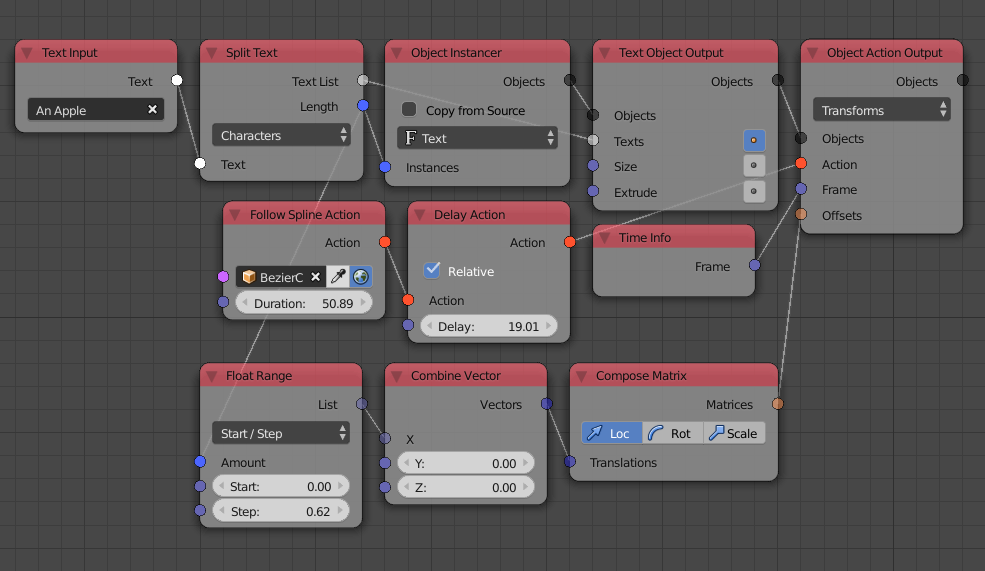
The Object Action Output node is used to animate the objects based on that action we created, however, we offset each character along the x-axis by some amount that define the spacing between each character:

While everything should be ready, the action oriented the texts in a wrong direction, so we are just going to adjust it as follows, but this may vary depending on what orientation you want your text:

Which gives:

You might notice weird character spacing for non monospace fonts, this is because of our choice of a constant character offset, to fix this, a variable offset based on the local bounding box width of each character can be used.
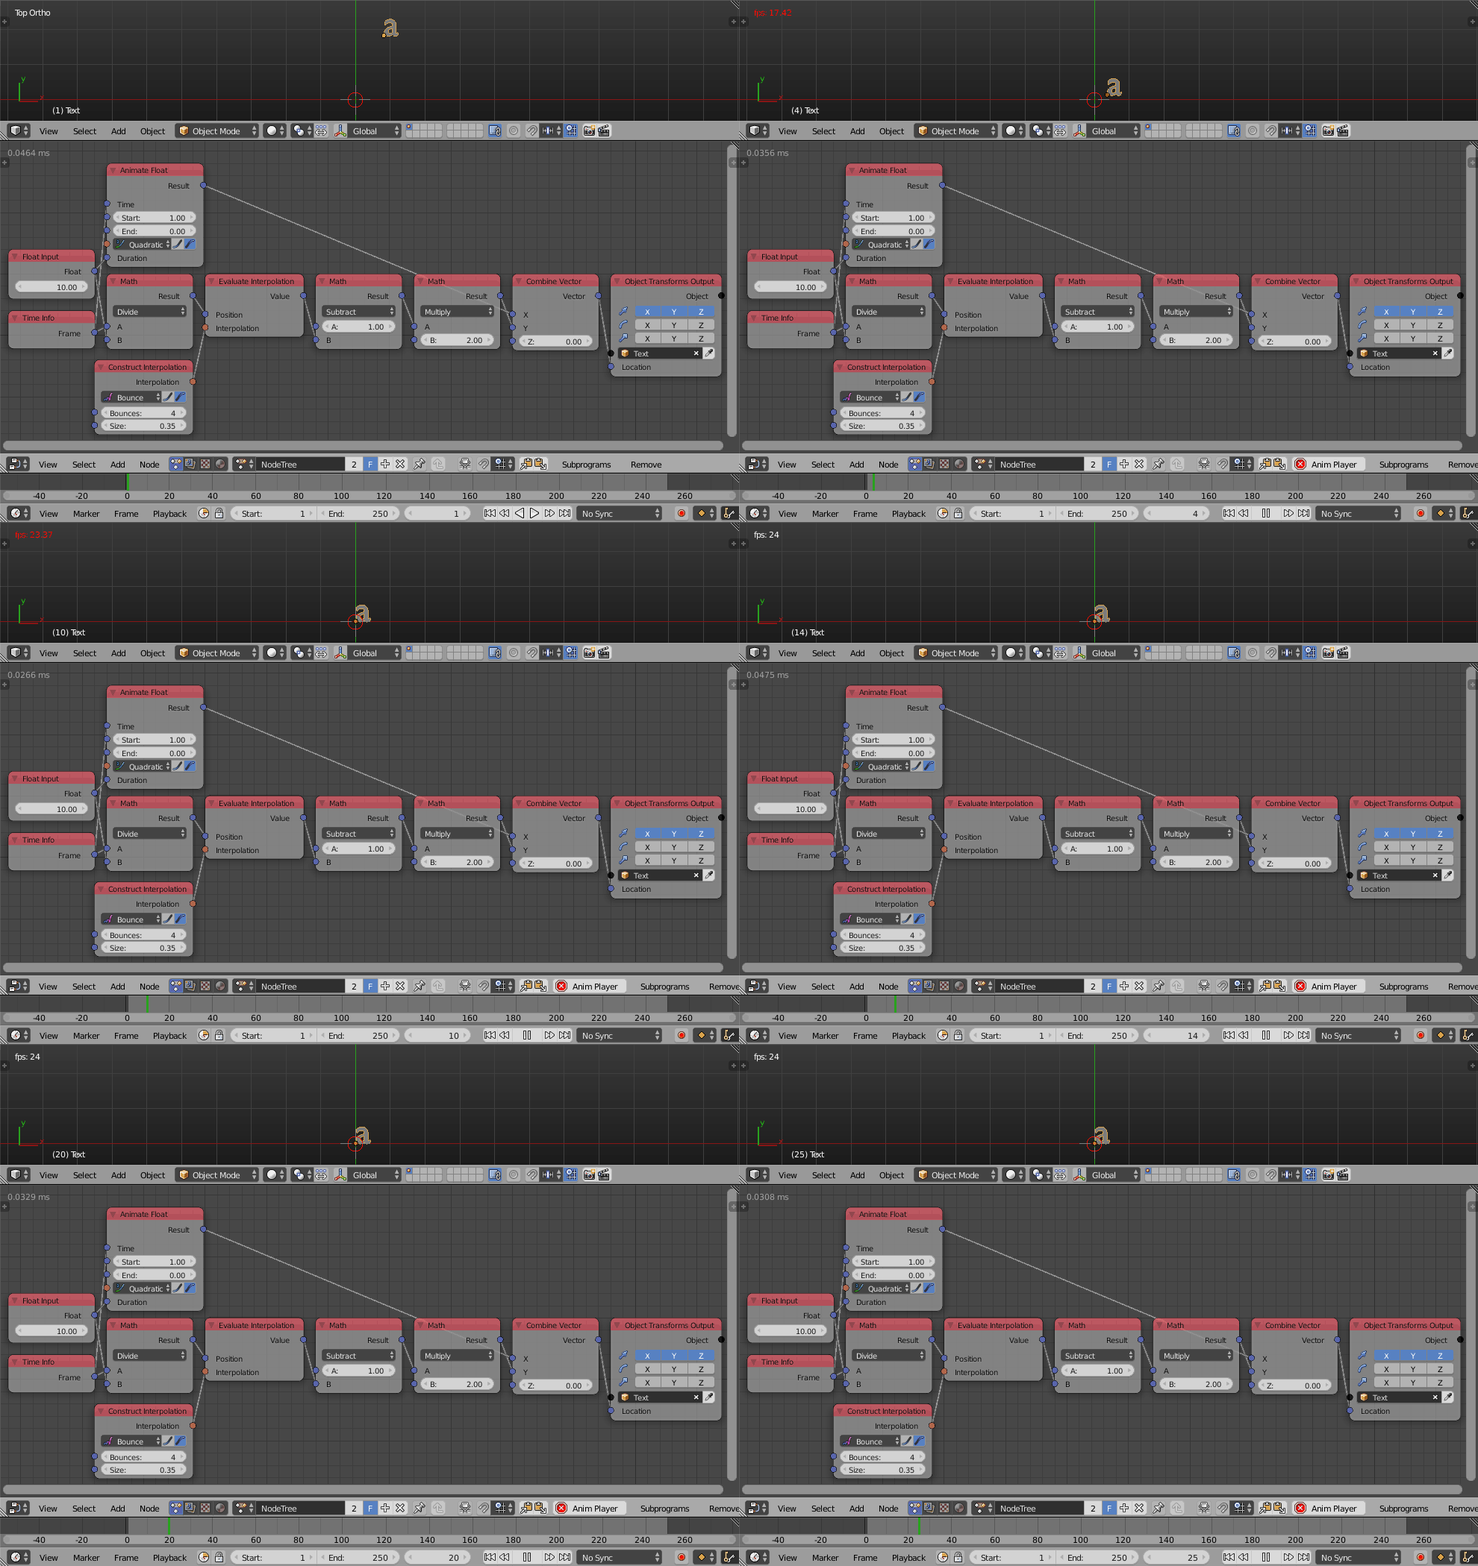
For the bounce effect, a simple Animate Float node to control the x location with the y location controlled by the time evaluated at a bounce interpolation will do. The subtract node inverts the results such that its starts high and ends low while the multiple node controles how high its starts:

The other effects follow the same workflow. Falloffs are also very useful when dealing with such animation, see the documentation on falloffs for more information.

