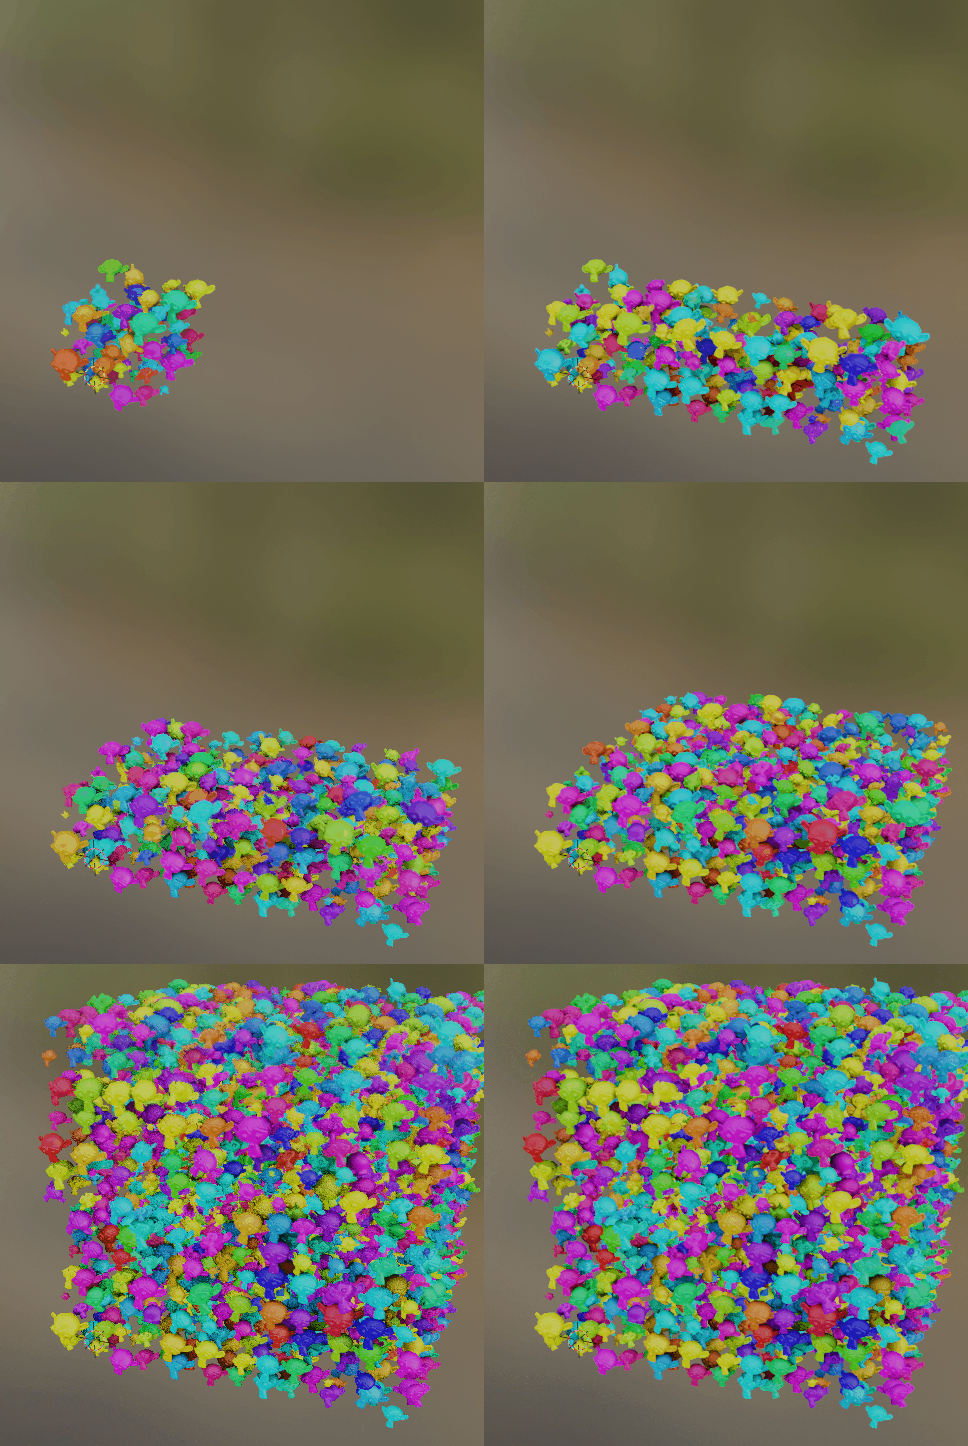
5
$\begingroup$

I would very much like to recreate a workflow I commonly use in Cinema 4D, which is this:

  1. Duplicate multiple instances of an object using the Mograph modifier (similar to the Array modifier)

  2. Randomize the offset/scale/rotation/etc of all the duplicated objects using a Randomize effector

From my search through various Blender forums there doesn't seem to be an elegant way to do this. In C4D this is such basic functionality that I just refuse to believe that there isn't a way to do it in Blender.

Would love a good workflow to achieve this.

$\endgroup$
0

3 Answers 3

6
$\begingroup$

You want to randomize an object that has a array modifier?

For that first apply the array modifier then in the Search bar which appears by clicking Space Bar (if not , in the preferences , you need to change the way space bar works , its possible your spacebar plays the animation) , search for separate by loose parts and select it.Then search for randomize transforms(make sure all the objects i the cluster are selected) and then open the box in the bottom left and change the location ,rotation and scale

$\endgroup$
2
  • 3
    $\begingroup$ THIS! I appreciate all of the other solutions, which all have their own distinct and relevant applications for different use cases... but this is exactly what I was looking for. It unfortunately takes away the procedural approach from C4D (in other words, I can't remove the randomizer with one-click) but it stills gets me there without having to using a long winded particle system approach. Cheers! $\endgroup$ Commented Jan 5, 2021 at 20:38
  • $\begingroup$ In Blender 3.0, searching for "separate by loose parts" doesn't find anything. $\endgroup$
    – Cactus
    Commented Nov 28, 2022 at 14:21
8
$\begingroup$

Maybe a more Blenderish way is to think of your array as a particle system from the get-go.

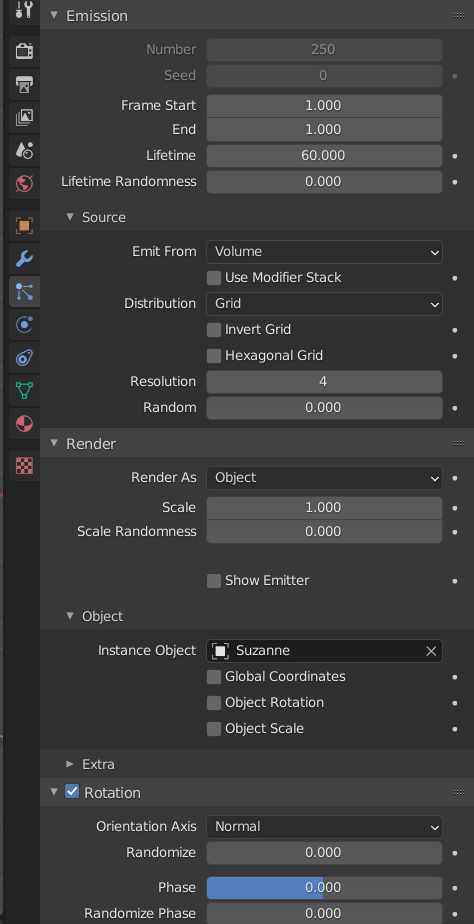
enter image description here

All Physics, velocities, etc, switched off. Gravity switched off in the Force Fields panel.

  • Emission: All on frame 1. Here, from volume, but could be faces or vertices of an emitter, for more specialised distributions.
  • Source: Grid will give you a regular array. (The Random setting here will randomise the locations.)
  • Render: .. as Object, instances your source object. Here is where you can randomise scale
  • Rotation: Here is where you can randomise the rotation of the instances.

Not shown: Viewport Display, where you can hide the emitter in the viewport, by setting As Render, with Show Emitter unchecked in the Render panel.

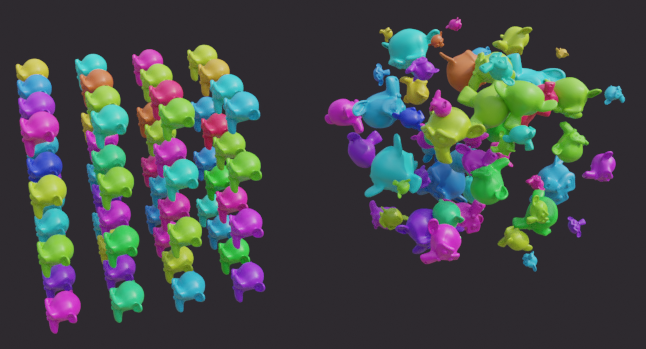
enter image description here

The cluster on the left: the grid. On the right: after randomisation.

You can name and save the particle settings for future use, you don't have to go through all the settings for every collection. The particle system is in the emitter's modifier stack; it can be 'applied'. The particles can be converted to real instances, there.

The system could be subjected to various force-fields for flow-like distributions, etc. and frozen by conversion at any point.

$\endgroup$
2
  • $\begingroup$ Yup this is one is definititely better and gives more control ! :) $\endgroup$
    – Gorgious
    Commented Jan 5, 2021 at 15:18
  • $\begingroup$ @Gorgious... welll.. :/ it's not so easy to get a nicely distributed fixed-count array in the fist place, if that's important.. your way's better for that. $\endgroup$
    – Robin Betts
    Commented Jan 5, 2021 at 15:32
6
$\begingroup$

This one is convoluted and you don't have that much control but it's procedural.

Create a triangle and add your array modifier(s).
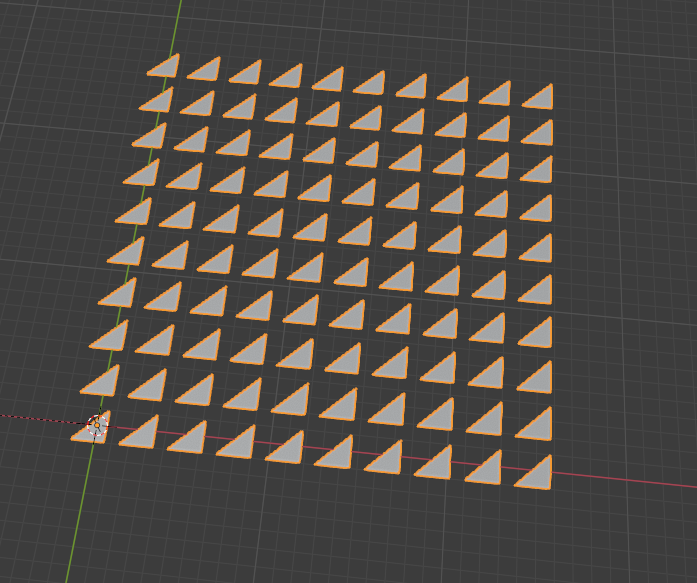
enter image description here

Select the object you want to be arrayed, parent it to your triangles with CTRL + P or Object > Parent > Object (The triangles must be the parent object, not the other way around)

Select the triangle, go into the object properties and select instancing on faces. Uncheck "Show instancer" so you get only your desired objects. Check "Scale by face size", important for later.
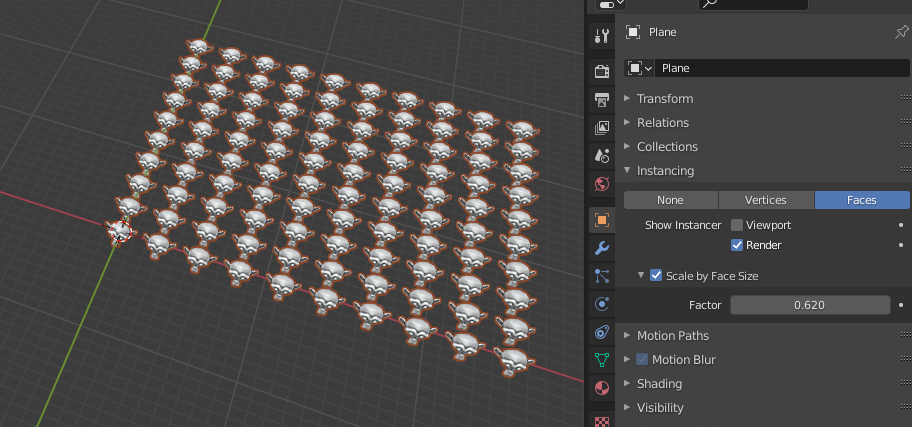
enter image description here

Now you can't select your objects in the 3D viewport but you can still select them in the outliner.

Add a displace modifier, and a new texture. Set the direction to X (or Y) and click on that button to modify the texture :
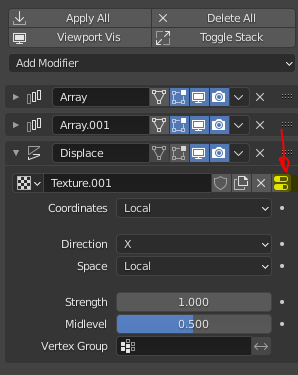
enter image description here

Set it to clouds, and go back to the modifiers. Increase the displace strength to get a random scale.
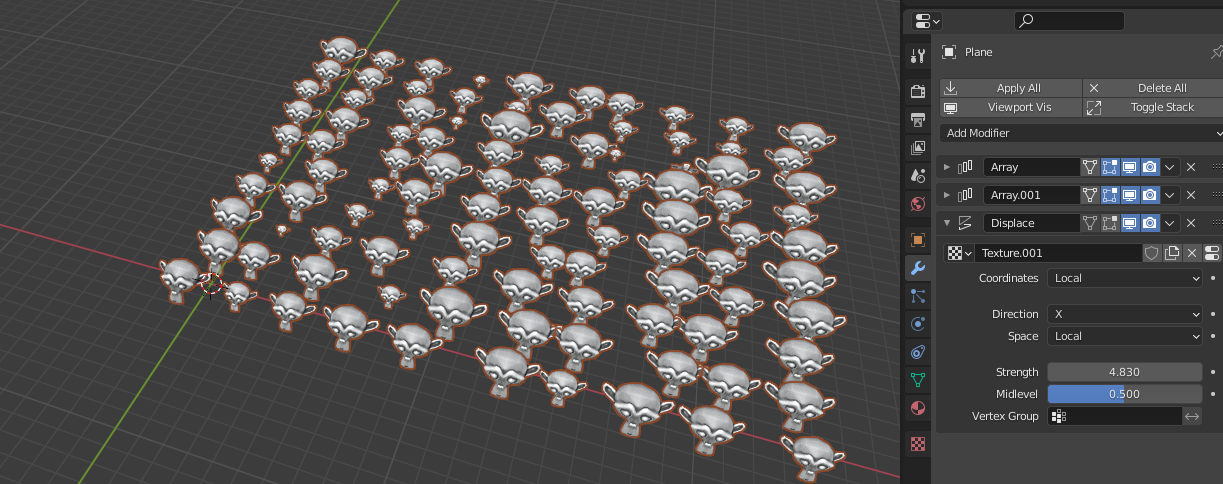
enter image description here

Add another displace modifier, and another texture. This time set it to "RGB to XYZ". Change the new texture to "Clouds" and the color from "Grayscale" to "Color".

Go back to the modifiers and change the displace strength to get kinda random location and rotation :
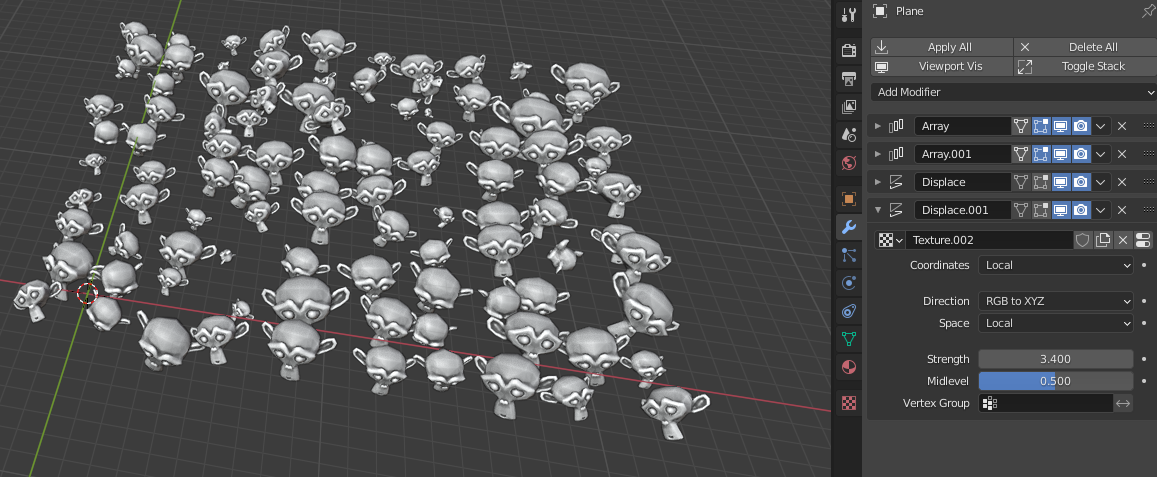
enter image description here

Result with an array along Z and a shader :
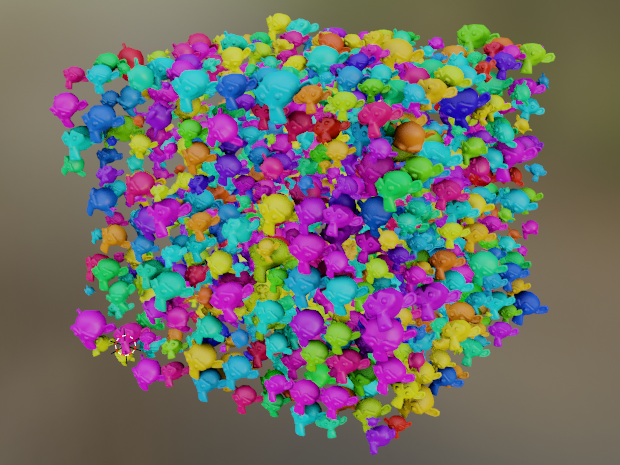
enter image description here

enter image description here

$\endgroup$
3
  • $\begingroup$ Also see youtu.be/Nlqjfj1lL5A?t=1688 for fine control if you can use the latest alpha version $\endgroup$
    – Gorgious
    Commented Jan 5, 2021 at 10:23
  • $\begingroup$ Got there first.. my version wouldn't have been so jolly. Do you have any idea when Blender is going to get shot of its legacy texture system? I'm hoping that will be part of Everything Nodes. $\endgroup$
    – Robin Betts
    Commented Jan 5, 2021 at 11:07
  • $\begingroup$ I wouldn't know for sure but I don't think it is very high in the priority list so I wouldn't count on it very soon... Personally I would much rather prefer custom shaders for Grease Pencil objects ! But this kind of hack will definitely see an end once the current Geometry Nodes project gets a bit more beefy :) $\endgroup$
    – Gorgious
    Commented Jan 5, 2021 at 15:21

You must log in to answer this question.

Not the answer you're looking for? Browse other questions tagged .