I was trying to find information about how can I do projection mapping with blender on real surfaces/objects. Found some tutorials but they didn't help much. Most of them were talking about creating objects/animation and then project them to a surface using other tools like HeavyM, MadMapper, etc. I found out Blam and fSpy and I was wondering if I can use these. Is it possible to use only Blender (with Blam) for matching my objects/animations or anything to a real surface?
-
1$\begingroup$ blender.stackexchange.com/questions/57013/… $\endgroup$– Duarte Farrajota Ramos ♦Commented Jun 13, 2019 at 10:34
-
$\begingroup$ I want to do projection mapping on real surfaces/objects like walls/boxes after creating the effects I need. $\endgroup$– AgapiCommented Jun 13, 2019 at 10:55
-
$\begingroup$ While it might be possible, I'm not aware of any specific tools within Blender to do this. Scripting is quite flexible and may add new functionality $\endgroup$– Duarte Farrajota Ramos ♦Commented Jun 13, 2019 at 11:13
-
1$\begingroup$ In the old Blam repository, there's an illustration of how to use it for projection mapping. You can use fspy in the same way. $\endgroup$– Robin Betts ♦Commented Jun 13, 2019 at 16:18
-
$\begingroup$ I tried it with both BLAM and fSpy, (I couldn't make BLAM work properly so continue with fSpy) but it doesn't seem to do what I want. I have to render everything first and then project it and map the video with another mapping tool. Am I right or am I doing this thing all wrong? @RobinBetts $\endgroup$– AgapiCommented Jun 24, 2019 at 11:22
2 Answers
Sure you can, and it works like a charm. Follow Robin's link. If you want to use fSpy (because its better). You need an extra step. Based on the the example in the previously mentioned link by stuffmatic, the workflow is as follows:
CREATE A PLACEHOLDER IMAGE: Use any drawing software that allows you to work in full screen mode. This is a must. For example Blender:
- Open Blender, set the render size to match projector.
- Go to Blender-> UV/Image Editor, create a new image matching the projector and render size, enter paint mode, set radius to 1 and paint stroke to line (choose high contrast background/line), and draw diagonals precisely to mark center and corners. -While still in the UV/Image Editor; go to View -> Duplicate Area into New Window. -Drag that window into the second display (the projector). -Enter full screen with the following commands alt+F9 and alt+F11.
DRAW GEOMETRY ON THE PLACEHOLDER IMAGE: The idea is to place yourself inside the projector so you can obtain an image of what the projector "sees". Now you must draw lines that will help you understand the scene when you import the image into fSpy. While watching the real, scene that should now have the placeholder image projected on it, trace as many straight lines as you can. Keep in mind that you need to define 2 or 3 sets of vanishing points (lines that are parallel in reality but that would eventually converge when projected to 2D perspective. Save the image.
CALIBRATE IN fSpy: Open the image and use fSpy to calibrate focal length, camera position, center point. Keep in mind the number of vanishing points you have, different options will give you different results. Save the fSpy.
IMPORT CALIBRATION INTO BLENDER: You have to install the plugin for your version of Blender. Once you import the fSpy file you should have a new calibrated camera in the scene looking at the center of the scene (which should correspond to the center point as you placed in fSpy).
RECREATE GEOMETRY: Set your placeholder image as a background image and. Model the surfaces you want to have mapping content, and create your motion graphics content.
MAPPING: Go crazy using realtime or rendered video output for sweet open source mapping. The best part is that if anyone moves your projector, you can simply repeat the calibration and match the scene with no need to alter the content.
P
-
$\begingroup$ What is the purpose of "draw diagonals precisely to mark center and corners"? I can not find a use for them since they relate in no way to the perspective in reallife. $\endgroup$ Commented Apr 13, 2022 at 19:31
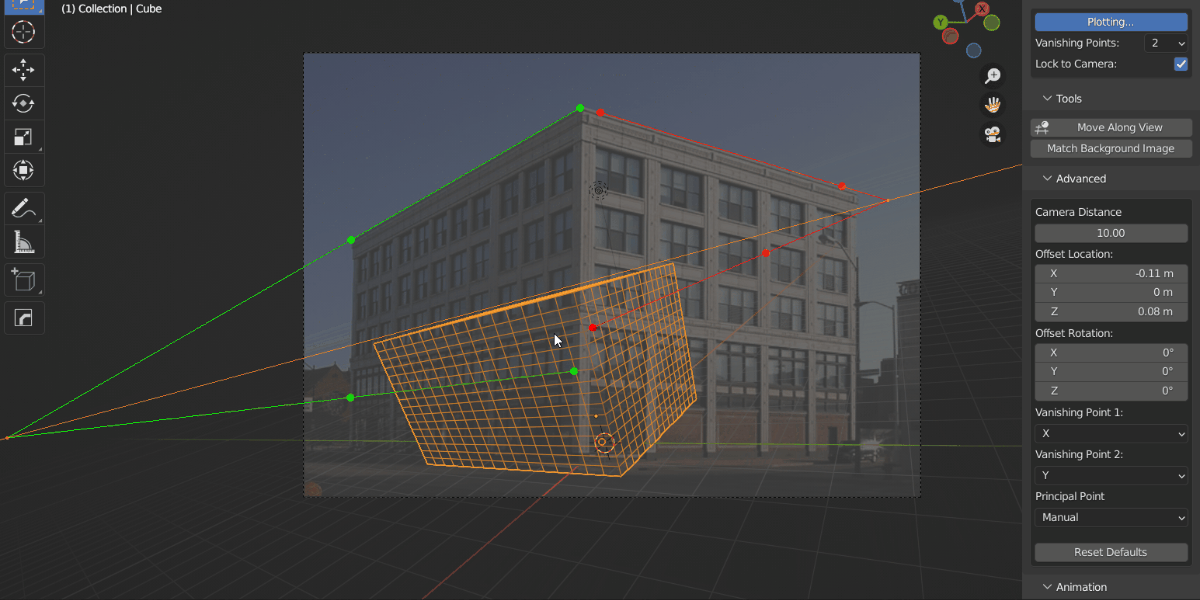
Instead of fSpy or BLAM you could also use the relatively new Perspective Plotter commercial add-on: https://blendermarket.com/products/perspective-plotter
This will save you to hop between software for the calibration step which makes re-calibration a breeze.
Here's a good video showing the camera alignment process in Perspective Plotter.
Disclaimer: I'm not in any way connected to the add-on producer. I'm merely a user of it and didn't test it for projection mapping (yet).

