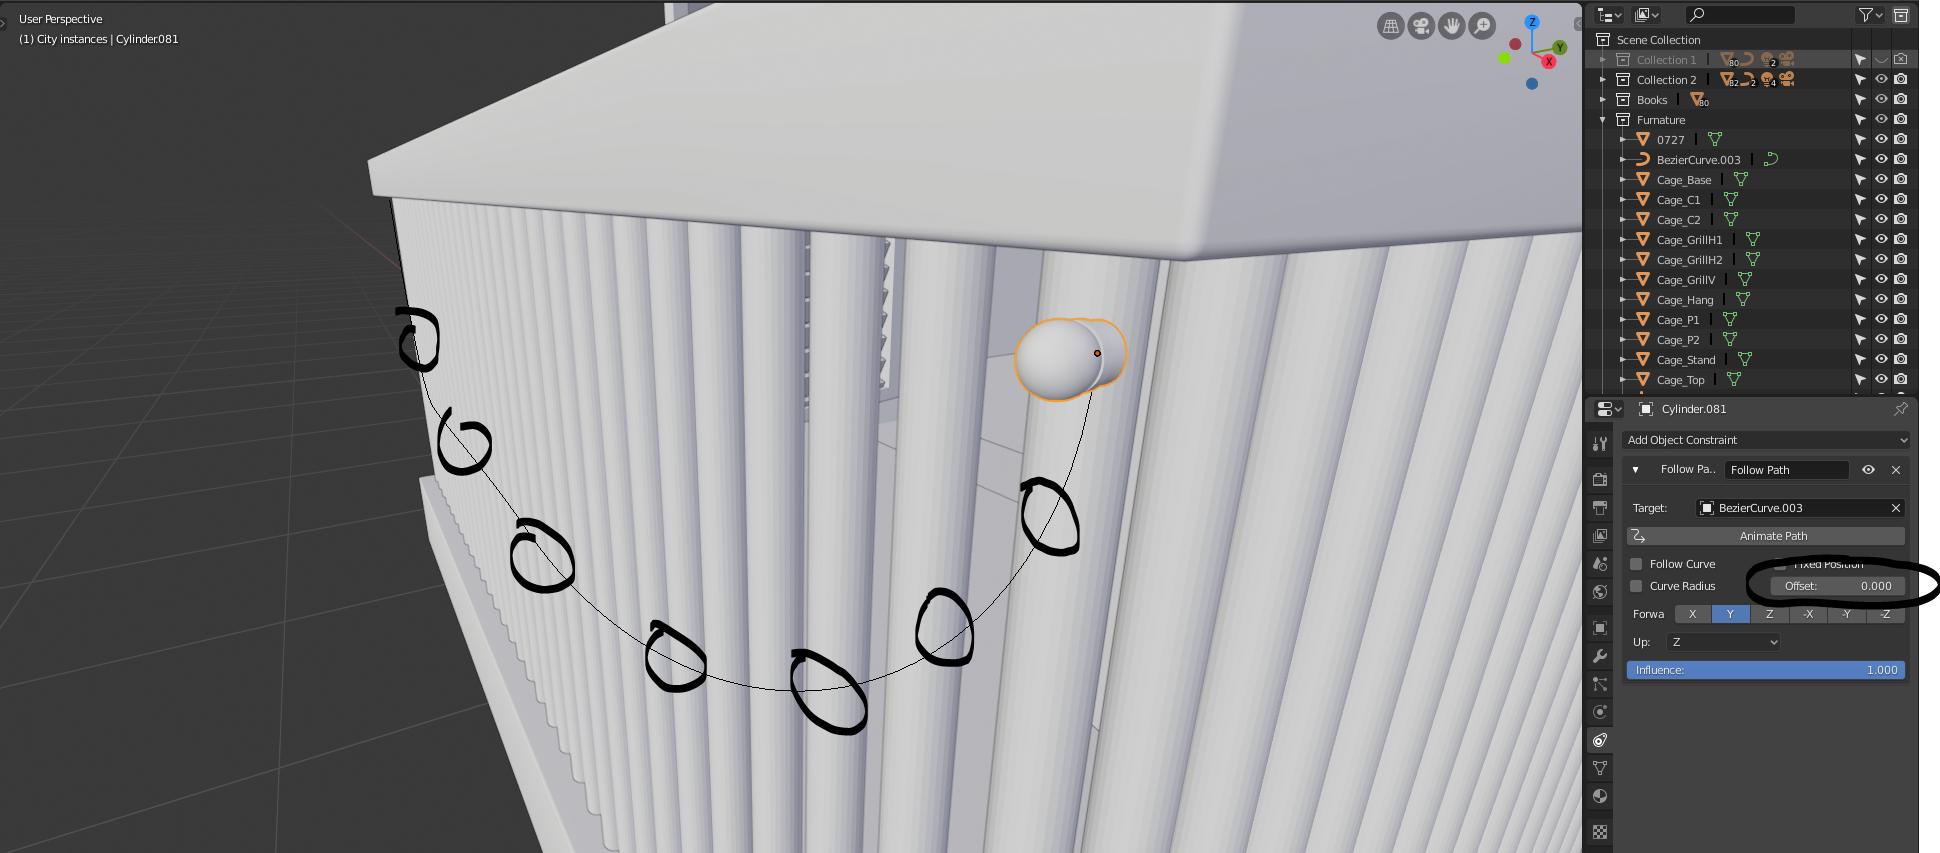
i'm trying to distribute multiple objects that have the same path constraint, my goal is to apply the distribution on the offset value of the constraint between 0 and -100 so i can have an even distribution, i've noticed that if i use Alt then place a value it will apply the same value to the all selected obhects thats not what i'm looking for. for example in Softimage XSI if you toy L before applying a value of 0,100 it will distribute objects evenly based on the value input. i'm looking for something similar that can do the same.

-
$\begingroup$ Does the Array Modifier using a constant offset and then adding a Curve Modifier not accomplish what you need? $\endgroup$– robCommented Apr 25, 2019 at 13:05
-
$\begingroup$ Don't you have what you want with Dupliframes? youtube.com/watch?v=Rp88ckdLwVQ $\endgroup$– moonbootsCommented Apr 25, 2019 at 15:26
-
$\begingroup$ Ok, edited with the Duplifaces method for 2.8 $\endgroup$– moonbootsCommented Apr 26, 2019 at 9:14
2 Answers
Use fixed position offset factor of follow path constraint.
For a follow path constraint with fixed position set, then 0 is one end, 1 the other, 0.5 half way along etc. Related https://blender.stackexchange.com/a/72682/15543
Using this we can thread objects onto a curve.
Code edited from https://blender.stackexchange.com/a/93441/15543
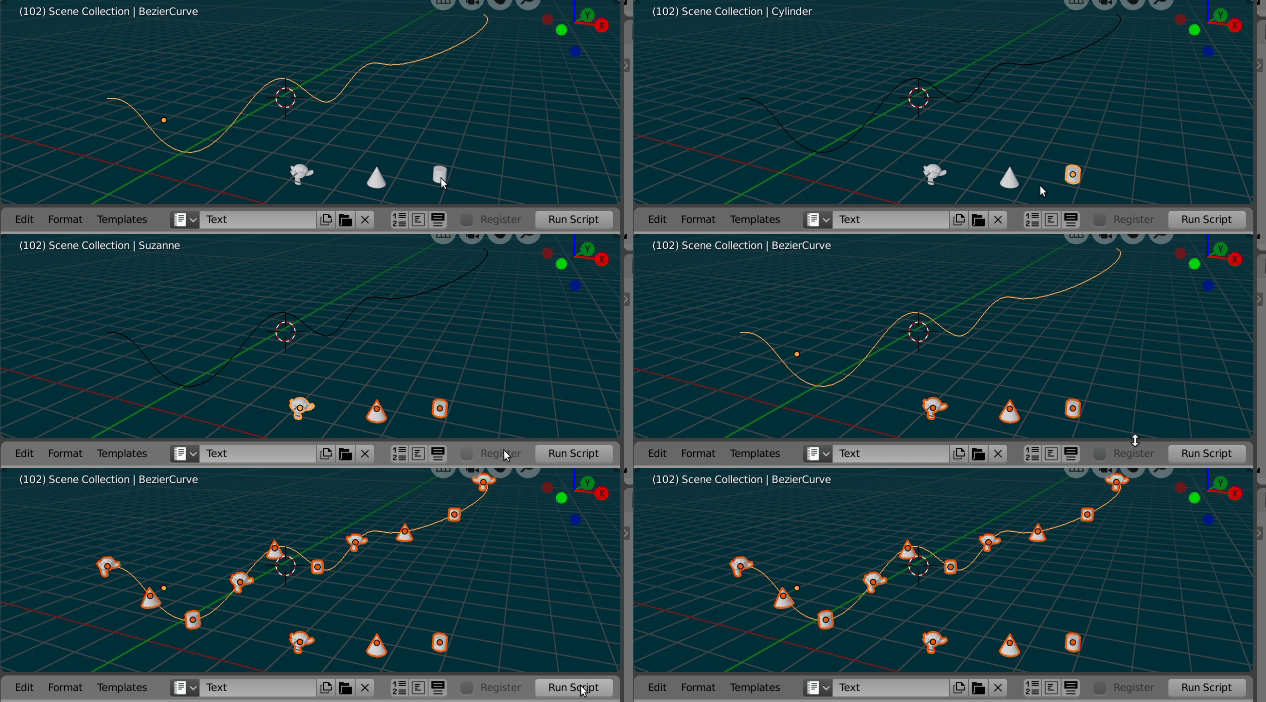
 Demo run , cone, suzanne and cylinder threaded onto a path such that there are 10 items equally spaced. Curve follow is set to False
Test script (Targeted to blender 2.8+). Select the object(s) you wish to thread on the path. Select the path last to make it active object
Edit the res = 10 to have more or less items. Change cyclic to True if the path is a cycle. (Note in link above code tests for this)
Constraints are using default settings for follow and up axes. The location of object copies is set to zero to thread them on the path. _If making this into an operator would make these properties
import bpy
context = bpy.context
scene = context.scene
curve_ob = context.object
obs = [o for o in context.selected_objects if o is not curve_ob]

res = 10
cyclic = False
new_obs = []
o = 0 if cyclic else 1
pts = res - 1
for i in range(pts + o):
    s = obs[i % len(obs)].copy()
    s.location = (0, 0, 0)
    fp = s.constraints.new(type='FOLLOW_PATH')
    fp.target = curve_ob
    fp.use_fixed_location = True
    fp.use_curve_follow = True
    fp.forward_axis = 'FORWARD_Y' # 'TRACK_NEGATIVE_Y`
    fp.up_axis = 'UP_Z'
    # calculate the offset factor
    fp.offset_factor = i / pts
    scene.collection.objects.link(s)
    new_obs.append(s)
Should you wish to remove the follow path constraint on copies
# remove constraints
scene.update()
for s in new_obs:
    sc = s.constraints[0]
    s.location = s.matrix_world.translation
    s.constraints.remove(sc)
Do you have a good reason to use a Follow Path constraint?
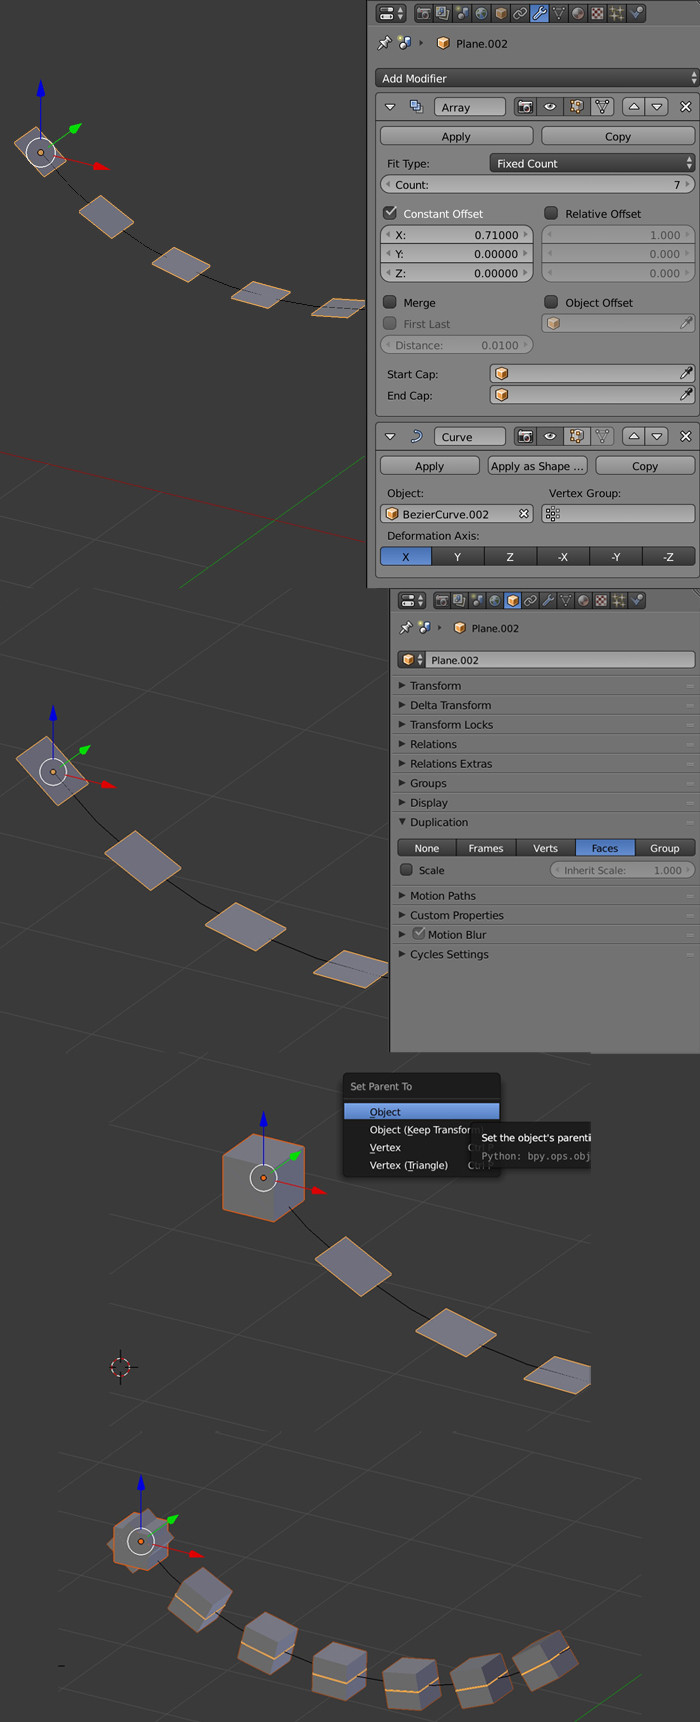
Method to duplicate an object along a curve without deformation in 2.8 with Duplifaces as explained here by Zeauro:
- Create your curve, make sure that the normals go in the right direction, put its origin on its beginning point.
- Create a plane, put it on the same point as the curve origin, apply its scale.
- Give this plane an Array modifier, choose the Count value, choose the Constant Offset mode and increase its value.
- Give the plane a Curve modifier and choose the curve as Object.
- Keep the plane selected and in the Properties panel > Object > Duplication activate Faces.
- Create the object that is supposed to be duplicated, put it on the same point as the curve origin, parent it to the plane, it should be duplicated along the curve.
- If you want your object to stay on the same Z axis all along the curve, select the plane, choose Verts instead of Faces and in Edit mode collapse the mesh with a altM.
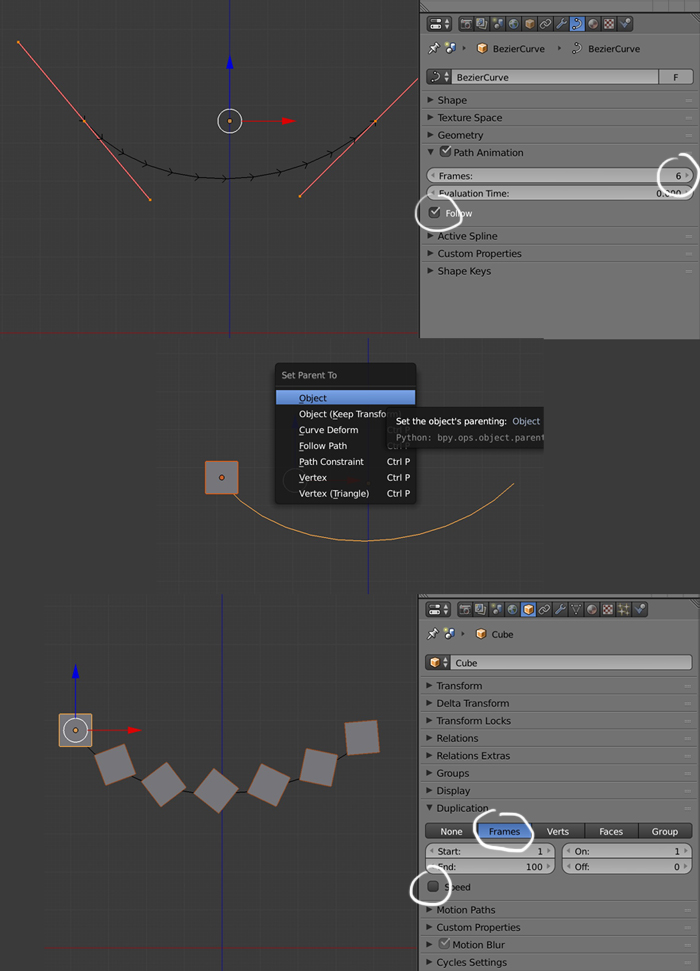
Until the 2.79 we had the Dupliframes method:
- Select the curve, make sure that the normals go in the right direction, in Frames choose the number of duplications you want, enable Follow if you want the duplications to follow the rotate along the curve.
- Put your object to duplicate at the beginning of the curve and parent it to the curve.
- Keep the object selected and in the Properties panel > Object > Duplication, activate Frames, deactivate Speed, it should work.
-
$\begingroup$ But what are we going to do now they're gone? They may have been a 'hack', but they were a very useful modeling tool..I can't figure out how else, for example, to smoothly change the intervals between instances along a curve, without a lot of work. $\endgroup$– Robin Betts ♦Commented Apr 25, 2019 at 17:17
-
$\begingroup$ what the hell? Ok I didn't know that, maybe it will be reimplemented... $\endgroup$ Commented Apr 25, 2019 at 17:44
-
$\begingroup$ someone explains the method here: blenderartists.org/t/… I'm going to dig $\endgroup$ Commented Apr 26, 2019 at 8:32
-
$\begingroup$ Reassuring to see that the reason for removing dupliframes it is incompatibility with the new dependency graph. That makes sense. $\endgroup$– Robin Betts ♦Commented Apr 26, 2019 at 13:05


