9
$\begingroup$

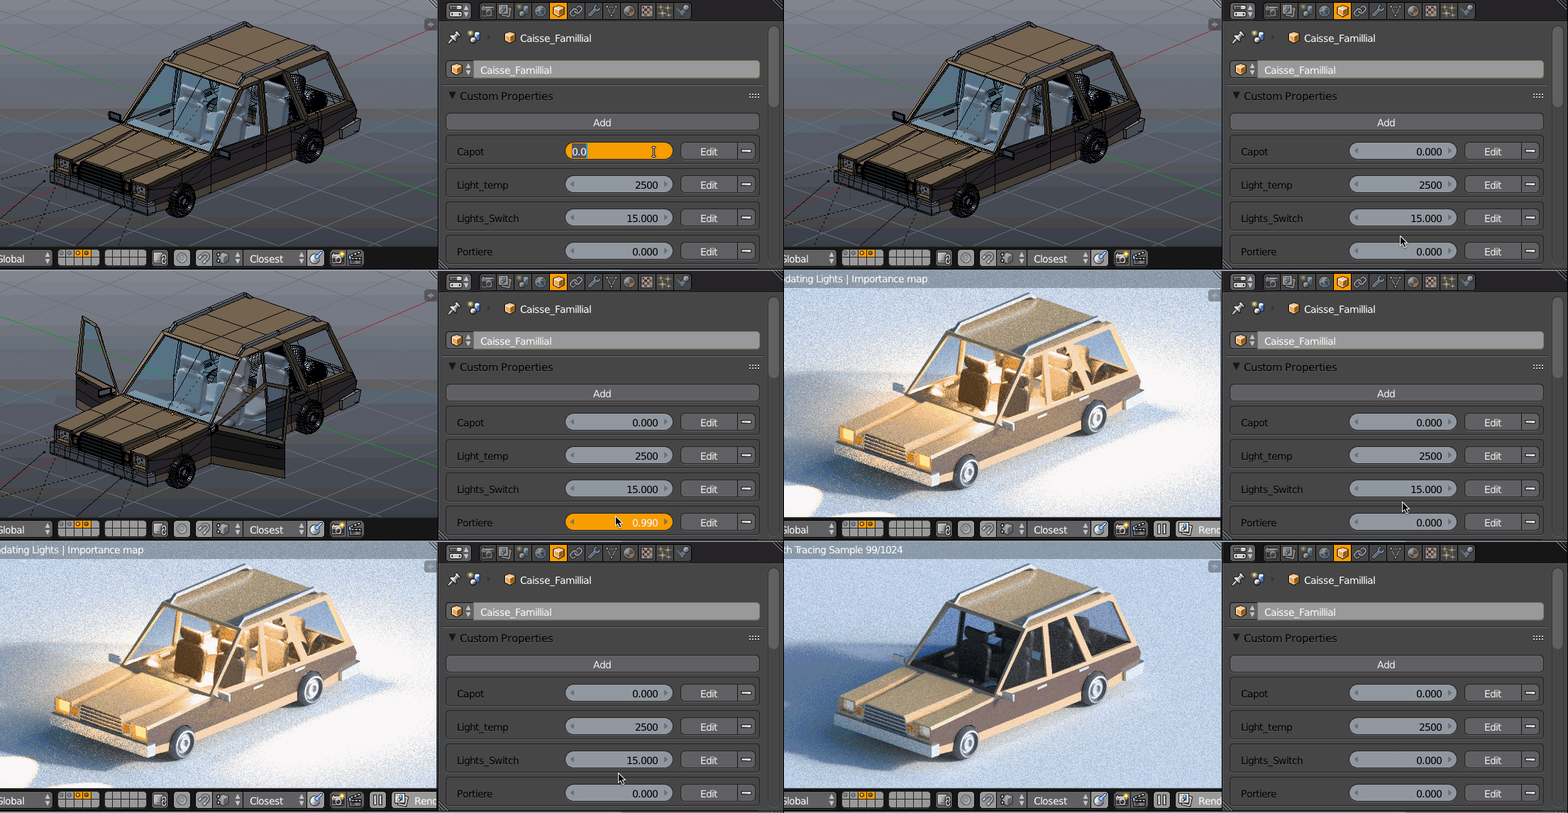
I'm starting to use the amazing, yet simple to use Blender Drivers:

mycartooncar

I'm looking for a way to add other Types of Custom Properties than the default floats.

For instance: Color, Vector, String, Boolean or Integer.

From what I've seen it seems to rely on Python.

$\endgroup$
0

2 Answers 2

15
$\begingroup$

AFAIK you can set up all but boolean by using that type in the property value field. Eg type in integer 1 and you will notice the slider moves by integers, even if min and max are displayed as reals.

For vector floats, typing in (1.0, 0.0, 0.0, 0.0) gives a list usable for rgba values.

>>> C.scene['prop']
<bpy id property array [4]>

>>> C.object.color = C.scene['prop']

>>> [c for c in C.scene['prop']]
[1.0, 0.0, 0.0, 1.0]

To define them with a script is pretty simple too

import bpy
context = bpy.context
scene = context.scene
scene["someprop"] = False

To get a little more into it, the _RNA_UI is where custom properties keep their data, min, max, default, description

import bpy

context = bpy.context
obj = context.object

rna_ui = obj.get('_RNA_UI')
if rna_ui is None:
    obj['_RNA_UI'] = {}
    rna_ui = obj['_RNA_UI']

obj["prop"] = (1.0, 0.0, 0.0, 1.0)
obj["bool"] = 0

rna_ui["bool"] = {"description":"Bool",
                  "default": True,
                  "min":0,
                  "max":1,
                  "soft_min":0,
                  "soft_max":1}

rna_ui["prop"] = {"description": "Color Prop",
                  "default": (1.0, 0.0, 0.0, 0.0),
                  "min": 0.0,
                  "max": 1.0,
                  "soft_min":0.0,
                  "soft_max":1.0,
                  }

You can add these to your own layout

import bpy
from bpy.props import FloatVectorProperty, BoolProperty

class CarPanel(bpy.types.Panel):
    """Creates a Panel in the Object properties window"""
    bl_label = "Car Details"
    bl_idname = "OBJECT_PT_hello"
    bl_space_type = 'PROPERTIES'
    bl_region_type = 'WINDOW'
    bl_context = "object"

    @classmethod
    def poll(cls, context):
        return context.object.get("Capot", False)

    def draw(self, context):
        layout = self.layout

        car = context.object
        layout.prop(car, '["Capot"]')
        #bools don't show well (1 or 0 integer)
        layout.prop(car, "switch")
        layout.prop(car, '["bool"]')
        col = layout.column()
        col.prop(car, '["prop"]')
        # car color property
        row = layout.row()
        row.prop(car, "car_color")
        # object color rgba
        row = layout.row()
        row.prop(car, "color")

def register():
    # define a registered property (available for all Object types size=4 gives rgba)
    bpy.types.Object.car_color = FloatVectorProperty(subtype='COLOR', size=3)
    bpy.types.Object.switch = BoolProperty()
    bpy.utils.register_class(CarPanel)

def unregister():
    bpy.utils.unregister_class(CarPanel)

if __name__ == "__main__":
    register()
$\endgroup$
6
  • $\begingroup$ Thanks. Really useful to me. I guess I was looking for a way to change the UI based on propierty: Boolean -> Tic Box; Array4 -> Color Picker. $\endgroup$
    – melMass
    Commented Dec 28, 2015 at 13:22
  • $\begingroup$ NP, changed a little to show how to make a custom panel for your car. Any object that has a "Capot" custom prop will make the panel show (poll). Change to a more suitable prop. Panel is displayed in the object properties panel, but can be simply moved to 3D UI or Tool panels. Cool model, and drivers and custom props is a great way to "drive" it. $\endgroup$
    – batFINGER
    Commented Dec 28, 2015 at 13:39
  • $\begingroup$ Thanks batFINGER, its pretty much it except the color value is represented as 4 sliders as opposed to a Color Picker. $\endgroup$
    – melMass
    Commented Dec 29, 2015 at 12:16
  • $\begingroup$ To use the colorpicker you need to register a FloatVectorProperty subtype=color blender.org/api/blender_python_api_current/…, or use an existing color property (object or material). $\endgroup$
    – batFINGER
    Commented Dec 29, 2015 at 12:35
  • $\begingroup$ @Akelian updated answer with registered props to show how to make a switch and use the color picker, either from the a defined prop, or using the object color. The registered props using XxxxProperty are available to all objects of that type (via obj.prop) , whereas ID properties are defined on a single object instance (via obj["prop"]) $\endgroup$
    – batFINGER
    Commented Dec 29, 2015 at 12:48
7
$\begingroup$

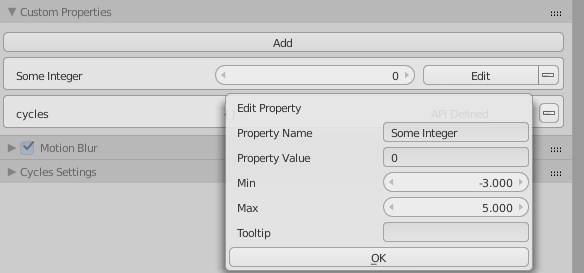
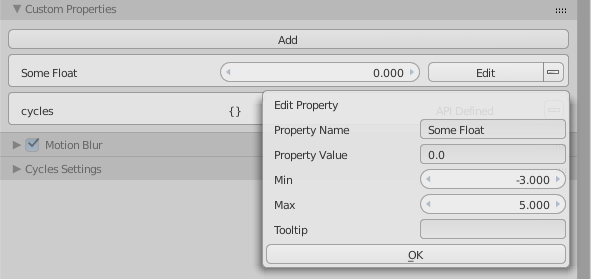
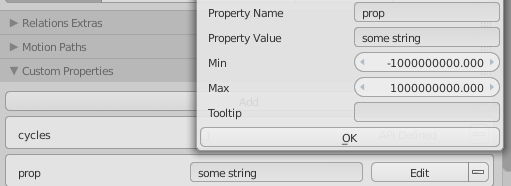
In general press Add or Edit and whatever you type into the Property Value field will be used as the property type (with some exceptions**)

  • For Integer ID property:

    enter image description here

  • Float too.

    enter image description here

  • String, type in a word or a couple of words.

    enter image description here

  • The Boolean is really an Integer with two possible states, 0 and 1. You could limit a property by setting Min and Max to 0 and 1. A TickBox would be great for UI, but sadly this isn't available for ID props (not in a convenient way anyway). (Dec 2015)

  • For Array types (Color, Vector) there's currently not a convenient interface exposed by Custom Properties panel. By this I mean you can make a custom property by setting the value, by typing in (0,0,0) or [0,0,0] or even just 0,0,0

    enter image description here

    But you won't get a UI element like regular bpy.props

Id properties : http://wiki.blender.org/index.php/Dev:Source/Data_System/ID_Property

$\endgroup$

You must log in to answer this question.

Not the answer you're looking for? Browse other questions tagged .