1
$\begingroup$

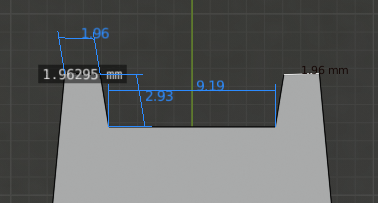
I was playing with measuring tools a couple weeks ago and came back to my project and I forgot how I created a measurement marker on a blender object. The unknown measurement is shown in the accompanying diagram at 1.96295mm in Edit & Object mode.

The blue measurements are from the MeasureIt tool. The black measurement text of 1.96 is when I enabled edge length in the viewport overlay.

So my question is how did I create that 1.96295mm dark highlighted measurement. enter image description here
$\endgroup$

1 Answer 1

1
$\begingroup$

OK,

Figured it out. After disabling MeasureIt addon since that wasn't related and disabling edge-length display in 3d viewport I noticed the protractor icon (measure tool) was selected on the left.

Playing around I realized that you select a vertex point with the left mouse button and drag it towards another vertex. Only after you start dragging you can hold down the Ctrl key to have it snap to another vertex. The result is the measurement in white text highlighted in a black box as displayed in the above attached image.

Some notes:

  1. After selecting the first vertex, make sure not to drag or Ctrl+Drag the left mouse button while over empty space or it might select a vertex hidden below the one you need to select. (Inconsistent)
  2. To delete a measurement, tap on the measurement or the ruler line it created and press X on the keyboard
$\endgroup$

You must log in to answer this question.

Not the answer you're looking for? Browse other questions tagged .