added 529 characters in body
Source Link
risingfall
  • 3.2k
  • 10
  • 19

Well there may be a simpler way than what I'm about to propose. However, while I thought maybe the Shrinkwrap modifier might help, it has some issues. It might be helpful if you could post your blend file.

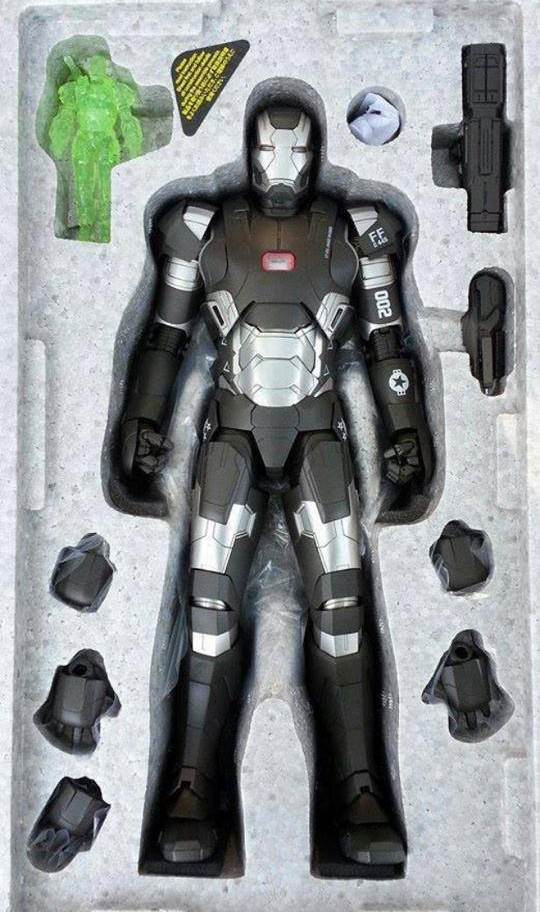
I assume you're trying to make some sort of insert that sort of "nests" around the object, like the foam tray in this picture:

enter image description here

My suggestion: In edit mode select one of the downward-facing faces of your knight, like the bottom of a hoof, or whatever surface faces "down" (or "back") in the package. Now choose Select-->Select Similar-->Normal, and in the bottom part of the tool shelf play with the "threshold" value until you are getting the bottom-and-side surfaces of the mesh. You may also get some unwanted faces in the upper part of the mesh, that's okay for now. Once you have the desired regions selected, duplicate them (Shift-D) then split them into a new object (P).

Go into object mode, select the new object you created, then go into edit mode. with any luck you'll be able to easily select and delete the "wrong" faces. Select linked (L) may allow you to select entire "islands" of wrong faces based on selecting one unwanted face.

Once you have only the correct faces left: select all (type A), Extrude (E), type Z to constrain to the Z axis, and pull upwards to create "sides" for your hull/nest. Without changing the selection, type S, Z, 0 (zero), Enter. That will make the selected vertices coplanar (and, more importantly, make the sides come to a constant height). Finally, type X and choose "dissolve faces". You can delete the ngon that results. You should have a shell that will fit the bottom part of your knight. You can scale it up slightly to allow for a fit, although I think the right way to do this is with Shrink-Fatten (edit mode, select all, Alt-S).

Modeling the rest of the insert (the flat faces) could be approached in various ways. You might want to add a plane (in edit mode), center it over your hull surrounding the top edges, delete the plane's face (only, leaving the vertices and edges), select the edge loop around the top of the "nest" and the edge loop of the plane, and choose "Mesh-->Faces-->Fill" to create non-ngon faces.

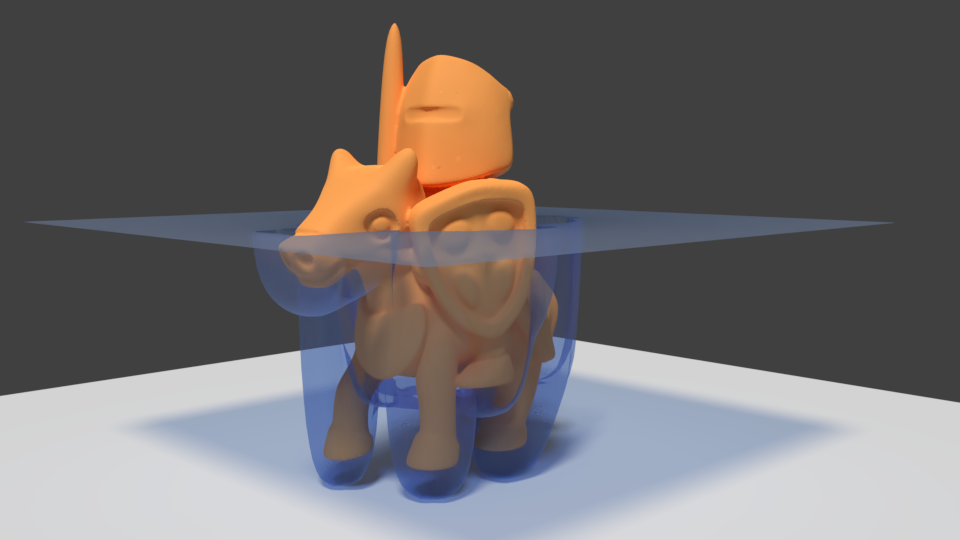
EDIT: lol your knight figure is way more complicated to work with - I remeshed it to get somthing simpler to manipulate. After creating the hull as described above, it was still too funky to work directly, so I ended up creating a subdivided plane and using a shrinkwrap modifier (Mode: Project, Axis: Z, Direction: Negative) that wrapped over the hull object. And then a bunch of tweaking, shrink/fattening, subsurfaces, etc. Wish it was a simple process to describe.

enter image description here

Well there may be a simpler way than what I'm about to propose. However, while I thought maybe the Shrinkwrap modifier might help, it has some issues. It might be helpful if you could post your blend file.

I assume you're trying to make some sort of insert that sort of "nests" around the object, like the foam tray in this picture:

enter image description here

My suggestion: In edit mode select one of the downward-facing faces of your knight, like the bottom of a hoof, or whatever surface faces "down" (or "back") in the package. Now choose Select-->Select Similar-->Normal, and in the bottom part of the tool shelf play with the "threshold" value until you are getting the bottom-and-side surfaces of the mesh. You may also get some unwanted faces in the upper part of the mesh, that's okay for now. Once you have the desired regions selected, duplicate them (Shift-D) then split them into a new object (P).

Go into object mode, select the new object you created, then go into edit mode. with any luck you'll be able to easily select and delete the "wrong" faces. Select linked (L) may allow you to select entire "islands" of wrong faces based on selecting one unwanted face.

Once you have only the correct faces left: select all (type A), Extrude (E), type Z to constrain to the Z axis, and pull upwards to create "sides" for your hull/nest. Without changing the selection, type S, Z, 0 (zero), Enter. That will make the selected vertices coplanar (and, more importantly, make the sides come to a constant height). Finally, type X and choose "dissolve faces". You can delete the ngon that results. You should have a shell that will fit the bottom part of your knight. You can scale it up slightly to allow for a fit, although I think the right way to do this is with Shrink-Fatten (edit mode, select all, Alt-S).

Modeling the rest of the insert (the flat faces) could be approached in various ways. You might want to add a plane (in edit mode), center it over your hull surrounding the top edges, delete the plane's face (only, leaving the vertices and edges), select the edge loop around the top of the "nest" and the edge loop of the plane, and choose "Mesh-->Faces-->Fill" to create non-ngon faces.

EDIT: lol your knight figure is way more complicated to work with - I remeshed it to get somthing simpler to manipulate. After creating the hull as described above, it was still too funky to work directly, so I ended up creating a subdivided plane and using a shrinkwrap modifier (Mode: Project, Axis: Z, Direction: Negative) that wrapped over the hull object. And then a bunch of tweaking, shrink/fattening, subsurfaces, etc. Wish it was a simple process to describe.
enter image description here

Source Link
risingfall
  • 3.2k
  • 10
  • 19

Well there may be a simpler way than what I'm about to propose. However, while I thought maybe the Shrinkwrap modifier might help, it has some issues. It might be helpful if you could post your blend file.

I assume you're trying to make some sort of insert that sort of "nests" around the object, like the foam tray in this picture:

enter image description here

My suggestion: In edit mode select one of the downward-facing faces of your knight, like the bottom of a hoof, or whatever surface faces "down" (or "back") in the package. Now choose Select-->Select Similar-->Normal, and in the bottom part of the tool shelf play with the "threshold" value until you are getting the bottom-and-side surfaces of the mesh. You may also get some unwanted faces in the upper part of the mesh, that's okay for now. Once you have the desired regions selected, duplicate them (Shift-D) then split them into a new object (P).

Go into object mode, select the new object you created, then go into edit mode. with any luck you'll be able to easily select and delete the "wrong" faces. Select linked (L) may allow you to select entire "islands" of wrong faces based on selecting one unwanted face.

Once you have only the correct faces left: select all (type A), Extrude (E), type Z to constrain to the Z axis, and pull upwards to create "sides" for your hull/nest. Without changing the selection, type S, Z, 0 (zero), Enter. That will make the selected vertices coplanar (and, more importantly, make the sides come to a constant height). Finally, type X and choose "dissolve faces". You can delete the ngon that results. You should have a shell that will fit the bottom part of your knight. You can scale it up slightly to allow for a fit, although I think the right way to do this is with Shrink-Fatten (edit mode, select all, Alt-S).

Modeling the rest of the insert (the flat faces) could be approached in various ways. You might want to add a plane (in edit mode), center it over your hull surrounding the top edges, delete the plane's face (only, leaving the vertices and edges), select the edge loop around the top of the "nest" and the edge loop of the plane, and choose "Mesh-->Faces-->Fill" to create non-ngon faces.