grammar fix
Source Link
Carlo
  • 24.9k
  • 2
  • 50
  • 93

Sketch curve, convert to mesh and then refine.

Sketch pattern main feature:

I would start from the sketching the main lines of the pattern with theusing a bezier curvebezier curve. First thing to place are the startingstart and end point. Grab them around upon a reference image. Then adjust the handles orientation to match the reference curve's tangency (vertical) like the omageimage below is showing:

enter image description here.

Create main geometry

Now that we have the curve, we can set a bevel objectbevel object (the black arrow in the picture is pointing mine) to start placingplace some faces to work with. At this point you can temporarily add modifiers to the object to get an idea of the final apparence of the pattern.:

enter image description here

Convert to mesh and edit the object

As for the final model I plan to use the subdivision surface modifier, I kept the curve's resolution low before converting the curve to meshconverting the curve to mesh. After this a, run the symmetrizesymmetrize command to mirror and duplicate the mesh around the origin,. Then clean up a bit the model by deleting unecessary faces:

enter image description here

You'll have to repeat the operation to take care of the border in order to achieaveachieve a fully tileable mesh. Fill the voids with the faces paying attention to not work outside the imaginary boundaries of the figure. You should come up with something similar. to the image below:

enter image description here

Final retouches and modifiers

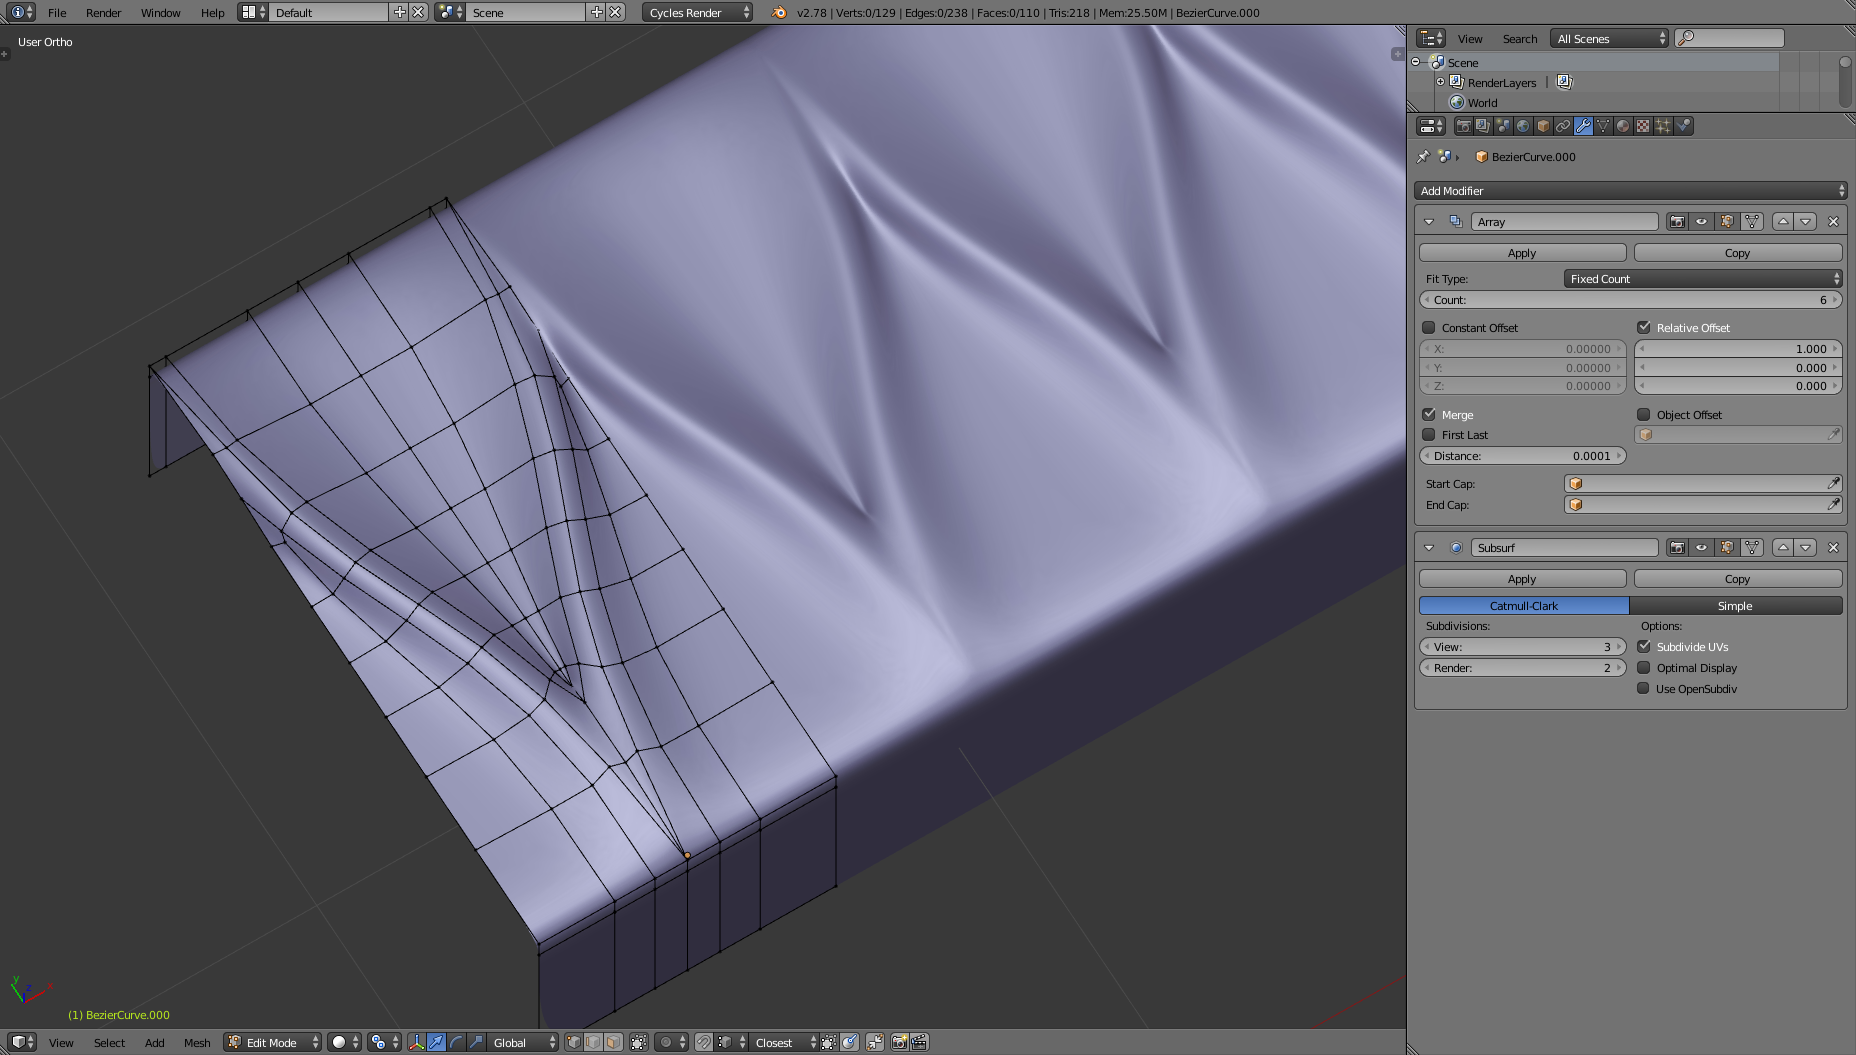
Now that the basic shape is ready you can tweaktweak each verticesvertex position manually, with proportional edit enabled, or even with the sculpting tools, or using the smooth vertex command... in order to achieve the right shape. You can also alteralter the topologytopology with the knife tool, edge collapsing, deleting and creating faces... till you reach a satifying result.

enter image description here

Sketch curve, convert to mesh and then refine.

Sketch pattern main feature:

I would start from the sketching the main lines of the pattern with the a bezier curve. First thing to place are the starting and end point. Grab them around upon a reference image. Then adjust the handles orientation to match the reference curve's tangency (vertical) like the omage below is showing:

enter image description here.

Create main geometry

Now that we have the curve, we can set a bevel object (the black arrow in the picture is pointing mine) to start placing some faces to work with. At this point you can temporarily add modifiers to get an idea of the final apparence of the pattern.

enter image description here

Convert to mesh and edit the object

As for the final model I plan to use the subdivision surface modifier, I kept the curve's resolution low before converting the curve to mesh. After this a run the symmetrize command to mirror and duplicate the mesh around the origin, clean up a bit the model:

enter image description here

You'll have to repeat the operation to take care of the border in order to achieave a fully tileable mesh. Fill the voids with the faces paying attention to not work outside the imaginary boundaries of the figure. You should come up with something similar.

enter image description here

Final retouches and modifiers

Now that the basic shape is ready you can tweak each vertices manually, with proportional edit enabled, or even the sculpting tools, or using the smooth vertex command... in order to achieve the right shape. You can also alter the topology with the knife tool, edge collapsing, deleting and creating faces... till you reach a satifying result.
enter image description here

Sketch curve, convert to mesh and then refine.

Sketch pattern main feature:

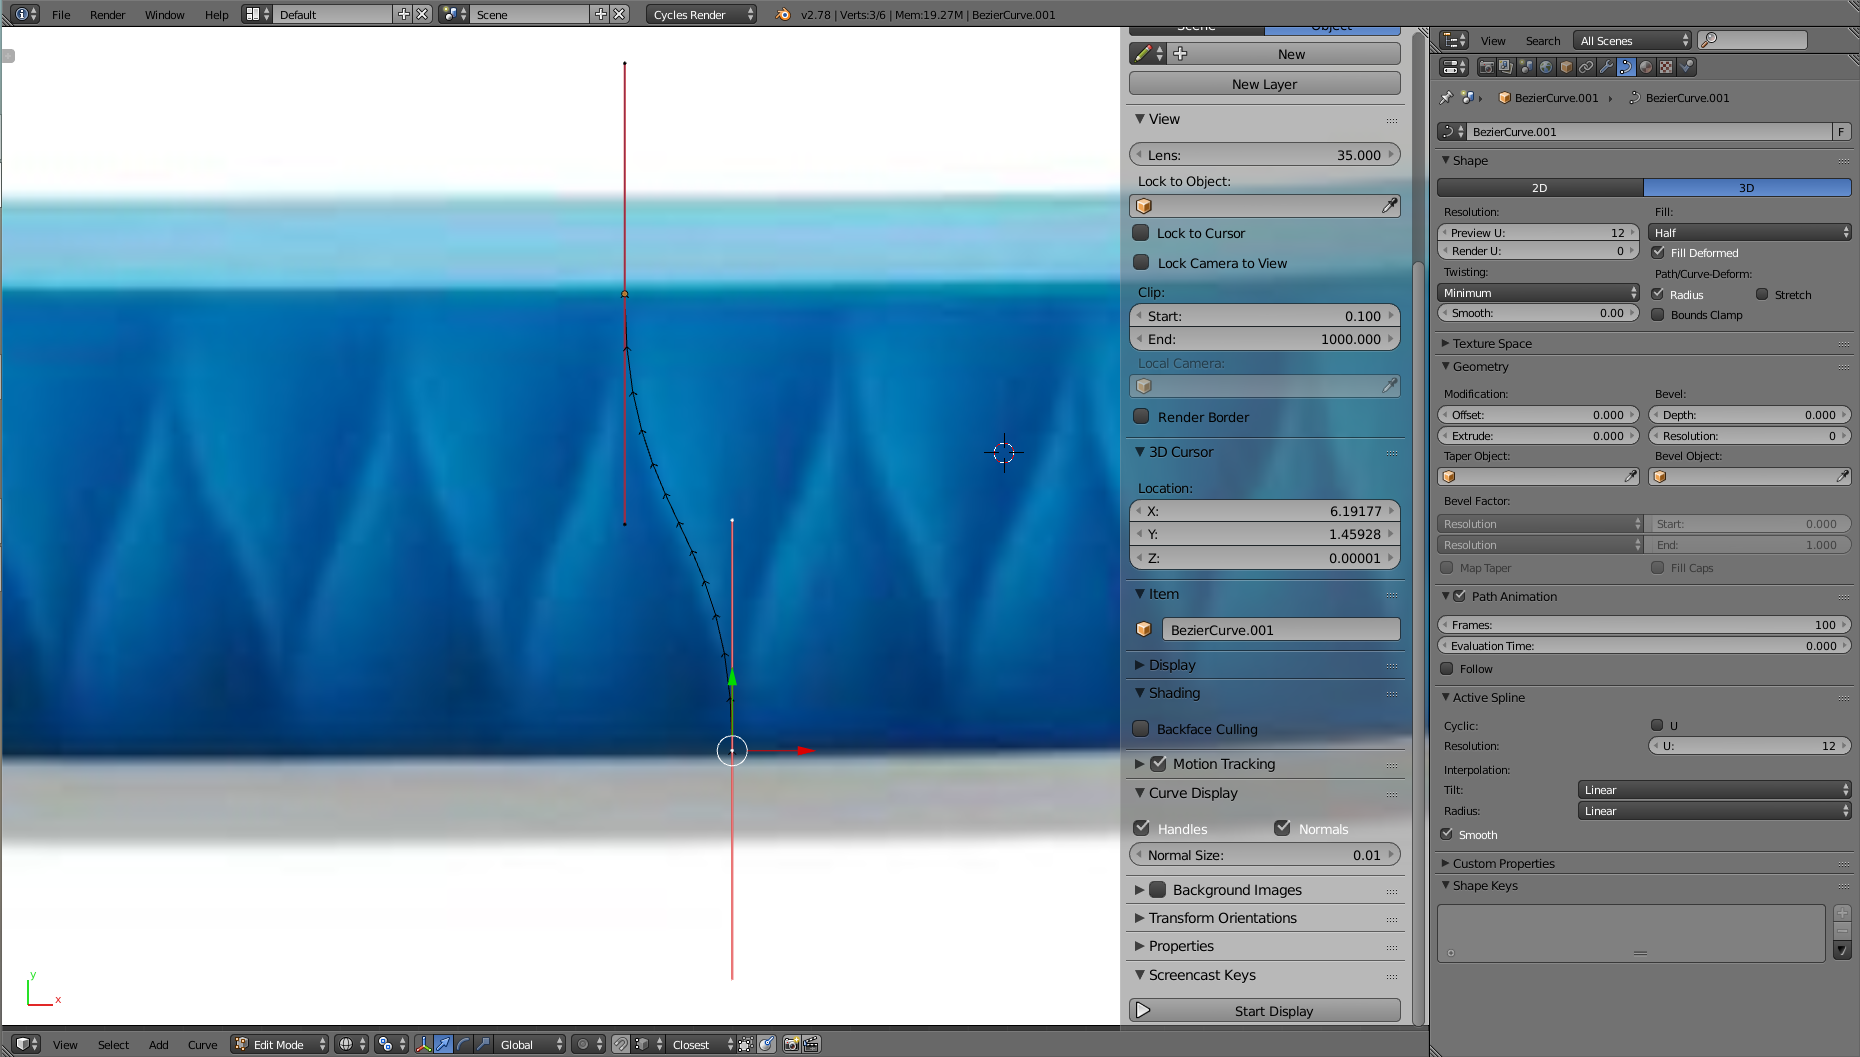
I would start from the sketching the main lines of the pattern using a bezier curve. First thing to place are the start and end point. Grab them around upon a reference image. Then adjust the handles orientation to match the reference curve's tangency (vertical) like the image below is showing:

enter image description here.

Create main geometry

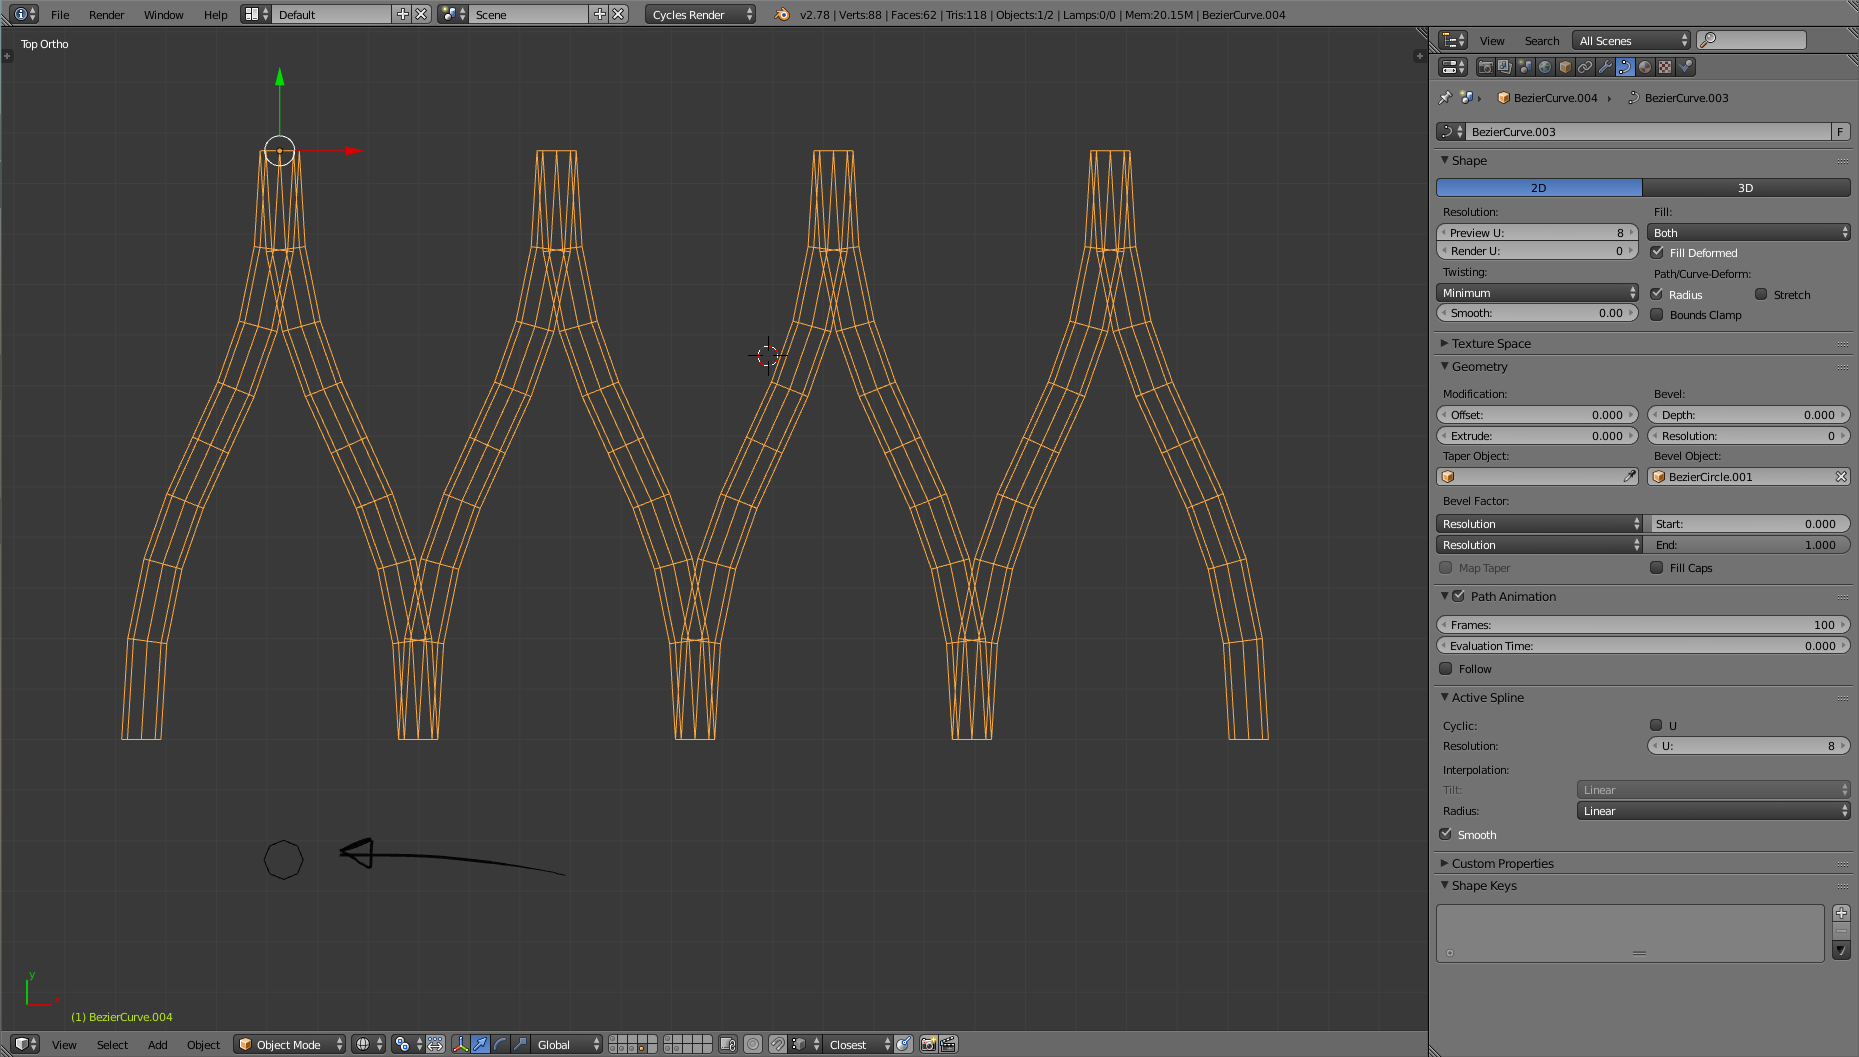
Now that we have the curve, set a bevel object (the black arrow in the picture is pointing mine) to place some faces to work with. At this point you can temporarily add modifiers to the object to get an idea of the final apparence of the pattern:

enter image description here

Convert to mesh and edit the object

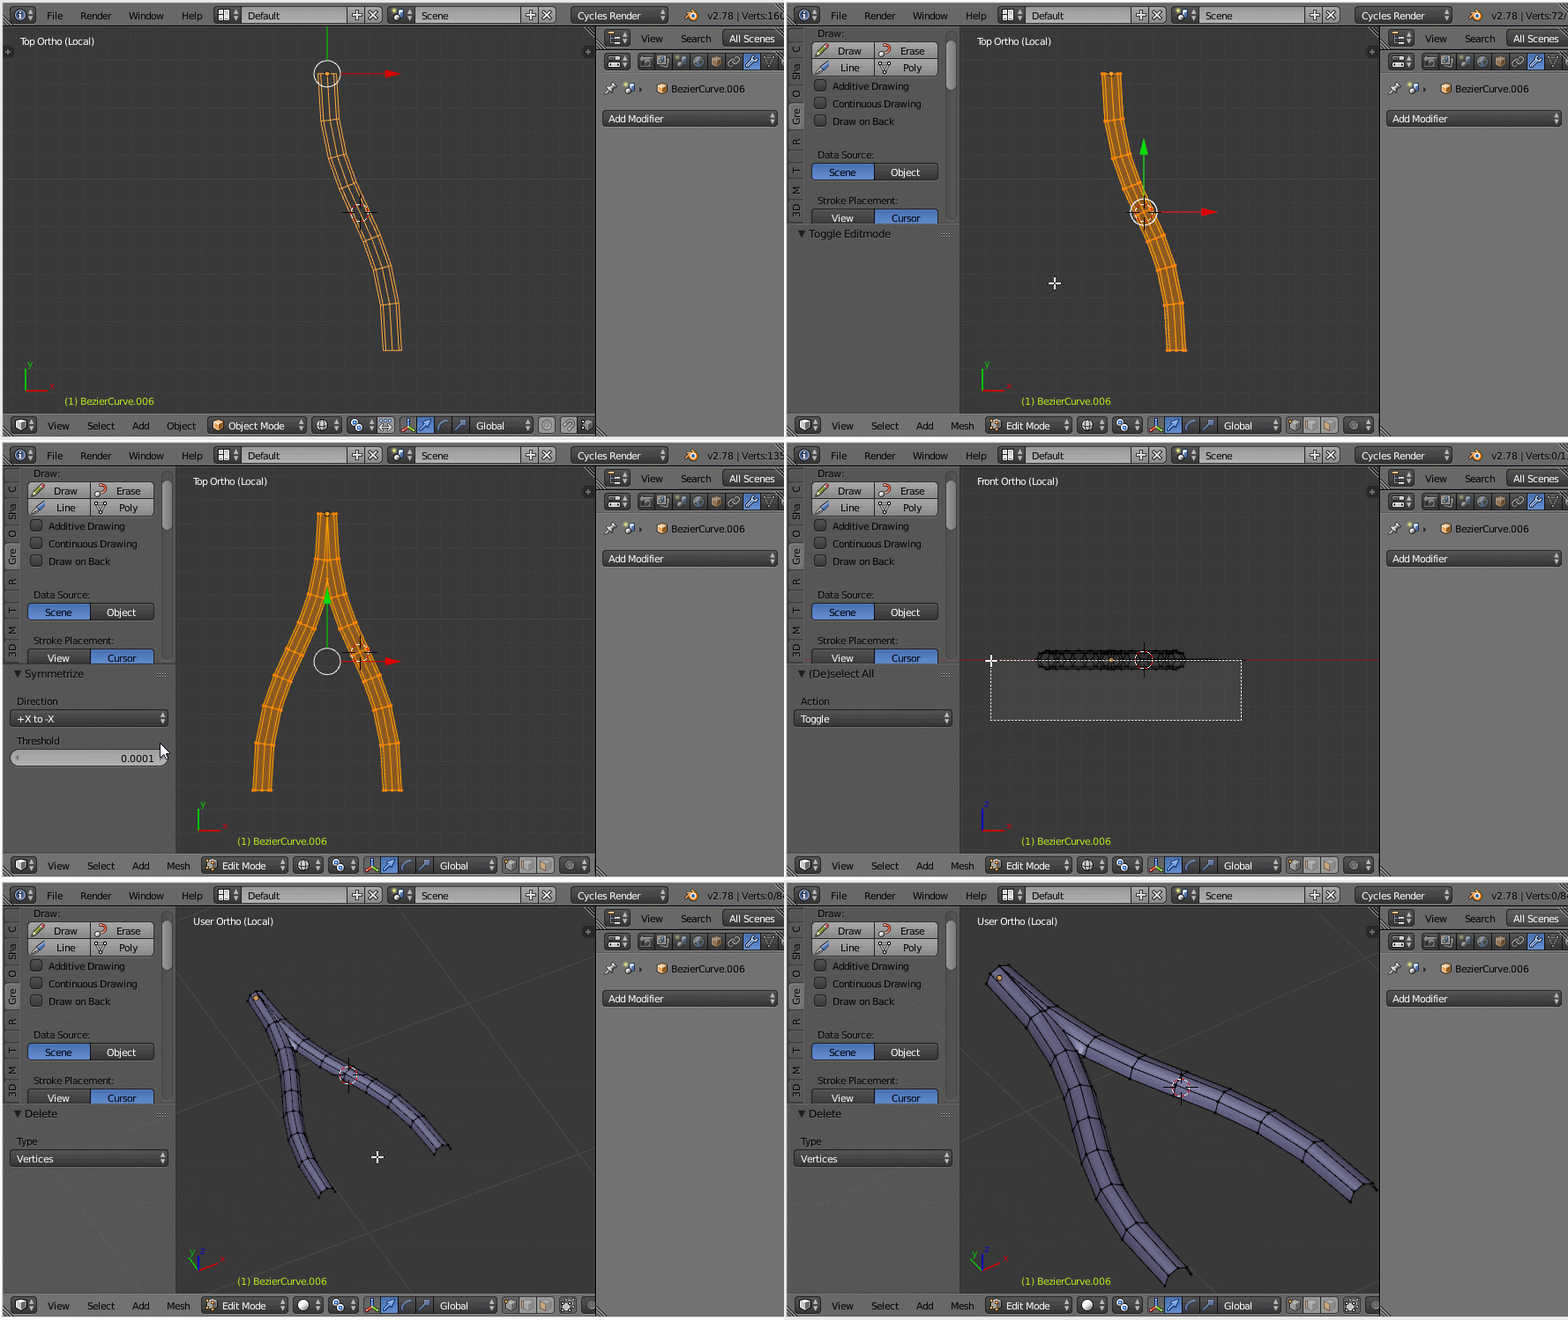
As for the final model I plan to use the subdivision surface modifier, I kept the curve's resolution low before converting the curve to mesh. After this, run the symmetrize command to mirror and duplicate the mesh around the origin. Then clean up a bit the model by deleting unecessary faces:

enter image description here

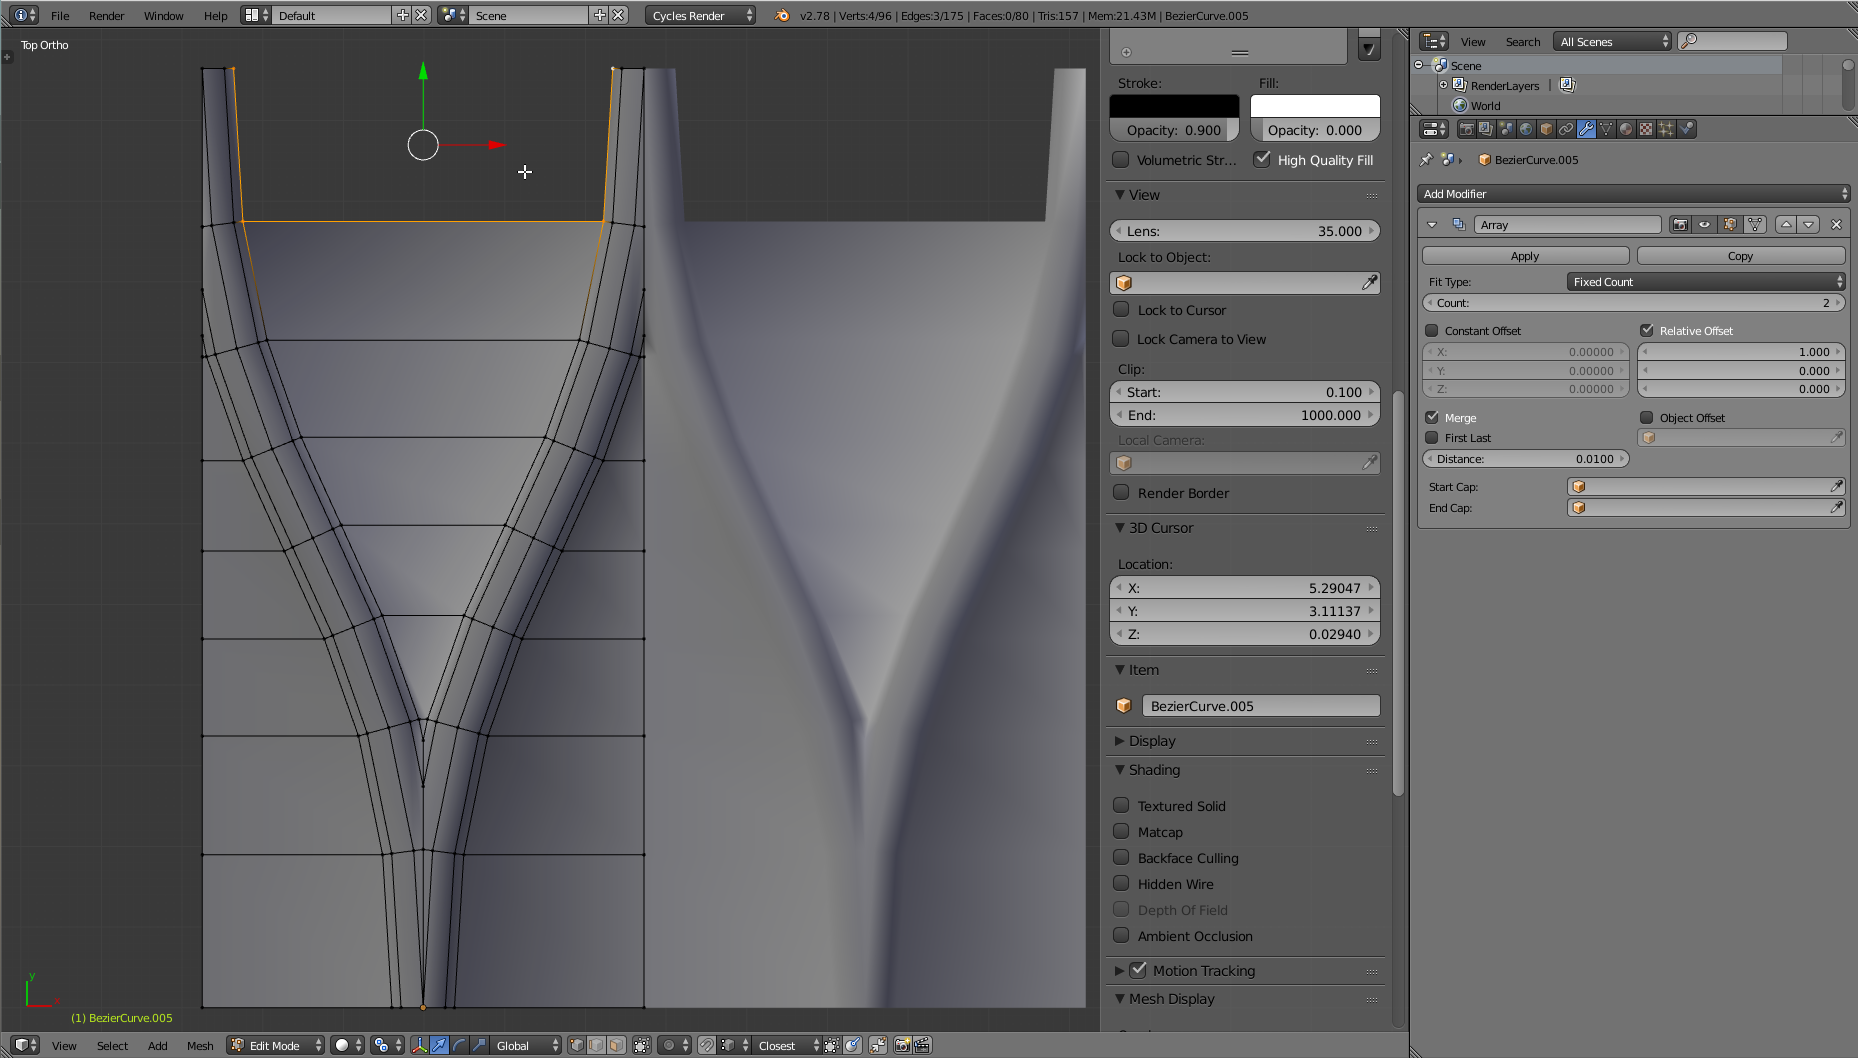
You'll have to repeat the operation to take care of the border in order to achieve a fully tileable mesh. Fill the voids with the faces paying attention to not work outside the imaginary boundaries of the figure. You should come up with something similar to the image below:

enter image description here

Final retouches and modifiers

Now that the basic shape is ready you can tweak each vertex position manually, with proportional edit enabled, or even with the sculpting tools, or using the smooth vertex command... in order to achieve the right shape. You can also alter the topology with the knife tool, edge collapsing, deleting and creating faces... till you reach a satifying result.
enter image description here

Source Link
Carlo
  • 24.9k
  • 2
  • 50
  • 93

Sketch curve, convert to mesh and then refine.

Sketch pattern main feature:

I would start from the sketching the main lines of the pattern with the a bezier curve. First thing to place are the starting and end point. Grab them around upon a reference image. Then adjust the handles orientation to match the reference curve's tangency (vertical) like the omage below is showing:

enter image description here.

Create main geometry

Now that we have the curve, we can set a bevel object (the black arrow in the picture is pointing mine) to start placing some faces to work with. At this point you can temporarily add modifiers to get an idea of the final apparence of the pattern.

enter image description here

Convert to mesh and edit the object

As for the final model I plan to use the subdivision surface modifier, I kept the curve's resolution low before converting the curve to mesh. After this a run the symmetrize command to mirror and duplicate the mesh around the origin, clean up a bit the model:

enter image description here

You'll have to repeat the operation to take care of the border in order to achieave a fully tileable mesh. Fill the voids with the faces paying attention to not work outside the imaginary boundaries of the figure. You should come up with something similar.

enter image description here

Final retouches and modifiers

Now that the basic shape is ready you can tweak each vertices manually, with proportional edit enabled, or even the sculpting tools, or using the smooth vertex command... in order to achieve the right shape. You can also alter the topology with the knife tool, edge collapsing, deleting and creating faces... till you reach a satifying result.
enter image description here