Commonmark migration
Source Link

It is hard to see the "how to" in the context you describe, but here is an approach for rigging the eyes.

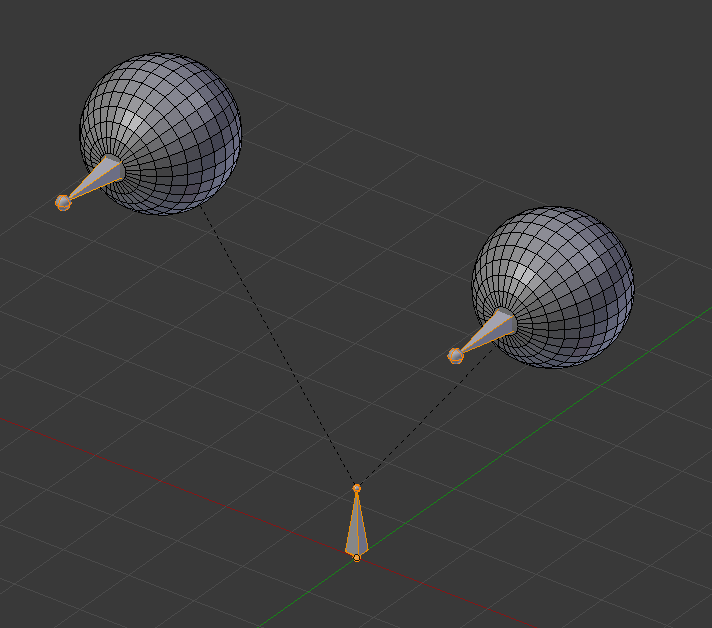
  • Create an armature
  • Add bones for the eyes to this armature (keep a main bone, extrude and set it as not connected bone)
  • Place these bones to the center of the eyeball (place the 3D cursor in the center and place the bone at the 3D cursor, use Shift + S)
  • In object mode, select the eyes, then the armature and Ctrl + P and "with automatic weights"

At this step we may have something like this :

[![enter image description here][1]][1]enter image description here
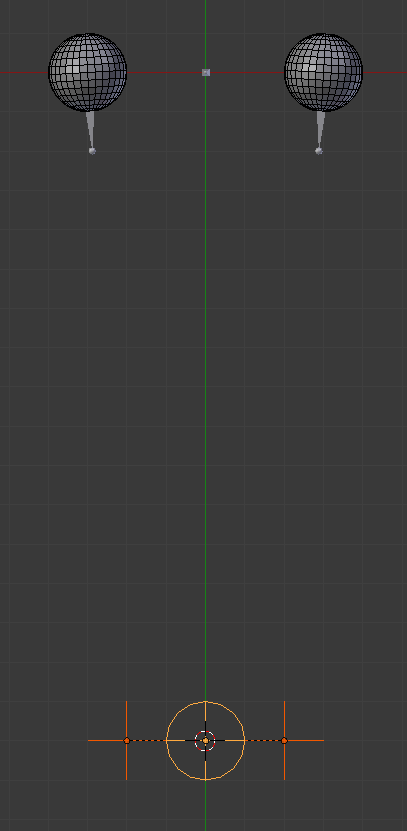
  • Create 3 empties (bottom of the image below)

2 empties for the eyes, with a little convergence. 1 empty to drive the 2 previous. Parent the two first with the last empty.

[![enter image description here][2]][2]enter image description here
  • Back to the eyes armature

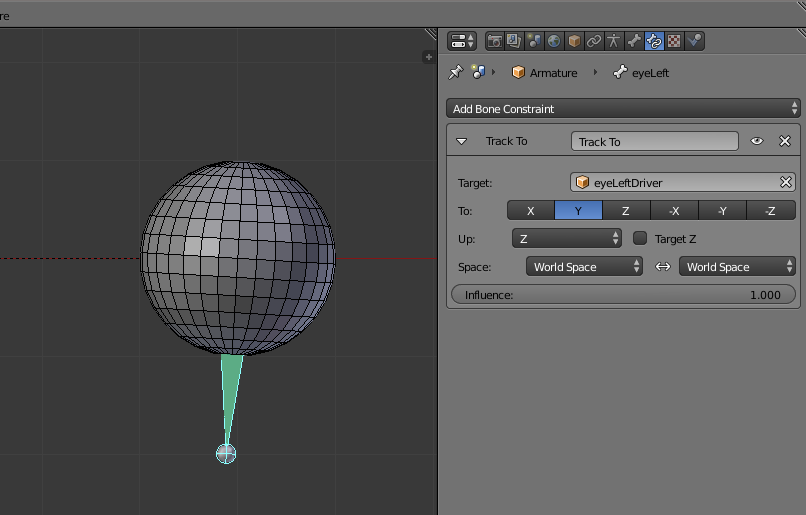
Go to pose mode (for a direct answer, this point 'pose mode' is probably the problem in your question).

Select the left bone and add a "track to" constraint. Set the corresponding left empty as target. Then do the same for the right eye.

[![enter image description here][3]][3]enter image description here
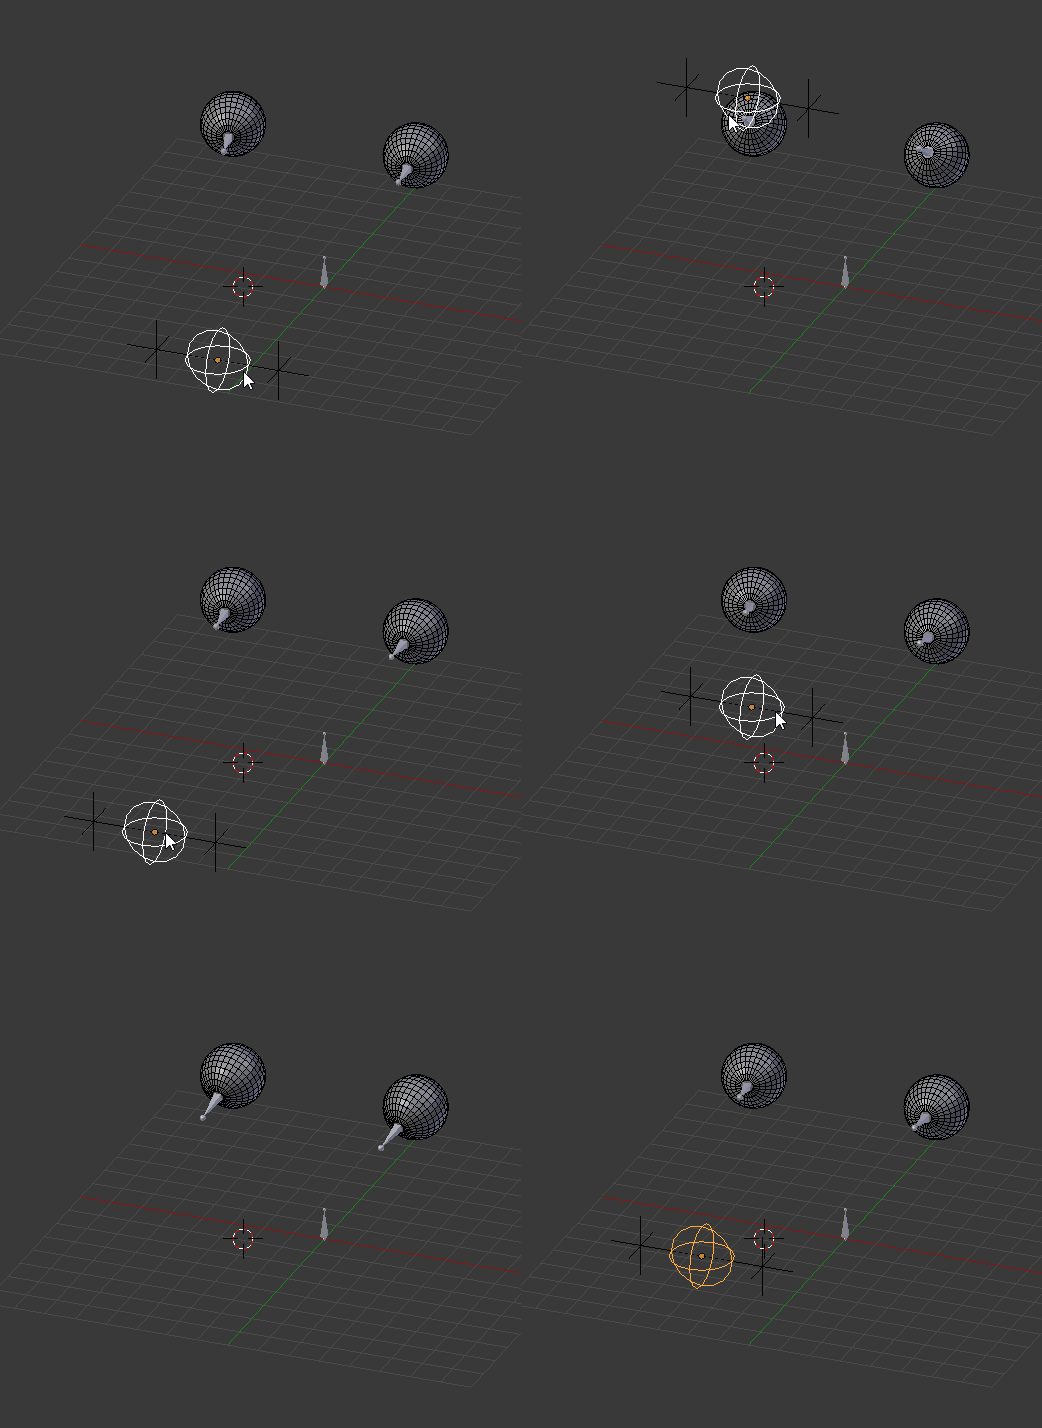
It is done :

[![enter image description here][4]][4]enter image description here

Eventually, you can parent this armature to your current armature, but I think this is better to incorporate all in your armature.

[1]: https://i.sstatic.net/B9FhE.png [2]: https://i.sstatic.net/nbToh.png [3]: https://i.sstatic.net/jxRro.png [4]: https://i.sstatic.net/fxTCz.gif

It is hard to see the "how to" in the context you describe, but here is an approach for rigging the eyes.

  • Create an armature
  • Add bones for the eyes to this armature (keep a main bone, extrude and set it as not connected bone)
  • Place these bones to the center of the eyeball (place the 3D cursor in the center and place the bone at the 3D cursor, use Shift + S)
  • In object mode, select the eyes, then the armature and Ctrl + P and "with automatic weights"

At this step we may have something like this :

[![enter image description here][1]][1]

  • Create 3 empties (bottom of the image below)

2 empties for the eyes, with a little convergence. 1 empty to drive the 2 previous. Parent the two first with the last empty.

[![enter image description here][2]][2]

  • Back to the eyes armature

Go to pose mode (for a direct answer, this point 'pose mode' is probably the problem in your question).

Select the left bone and add a "track to" constraint. Set the corresponding left empty as target. Then do the same for the right eye.

[![enter image description here][3]][3]

It is done :

[![enter image description here][4]][4]
Eventually, you can parent this armature to your current armature, but I think this is better to incorporate all in your armature.

[1]: https://i.sstatic.net/B9FhE.png [2]: https://i.sstatic.net/nbToh.png [3]: https://i.sstatic.net/jxRro.png [4]: https://i.sstatic.net/fxTCz.gif

It is hard to see the "how to" in the context you describe, but here is an approach for rigging the eyes.

  • Create an armature
  • Add bones for the eyes to this armature (keep a main bone, extrude and set it as not connected bone)
  • Place these bones to the center of the eyeball (place the 3D cursor in the center and place the bone at the 3D cursor, use Shift + S)
  • In object mode, select the eyes, then the armature and Ctrl + P and "with automatic weights"

At this step we may have something like this :

enter image description here

  • Create 3 empties (bottom of the image below)

2 empties for the eyes, with a little convergence. 1 empty to drive the 2 previous. Parent the two first with the last empty.

enter image description here

  • Back to the eyes armature

Go to pose mode (for a direct answer, this point 'pose mode' is probably the problem in your question).

Select the left bone and add a "track to" constraint. Set the corresponding left empty as target. Then do the same for the right eye.

enter image description here

It is done :

enter image description here

Eventually, you can parent this armature to your current armature, but I think this is better to incorporate all in your armature.

replaced http://blend-exchange.giantcowfilms.com with https://blend-exchange.giantcowfilms.com
Source Link

It is hard to see the "how to" in the context you describe, but here is an approach for rigging the eyes.

  • Create an armature
  • Add bones for the eyes to this armature (keep a main bone, extrude and set it as not connected bone)
  • Place these bones to the center of the eyeball (place the 3D cursor in the center and place the bone at the 3D cursor, use Shift + S)
  • In object mode, select the eyes, then the armature and Ctrl + P and "with automatic weights"

At this step we may have something like this :

[![enter image description here][1]][1]

  • Create 3 empties (bottom of the image below)

2 empties for the eyes, with a little convergence. 1 empty to drive the 2 previous. Parent the two first with the last empty.

[![enter image description here][2]][2]

  • Back to the eyes armature

Go to pose mode (for a direct answer, this point 'pose mode' is probably the problem in your question).

Select the left bone and add a "track to" constraint. Set the corresponding left empty as target. Then do the same for the right eye.

[![enter image description here][3]][3]

It is done :

[![enter image description here][4]][4]

Eventually, you can parent this armature to your current armature, but I think this is better to incorporate all in your armature.

http://blend-exchange.giantcowfilms.com/embedImage.png?bid=1552 [1]: https://i.sstatic.net/B9FhE.png [2]: https://i.sstatic.net/nbToh.png [3]: https://i.sstatic.net/jxRro.png [4]: https://i.sstatic.net/fxTCz.gif

It is hard to see the "how to" in the context you describe, but here is an approach for rigging the eyes.

  • Create an armature
  • Add bones for the eyes to this armature (keep a main bone, extrude and set it as not connected bone)
  • Place these bones to the center of the eyeball (place the 3D cursor in the center and place the bone at the 3D cursor, use Shift + S)
  • In object mode, select the eyes, then the armature and Ctrl + P and "with automatic weights"

At this step we may have something like this :

[![enter image description here][1]][1]

  • Create 3 empties (bottom of the image below)

2 empties for the eyes, with a little convergence. 1 empty to drive the 2 previous. Parent the two first with the last empty.

[![enter image description here][2]][2]

  • Back to the eyes armature

Go to pose mode (for a direct answer, this point 'pose mode' is probably the problem in your question).

Select the left bone and add a "track to" constraint. Set the corresponding left empty as target. Then do the same for the right eye.

[![enter image description here][3]][3]

It is done :

[![enter image description here][4]][4]

Eventually, you can parent this armature to your current armature, but I think this is better to incorporate all in your armature.

[1]: https://i.sstatic.net/B9FhE.png [2]: https://i.sstatic.net/nbToh.png [3]: https://i.sstatic.net/jxRro.png [4]: https://i.sstatic.net/fxTCz.gif

added 110 characters in body
Source Link
lemon
  • 60.8k
  • 3
  • 68
  • 141

It is hard to see the "how to" in the context you describe, but here is an approach for rigging the eyes.

  • Create an armature
  • Add bones for the eyes to this armature (keep a main bone, extrude and set it as not connected bone)
  • Place these bones to the center of the eyeball (place the 3D cursor in the center and place the bone at the 3D cursor, use Shift + S)
  • In object mode, select the eyes, then the armature and Ctrl + P and "with automatic weights"

At this step we may have something like this :

[![enter image description here][1]][1]

  • Create 3 empties (bottom of the image below)

2 empties for the eyes, with a little convergence. 1 empty to drive the 2 previous. Parent the two first with the last empty.

[![enter image description here][2]][2]

  • Back to the eyes armature

Go to pose mode (for a direct answer, this point 'pose mode' is probably the problem in your question).

Select the left bone and add a "track to" constraint. Set the corresponding left empty as target. Then do the same for the right eye.

[![enter image description here][3]][3]

It is done :

[![enter image description here][4]][4]

Eventually, you can parent this armature to your current armature, but I think this is better to incorporate all in your armature.

http://blend-exchange.giantcowfilms.com/embedImage.png?bid=1552 [1]: https://i.sstatic.net/B9FhE.png [2]: https://i.sstatic.net/nbToh.png [3]: https://i.sstatic.net/jxRro.png [4]: https://i.sstatic.net/fxTCz.gif

It is hard to see the "how to" in the context you describe, but here is an approach for rigging the eyes.

  • Create an armature
  • Add bones for the eyes to this armature (keep a main bone, extrude and set it as not connected bone)
  • Place these bones to the center of the eyeball (place the 3D cursor in the center and place the bone at the 3D cursor, use Shift + S)
  • In object mode, select the eyes, then the armature and Ctrl + P and "with automatic weights"

At this step we may have something like this :

[![enter image description here][1]][1]

  • Create 3 empties (bottom of the image below)

2 empties for the eyes, with a little convergence. 1 empty to drive the 2 previous. Parent the two first with the last empty.

[![enter image description here][2]][2]

  • Back to the eyes armature

Go to pose mode (for a direct answer, this point 'pose mode' is probably the problem in your question).

Select the left bone and add a "track to" constraint. Set the corresponding left empty as target. Then do the same for the right eye.

[![enter image description here][3]][3]

It is done :

[![enter image description here][4]][4]

Eventually, you can parent this armature to your current armature, but I think this is better to incorporate all in your armature.

http://blend-exchange.giantcowfilms.com/embedImage.png?bid=1552 [1]: https://i.sstatic.net/B9FhE.png [2]: https://i.sstatic.net/nbToh.png [3]: https://i.sstatic.net/jxRro.png [4]: https://i.sstatic.net/fxTCz.gif

Source Link
lemon
  • 60.8k
  • 3
  • 68
  • 141
Loading