added 186 characters in body
Source Link
Timmethy
  • 361
  • 1
  • 16

As KickAir8p mentioned using subsurface might improve the skin. Concerning the lighting, your model has a bright light above the head pointing downwards. Your reference seems to be lit from the front (a bit to the left) and only slightly raised. Most likely there's also some additional lighting.

When you want to figure out how an image is lit it helps to convert it to black and white. Then it is easier to see where shadows and highlight are. If you know where the shadows are (below the chin in this case) you can "reverse engineer" the position of the lamp(s).

Edit: I

I took a look at your file. First thing: the heads scale was off. It was almost 1m big, so I scaled it down to a roughly human size and applied the scale .

Second: You have a lot of lamps in the file.   

1enter image description here You
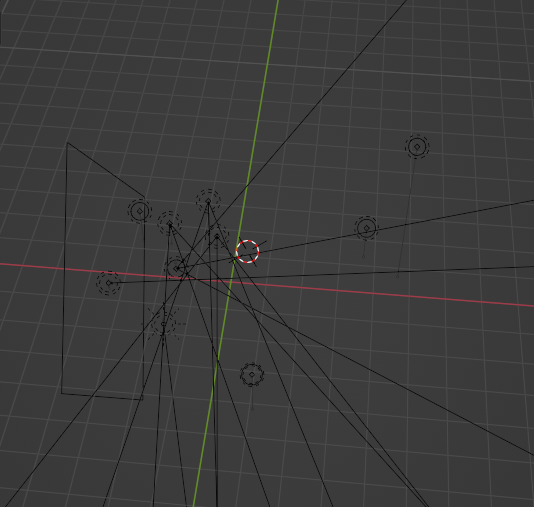
You can check some tutorials on how photographers set up their lighting when shooting portraits. It's mostly not more then 2-4 light sources.

I quickly set up a material for the skin:   

2enter image description here and
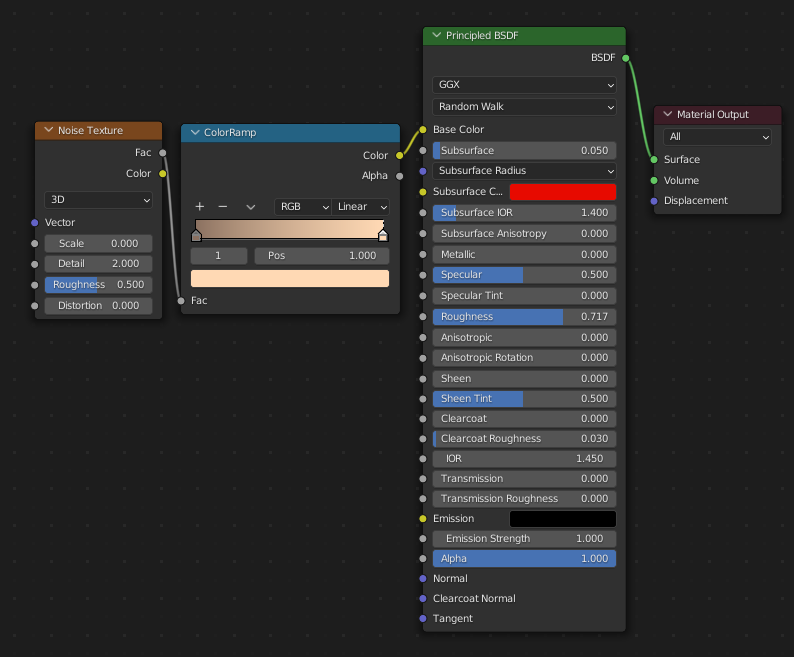
and reduced the Specular and Roughness values on your hair. This is how it turns out in Eevee:   

3enter image description here And
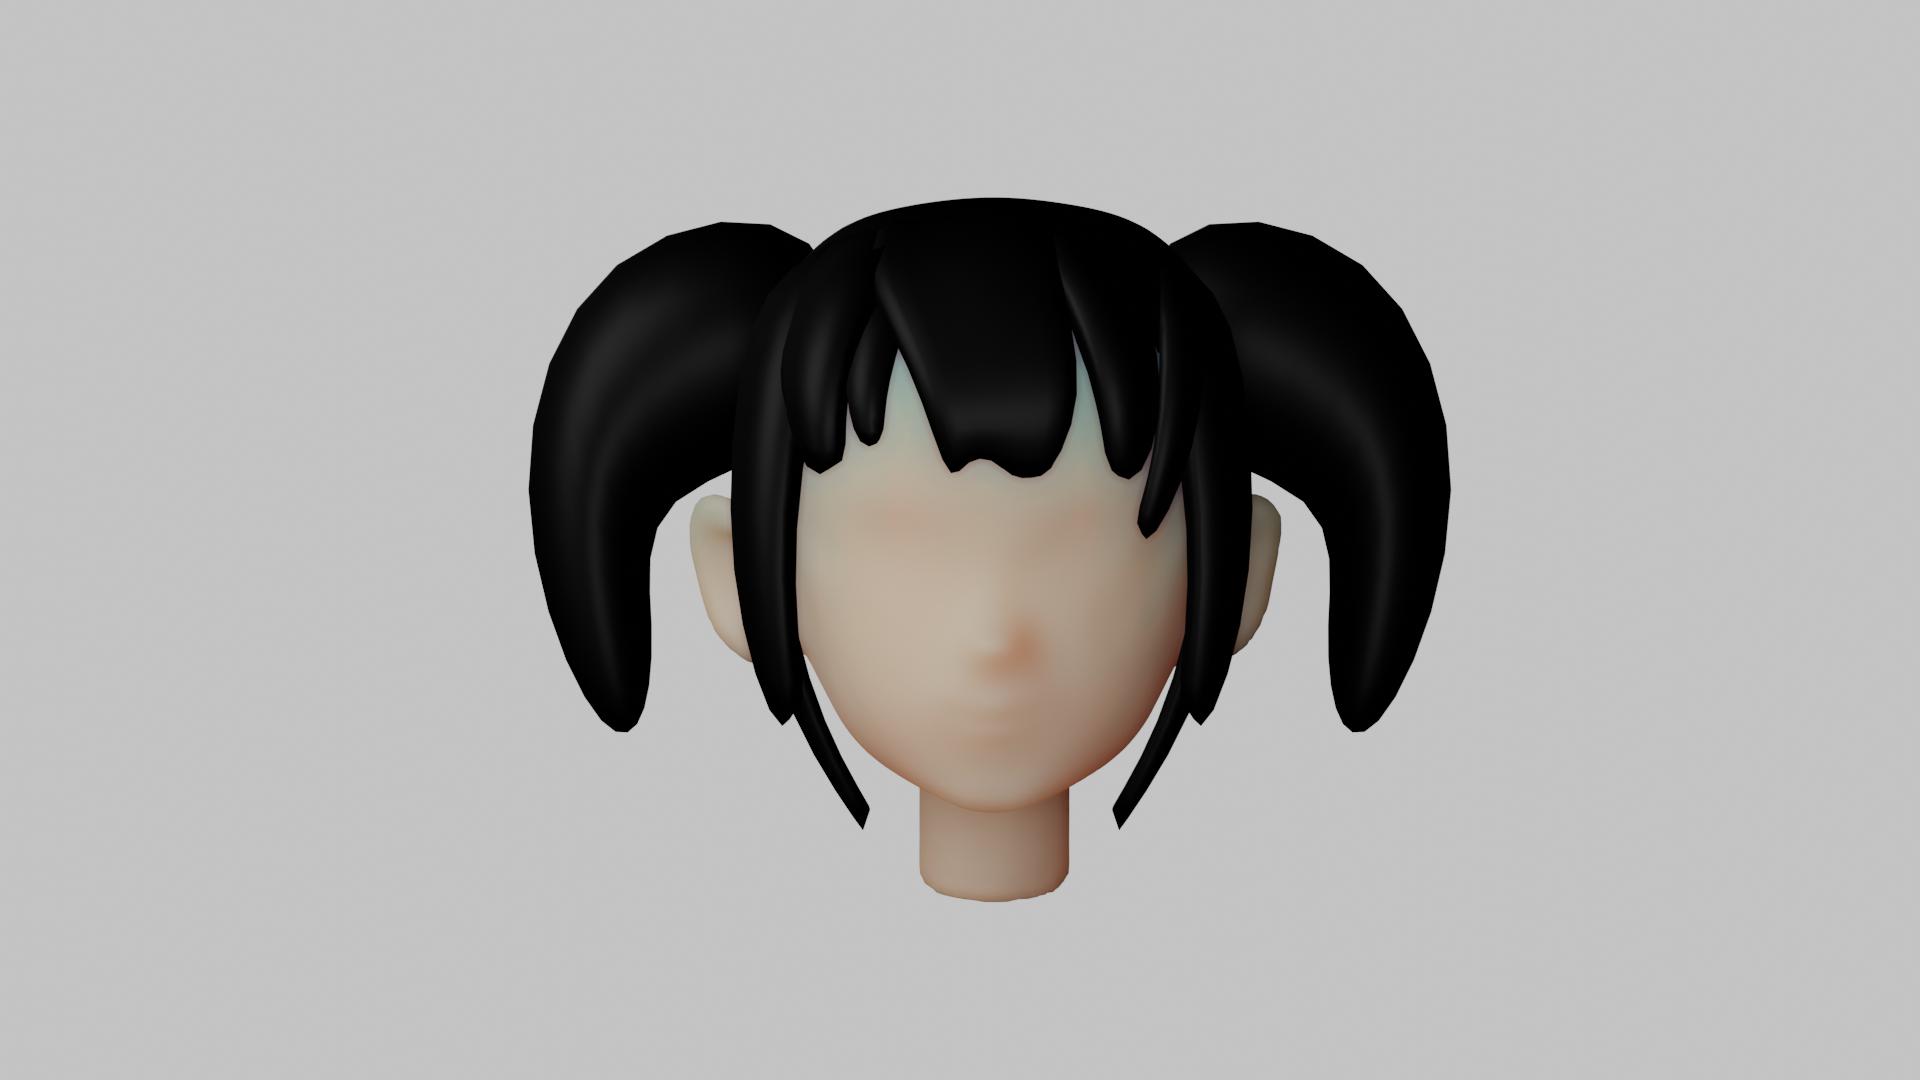
And in Cycles:   

4enter image description here

I lit this scene with only three Arealamps:   

5enter image description here

As KickAir8p mentioned using subsurface might improve the skin. Concerning the lighting, your model has a bright light above the head pointing downwards. Your reference seems to be lit from the front (a bit to the left) and only slightly raised. Most likely there's also some additional lighting.

When you want to figure out how an image is lit it helps to convert it to black and white. Then it is easier to see where shadows and highlight are. If you know where the shadows are (below the chin in this case) you can "reverse engineer" the position of the lamp(s).

Edit: I took a look at your file. First thing: the heads scale was off. It was almost 1m big, so I scaled it down to a roughly human size and applied the scale .

Second: You have a lot of lamps in the file.  1 You can check some tutorials on how photographers set up their lighting when shooting portraits. It's mostly not more then 2-4 light sources.

I quickly set up a material for the skin:  2 and reduced the Specular and Roughness values on your hair. This is how it turns out in Eevee:  3 And in Cycles:  4

I lit this scene with only three Arealamps:  5
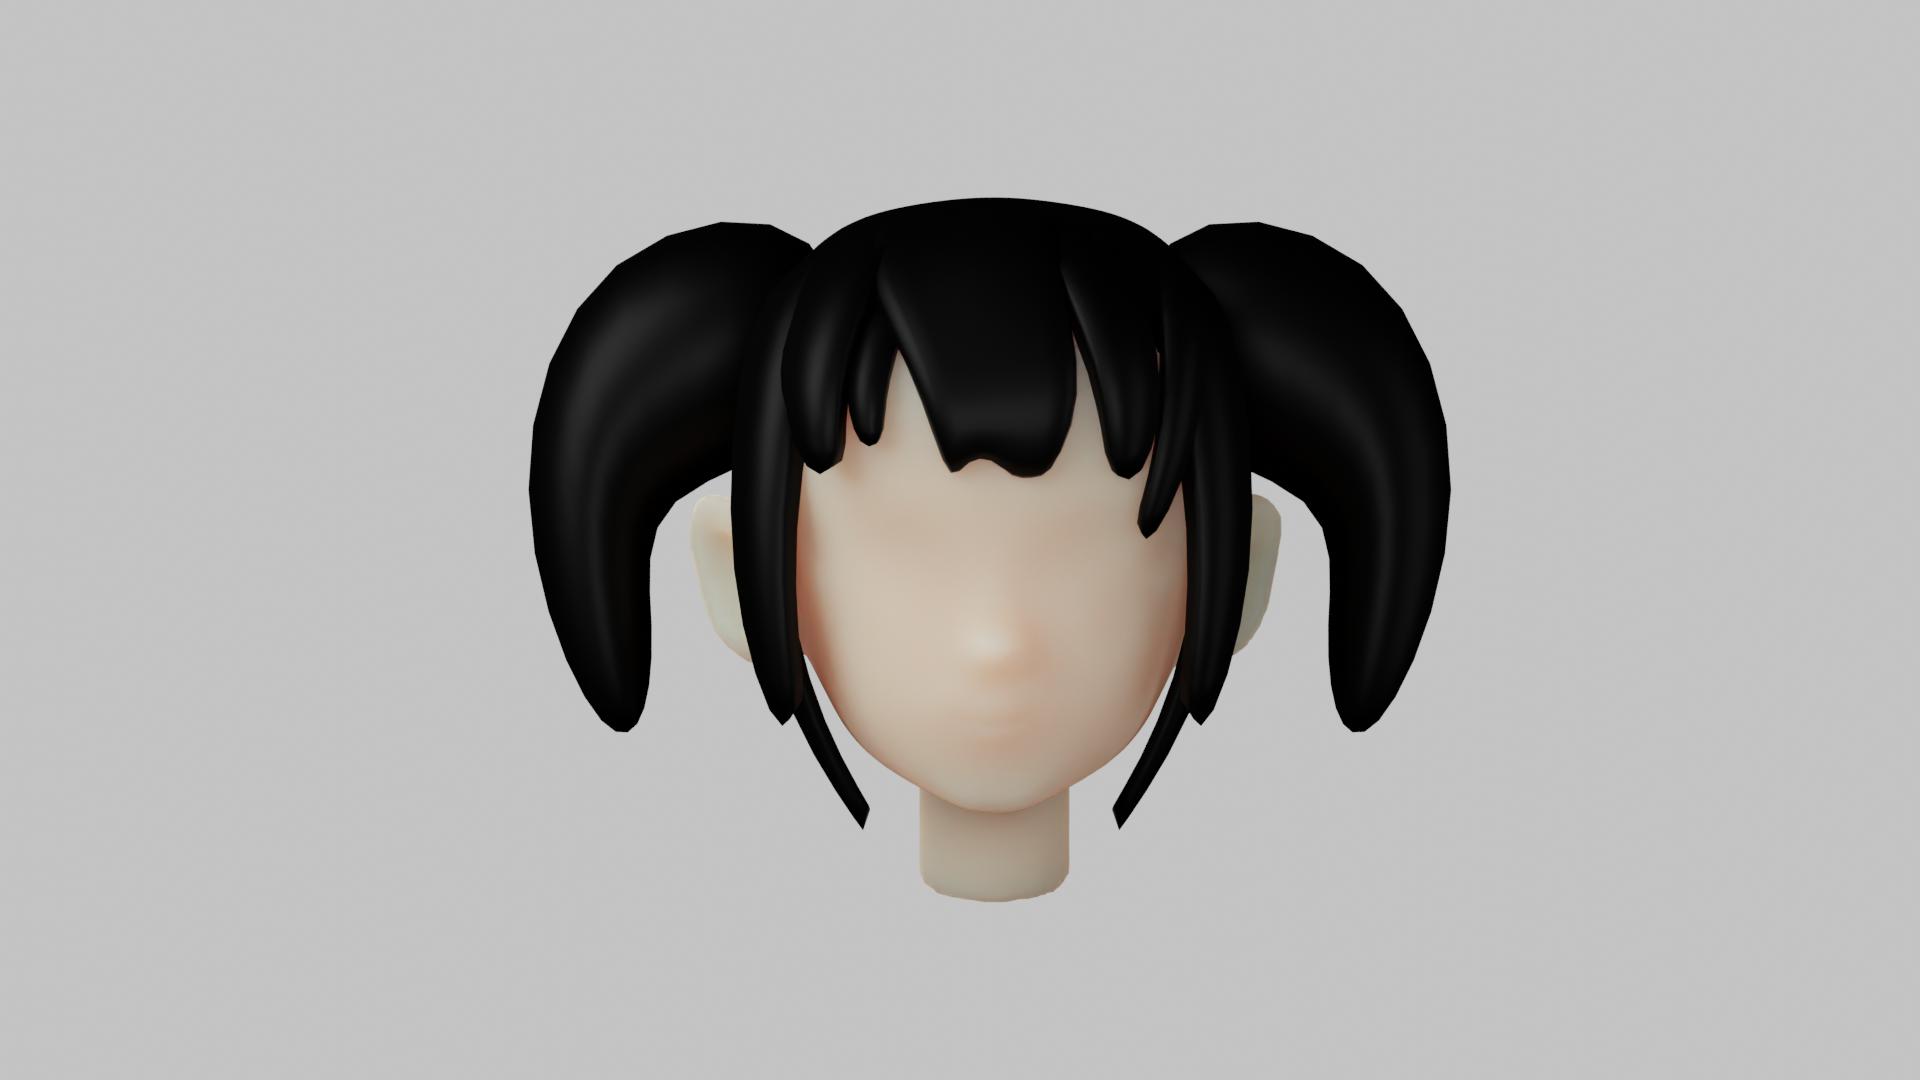
As KickAir8p mentioned using subsurface might improve the skin. Concerning the lighting, your model has a bright light above the head pointing downwards. Your reference seems to be lit from the front (a bit to the left) and only slightly raised. Most likely there's also some additional lighting.

When you want to figure out how an image is lit it helps to convert it to black and white. Then it is easier to see where shadows and highlight are. If you know where the shadows are (below the chin in this case) you can "reverse engineer" the position of the lamp(s).

Edit:

I took a look at your file. First thing: the heads scale was off. It was almost 1m big, so I scaled it down to a roughly human size and applied the scale .

Second: You have a lot of lamps in the file. 

enter image description here

You can check some tutorials on how photographers set up their lighting when shooting portraits. It's mostly not more then 2-4 light sources.

I quickly set up a material for the skin: 

enter image description here

and reduced the Specular and Roughness values on your hair. This is how it turns out in Eevee: 

enter image description here

And in Cycles: 

enter image description here

I lit this scene with only three Arealamps: 
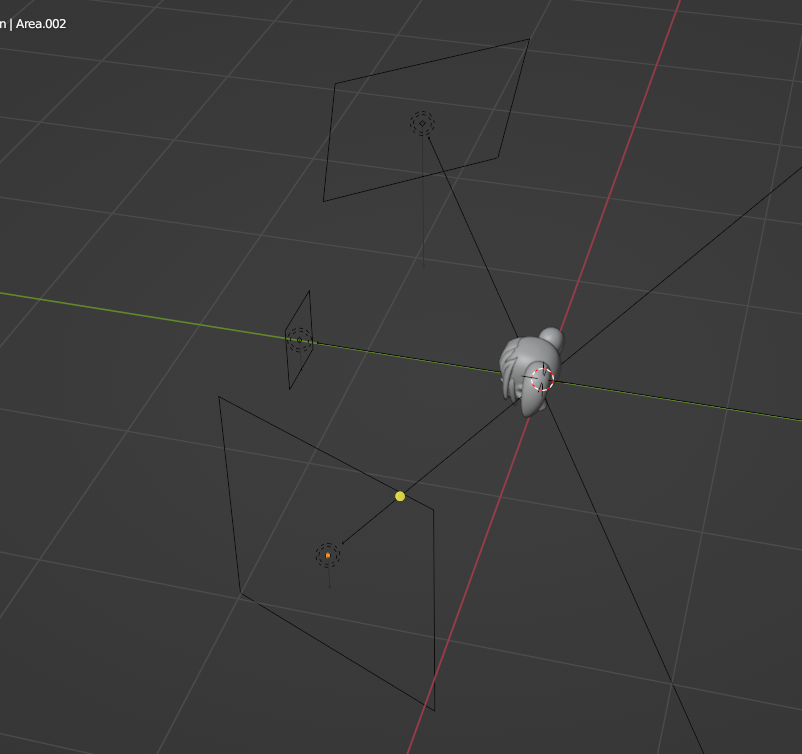
enter image description here

added 814 characters in body
Source Link
Timmethy
  • 361
  • 1
  • 16

As KickAir8p mentioned using subsurface might improve the skin. Concerning the lighting, your model has a bright light above the head pointing downwards. Your reference seems to be lit from the front (a bit to the left) and only slightly raised. Most likely there's also some additional lighting.

When you want to figure out how an image is lit it helps to convert it to black and white. Then it is easier to see where shadows and highlight are. If you know where the shadows are (below the chin in this case) you can "reverse engineer" the position of the lamp(s).

Edit: I took a look at your file. First thing: the heads scale was off. It was almost 1m big, so I scaled it down to a roughly human size and applied the scale .

Second: You have a lot of lamps in the file. 1 You can check some tutorials on how photographers set up their lighting when shooting portraits. It's mostly not more then 2-4 light sources.

I quickly set up a material for the skin: 2 and reduced the Specular and Roughness values on your hair. This is how it turns out in Eevee: 3 And in Cycles: 4

I lit this scene with only three Arealamps: 5

As KickAir8p mentioned using subsurface might improve the skin. Concerning the lighting, your model has a bright light above the head pointing downwards. Your reference seems to be lit from the front (a bit to the left) and only slightly raised. Most likely there's also some additional lighting.

When you want to figure out how an image is lit it helps to convert it to black and white. Then it is easier to see where shadows and highlight are. If you know where the shadows are (below the chin in this case) you can "reverse engineer" the position of the lamp(s).

Edit: I took a look at your file. First thing: the heads scale was off. It was almost 1m big, so I scaled it down to a roughly human size and applied the scale .

Second: You have a lot of lamps in the file. 1 You can check some tutorials on how photographers set up their lighting when shooting portraits. It's mostly not more then 2-4 light sources.

I quickly set up a material for the skin: 2 and reduced the Specular and Roughness values on your hair. This is how it turns out in Eevee: 3 And in Cycles: 4

I lit this scene with only three Arealamps: 5

deleted 94 characters in body
Source Link
Timmethy
  • 361
  • 1
  • 16

As KickAir8p mentioned using subsurface might improve the skin. Concerning the lighting, your model has a bright light above the head pointing downwards. Your reference seems to be lit from the front (a bit to the left) and only slightly raised. Also theMost likely there's also some additional lighting.

When you want to figure out how an image is more soft in the referencelit it helps to convert it to black and white. You Then it is easier to see where shadows and highlight are. If you know where the shadows are (below the chin in this case) you can try playing with"reverse engineer" the position of your lighting and increasing the size to make it softerlamp(s).

As KickAir8p mentioned using subsurface might improve the skin. Concerning the lighting, your model has a bright light above the head pointing downwards. Your reference seems to be lit from the front (a bit to the left) and only slightly raised. Also the lighting is more soft in the reference. You can try playing with position of your lighting and increasing the size to make it softer.

As KickAir8p mentioned using subsurface might improve the skin. Concerning the lighting, your model has a bright light above the head pointing downwards. Your reference seems to be lit from the front (a bit to the left) and only slightly raised. Most likely there's also some additional lighting.

When you want to figure out how an image is lit it helps to convert it to black and white. Then it is easier to see where shadows and highlight are. If you know where the shadows are (below the chin in this case) you can "reverse engineer" the position of the lamp(s).

Source Link
Timmethy
  • 361
  • 1
  • 16
Loading