Bounty Ended with 150 reputation awarded by Nicola Sap
added 2 characters in body
Source Link
Rich Sedman
  • 45.2k
  • 2
  • 109
  • 233

animatedanimated

animated

animated

added 459 characters in body
Source Link
Rich Sedman
  • 45.2k
  • 2
  • 109
  • 233

Here's an example of a phone screen (screengrab from an iPhone) with a Bevel added to the edges of the mesh (which actually interacts with the parallax quite well when the image is close to the edge). (click to see at full resolution)

iphone hi-res


Here's an example of a phone screen (screengrab from an iPhone) with a Bevel added to the edges of the mesh (which actually interacts with the parallax quite well when the image is close to the edge). (click to see at full resolution)

iphone hi-res

added 69 characters in body
Source Link
Rich Sedman
  • 45.2k
  • 2
  • 109
  • 233

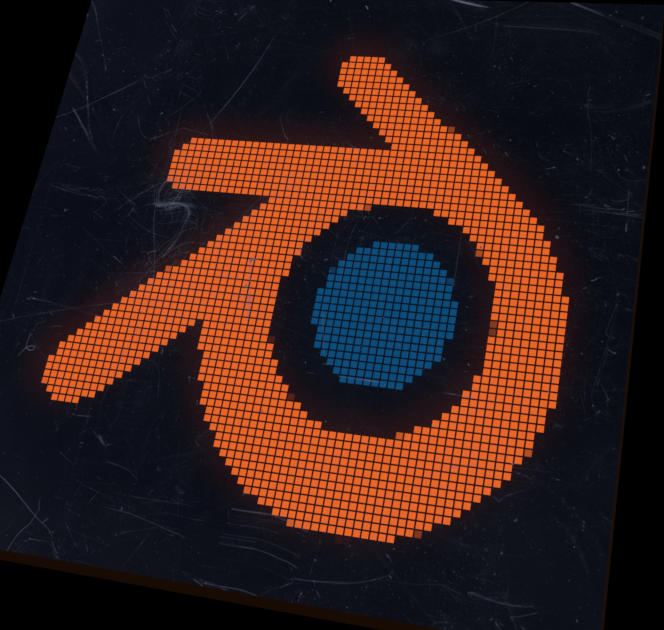
Here's an alternative method that deals with :

  1. Parallax (where the emissive part of the screen is behind the 'glass' surface
  2. Surface reflections
  3. Pixellation of the image
  4. Scattering of the image into the 'glass'
  5. Dimming due to viewing angle
  6. Surface scratches

example

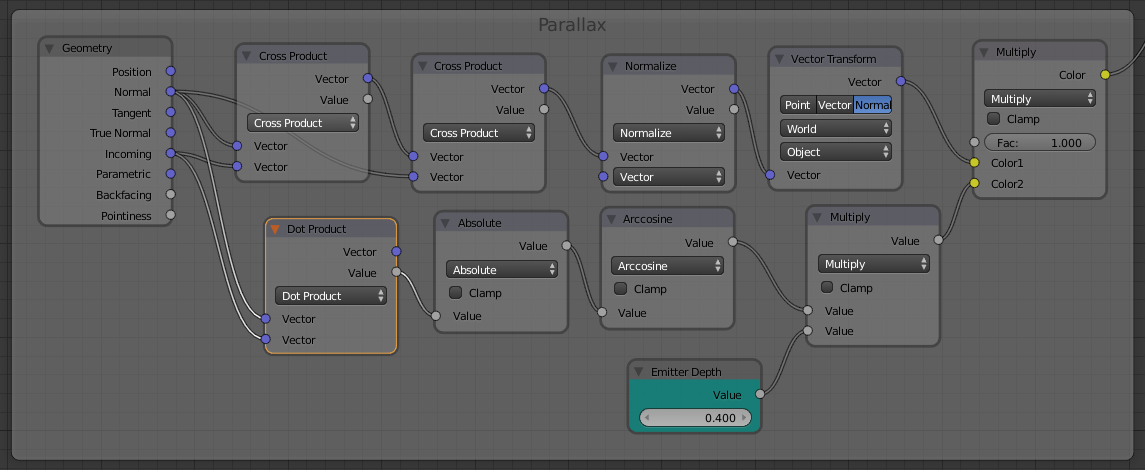
First to the parallax. This is the effect where the screen image moves in relation to the surface due to the viewing angle - due to being set behind the actual surface. This could be modelled by placing an additional (glass) surface in front of the 'emissive' surface but can actually be faked using vector maths similar to https://blender.stackexchange.com/a/84618/29586.
parallax nodes

The Cross Product is used to generate a vector in the required direction of displacement of the image and the Dot Product is used to calculate the amount of displacement to apply. Adjusting the Emitter Depth value node controls the effective depth below the surface.

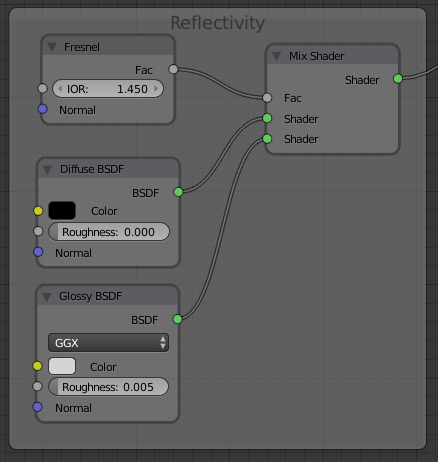
Next for the surface reflections - this is easy to achieve with a basic Fresnel arrangement to mix a Glossy shader with a small amount of roughness to slightly spread the reflections.
reflections

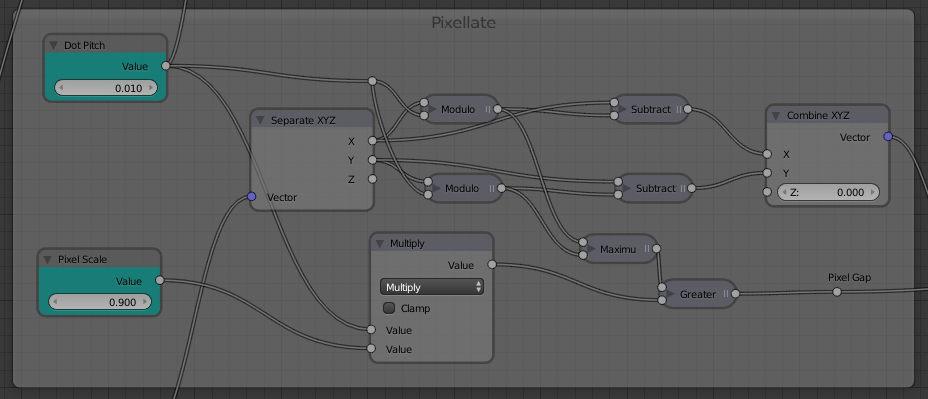
To make the image appear pixellated we can use the Modulo function to convert the input coordinates into discrete "steps". Some additional maths can detect when the point in the texture is close to the edge of one of these 'pixels' and 'black' it out so as to produce a dark border around each pixel.
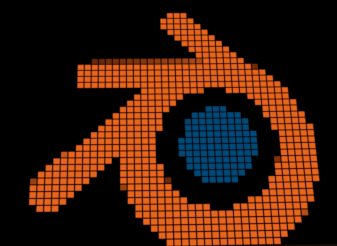
pixellate pixellated image

The bright image projected onto the back of the glass may produce some scattering or 'glow' below the surface, spread out by adding some Noise to displace the coordinates.
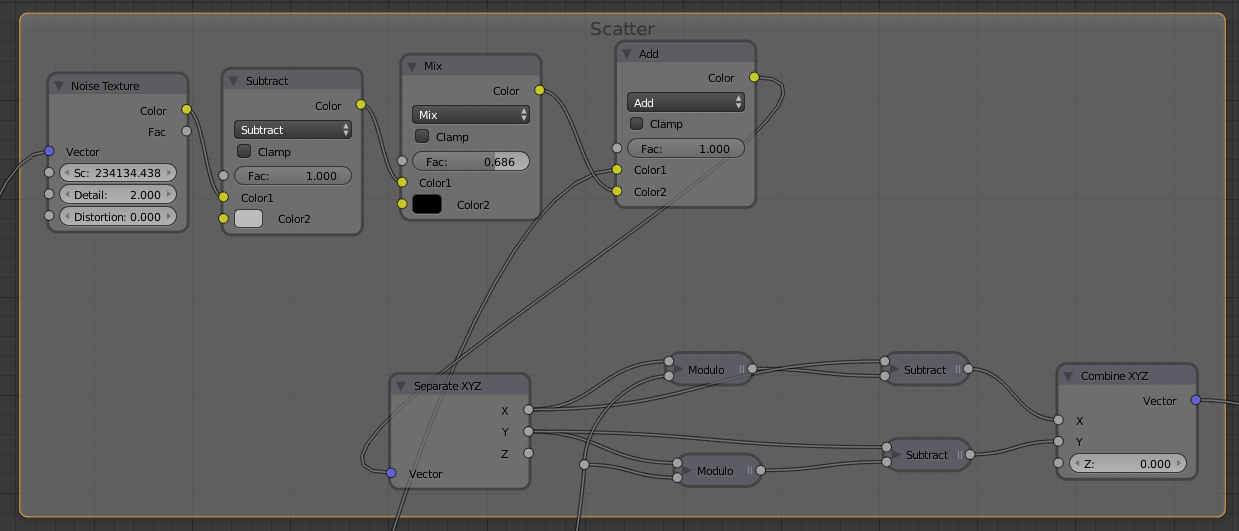
scattering

This uses the same 'pixellation' as for the main image (without the black border as it's an unnecessary complication since the result will be blurred anyway). The 'blurred' image will be in the 'correct' place on the screen rather than being offset to simulate the light being projected towards the screen causing a glow or scatter due to its high 'straight-on' intensity. Keep the intensity quite low so the effect is quite subtle.

Many screen technologies have limitations in the viewing angle where the image will become distorted or fade out at shallow angles. More Vector Maths can be used to achieve this by using the Dot Product to compare the Normal with the Incoming ray and using a Color Ramp to allow this to be tuned to affect the visibility as the angle changes.
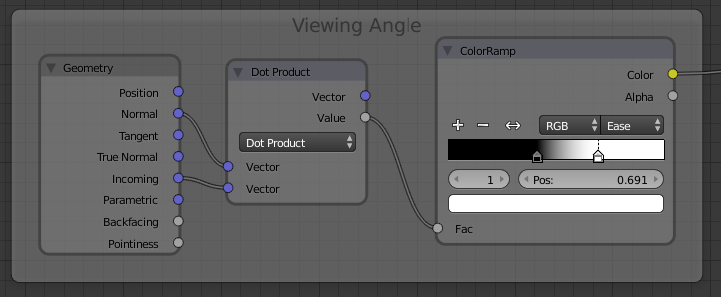
viewing angle

Finally, we can add some surface scratches which helps to bring out the parallax effect (as the emissive image will move in relation to the scratches). The surface scratches control the mixing in of a Glossy shader with a high roughness. This will look light when illuminated and will also block the emission to look darker the the scratches are obscuring the content on the screen (just like real scratches).

Bringing this all together produces the following material :
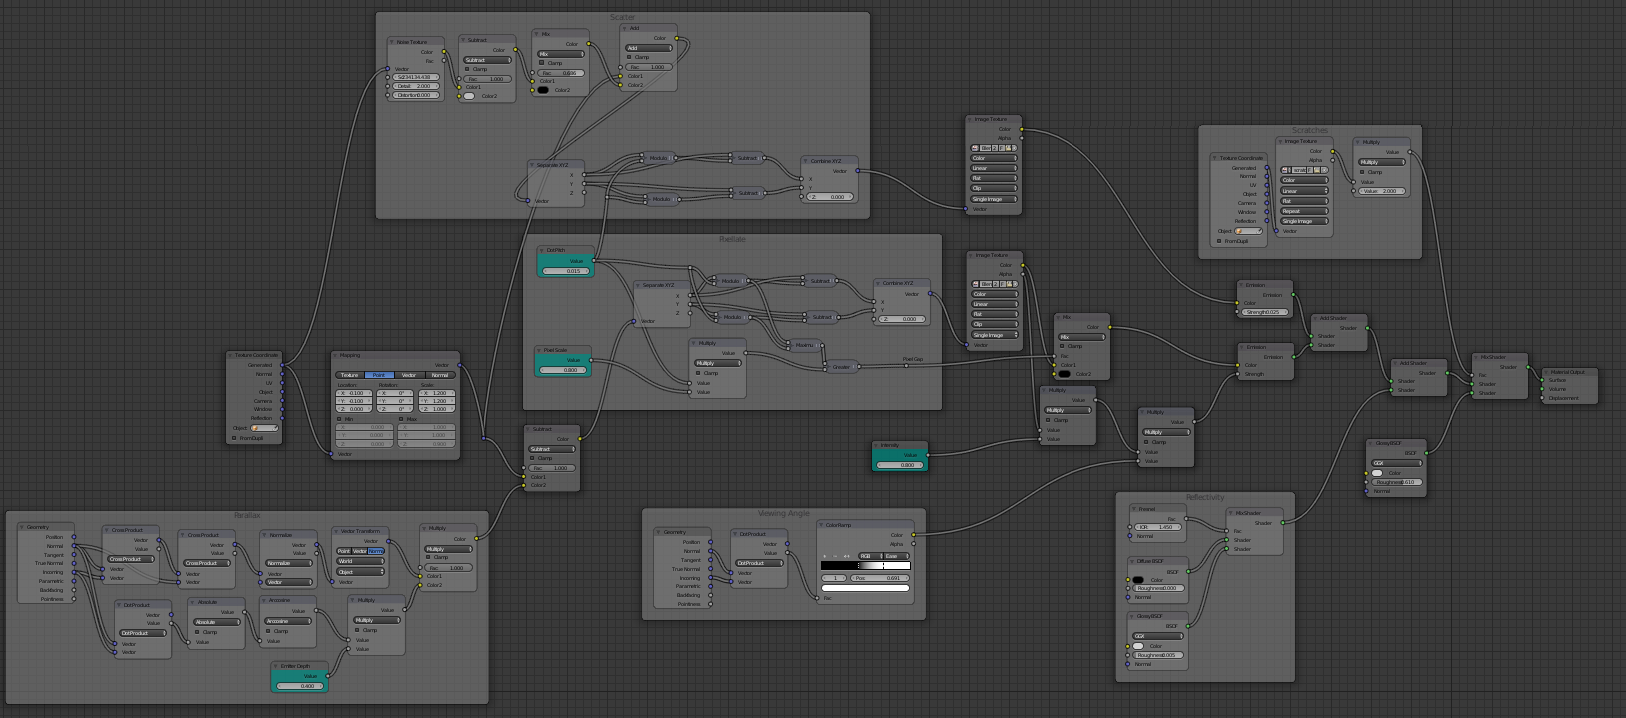
final material

The cyan nodes indicate parameters you can adjust - eg, the 'depth' below the surface of the emissive screen, the pixellation factor, the brightness of the emission and the glow. Also, you can adjust the color ramp to change the rate and angle of the falloff due to viewing angle.

And the final result :
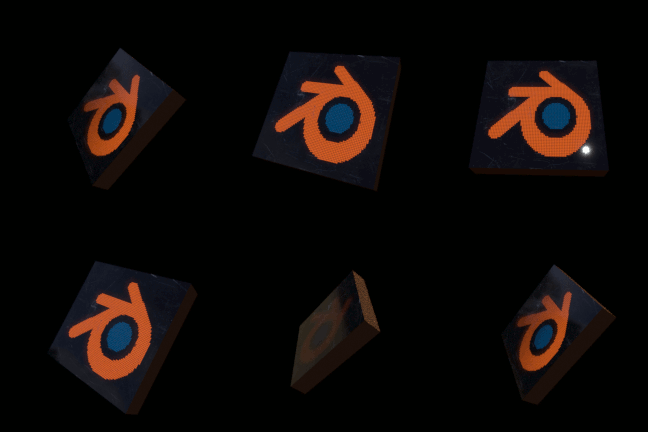
animated

Blend file included : (you'll need to add your own HDR for the environment)

Here's an alternative method that deals with :

  1. Parallax (where the emissive part of the screen is behind the 'glass' surface
  2. Surface reflections
  3. Pixellation of the image
  4. Scattering of the image into the 'glass'
  5. Dimming due to viewing angle
  6. Surface scratches

example

First to the parallax. This is the effect where the screen image moves in relation to the surface due to the viewing angle - due to being set behind the actual surface. This could be modelled by placing an additional (glass) surface in front of the 'emissive' surface but can actually be faked using vector maths similar to https://blender.stackexchange.com/a/84618/29586.

parallax nodes

The Cross Product is used to generate a vector in the required direction of displacement of the image and the Dot Product is used to calculate the amount of displacement to apply. Adjusting the Emitter Depth value node controls the effective depth below the surface.

Next for the surface reflections - this is easy to achieve with a basic Fresnel arrangement to mix a Glossy shader with a small amount of roughness to slightly spread the reflections.

reflections

To make the image appear pixellated we can use the Modulo function to convert the input coordinates into discrete "steps". Some additional maths can detect when the point in the texture is close to the edge of one of these 'pixels' and 'black' it out so as to produce a dark border around each pixel.

pixellate pixellated image

The bright image projected onto the back of the glass may produce some scattering or 'glow' below the surface, spread out by adding some Noise to displace the coordinates.

scattering

This uses the same 'pixellation' as for the main image (without the black border as it's an unnecessary complication since the result will be blurred anyway). The 'blurred' image will be in the 'correct' place on the screen rather than being offset to simulate the light being projected towards the screen causing a glow or scatter due to its high 'straight-on' intensity. Keep the intensity quite low so the effect is quite subtle.

Many screen technologies have limitations in the viewing angle where the image will become distorted or fade out at shallow angles. More Vector Maths can be used to achieve this by using the Dot Product to compare the Normal with the Incoming ray and using a Color Ramp to allow this to be tuned to affect the visibility as the angle changes.

viewing angle

Finally, we can add some surface scratches which helps to bring out the parallax effect (as the emissive image will move in relation to the scratches). The surface scratches control the mixing in of a Glossy shader with a high roughness. This will look light when illuminated and will also block the emission to look darker the the scratches are obscuring the content on the screen (just like real scratches).

Bringing this all together produces the following material :

final material

The cyan nodes indicate parameters you can adjust - eg, the 'depth' below the surface of the emissive screen, the pixellation factor, the brightness of the emission and the glow. Also, you can adjust the color ramp to change the rate and angle of the falloff due to viewing angle.

And the final result :

animated

Blend file included : (you'll need to add your own HDR for the environment)

Source Link
Rich Sedman
  • 45.2k
  • 2
  • 109
  • 233
Loading