22
$\begingroup$

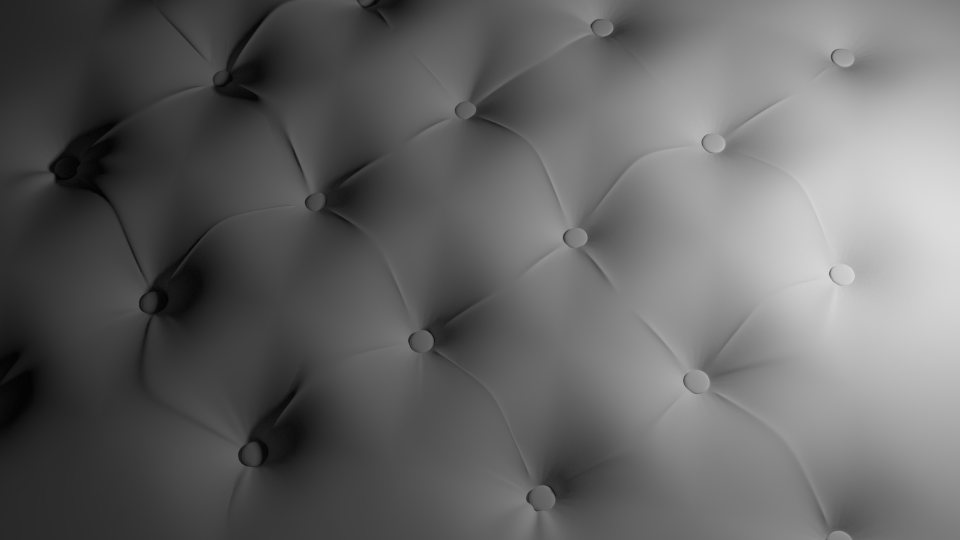
How can I model backrest upholstery for a bed?
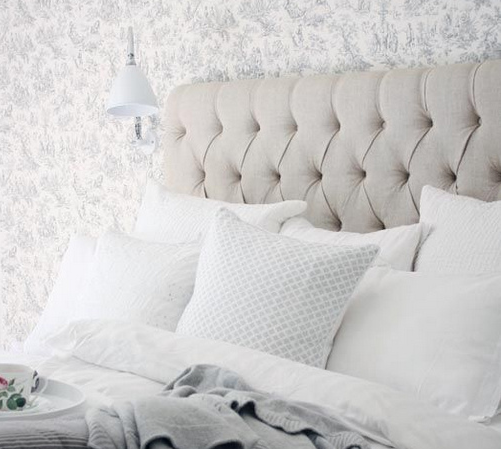
enter image description here

I Have used the Bevel command but it's not close:
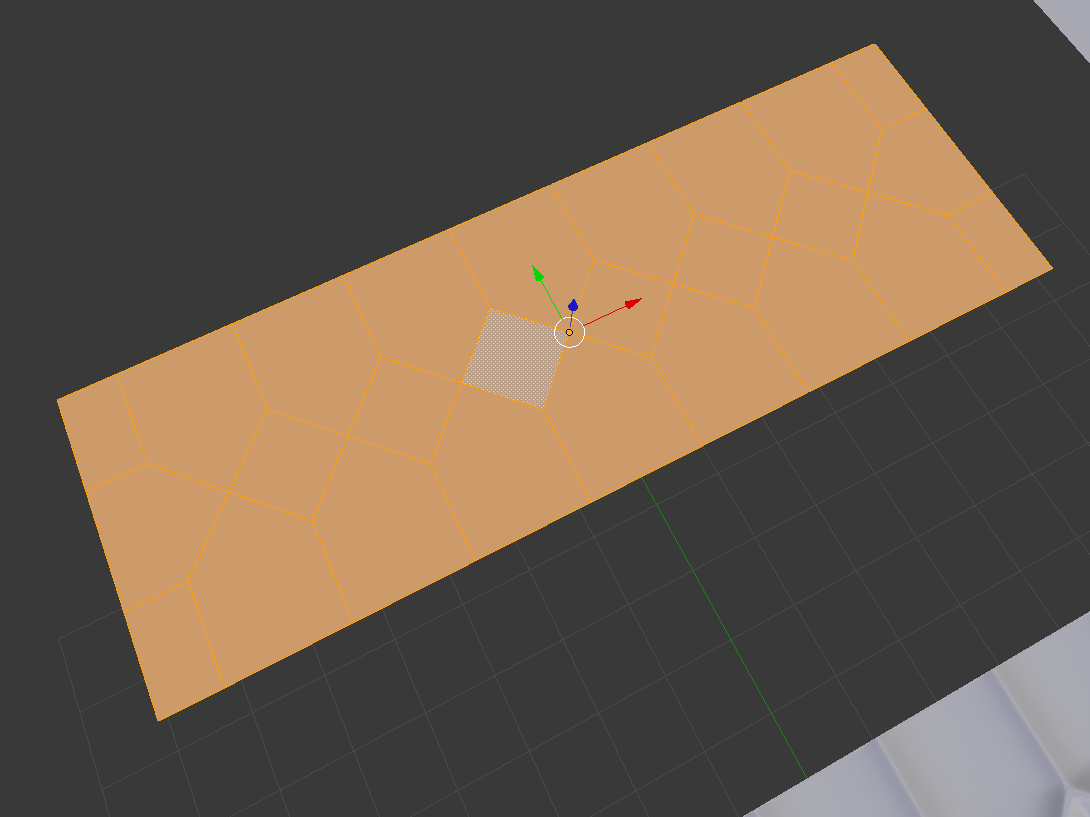
enter image description here

enter image description here

$\endgroup$
5
  • 1
    $\begingroup$ I would use texturing rather than modelling. Andrew Price has made a good tutorial on texturing. youtu.be/W07H7xeUnGE $\endgroup$
    – user7952
    Commented Nov 26, 2014 at 9:05
  • $\begingroup$ Maybe also doable with subsurf and an array modifier or two but the edges would be hard and I wouldn't put meshing that surface as below intermediate level $\endgroup$
    – Weaver
    Commented Nov 26, 2014 at 9:56
  • $\begingroup$ There are cushions, pillows and headboard in the picture, please specify which one is your target. It seems you are talking about the headboard? $\endgroup$ Commented Nov 26, 2014 at 10:19
  • $\begingroup$ @LeonCheung Yes the headboard? Sorry for Confusion. $\endgroup$ Commented Nov 26, 2014 at 10:33
  • $\begingroup$ I would create a single poked-in square piece, use an array modifier, apply the array, and sculpt the creases with a multiresolution modifier. $\endgroup$
    – PGmath
    Commented Nov 26, 2014 at 18:41

2 Answers 2

27
$\begingroup$

The following workflow is recomended:
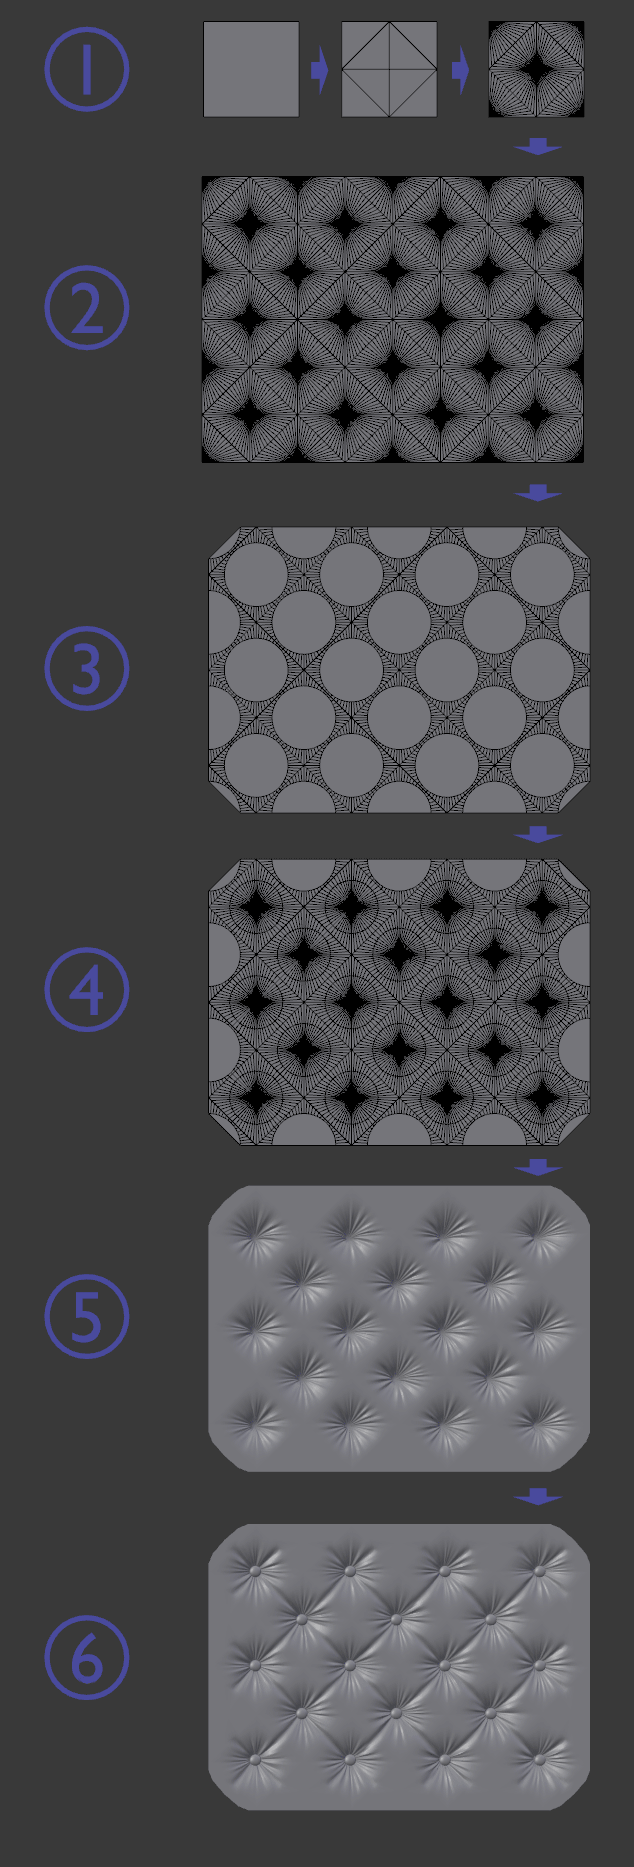
Method 1:

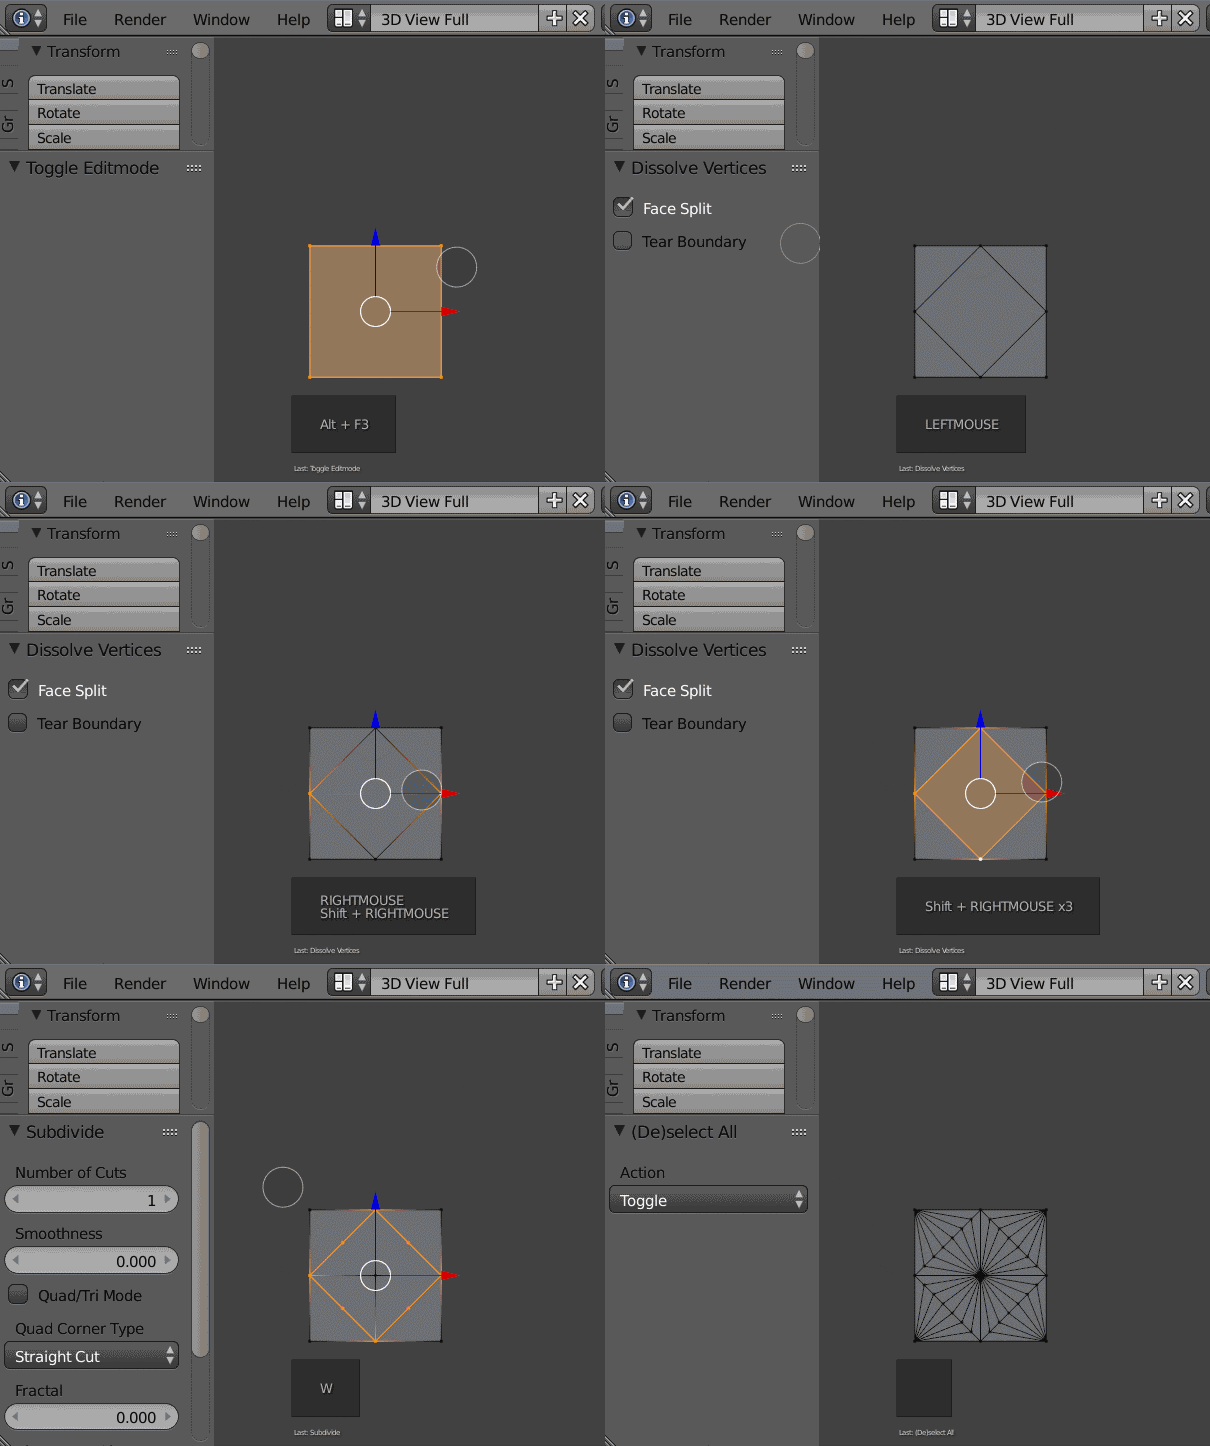
  1. Create unit mesh;
  2. Array modifers;
  3. Bevel modifier (type: Vertex Group);
  4. Apply modifiers, inset ngons, then poke;
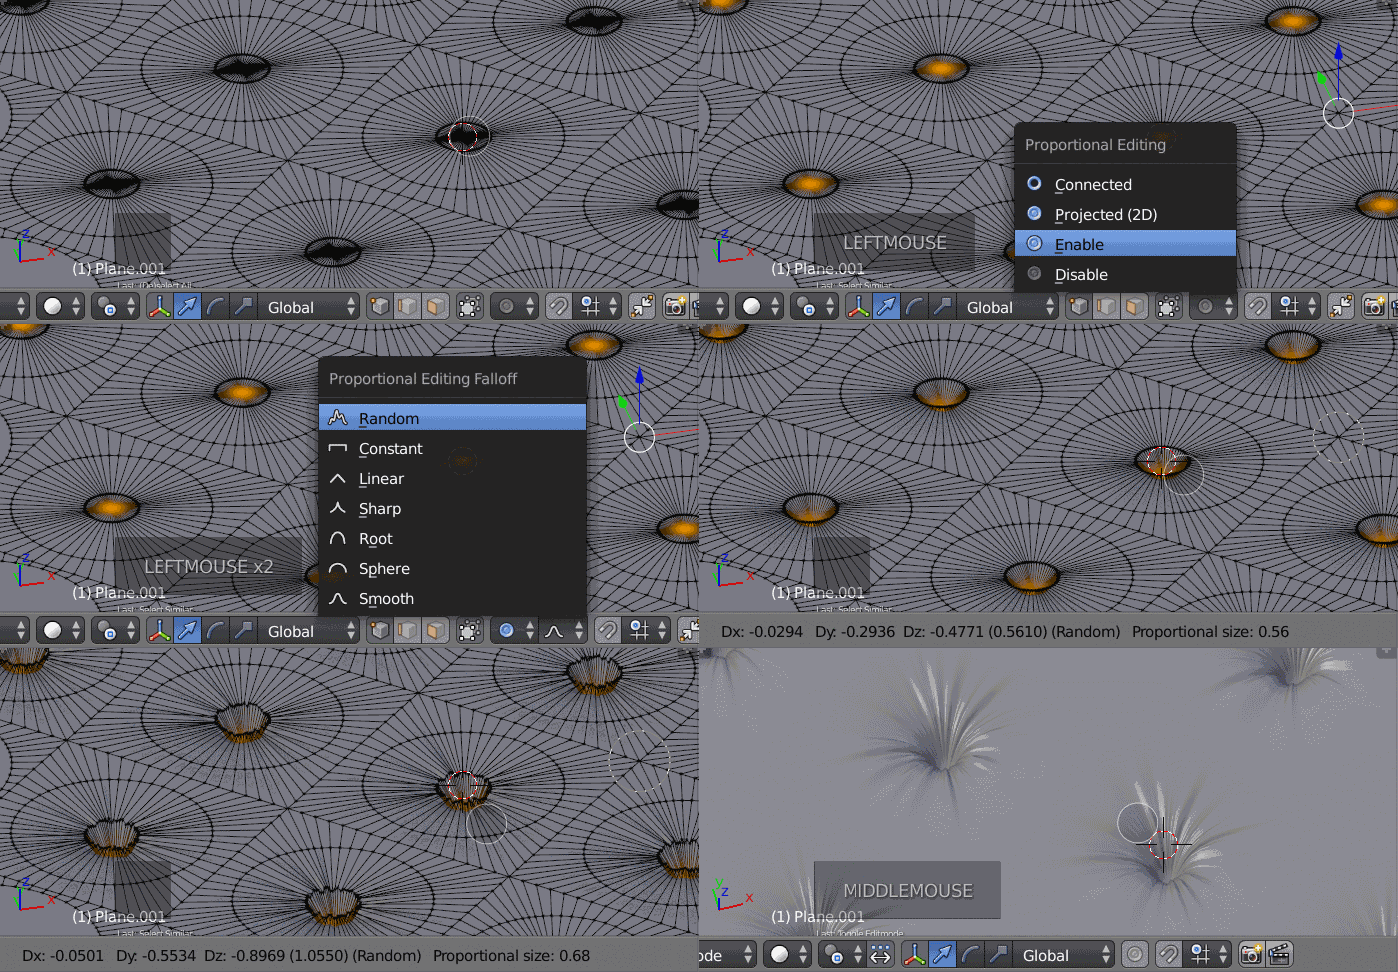
  5. Proportional edit (type: Random)
  6. refinement.

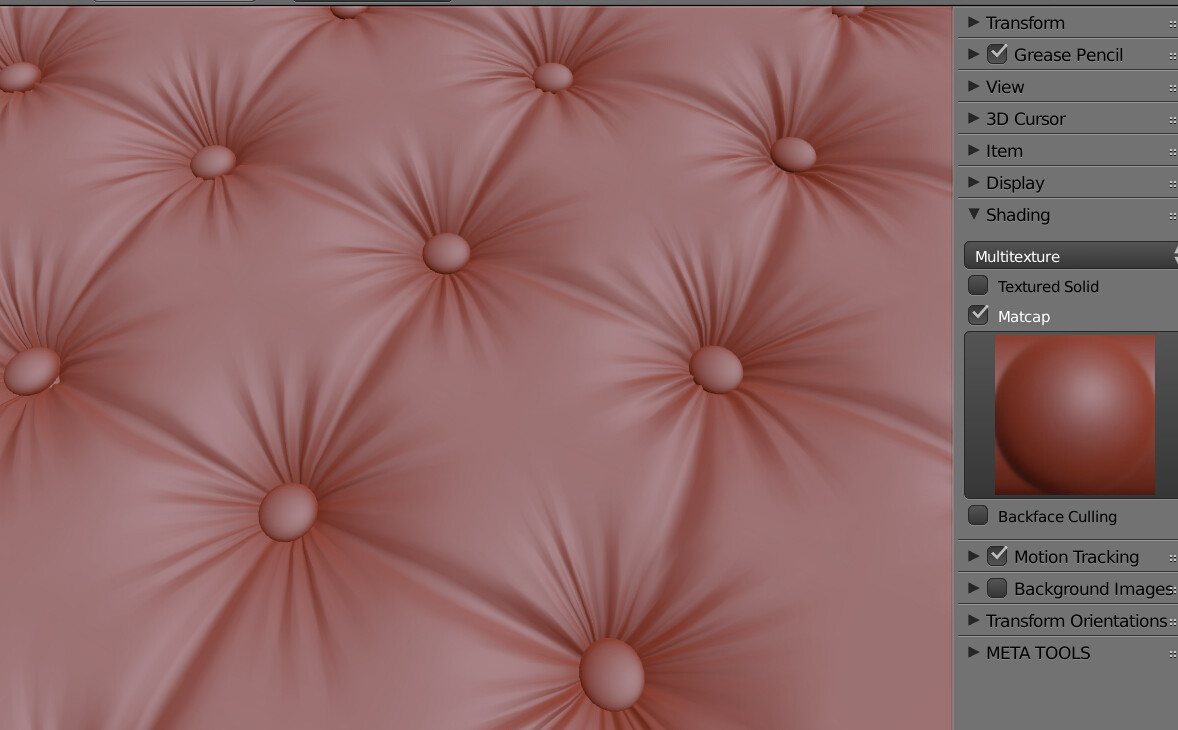
enter image description here

enter image description here

For Step 1:

enter image description here

For Step 5:

enter image description here

Example file for Method 1

Tip: Things can be much faster by using Select Similar operator (ShiftG) while processing.
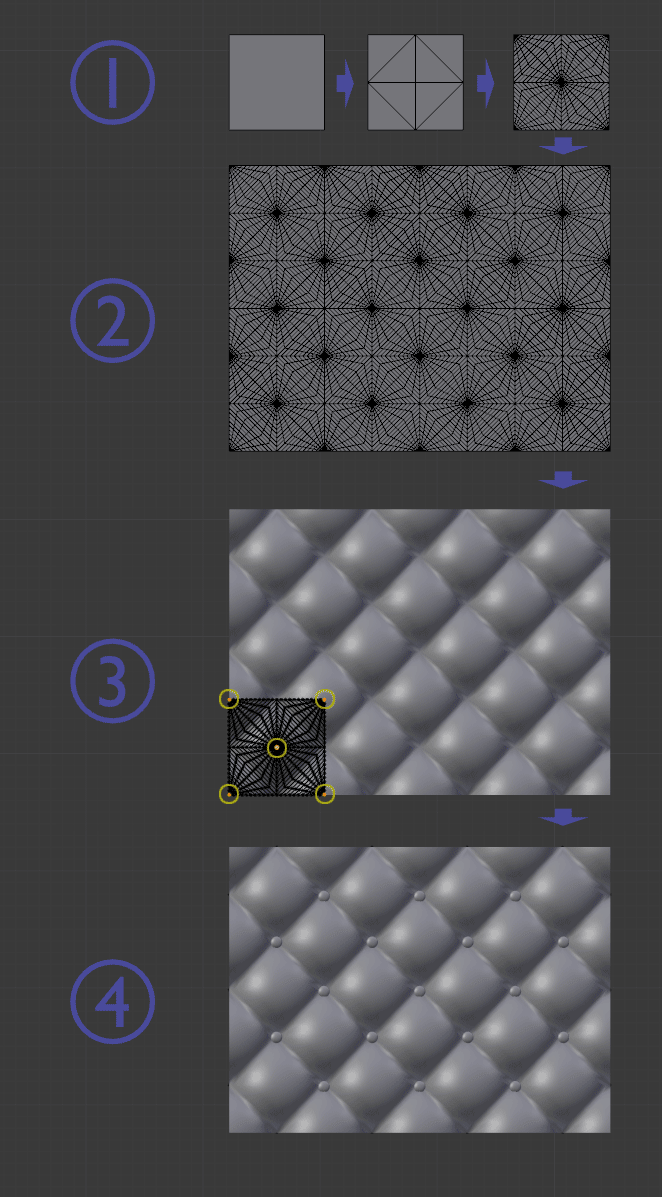

Method 2:

  1. Create unit mesh;
  2. Array modifiers;
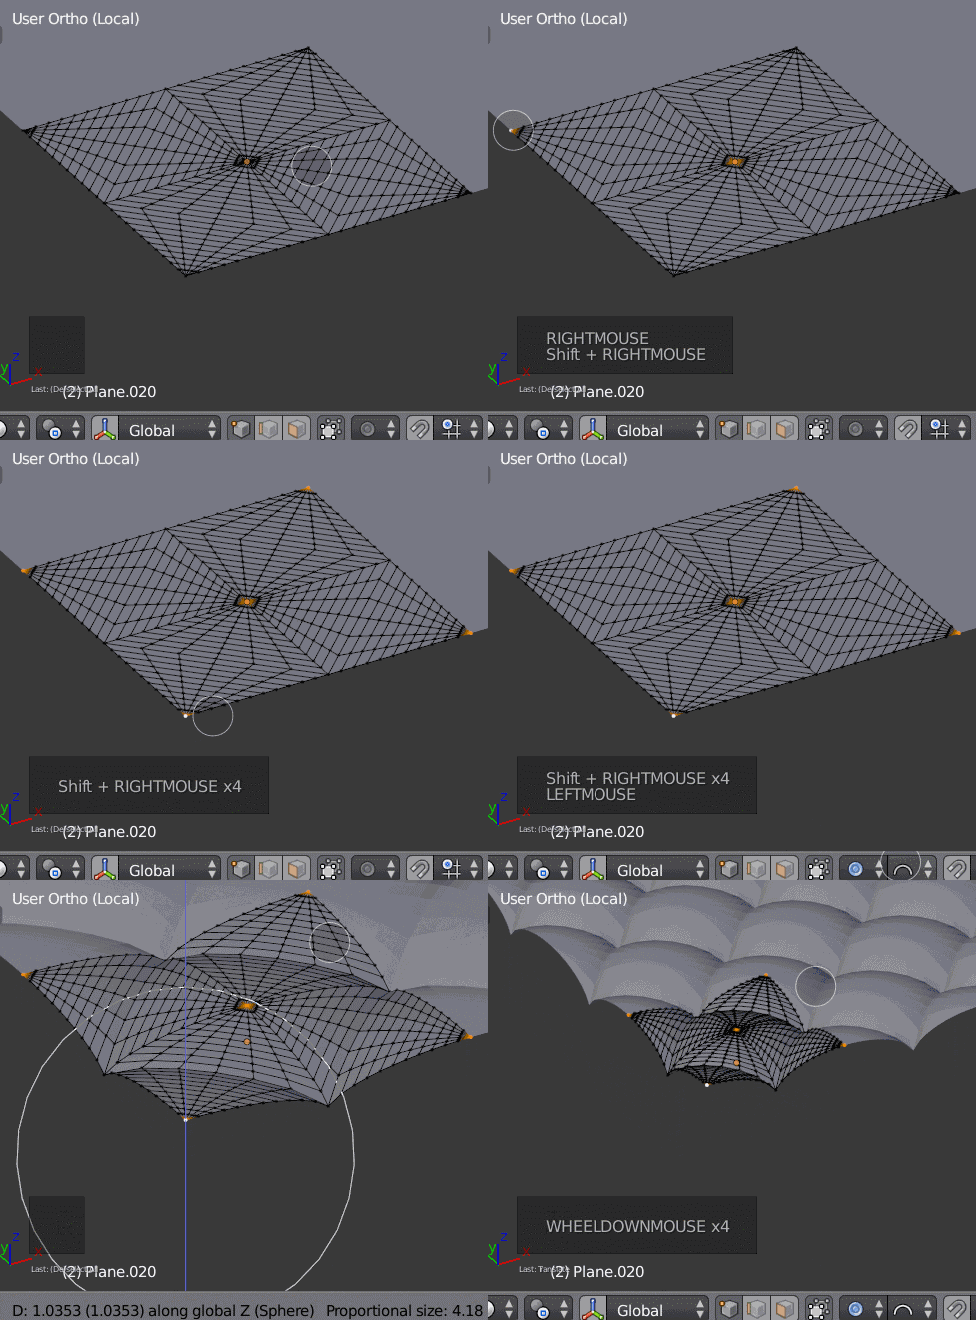
  3. Translate the four corners and one center vert with Proportional Editing Falloff.
  4. Refinement.

enter image description here

For Step 3:

enter image description here

Example file for Method 2

Note: Comparing with Method 1, the topology is cleaner with less wrinkles, which may be less realstic, but could probably be expected.

$\endgroup$
7
  • $\begingroup$ Really nice. Looks a bit generic, but the process is much less time consuming than my "manual way" to model this. Thanks! $\endgroup$
    – p2or
    Commented Nov 26, 2014 at 18:21
  • $\begingroup$ The no wrinkles problem on method 2 could be fixed with some careful sculpting. $\endgroup$
    – PGmath
    Commented Nov 27, 2014 at 0:47
  • $\begingroup$ @PGmath Sure, that's what such topology benefits. You can actually do refinement, including baking normal maps based on meshes from method 1, then apply it to method 2, etc. $\endgroup$ Commented Nov 27, 2014 at 3:10
  • $\begingroup$ in step 1, how were u able to subdivide the plane into diagonal styled meshes? have u used knife tool? when i subdivided all i see is square grids. $\endgroup$ Commented Nov 28, 2014 at 10:33
  • $\begingroup$ i have tried subdividing edge. then connecting the vertices with J key to accomplish this geometry, but this method is too long. are there any faster ways. $\endgroup$ Commented Nov 28, 2014 at 11:04
13
$\begingroup$

As a basic start, you might try something like this:

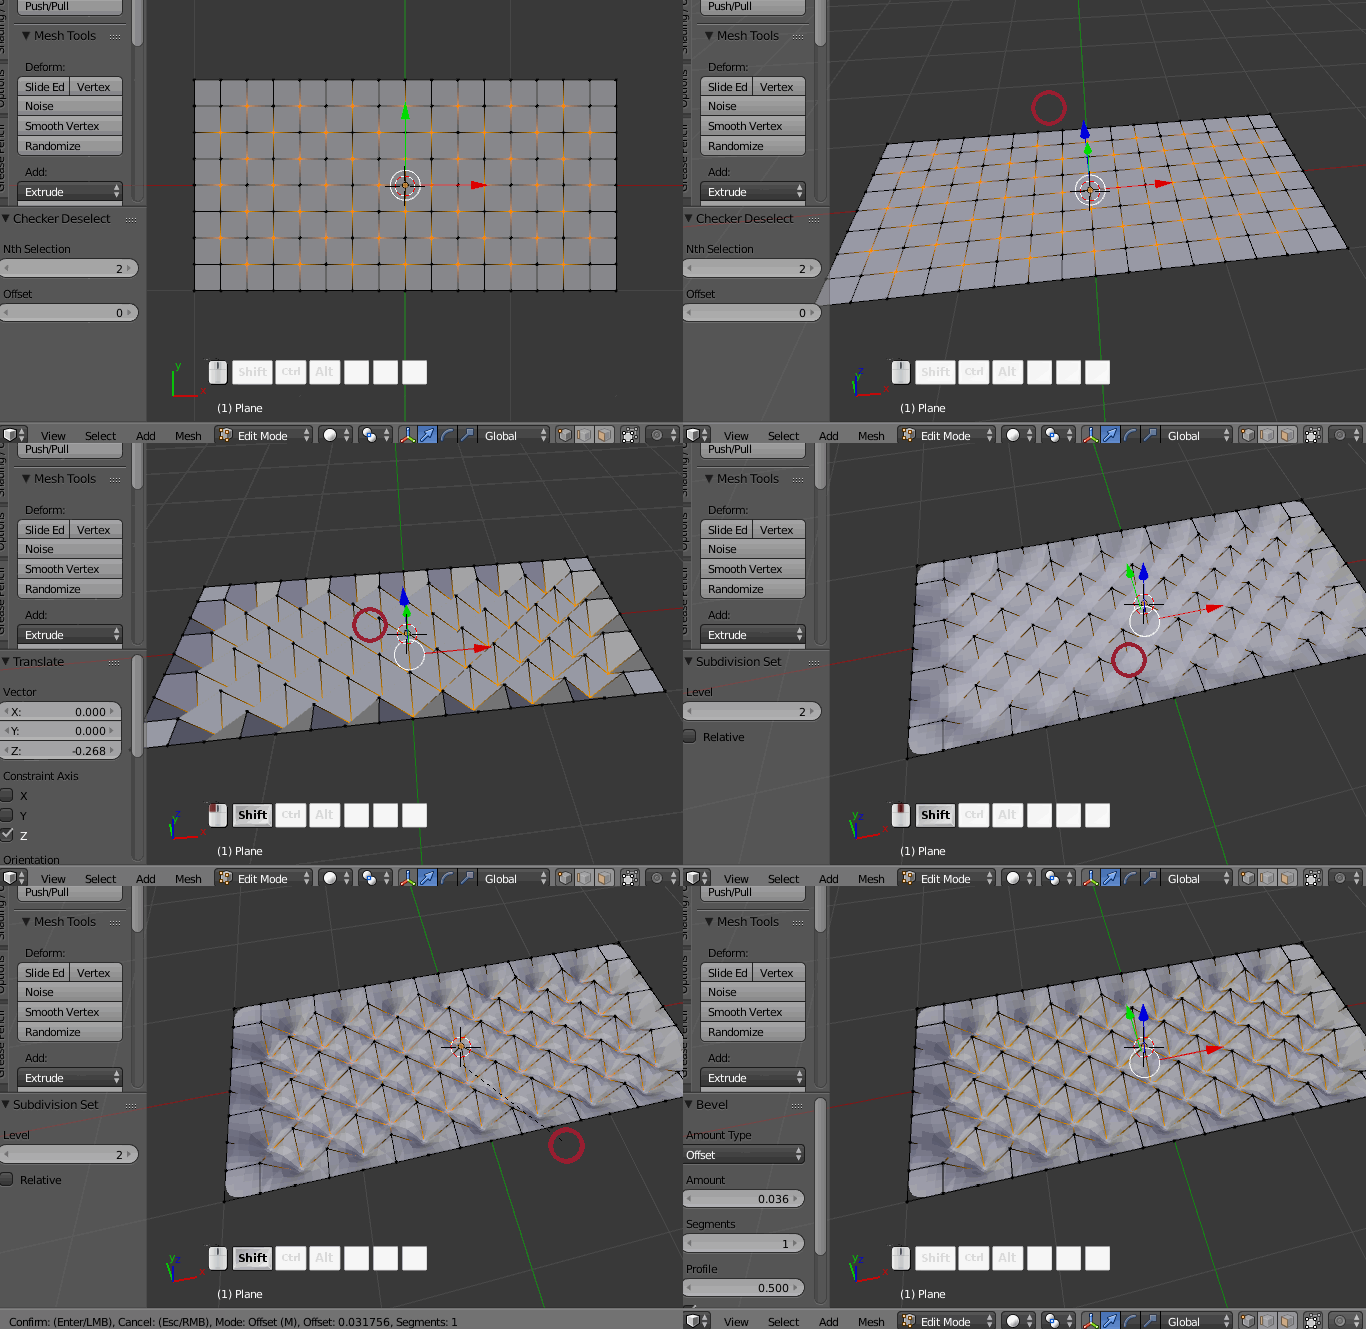
  1. Add a plane (⇧ ShiftA). (I've scaled it in edit mode so it's rectangular, but you can make it any shape you like)

  2. Subdivide it as evenly as possible (starting with square sections means you will end up with square sections):
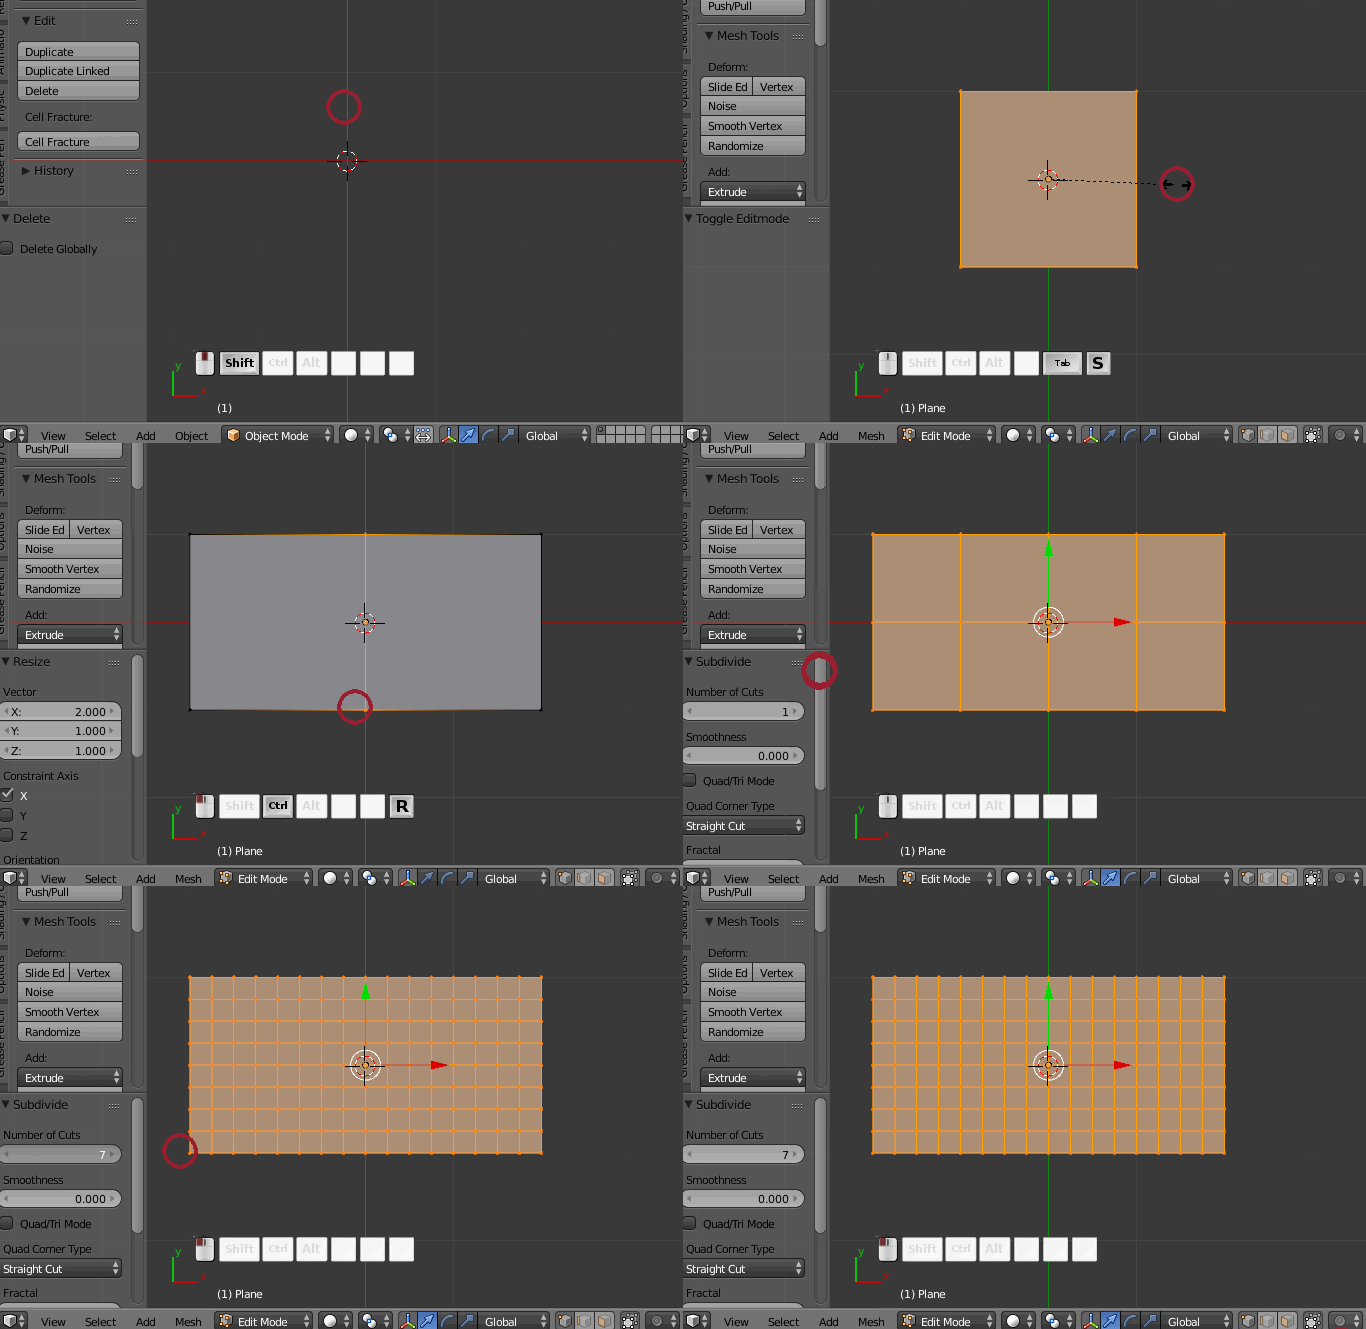
    enter image description here

  3. Select the inner vertices with Box select (B)

  4. Checker deselect 3D view > Header > Select:
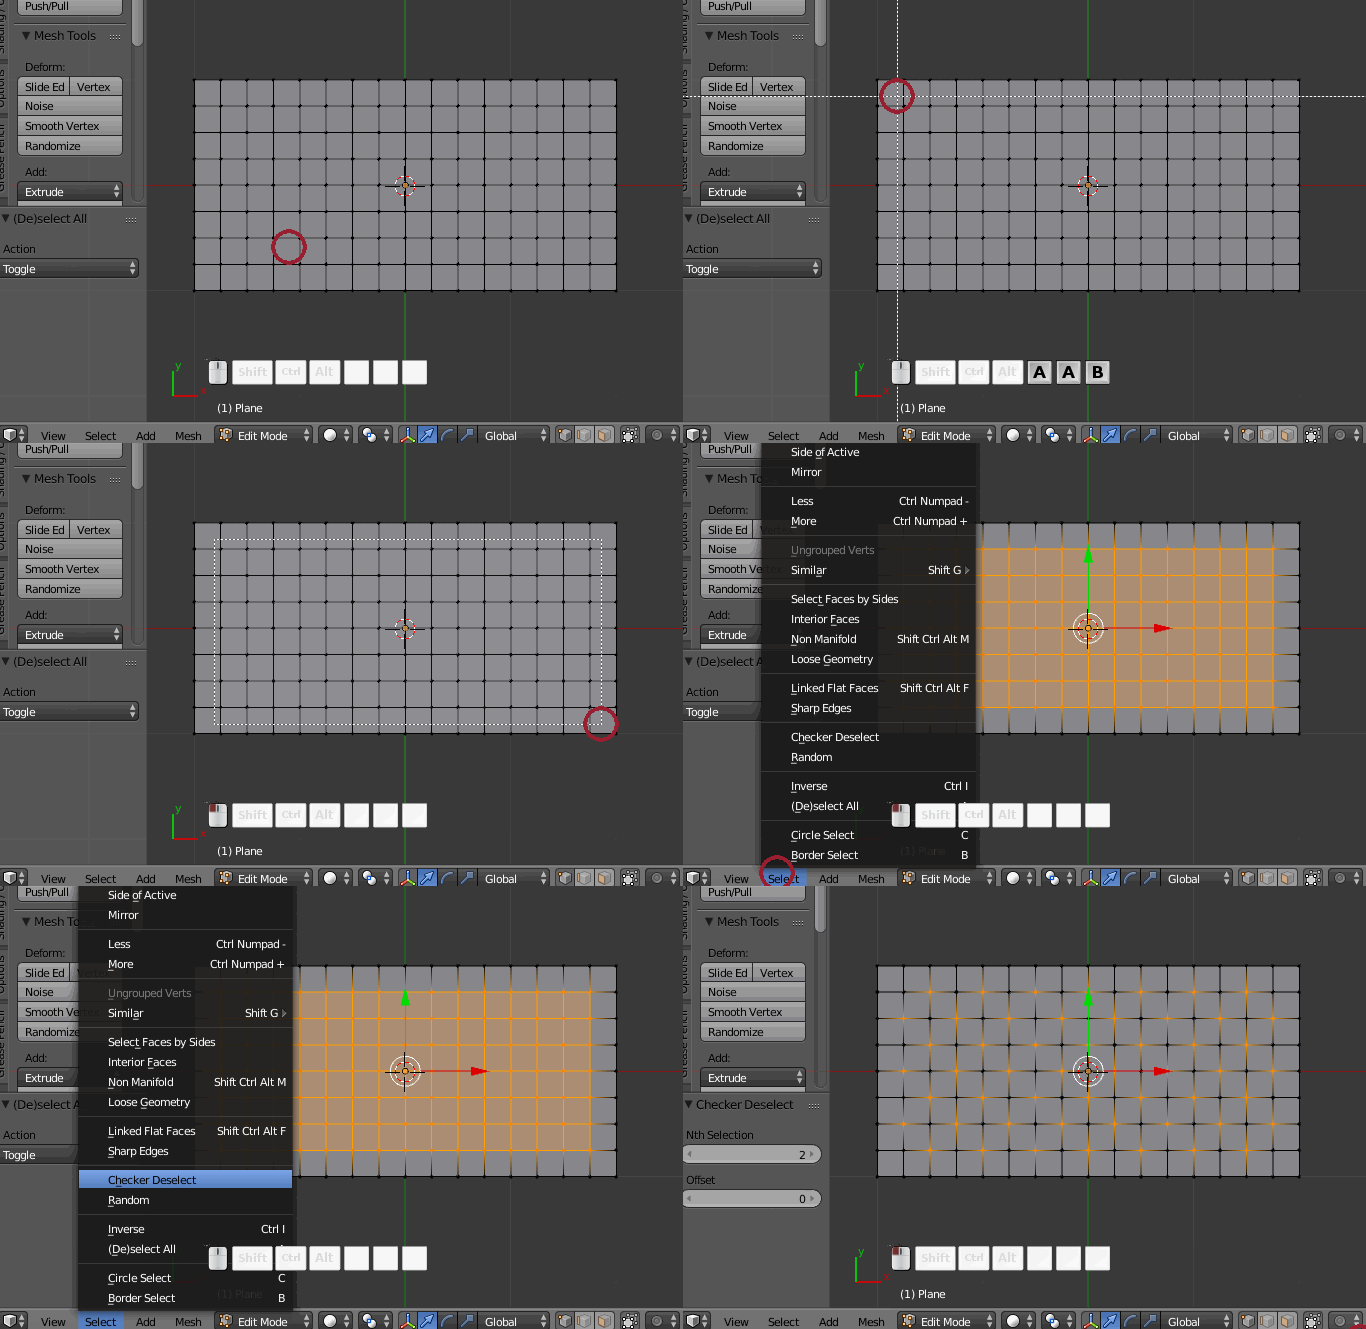
    enter image description here

  5. Move those vertices down on the Z (GZ), add a subsurf modifier (⎈ Ctrl2 where 2 refers to the number of view port subdivisions) and bevel them (⎈ Ctrl⇧ ShiftB):
    enter image description here

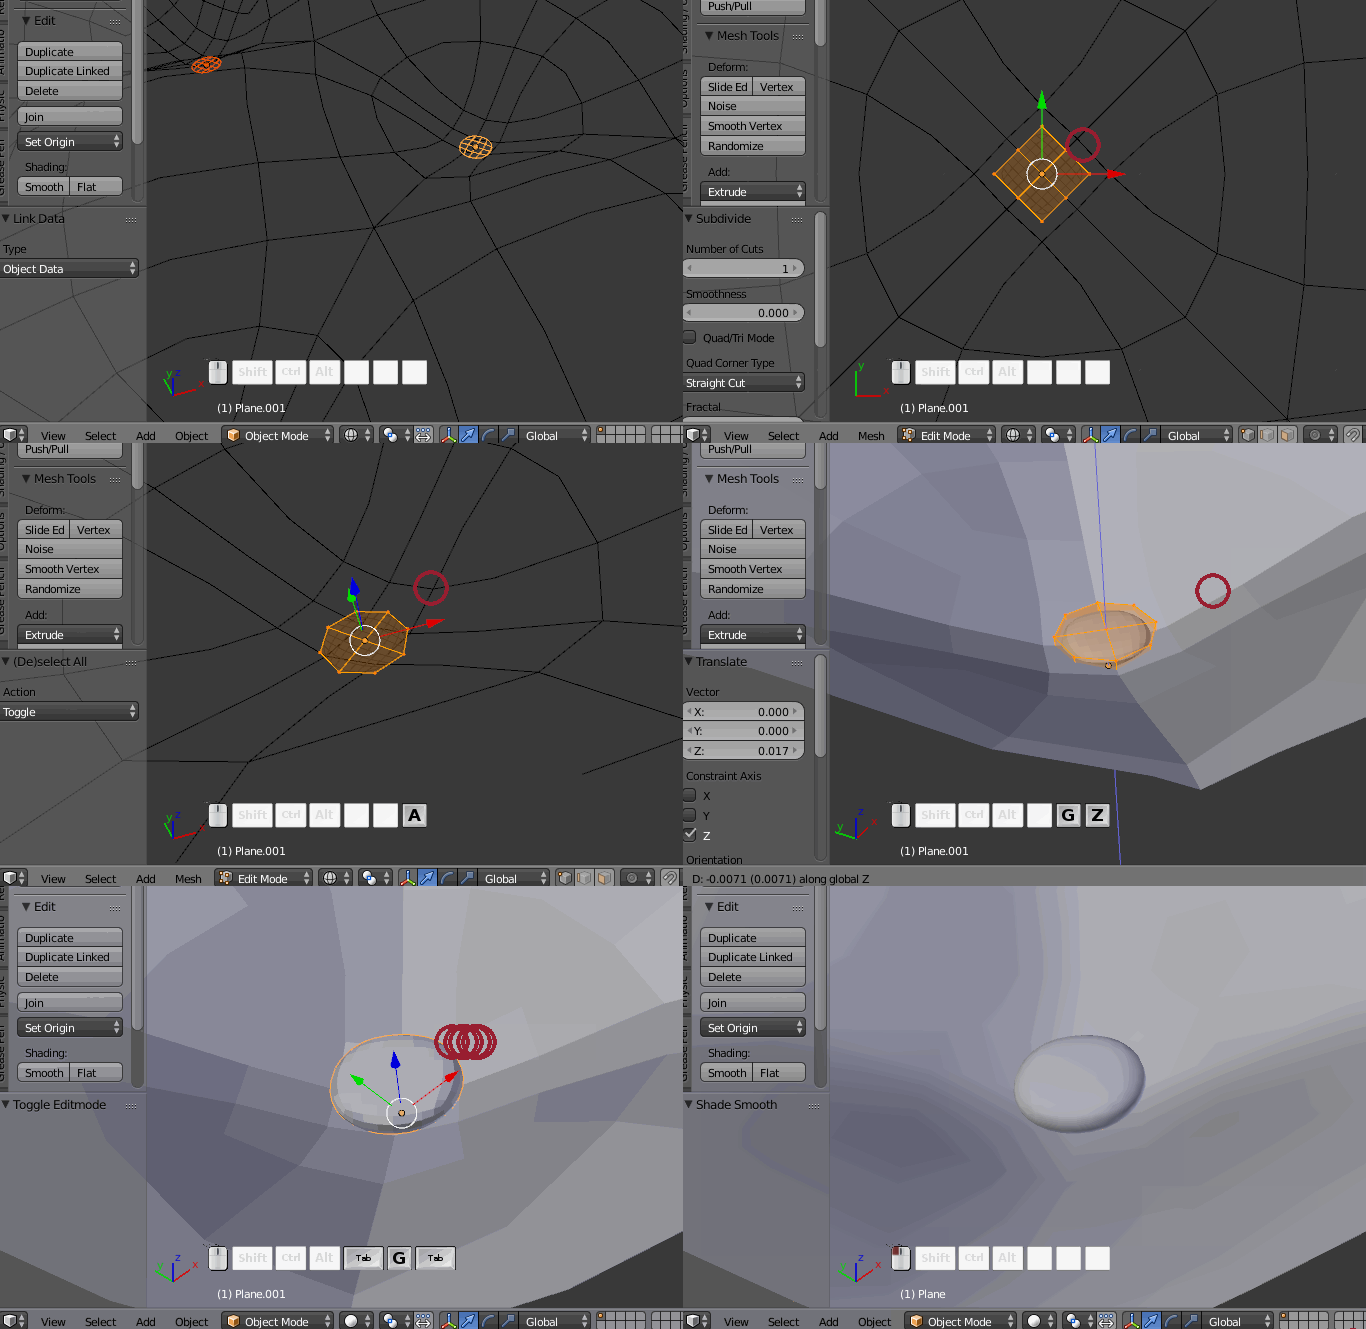
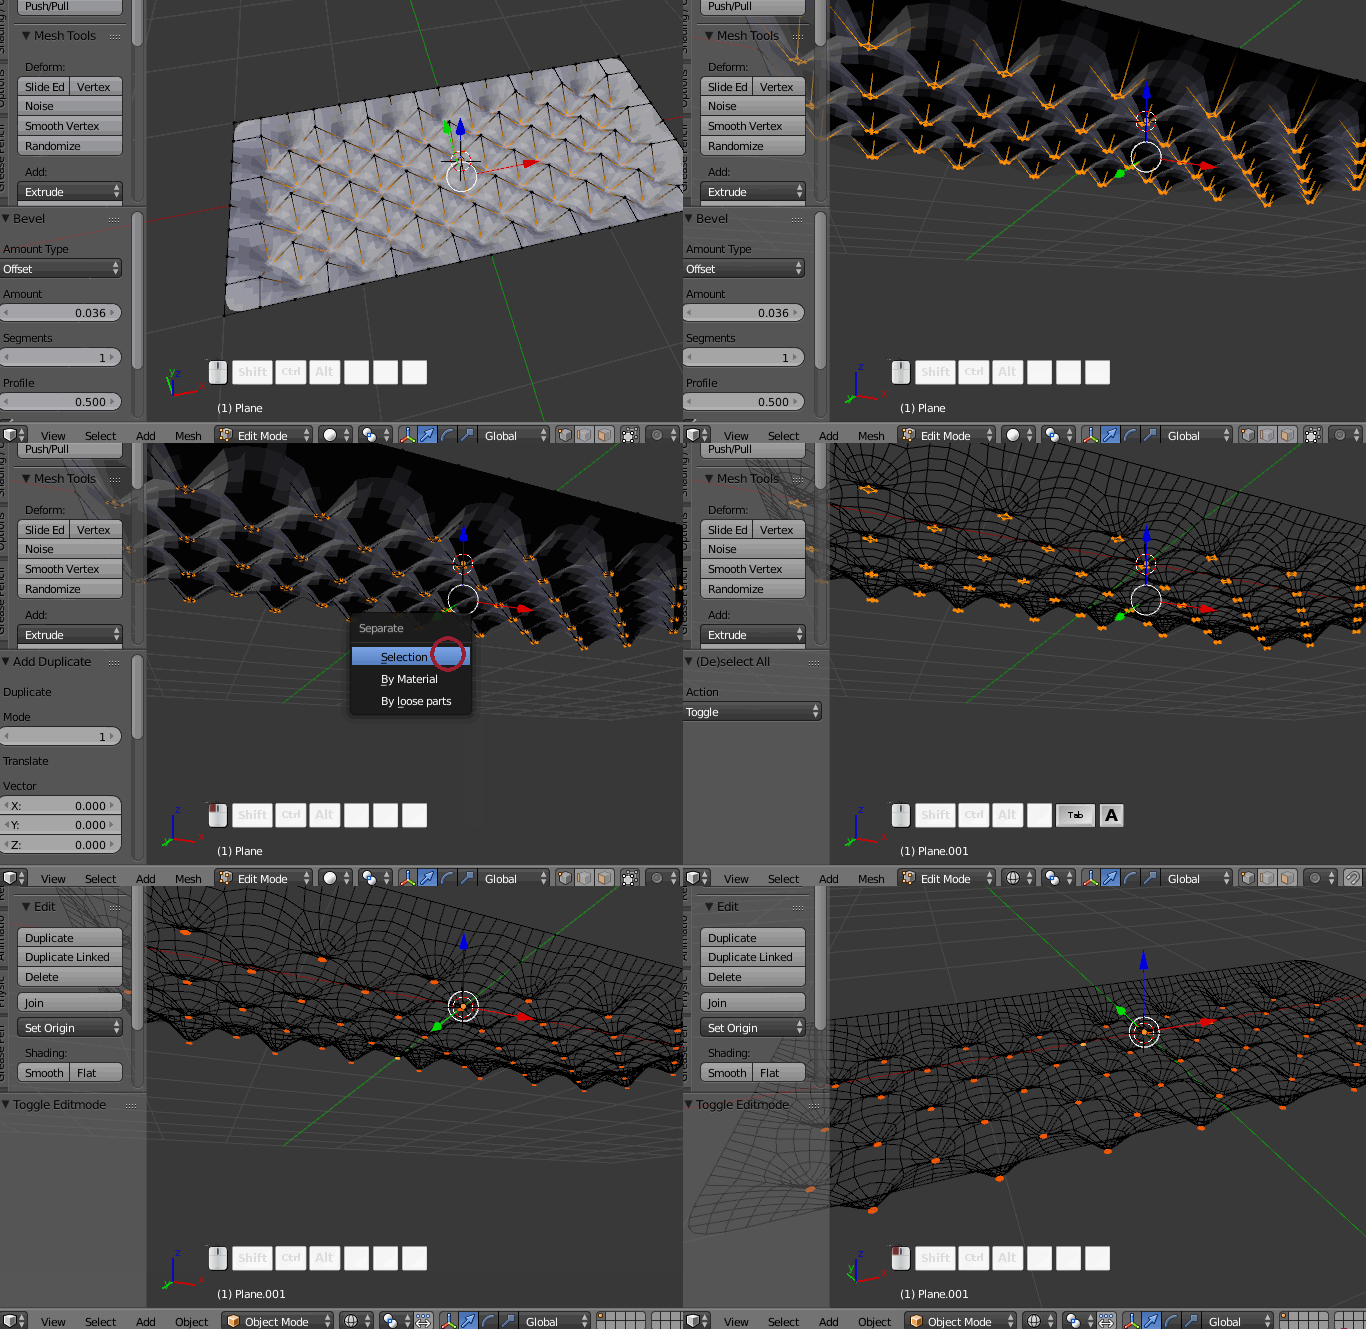
  6. Duplicate those faces (⇧ ShiftD) and press P> Selected to make a separate object out of them. Then select the new object and separate each face (button) into a separate object by pressing P> Loose parts while in edit mode (↹ Tab):
    enter image description here

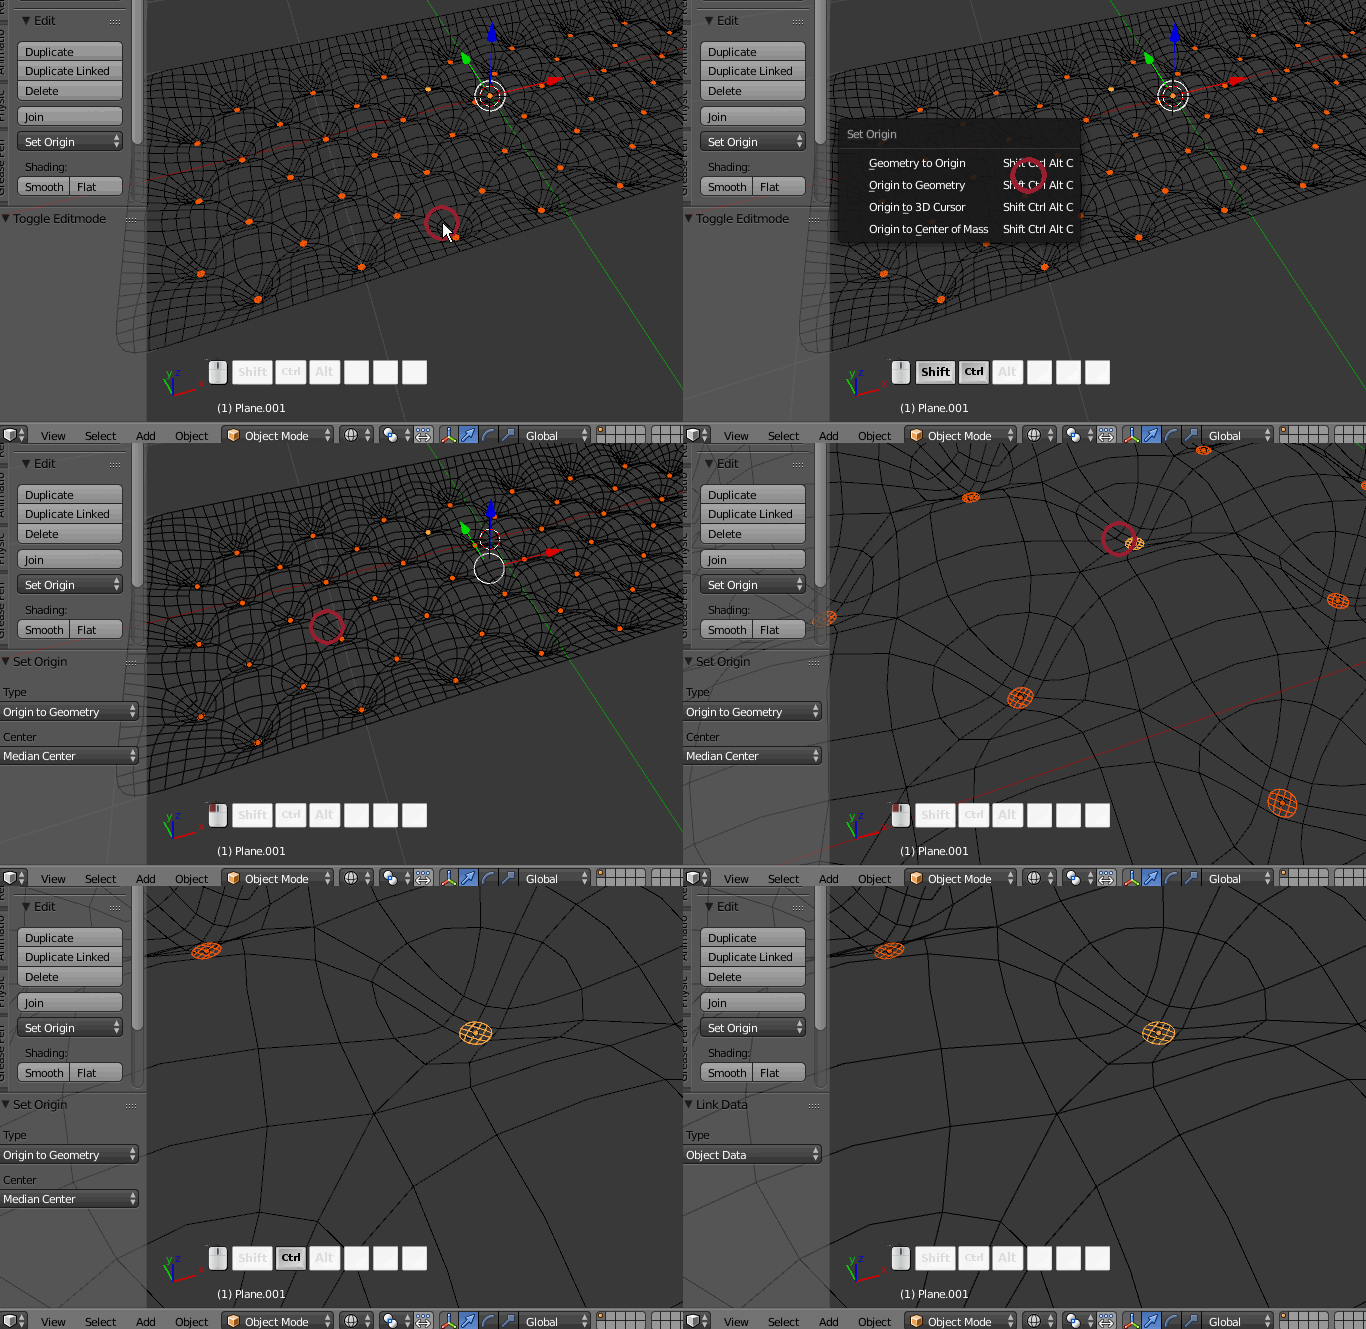
  7. Recenter the origins of all the faces (⎈ Ctrl⇧ Shift⎇ AltC> Origin to geometry), then pick one button to be the main button. With that button active (brighter yellow outline), press ⎈ CtrlL> Object data:
    enter image description here

    Now changes to one button in edit mode will affect all the buttons.

  8. Make the button more button-like:

    enter image description here

  9. Finish off the main part by extruding it and filling the back side with Grid fill:

$\endgroup$

You must log in to answer this question.

Not the answer you're looking for? Browse other questions tagged .