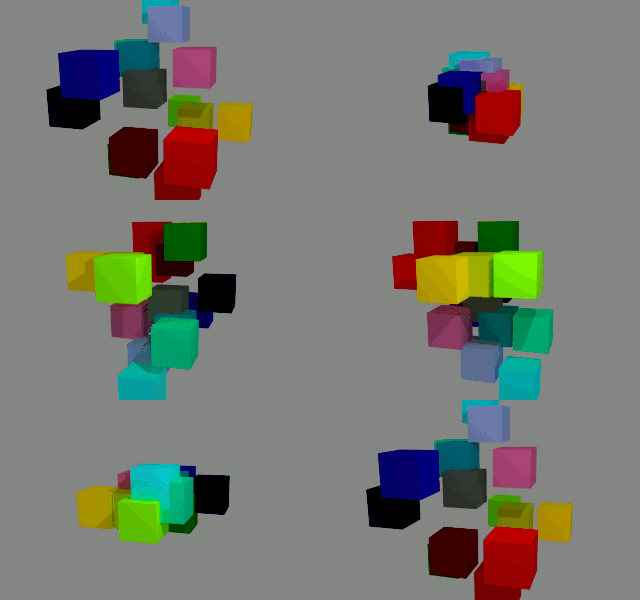
To achieve this you essentially need to be able to do two things :
- Capture the location of each object at a point in time and store it
- Access the stored data efficiently from within the Cycles material
The first task is relatively straight forward using a Python script to capture the object's location as follows :
import bpy

num_objects = len(bpy.data.objects)

for x in range(0,num_objects):
    object = bpy.data.objects[x]
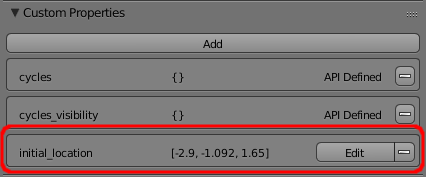
    object["initial_location"] = [object.location[0], object.location[1], object.location[2]]
This script runs through each object in turn, determines its location, and stores it in a Custom Property on each object.
While this is useful to demonstrate the capture of a property of each object, the Custom Properties aren't the best place to store the details since Cycles materials cannot (easily or efficiently) access the contents of the properties. Future Cycles enhancements may well provide a mechanism for reading object properties but for now we need a different method - we can use an Image Texture.
Cycles can very efficiently read the value of a pixel within an image using the Image Texture node and this provides an ideal method of passing the data into the material - encoded as the color of each pixel within an image. A normal 8-bit RGB image will not be sufficient - so we need to use a format that allows full 32-bit floating point values to allow it to hold the location vectors.
The following script will take the location of each object (as in the previous script) and will create an image 1 pixel high and wide enough to hold one pixel per object. Each pixel will be set with its RGB values set to the XYZ vector of the location of the corresponding object.
import bpy

width = len(bpy.data.objects)
height = 1

# Create the image
image = bpy.data.images.new("object_locations_"+str(width), width=width, height=height,float_buffer=True)

# Create an empty array of pixel data (each will hold R, G, B, A values as floats)
pixels = [None] * width * height

for x in range(0,width):
    y = 0
    object = bpy.data.objects[x]
    pixels[(y*width)+x] = [object.location[0], object.location[1], object.location[2],1.0]
    object.pass_index = x

# 'flatten' the array - so [R1,G1,B1,A1], [R2,G2,B2,A2], [R3,G3,B3,A3],.... becomes R1,B1,G1,A1,R2,G2,B2,A2,R3,G3,B3,A3,....
pixels = [chan for px in pixels for chan in px]

# Store the pixels in the image
image.pixels = pixels
image.update()
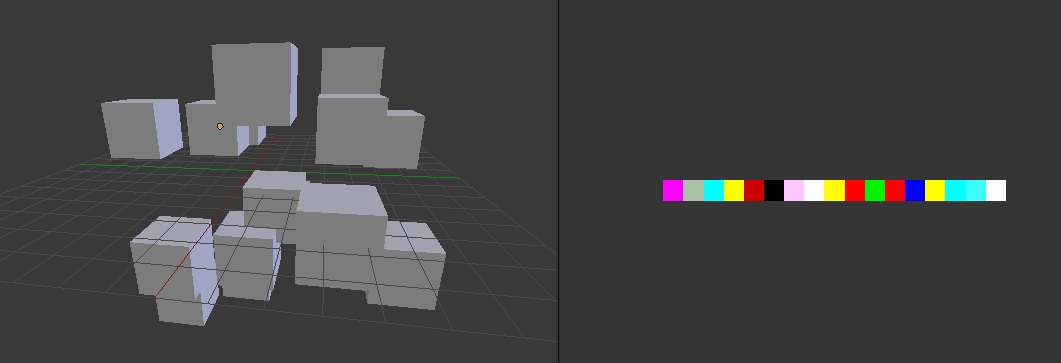
The script runs through each object and captures the location in a pixel in the image. Note that it also sets the object's 'pass_index' to the 'slot' corresponding to that object's pixel in the image - this will be used in the material to retrieve the correct pixel for each object. Running the script on my test scene produced the following image. Dragging the mouse over the pixels shows that each pixel relates to the XYZ location of each object in the scene.
The image needs to be saved - either as an image file or 'packed' into the blend file. However, this causes a potential problem. 'Normal' images are stored as a set of R, G, B, A values in the range 0.0 to 1.0 but our object locations will likely be well outside that range. To prevent this corrupting our stored values we need to ensure it is saved in a format that can store full float values (rather than a PNG). Saving and packing the image as a 32-bit float image is covered in this question. This produces the following final script to capture all object locations into a 32-bit float packed image :
import bpy
import os

width = len(bpy.data.objects)
height = 1

# Create the image
image = bpy.data.images.new("object_locations_"+str(width), width=width, height=height,float_buffer=True)

# Create an empty array of pixel data (each will hold R, G, B, A values as floats)
pixels = [None] * width * height

for x in range(0,width):
    y = 0
    object = bpy.data.objects[x]
    pixels[(y*width)+x] = [object.location[0], object.location[1], object.location[2],1.0]
    object.pass_index = x

# 'flatten' the array - so [R1,G1,B1,A1], [R2,G2,B2,A2], [R3,G3,B3,A3],.... becomes R1,B1,G1,A1,R2,G2,B2,A2,R3,G3,B3,A3,....
pixels = [chan for px in pixels for chan in px]

# Store the pixels in the image
image.pixels = pixels
image.update()

# Save image to temporary file and pack it (from answer by @sambler)
scn = bpy.data.scenes.new('img_settings')
scn.render.image_settings.file_format = 'OPEN_EXR'
scn.render.image_settings.color_mode = 'RGBA'
scn.render.image_settings.color_depth = '32'
img_path = bpy.path.abspath('//')
img_file = image.name+'.exr'
image.save_render(img_path+img_file, scene=scn)
try:
    # Remove the scene (pre-2.78)
    bpy.data.scenes.remove(scn)
except:
    # Remove the scene, (Blender 2.78+)
    bpy.data.scenes.remove(scn, do_unlink=True)


bpy.data.images.remove(image)
bpy.ops.image.open(filepath=img_path+img_file)
image = bpy.data.images[img_file]
image.pack()

os.remove(img_path+img_file)

# Add a fake user to ensure the image is retained
image.use_fake_user = True
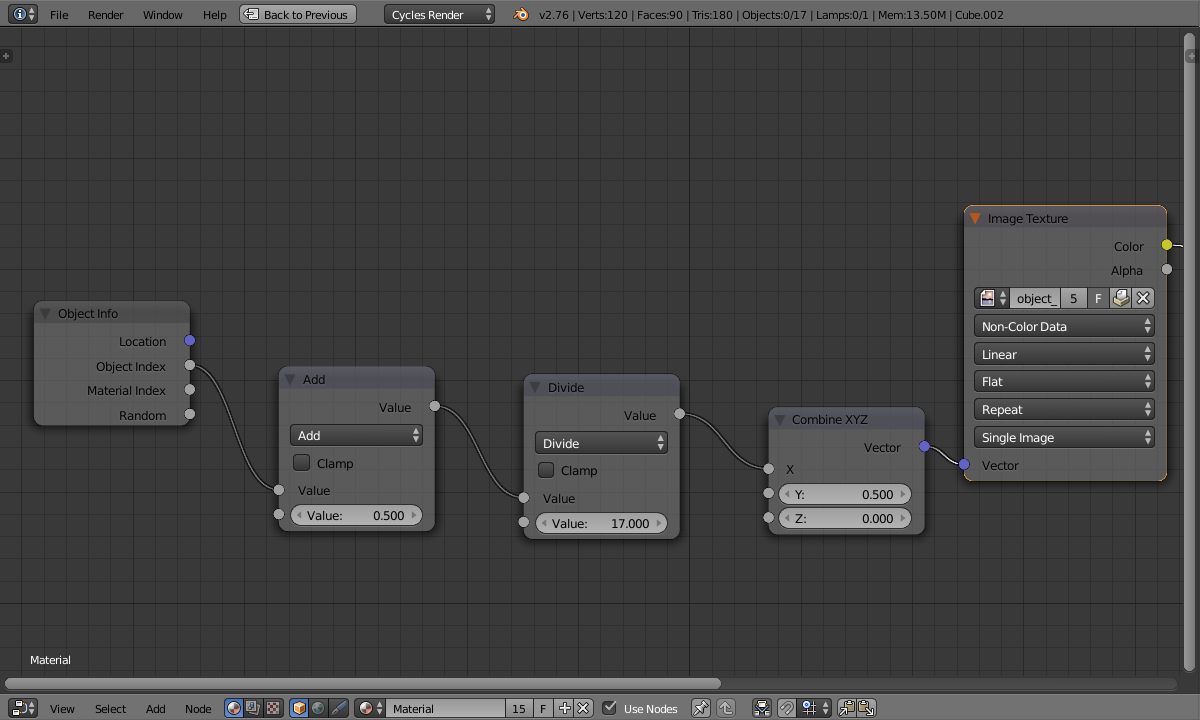
Once we have the stored 'initial' locations of the objects, we can use an Image Texture node and some simple maths to use the Object ID to calculate the location of the associated pixel to extract the color (to use as a vector) from the image as follows :
To convert the Object ID into a pixel location we need to add 0.5 (so that we sample the middle of a pixel) and then divide by the total number of pixels across the image. This will result in a value between 0.0 and 1.0 corresponding to the middle of the relevant pixel. Passing this into a Combine XYZ node with Y set to 0.5 produces the required vector. The Image Texture node should be set to 'Non-color Data' to prevent any color conversion (by default Blender will convert from sRGB colorspace into Linear colorspace).
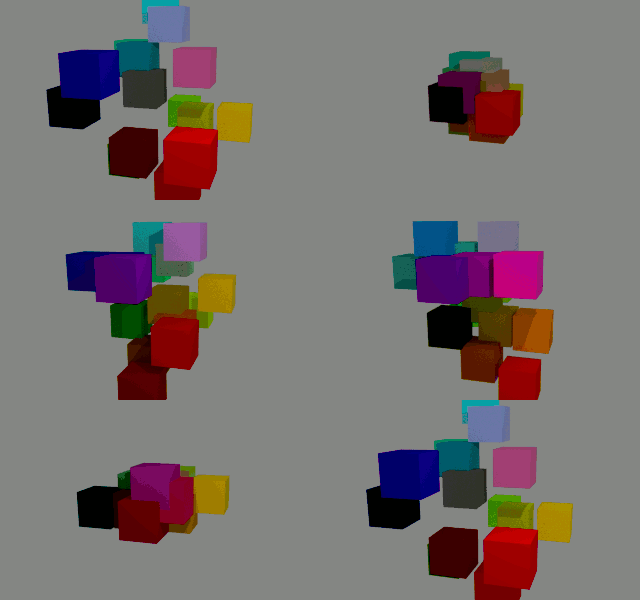
To demonstrate this in action, here's an animation moving the blocks and using the 'current' location to generate the color.
And here using the captured 'initial' location

