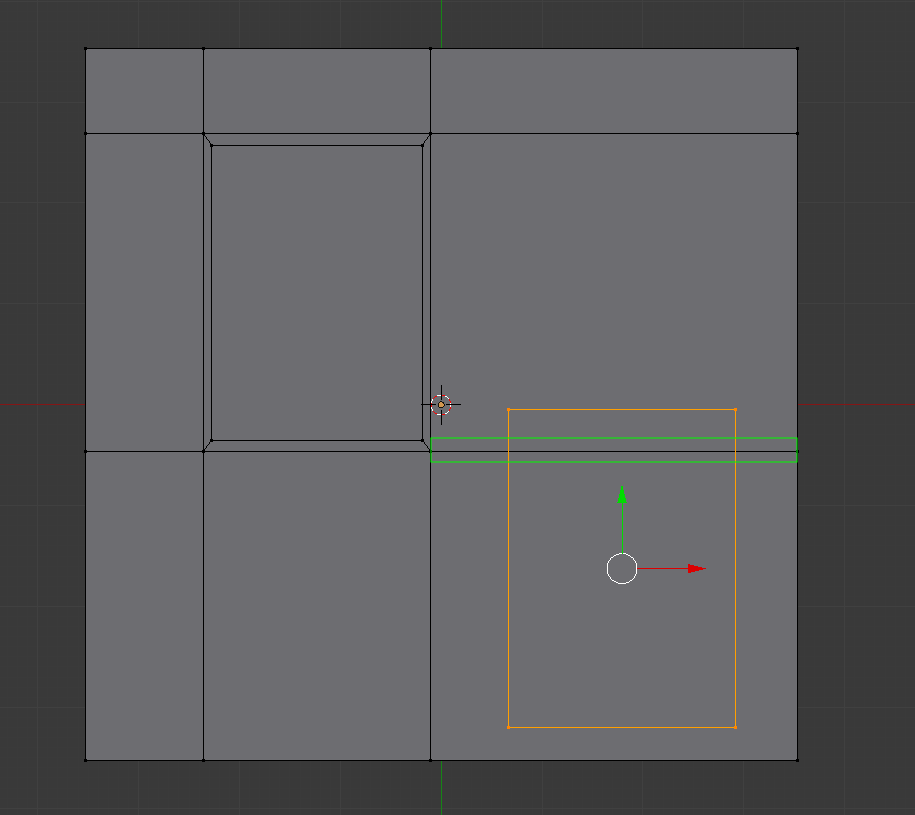
In the case you discuss, I'd duplicate the window, plus the surrounding four vertices, that is, the ones you used the inset tool to create the window from, so that you're copying 5 plane surfaces, instead of one. Then, delete the edge (and only the edge) behind the new location of the window—that is, the edge in the green box,  which will have the result of deleting the two faces of which it is a defining component as well. If your copy of the window includes the four faces around the original window itself, then the fact that the illustration contains merely a rectangular outline of the new window suggests that after you made your new copy of the window by duplicating the desired vertices, edges or faces, you separated the duplicated elements into a new object by pressing the <kbd>P</kbd> key, and choosing "by selection". Otherwise, even in solid shading, you'd see all five faces in the new object, just as you do in the original window.. If this is the case, you need to select the new window and the old side you duplicated it from in object mode, and join them into the same object by pressing <kbd>CTRL</kbd>-<kbd>J</kbd>. Then create new faces around the new window as needed. This technique might result in some awkward geometry right around the new window, complicating UV mapping, shading, and other bits, but if these become a major concern, they can be dealt with later, by deleting a larger part of your mesh, and redoing the geometry.