7
$\begingroup$

I know this may be a very basic question, but I somehow got myself tangled up.

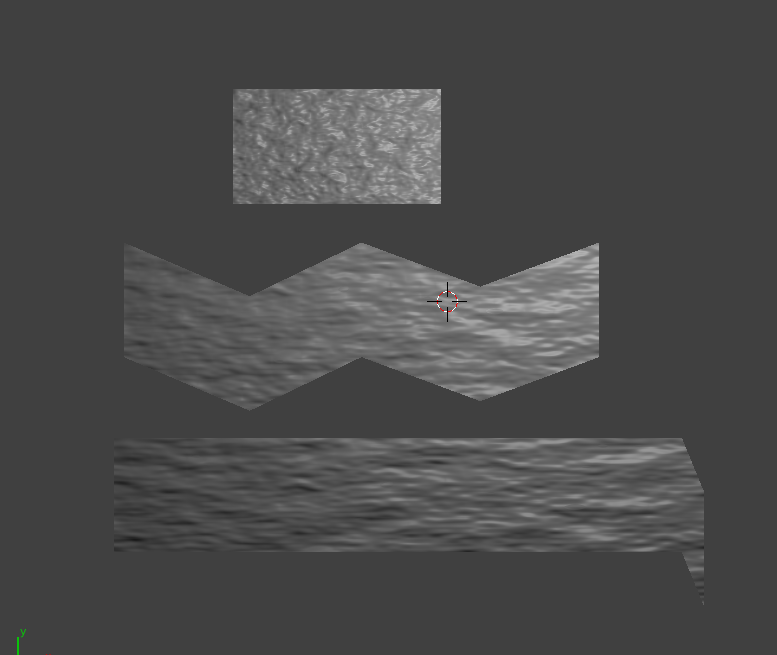
I'm trying to make procedural textures (like clouds) to follow the geometry of a simple model, for instance, a distorted plane.

I'm satarting from a plane and then adding twists and bends to it.

by now it's not working for me: The texture grain will not follow the direction of the breaks, but will stay in the original direction, as in this picture. enter image description here
These are the settings of the texture: enter image description here
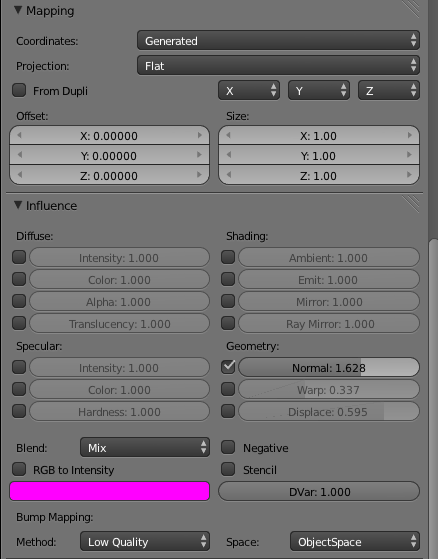
Maybe the problem is in the Mapping settings for the Projection and the Coordinates. Or maybe there's something I should set up with the geometry first (my guess is something with the UV's ¿?¿ which i know nothing about).

I appreciate any help or hints. As you may help me clarify i can edit the question to be more detailed and specific.

And here's a video, where it simply happens,

http://youtu.be/sxgwa-0e5Jw?t=46s

...And the author itself responds in one of the comments (mine by the way) That this happens because the texture is like "the pattern on a carpet" so it will naturally follow if you bend or twist it... So maybe it's even as simple as I'm not using the right tools to twist and bend the plane..... (wich were just extrude and subdivide....)

Thanks in advance

$\endgroup$
3
  • 1
    $\begingroup$ Try UV unwrapping your plane and then using the UV coordinates in Textures > Mapping. $\endgroup$
    – gandalf3
    Commented Apr 24, 2014 at 17:51
  • $\begingroup$ So first, i add the plane, then unwrap it, then apply the texture and finally i choose UV coordinates? (i'll give it a try now) thanks! $\endgroup$
    – invicente
    Commented Apr 24, 2014 at 17:53
  • $\begingroup$ Thanks @gandalf3 ,It's working now, but i still don't get it completly, i think you've got to set the texture first .... but i'm still not sure. $\endgroup$
    – invicente
    Commented Apr 25, 2014 at 14:52

1 Answer 1

7
$\begingroup$
  • Using UV mapping, This is often the most straightforward method since you can edit UV's directly and preview the changes realtime, However you only get 2D coordinates, but you have the advantage that the coordinates are editable and are stored per face-corner (they dont have to be contiguous). UV's are also well supported by many formats, game-engines and render-engines.
    • if your mesh has primarily a grid topology, then try the Follow-Active-Quads tool from the unwrap menu.
  • Using Generated mapping, this works when you deform a mesh by a modifier (ShapeKey, Lattice or Armature for example), the un-deformed mesh is used for texture coordinates.
  • Using TexMesh, see Mesh Data properties, This allows you to select another mesh to use for texture coordinates, this gives a lot of control but the vertex indices must match up. These have the advantage of allowing you to set XYZ coordinates, but you have to take care not to add/remove vertices from the mesh. While useful, this is a Blender specific feature.
$\endgroup$

You must log in to answer this question.

Not the answer you're looking for? Browse other questions tagged .