Can someone point me to or give me detailed step by step description on how to connect two objects with a hinge constraint?I am not sure which is the target.. the one that actually swings or the stationary one. Also the constraint icon doesn't move at all when both cubes move. So I get dashed lines from it to cubes. Also the different menu items on the left side and the properties side confuse me. When do I use them? Videos I see are simple, but I can't copy them.
-
3$\begingroup$ are you looking to do this in the game engine, or just blender's rigid body physics? $\endgroup$– DavidCommented May 22, 2016 at 13:54
-
$\begingroup$ I am attempting to be realistic in what I am doing, but still may need to use the game engine. I guess Blender's rigid body physics. If you have time to inform of both please do $\endgroup$– youkuyaCommented May 23, 2016 at 1:52
-
$\begingroup$ Oh just scrolled down and noticed your comprehensive answer. I will try it now... yes I didn't not have it in BGE. Must check if the videos I looked at were set to BGE! Ok will try what you said. $\endgroup$– youkuyaCommented May 23, 2016 at 2:02
3 Answers
As it is written in the Blender reference manual's page about Rigid Body Joint Constraint this kind of constraint..
... it is used by the physical part of the Blender Game Engine to simulate a joint between its owner and its target.
So the first step is to make sure you are using the Blender Game engine. You can always save the result of the animation by recording it in order to use outside the BGE.
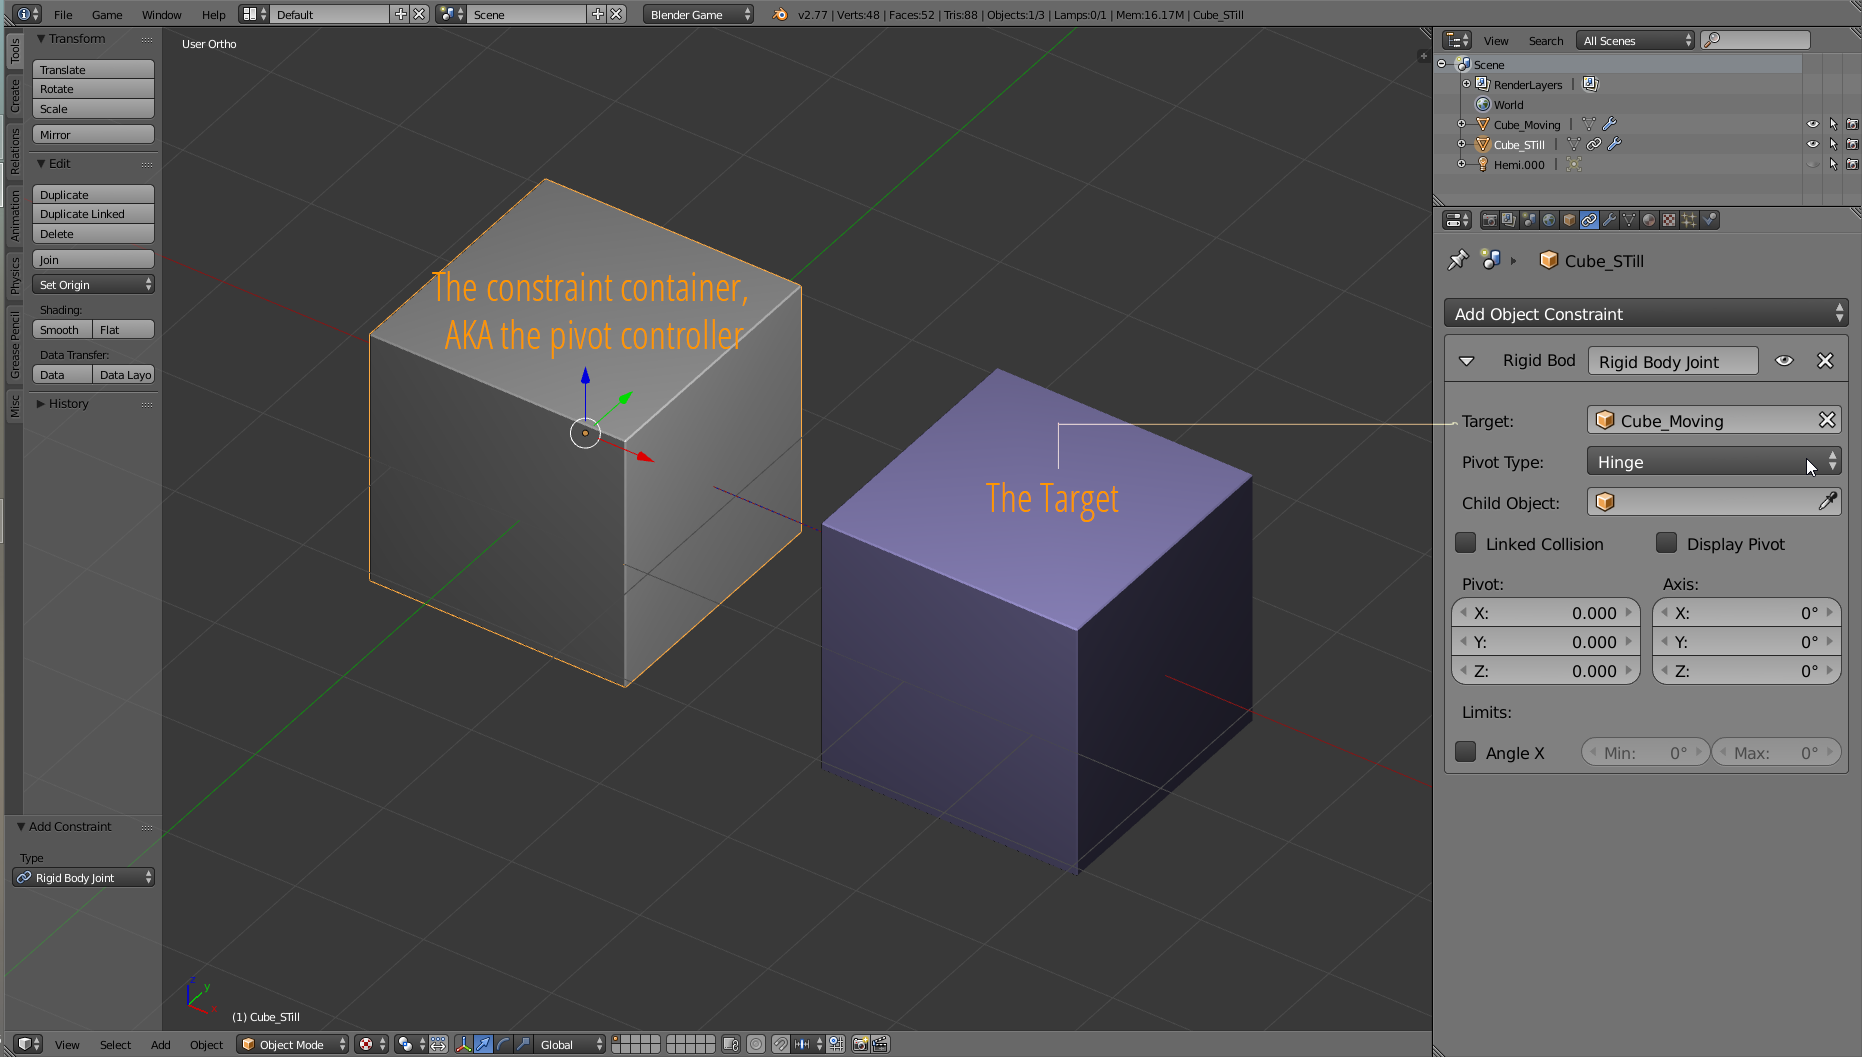
Now, focusing on a simple scene composed by two cubes like the following:
assign to the cube that will not move a Rigid Body Joint constraint and choose Hinge as pivot type. At this point you have to consider the cube (mainly it's origin) as the "pivot", while the target field must be filled with the name of the object that will be affected by the constraint: in this case the blue cube, named "Cube_Moving".
You should think about the object that brings the constrint as the pivot controller, by default it is placed in its origin, but you can tweak the relative position of the hinge with the options in the right panel.
Going on, you'll have to remember that...
...the owner and target can only rotate around the X axis of the pivot (joint point).
So it'll be better to move the blue cube away from the X axis, or we'll not see the result of the constraint.
At this point we have to set up some physic for testing the constraint. As it is said by a note in the manual:
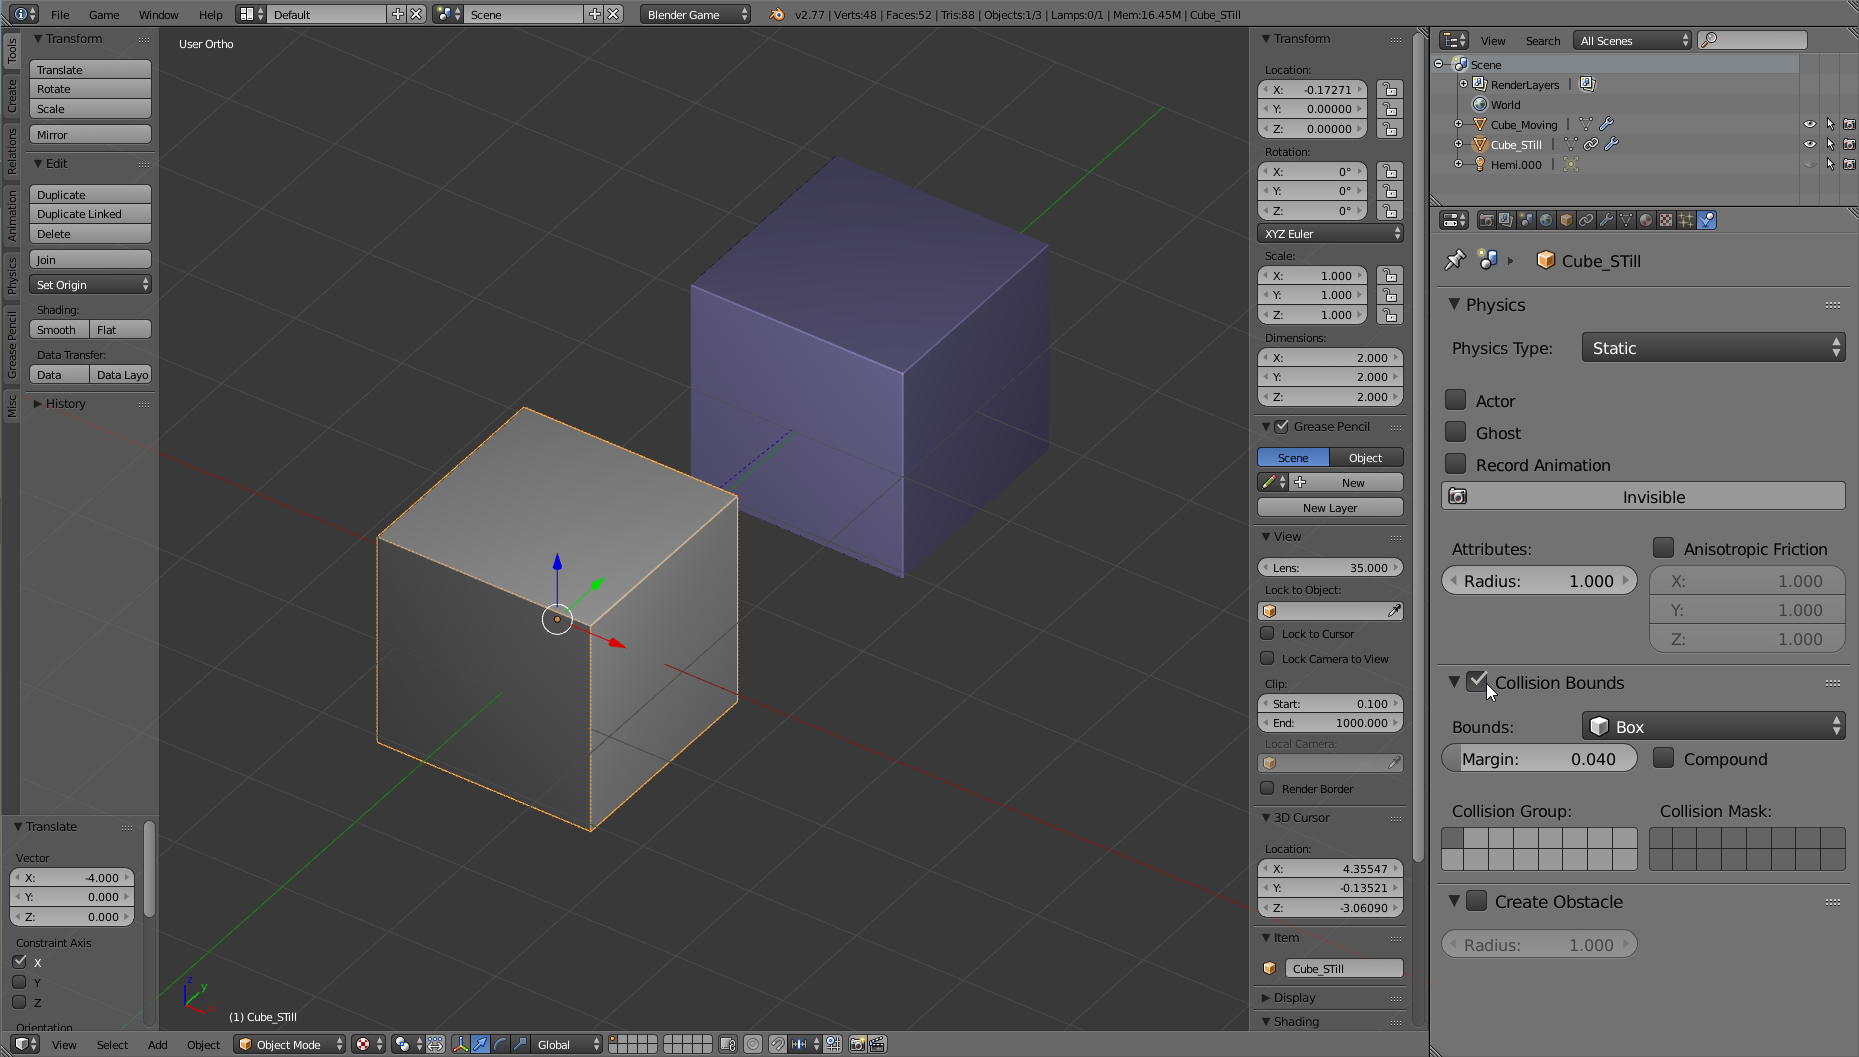
In order for this constraint to work properly, both objects (so the owner and the target object) need to have Collision Bounds enabled.
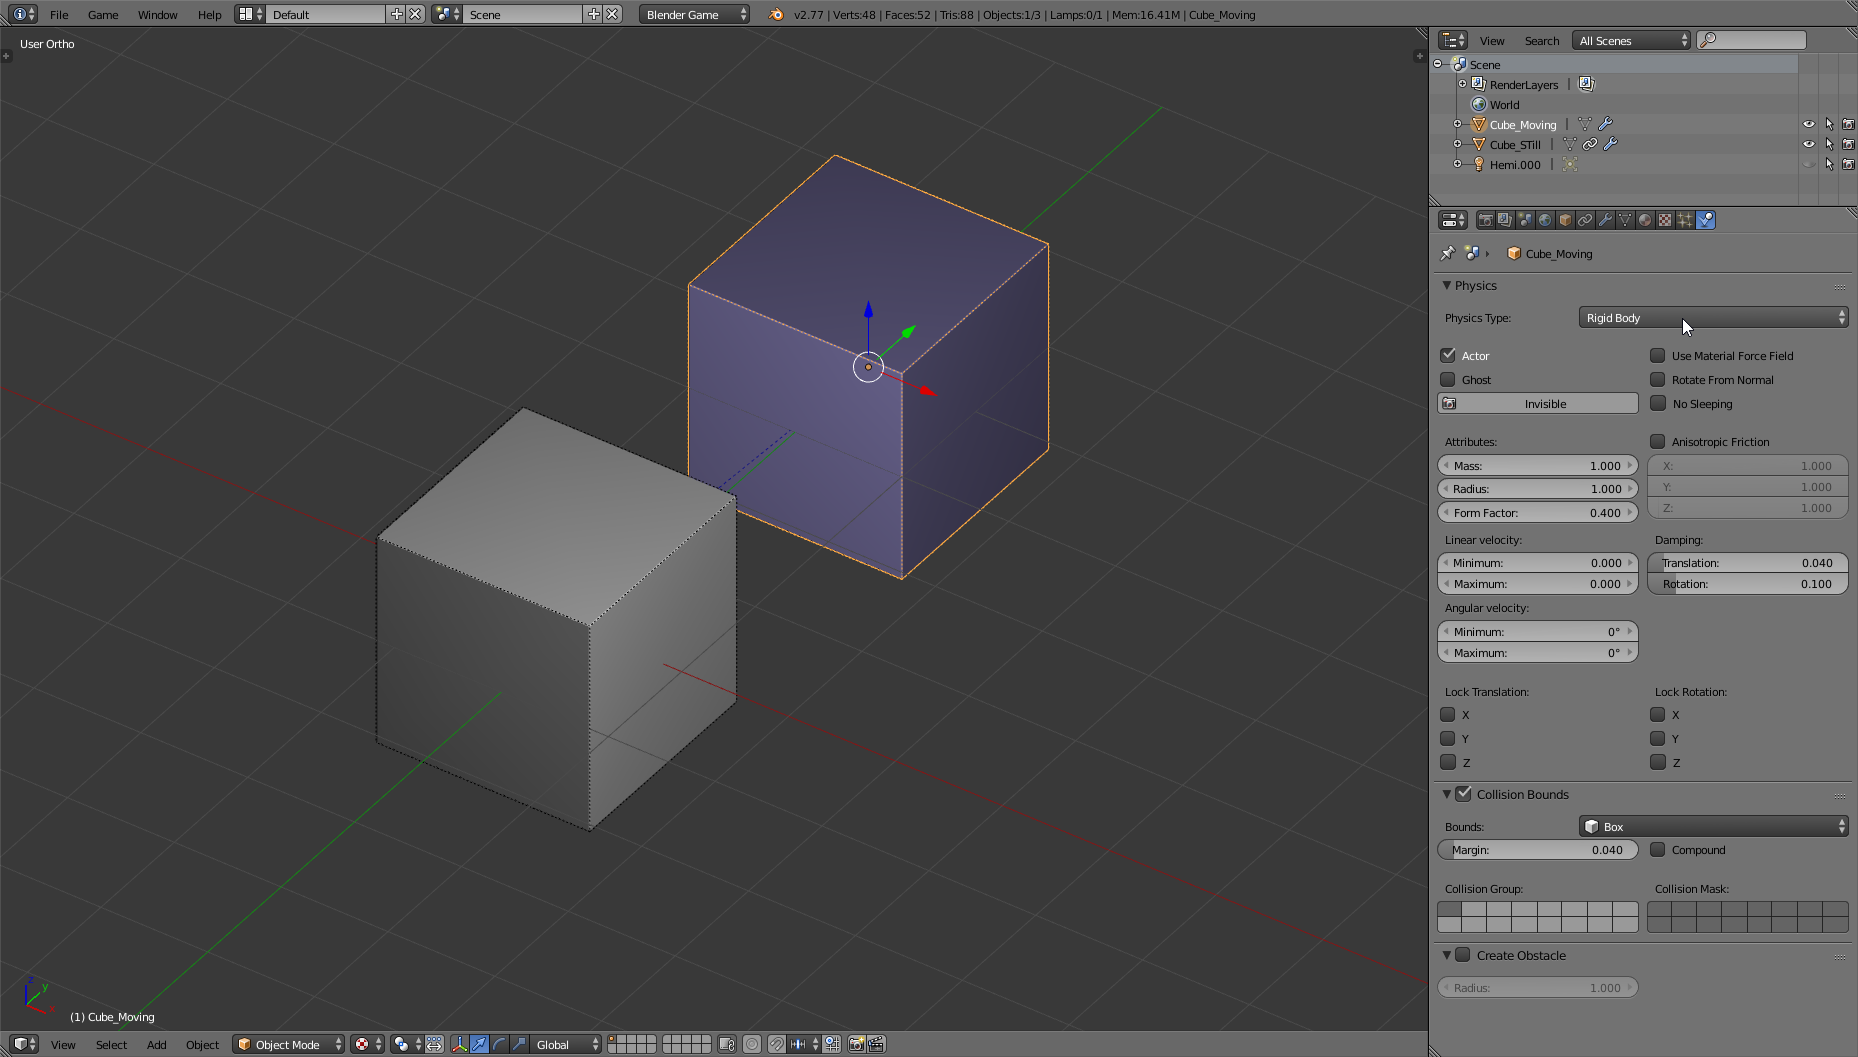
Go to the physic tab, as shown in the pic above and enable the option for the grey cube, and then for the blue. We-ll also change the Physic Type from Static to Rigid Body for this object (we could also have can set it for both, it's just an example):
To sum up:
- Blender Game
- Assign constraint to the pivot controller and make it pointing to the Target
- Collision Bounds enabled
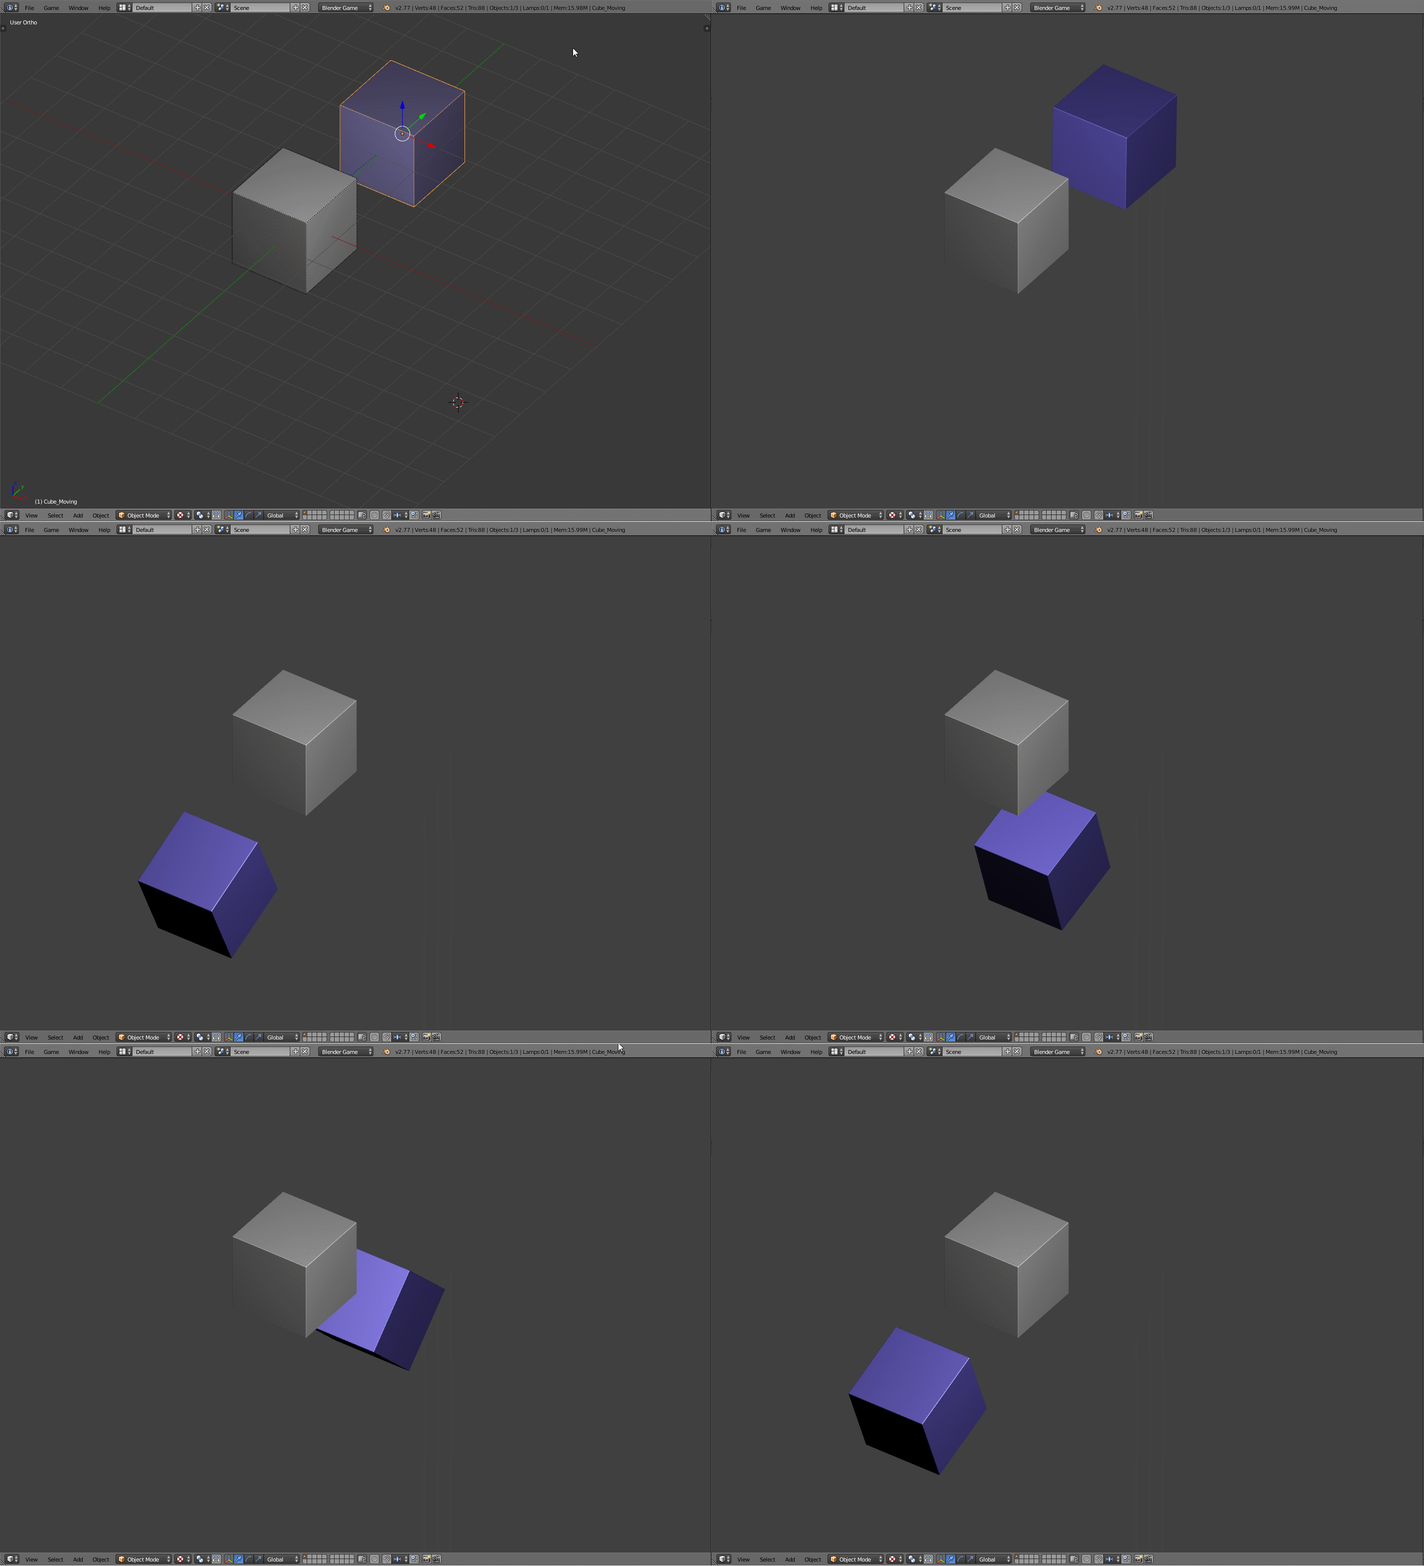
Final result:
-
$\begingroup$ Do you think something like the solution you have posted here would be useful for making a robotic gripper made with soft body objects like what I am trying to build? $\endgroup$– AmirCommented Oct 17, 2018 at 13:43
First off, I learned everything from here. It seems like a pretty easy tutorial for beginners, but I'll explain.
I built a simple contraption very much like the one from the video. Here is a starting .blend file for you to download and follow along from:
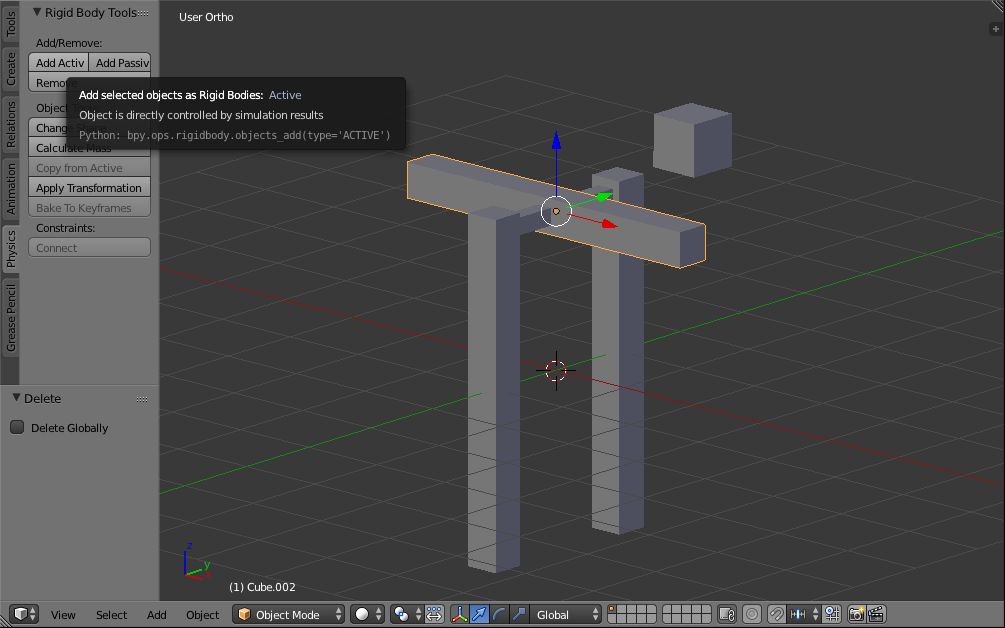
Upon opening the .blend file, select the bar that you want to move and click Add Active in the tools panel on the left (toggle tools open/close with T). The bar's outline should change from orange to green.
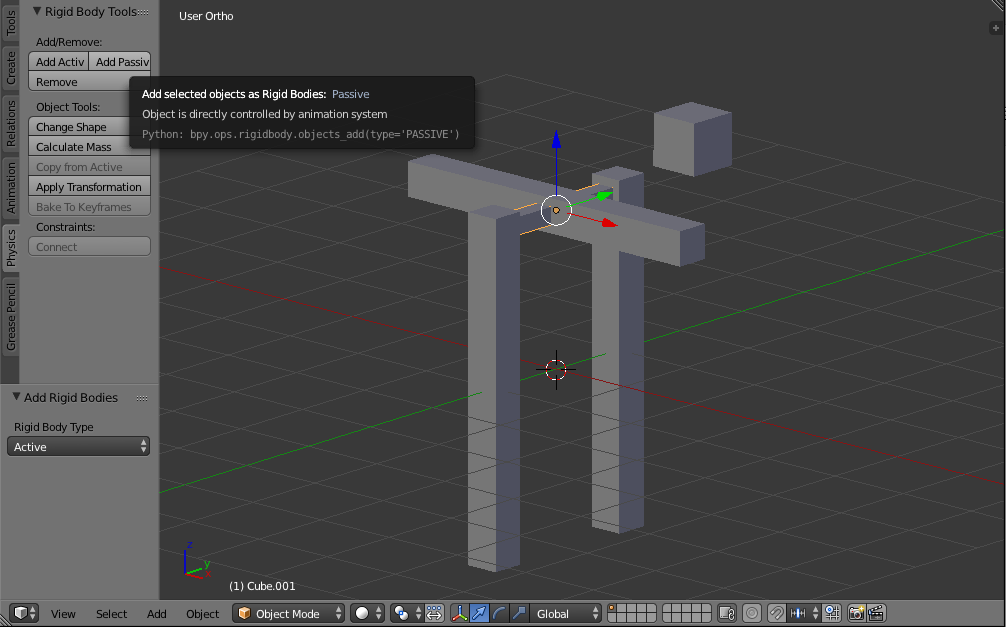
Next, select the bar that you want it to hinge on and click Add Passive, directly to the right of the Add Active button. The bar's outline should change from orange to green.
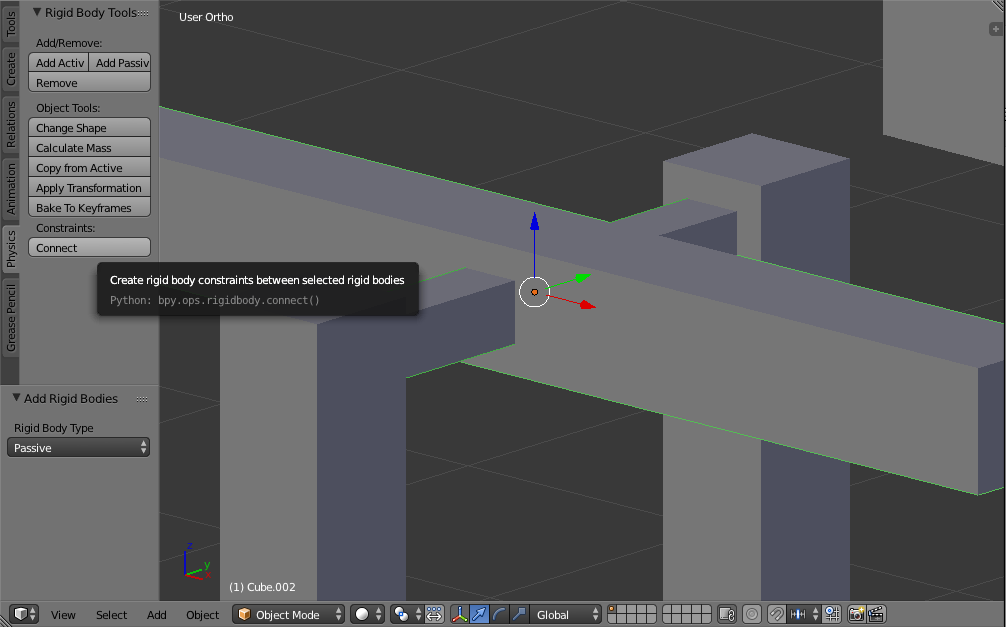
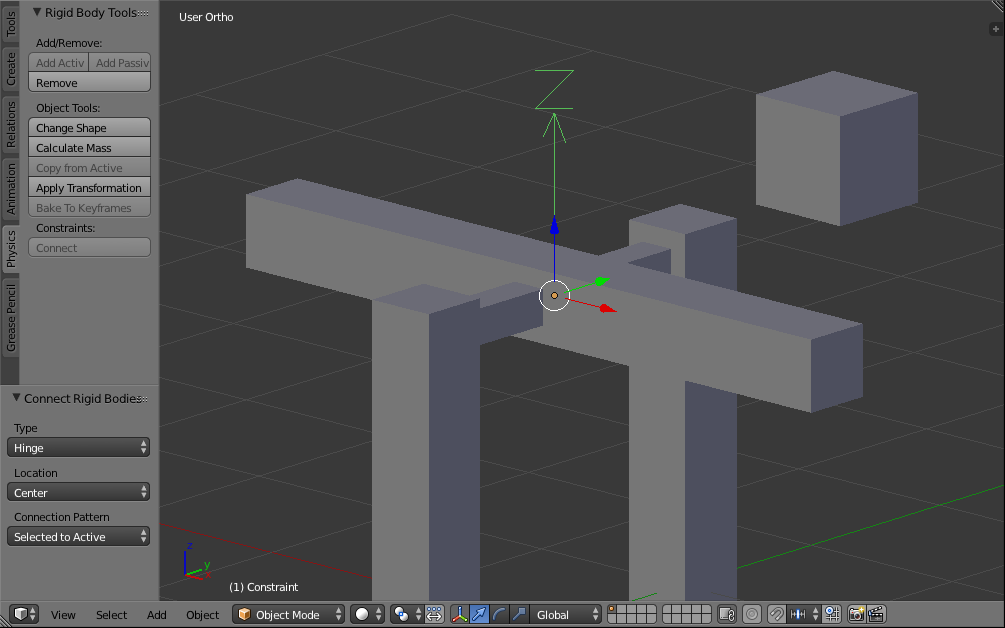
Select the Passive bar, Shift + RightMouseButton select the Active bar. In the tools panel, click Connect at the bottom.
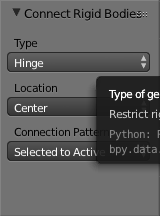
At the bottom of the tools panel, change the Type dropdown menu to say Hinge, if it doesn't already.
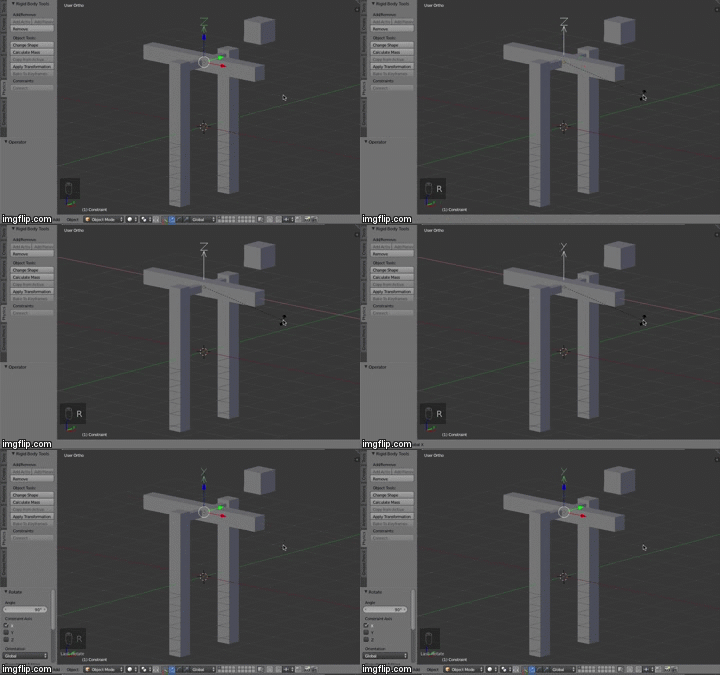
Back in the 3D part of the 3D Viewport, select the arrow that says "Z" and is sticking up out of the center of the two physics objects.
Key R, then X, then 90. An arrow labeled "Y" should now be sticking up.
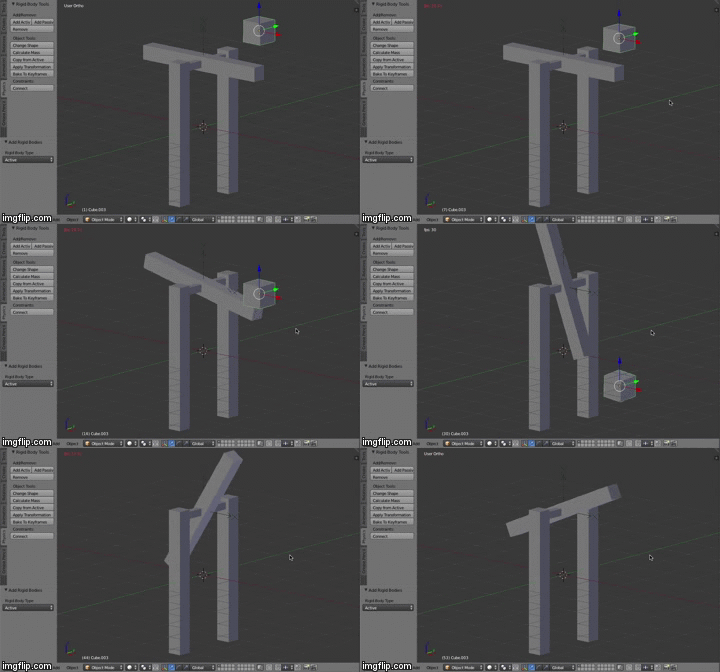
Select the floating cube. Click on the Add Active button in the tools panel. It should now show a green outline. Key Alt + A, and it should fall and turn the hinge.
Lastly, if you can't quite get it, you can download the finished .blend.
-
$\begingroup$ Hi Shady I got all that you showed me to work... thank you. For the second one I forgot about the BGE, but it still worked in Render and Cycles mode. The rigid body constraint menu to the right doesn't offer spring etc. I've been trying using the T bar Physics Connect, but I can't get the spring to behave. It goes shooting all over the place in BGE as well as Render. Would you mind going through springs and any other you have time to do? Thanks $\endgroup$– youkuyaCommented May 23, 2016 at 7:59
-
$\begingroup$ @youkuya If my answer helped, please consider accepting it by clicking the outline of the check mark at the top. $\endgroup$ Commented May 23, 2016 at 11:00
-
$\begingroup$ I remember now that there are two separate simulation bits to Blender, one in BGE and the other outside BGE. I recall that establishing one system is planned. I am not sure if one can get springs in BGE? $\endgroup$– youkuyaCommented May 24, 2016 at 2:21
-
$\begingroup$ I wouldn't know. You could ask Carlo. $\endgroup$ Commented May 24, 2016 at 2:33
-
$\begingroup$ I found this to get springs in BGE at homepages.ihug.co.nz/~m_collett/blender/spring4.html. $\endgroup$– youkuyaCommented May 25, 2016 at 5:27
You don't need to use the blender game engine, it works with cycles or whatever.
My favorite tutorial is this one:
https://www.youtube.com/watch?v=FSYiDLv2fjw
The following tutorial also shows how to use it to make gears, each spinning around their spindle.
https://www.youtube.com/watch?v=DqBOva04lcE
For the first tutorial above I transcribed it and came up with the following. I'm not sure what the second section is for, Newton's cradle perhaps.
1) Add the top static body object and name it anchor01. Click Add Passive in Physics Rigid Body Tools in tool panel on left.
2) Add an object below anchor01, name it moves01. Click Add Active in Rigid Body Tools in tool panel on left.
3) Select select moves01, shift select anchor01. In Physics Rigid Body Tools tool panel click Connect.
4) A new Empty is created; change its name to rbc01. Move the empty so its center is the same as anchor01. Rotate the empty on X 90 so its Z axis is parallel with the world Y axis.
5) Move moves01 left or right on the X axis and up on the Z axis. Press the play button and it should swing from anchor01.
===============================================================
3) Add Empty Arrows to top of rod01, name it rbc01. Rotate X 90. From side view, Right Ortho, Z arrow is on the left, Empty Z axis is parallel with world Y axis. Rod will rotate around that Z axis.
4) In physics panel add to empty rbc01 Rigid Body Constraint, Hinge. Set Object 1 to rod01. Set Object 2 to anchor01.
5) Select rod01, shift click empty rbc01 then anchor01 in that order. Do ctl-p and select first item, Object.
6) Add rod02, move rod02 to end of rod01. In Rigid Body Tools panel in tool panel on the left click on Add Active.
7) Select rod02, shift select rod01, click on Connect button in Rigid Body Tools in tool panel on the left.
8) Move the empty created to the end of rod01, name it rbc02. Rotate X 90.
9) Select rod02, shift click rbc02 then rod01 in that order. Do ctl-p and select first item, Object.


