7
$\begingroup$

If I have an animated moving object, is it possible to get its speed and/or acceleration vector into a driver variable?

Some ideas I've thought of and haven't worked out:

  • Obviously differentiating the position F-curve is the raw math way to do it. But finding and (repeatedly) differentiating the interpolation function seems a bit beyond Blender's Python capabilities. And I am hoping there is an easier way.
  • If it is possible to get the position at the previous frame the first derivative could be approximated. This doesn't help with acceleration though.

To be clear, I'm not talking about physics simulations, I'm talking about keyframed animation.

$\endgroup$
6
  • $\begingroup$ I think you could add a property to your object for this purpose, and store your value there. You could add as many as you need, and still look it up VIA its RNA data path in the Driver Variable. I'm not all that great with the physics aspect, but if you could provide the values you are looking to store, I'd be glad to help try to get to a solution. $\endgroup$
    – Rick Riggs
    Commented Mar 3, 2016 at 2:19
  • $\begingroup$ @RickRiggs I'm afraid I'm not quite sure I know what you are talking about. What do you mean by a "property object" and "my value"? $\endgroup$
    – PGmath
    Commented Mar 3, 2016 at 2:21
  • $\begingroup$ After chewing on this, I remember being able to trigger a driver on frame change (which would actually dismiss the notion of using the objects properties for storage of these values). For the driver itself, all it has to do is call a python function when the frame changes (So I'm going to have to search for how to do this part again). In the mean time, I will post what this function would basically consist of in my mind. $\endgroup$
    – Rick Riggs
    Commented Mar 3, 2016 at 5:19
  • $\begingroup$ Also could you describe the use such as: can this happen at render, is this live in the BGE, etc... ? $\endgroup$
    – Rick Riggs
    Commented Mar 3, 2016 at 5:29
  • 1
    $\begingroup$ Looked into this a while back, and went for a "baking" approach, ie once you have a displacement animation, use it to bake velocity and acceleration to custom properties using the f((x+h) - f(x-h)) / 2h first derivative approx. Iterate over frame range using the object's ob.matrix_world.to_transform() which "should" give a reasonable result regardless of animation type (keyframes, constraints, drivers etc). From blenderartists.org/forum/… $\endgroup$
    – batFINGER
    Commented Mar 3, 2016 at 14:12

4 Answers 4

6
$\begingroup$

Ensure that the Auto Execution 'Auto Run Python Scripts' setting is enabled in the File tab of the User Preferences. This allows you to run Python scripts within Drivers.
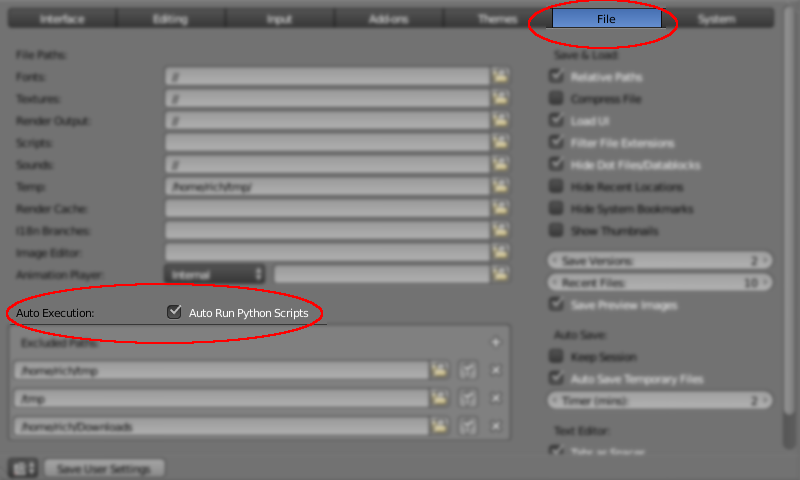
Enable Python Scripts

Open a 'Text Editor' window, click 'New', and paste the following text :

import bpy

attributes = {}

def drv_calc_change(frame, attr, value):
# Used to calculate the change of a property (eg, x-coord) between one frame and the next.

    # Determine whether we already have a value for this attribute
    if attr in attributes:
        attribute = attributes[attr]
    else:
        # Not found - create a new record for it and store it
        attribute = {'frame':frame, 'value':value}
        attributes[attr] = attribute

    # Calculate the difference
    difference = value - attribute['value']

    # If new frame then store the new value to use next time.
    if frame != attribute['frame']:
        attribute['frame'] = frame
        attribute['value'] = value
        attributes[attr] = attribute

    return difference

if 'drv_calc_change' in bpy.app.driver_namespace:
    del bpy.app.driver_namespace['drv_calc_change']
bpy.app.driver_namespace['drv_calc_change'] = drv_calc_change

Give it a suitable name and click 'Run Script' to run it now and tick 'Register' so that it is automatically run each time the .blend is opened.
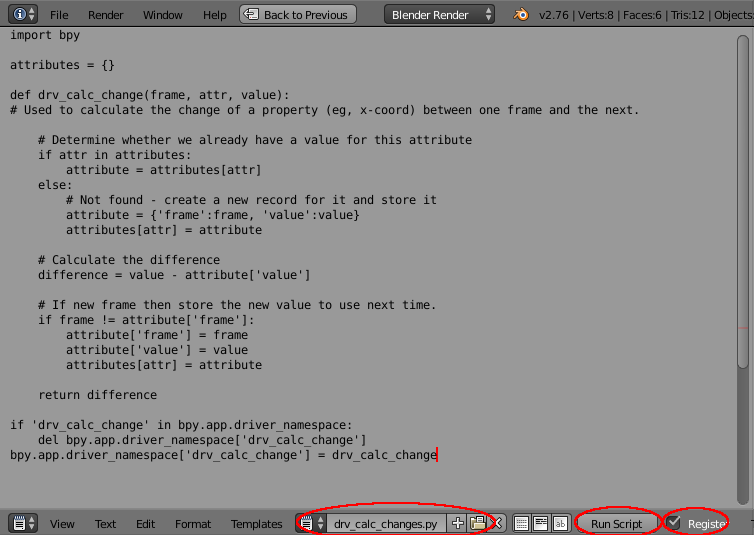
Script

Running the script will register a new function that is available from within Drivers that will calculate the change in any attribute between different animated frames. The script works by storing a list of attributes along with the value for that attribute and the associated frame number, returning the difference between the value passed into the function and that stored from the previous frame. On change of frame the new value is stored to be used for the next frame. Since each is stored along with the attribute name, the same function can be used for any number of properties simply be assigning each a different name.

Go to the object you want to track the velocity of. Open its 'Object' properties and in Custom Properties 'Add' a new property. Edit it and set its name to 'dx' (Delta-X), Value to '0.0', Min to -999999, Max to 999999, click 'OK' to accept. Right-click the value field and 'Add Driver'.
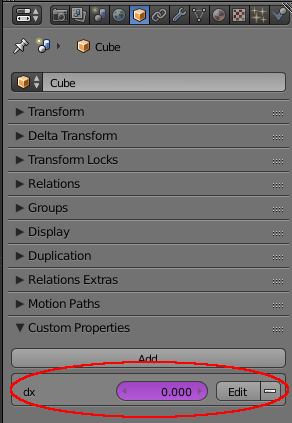
Add Property

Go to the Graph Editor and change mode to 'Drivers'. Select the new 'dx' driver, open the properties panel (press 'N' while the mouse is in the Graph Editor). Ensure the default 'var' Variable is set to Transform Channel, the Object/Bone property is set to the object you want to track, Type is set to 'X Location' and Space is 'World Space'.

Move up to the Drivers panel and set Type to Scripted Expression and set the expression to 'drv_calc_change(frame, "dx", var)'. This will set the value of the Property to that returned from the new function.
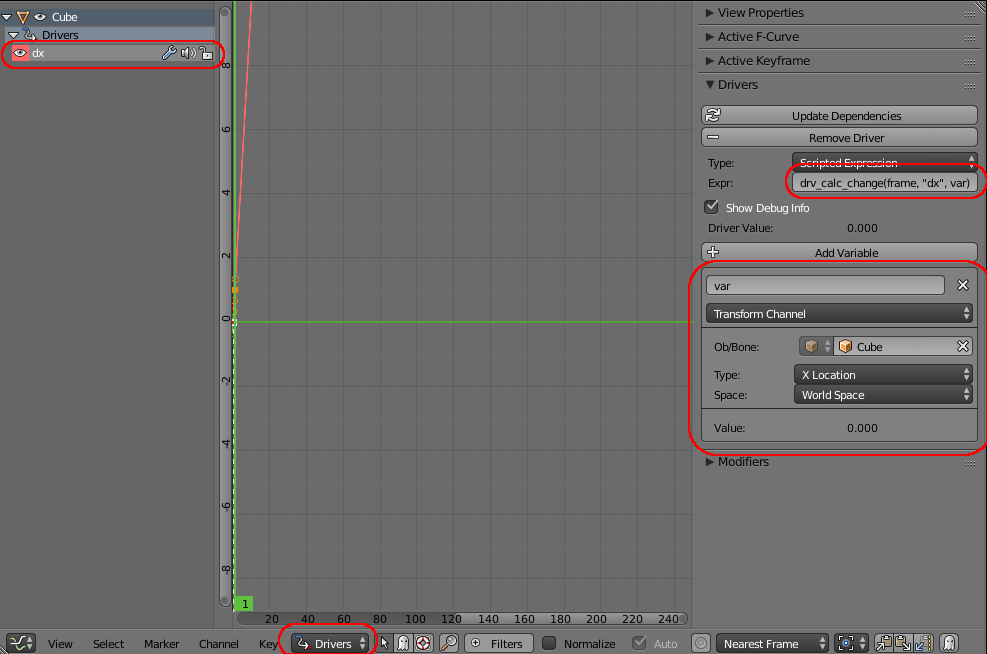
Driver

Repeat the above for 'dy' and 'dz' - using the appropriate Transform Channel (Y, Z) for each and using the appropriate label ("dy", "dz") in place of "dx" in the expression .

The 'dx', 'dy' and 'dz' Custom Properties should now automatically update with the velocity in each axis when moving between different frames of the animation.

Set some keyframes to move the object around and step through the animation to check that the properties are automatically updated to the velocity at each frame.
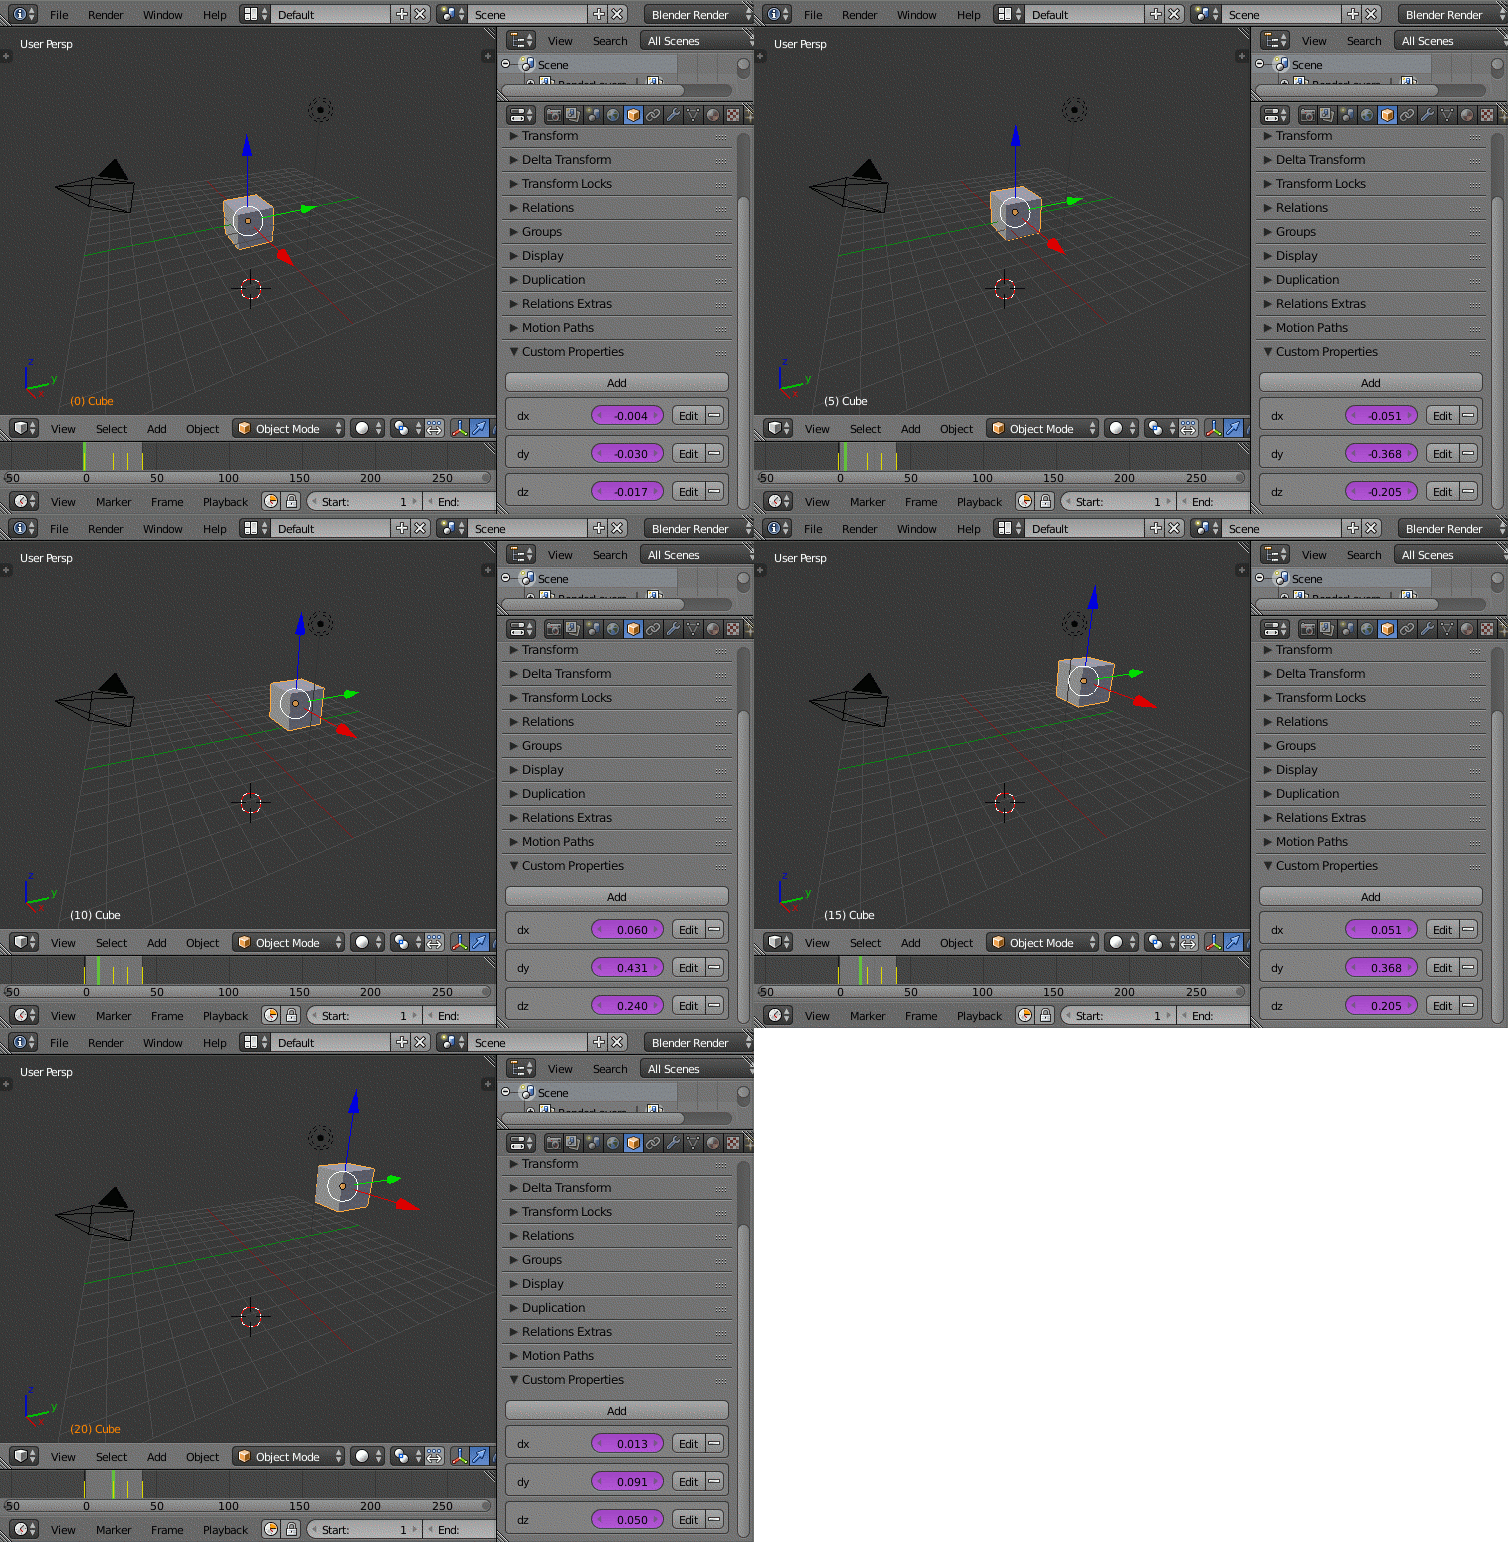
Test Velocity

In the same way we can now calculate the change in Velocity to arrive at the Acceleration. To do this, repeat the same steps to create three new Custom Properties - named 'ddx', 'ddy', 'ddz' - but this time based on the new 'dx', 'dy', 'dz' properties instead of the object X, Y, Z channels. This can be achieved by using the Variable Type of 'Single Property', setting the 'Object' to the object being tracked and the Path to '["dx"]' for 'ddx', '["dy"]' for 'ddy'', and '["dz"]' for 'ddz'.
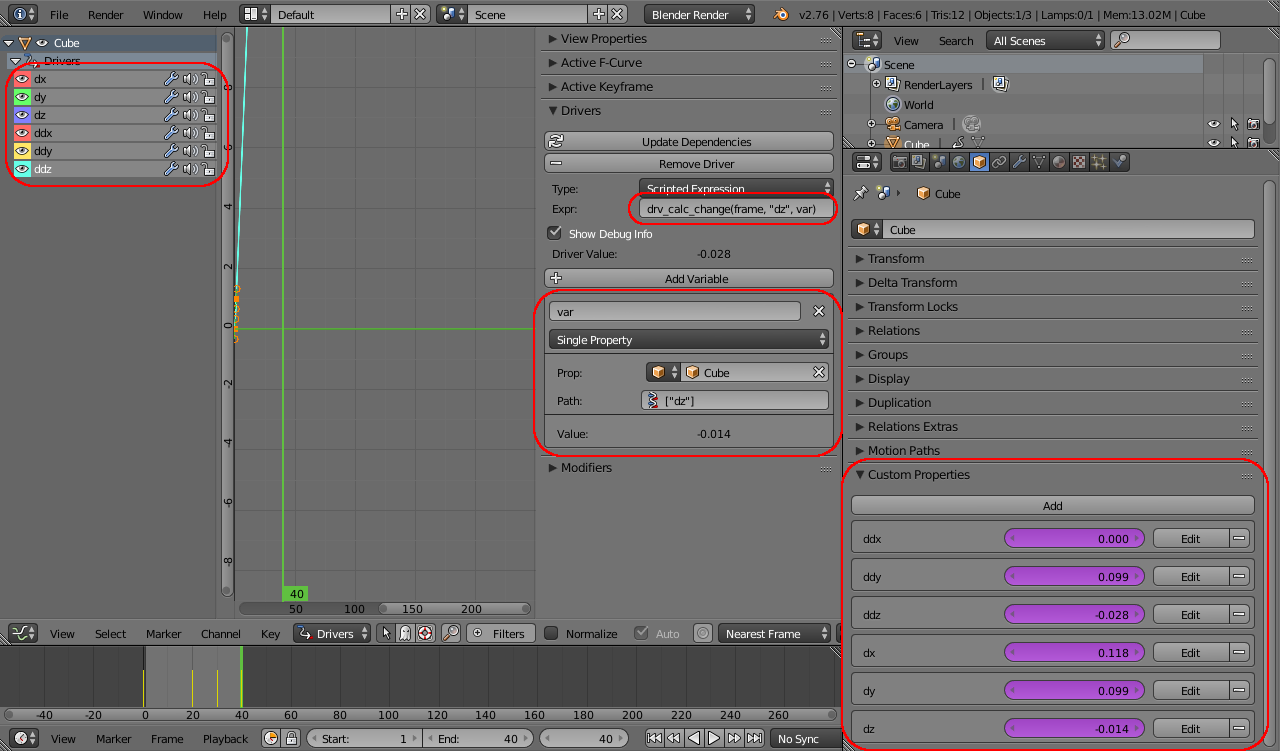
All Properties and Drivers

You should now have Custom Properties on the object for velocity (dx, dy, dz) and acceleration (ddx, ddy, ddz) and these should update automatically each time the 'frame' is changed. You can use these properties in drivers by way of the 'Single Property' variable type in the same way as already described above.

The acceleration could be used to automatically position a target for a Damped Track constraint to mimic the tilting of a Helicopter/Quadcopter to achieve the desired tilting to follow a path - rather than having to keyframe the motion by hand - as demonstrated :
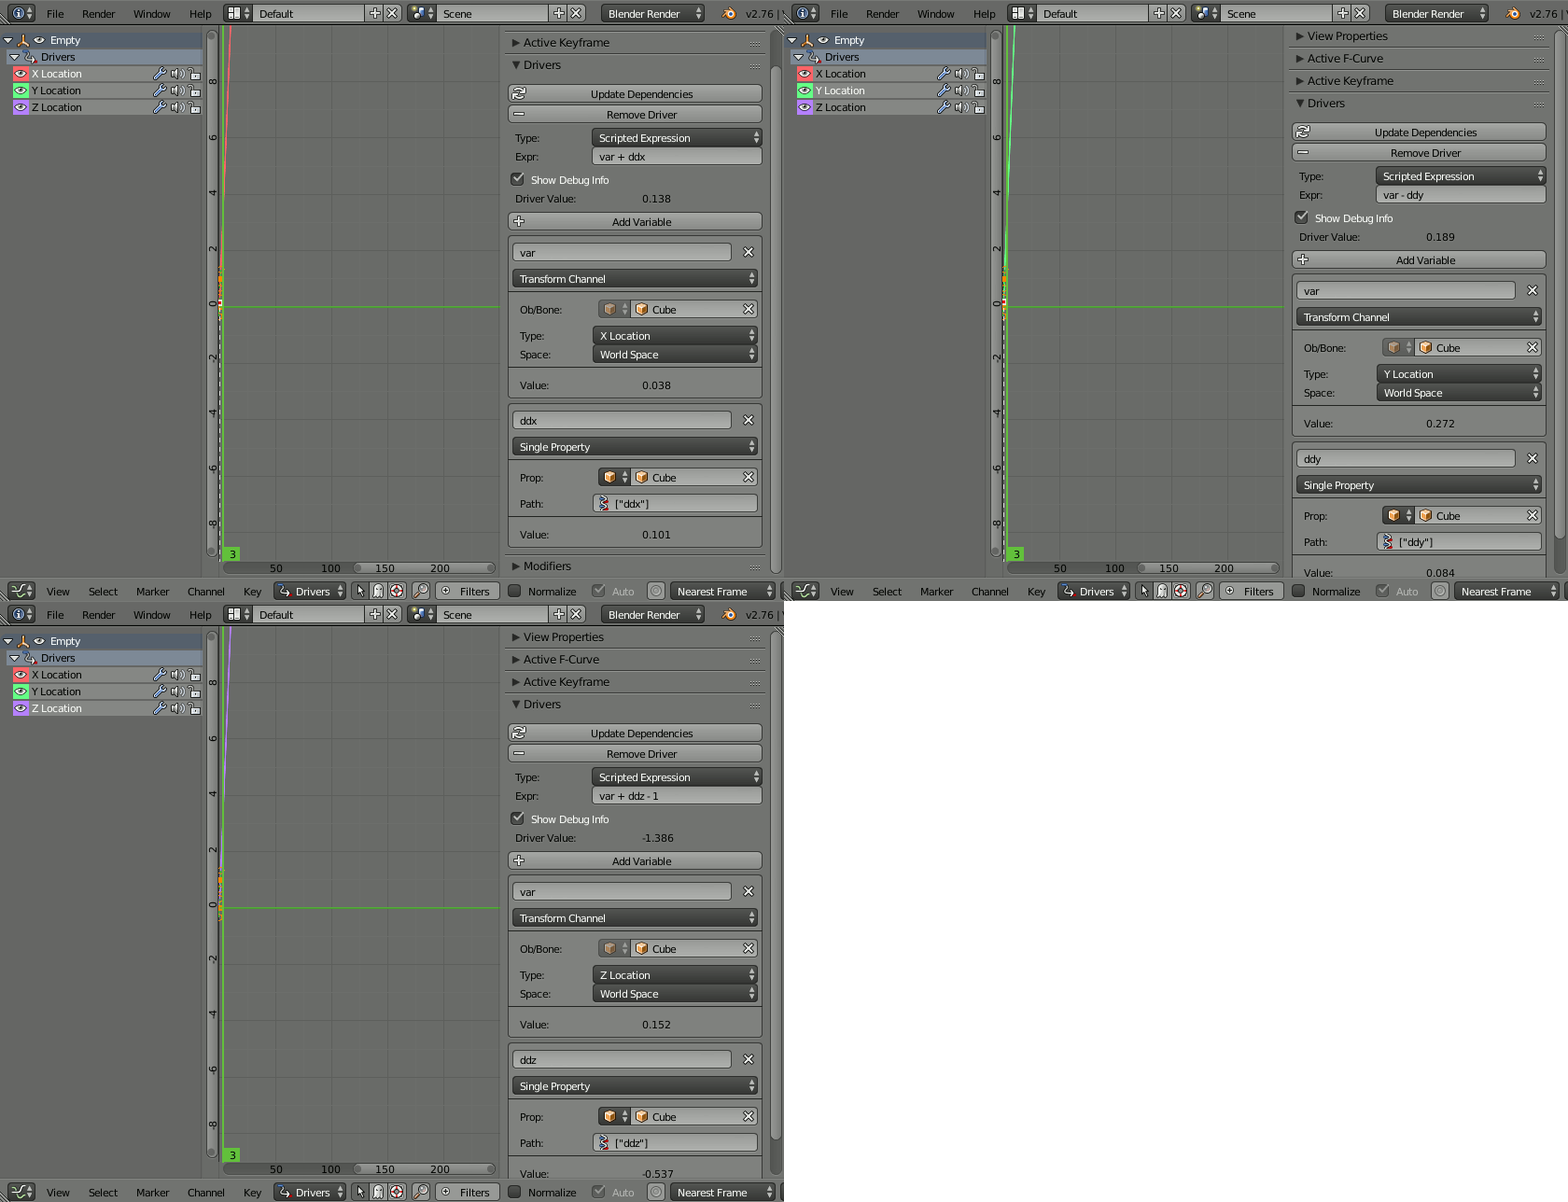
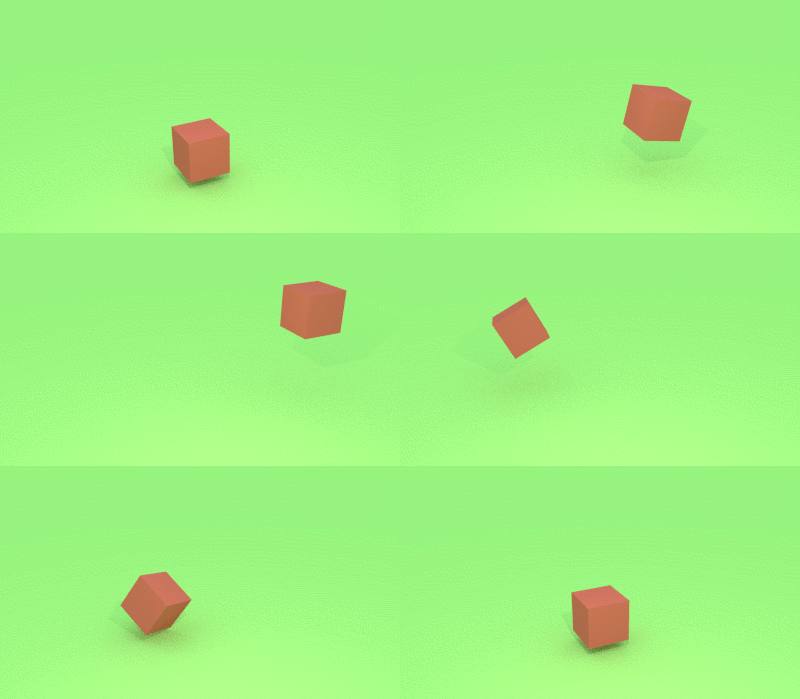
Empty Drivers Rendered

NOTE : The function does not allow for jumping to specific frames in the animation or running the animation backwards - only on change of frame. You should Bake the animation to keyframes prior to rendering to ensure that the calculated values are fixed prior to rendering - otherwise strange effects can occur such as sub-frames causing the acceleration to be mis-calculated (as the frame doesn't step by '1') or the 'initial' state being different between rendering runs.

Sample .blend file attached.

$\endgroup$
3
$\begingroup$
import bpy
import math

thecube = bpy.context.scene.objects['Cube']
def updateFramePlease():
    #get the values from these properties on this frame
    oxVal = bpy.context.scene.objects['Cube']['o_x']
    oyVal = bpy.context.scene.objects['Cube']['o_y']
    ozVal = bpy.context.scene.objects['Cube']['o_z']
    #get the current frame number
    cframe = bpy.context.scene.frame_current
    if cframe > 1:
        #if the cube has had a chance to change position get the delta of those positions
        deltaX = abs(thecube.location.x - oxVal)
        deltaY = abs(thecube.location.y - oyVal)
        deltaZ = abs(thecube.location.z - ozVal)
        #calculate the 3D linear distance travelled
        h1 = math.sqrt( (deltaX*deltaX) + (deltaY*deltaY) )
        h2 = math.sqrt( (h1*h1) + (deltaZ*deltaZ))
        #update the custom x,y,z fields before moving to the next frame
        bpy.context.scene.objects['Cube']['o_x'] = thecube.location.x
        bpy.context.scene.objects['Cube']['o_y'] = thecube.location.y
        bpy.context.scene.objects['Cube']['o_z'] = thecube.location.z
        bpy.context.scene.update()
        #answer the delta field request to have a value from this driver – Answer is the 3D linear distance
        return h2
    else:
        #if the cube has not had an opportunity to move
        return 0.0


# Add variable defined in this script into the drivers namespace.
bpy.app.driver_namespace["updateFramePlease"] = updateFramePlease

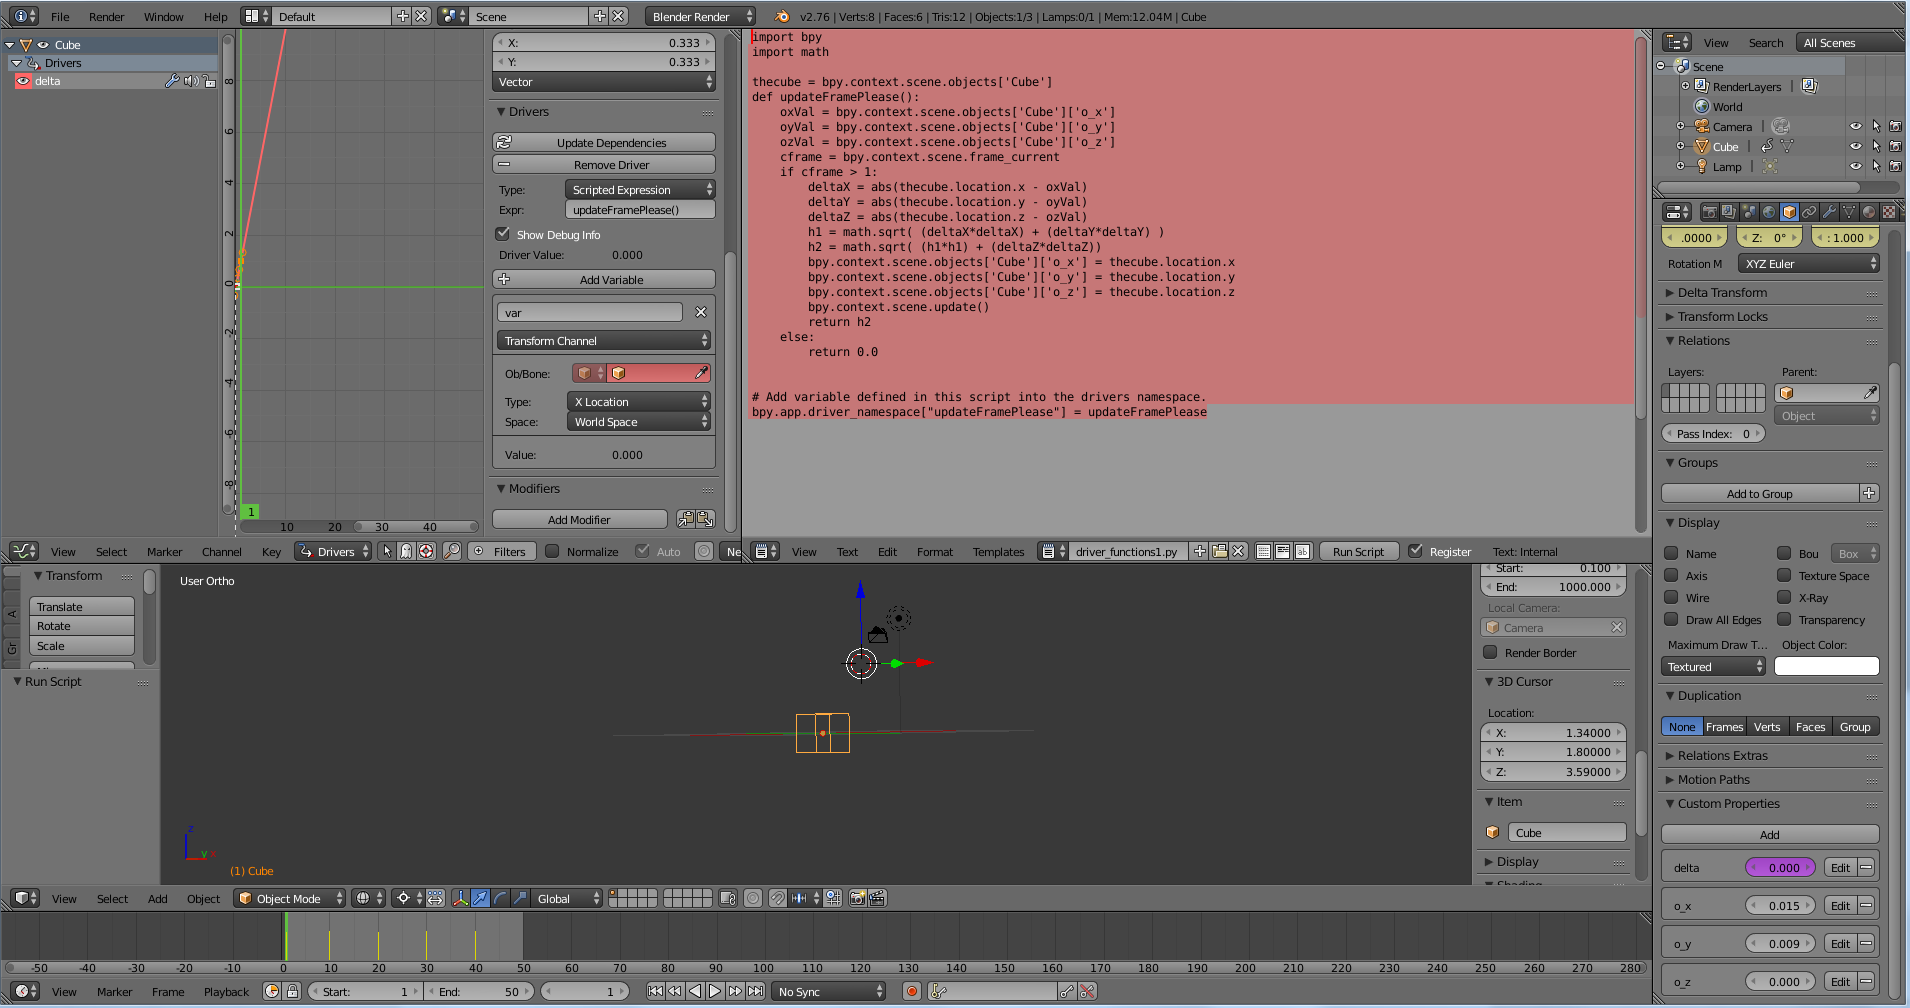
Here is everything in play:

Notice the bottom right hand corner, see the purple field, and the three below it? These are the property objects of the Cube. The purple indicates that there is a driver driving the value. To actually add the driver, you Right click on the value part of the field and select add driver. Then in the graph editor, make sure your graph type is Drivers, then select the property to drive at the top left of the screen. Then enter the function name as the expression and hit Enter. Over on the text editor, check register, and Run Script. Now increment the frame 1 step at a time, and pay attention to those properties on the lower right.

enter image description here

Here's the Blend File for reference:

And here is a link that basically seems to describe exactly what you are asking for in terms of the F-Curves:

F-Curves as Drivers

$\endgroup$
3
  • $\begingroup$ Sorry for my ignorance, but what do I do with that snippet of code? Do I simply run it from the text editor? The linked article and most of your explanation seems to be just explaining how to use drivers. I know how drivers work and how to use them and all, it's the Python stuff I'm not too experienced with. $\endgroup$
    – PGmath
    Commented Mar 3, 2016 at 13:36
  • $\begingroup$ Run the script once, just to register the function in the driver namespace. Then just cycle the frames. $\endgroup$
    – Rick Riggs
    Commented Mar 3, 2016 at 15:38
  • $\begingroup$ I wanted for anyone (at varying skill levels) that would look at this Q&A to be able to understand all of the linkages including the code, what your statement regarding the F-Curve analogy and the underlying math meant, and how drivers / python controls this. As for what to do with the snippet of code: I have modified my answer in the steps included to show when it becomes important to Run it. As for the rest of the answer, I was really hoping to capture the information that you needed from prev. frame to current, which I hope reflects in the delta property. Hope it was useful. $\endgroup$
    – Rick Riggs
    Commented Mar 3, 2016 at 19:52
1
$\begingroup$

The velocity can be approximated quite simply by adding an empty to the scene and creating drivers on its $X$, $Y$, $Z$ location properties to average its own location and that of the 'target' object $V$. ie,

$$ X = \frac{X + V_x}{2}\\ Y = \frac{Y + V_y}{2}\\ Z = \frac{Z + V_z}{2} $$

Where $V_x$ is the $x$ component of $V$. In this way on each change of frame it will move towards the location of the object you want to measure the velocity of. The faster the object the more it will lag behind, the slower the closer it will trail and when it stos it will move to the same location. You can then simply take the difference between the target object's location and the location of the empty to determine what is effectively its average velocity.

See https://blender.stackexchange.com/a/61804/29586 for an example of this being used to affect the strength of a wind force to blow particles when an object moves - effectively simulating the air motion around the moving object.

$\endgroup$
0
$\begingroup$

Not sure I'm accurately getting what you asked accomplished here, but see below code.

If you do not mind this generating extra keyframes in your animation you can copy paste into text editor & run script.

#######################################################################
# be sure to save blend file before running script                    #
# understand that this creates new keyframes every fstep of animation #
# it is recommended to test this on a dummy file before use           #
#######################################################################

import bpy

list_of_all_scenes = bpy.data.scenes
fstep=5

if bpy.data.is_saved:
    for y in list_of_all_scenes:
        bpy.context.screen.scene = y
        ########## add custom properties to objects ############
        for obj in bpy.data.objects:
            obj["XVel"]=0.0
            obj["YVel"]=0.0
            obj["ZVel"]=0.0
        ########################################################
        for f in range(y.frame_start, y.frame_end+fstep,fstep):
            y.frame_set(f)
            for obj in bpy.data.objects:                       
                currentx=obj.location.x
                currenty=obj.location.y
                currentz=obj.location.z
                y.frame_set(f-fstep)
                oldx=obj.location.x
                oldy=obj.location.y
                oldz=obj.location.z
                y.frame_set(f+fstep)
                obj['XVel']=(currentx - oldx)/fstep
                obj['YVel']=(currenty - oldy)/fstep
                obj['ZVel']=(currentz - oldz)/fstep
                obj.keyframe_insert(data_path='["XVel"]', frame=bpy.context.scene.frame_current)
                obj.keyframe_insert(data_path='["YVel"]', frame=bpy.context.scene.frame_current)
                obj.keyframe_insert(data_path='["ZVel"]', frame=bpy.context.scene.frame_current)
$\endgroup$

You must log in to answer this question.

Not the answer you're looking for? Browse other questions tagged .