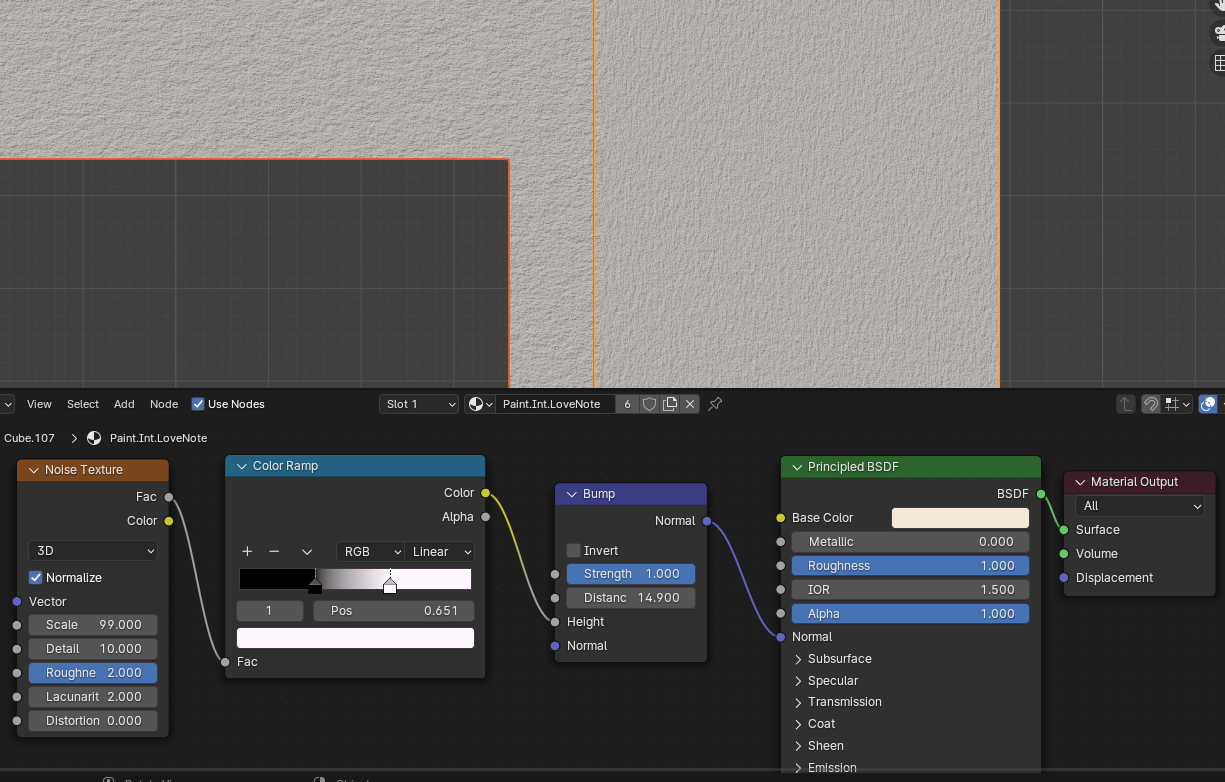
This is an extremely simple, procedural Material.
Why does it stretch differently, even on super-basic objects?
How do I resolve this issue (without using a Texture & UV unwrapping)?
-
$\begingroup$ Have you applied the scale to your object(s), and any particular reason why you don't want to UV unwrap them? - We can't really see what object you're trying to apply the bump to from that image. $\endgroup$– John EasonCommented Aug 27 at 9:24
1 Answer
Procedural textures like the Noise Texture use Generated texture coordinates by default if there is nothing plugged into the Vector input.
Generated texture coordinates (if not move or scaled with a Mapping node always go from 0 to 1 from the bottom left of the object's bounding box to the top right.
So no matter what the dimensions are or the aspect ratio of the dimensions relative to each other, the coordinates always have the same range from 0 to 1.
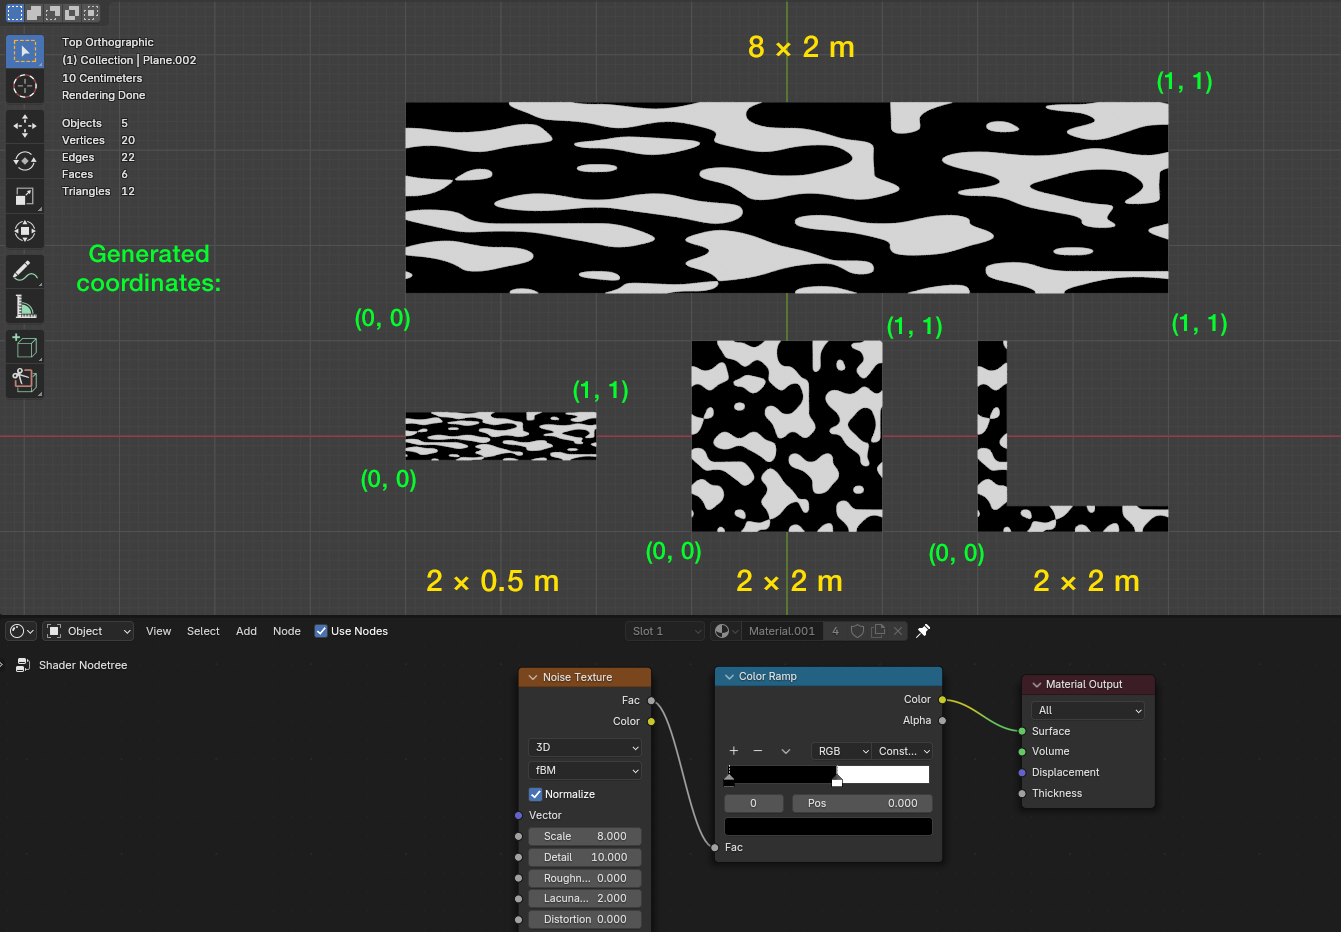
See the following example, these are just planes so I'll focus on 2-dimensional XY coordinates here. All objects use the same material, I've made the noise very large and just black and white so the results can more easily be compared to each other:
In the center below is a default plane, square. The coordinates are equally spaced in X and Y direction, from 0 to 1 on X is 2 m, from 0 to 1 on Y as well.
The larger plane above has the 0 to 1 coordinate range in Y direction also over a length of 2 m, but the X coordinates are stretched over 8 m. This is why the texture is the same as on the square plane, but stretched out to fit the width of the object.
The L shape to the right is also 2 × 2 m in width and height, so it has the same bounding box as the square plane in the center. Although it does not fill the whole space, the coordinates are the same and therefore the L shows the same part of the texture as the square does in these areas.
The small plane to the left has the same width as the square, but only a quarter of the height. Compared to the square, the texture is squashed on the Y axis. But since the aspect ratio is the same as on the large object, the texture is just a smaller version of the large stretched one.
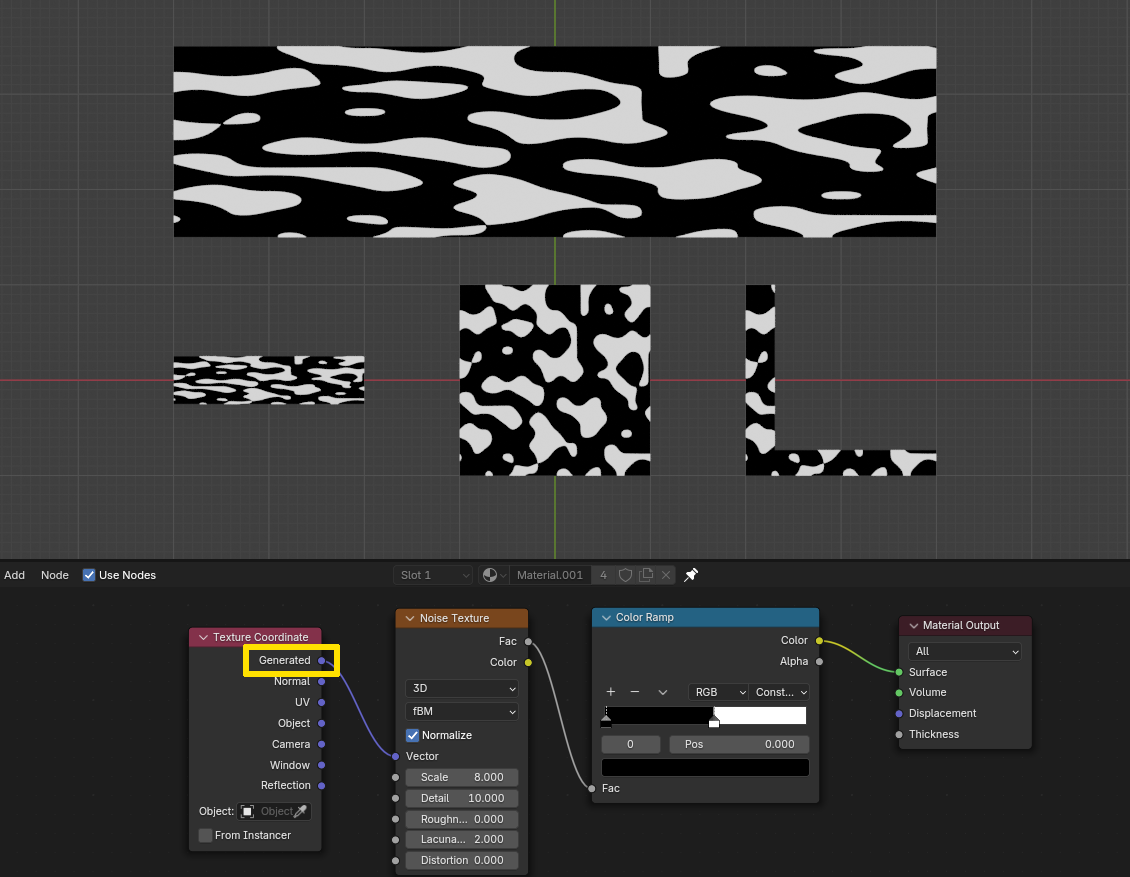
By the way, here I have plugged a Texture Coordinate node's Generated output into the Vector input to show these are the same results:
The stretching here is solely based on the bounding boxes of the objects. Since generated coordinates always go from 0 to 1 no matter what the scale or dimensions of the object are, they get stretched whenever the object's bounds are not at a 1:1 ratio.
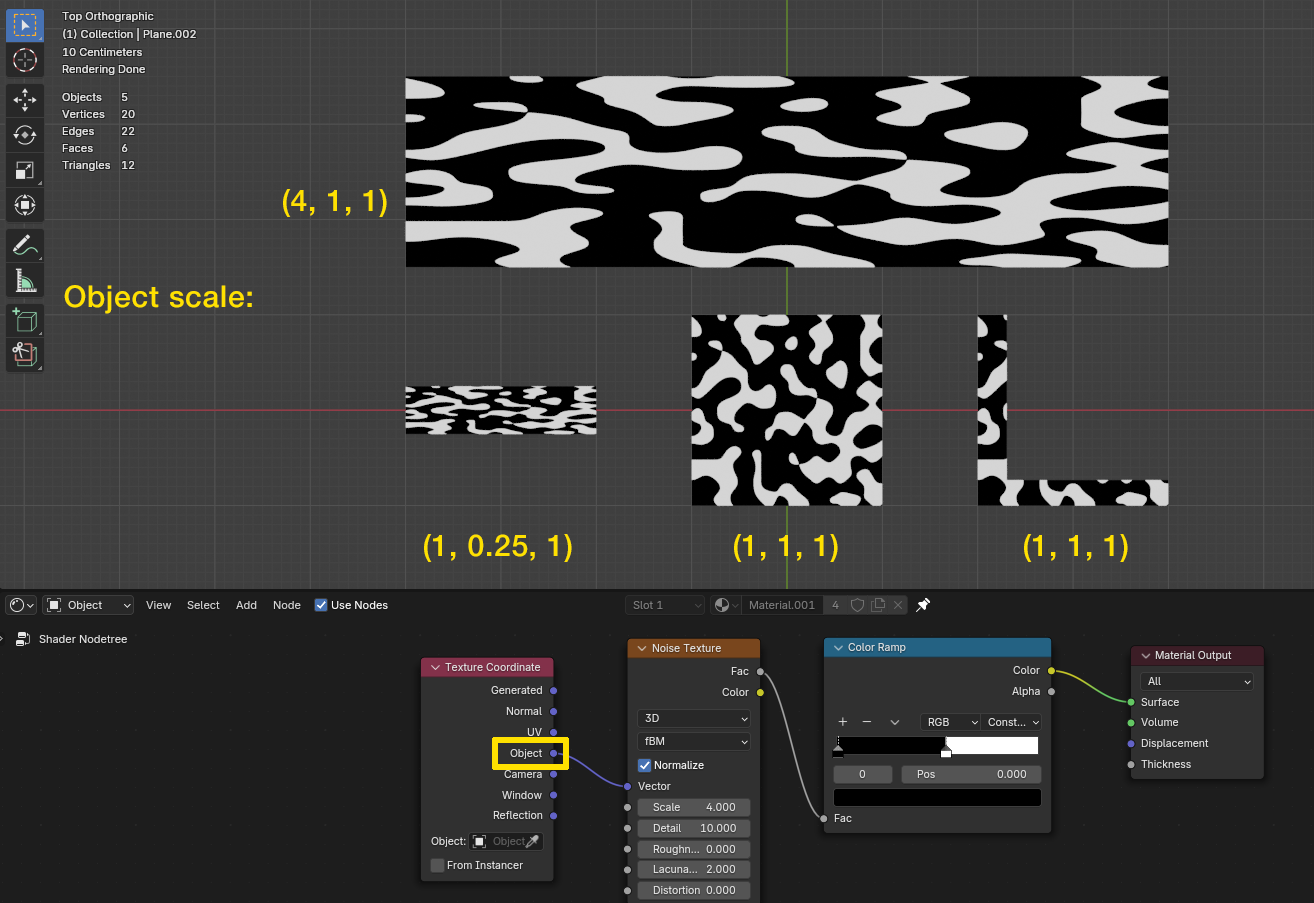
Something different happens when you use Object coordinates. At first it seems changing to Object coordinates only gives a different pattern, but apart from that there are the same stretching/squashing effects:
This is because the object coordinates are in absolute meters but relative to the original mesh. They have their center at the objects origin, and in case of the square with a scale of (1, 1, 1) and 2 m in X and Y direction they go from 0 at the center to +1 m in +X direction and -1 m in -X direction, the same for the Y directions.
All other objects are 2 × 2 m as well if you scale them back to (1, 1, 1), that is why the pattern is the same as on the square plane but stretched to the current scale.
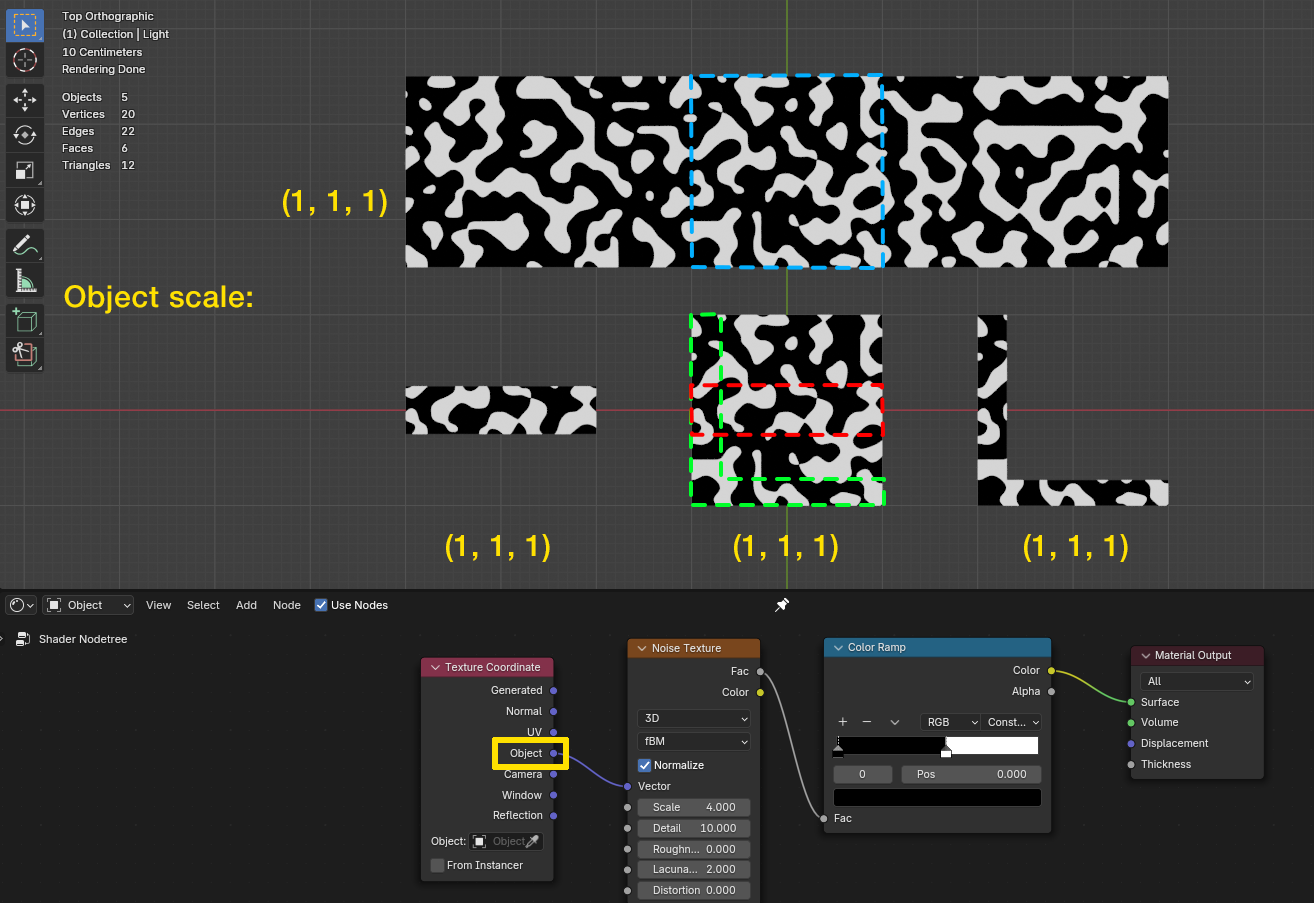
However, if you now apply the scale of the objects with Ctrl+A > Apply > Scale so that their current state becomes their new "original" mesh with a scale of (1, 1, 1), you will see that the size of the pattern is now even on all objects, and the pattern of the square is a part of the large plane, the small one and the L are parts of the square (and of course the large one as well then):
To sum is up in a way, use Generated coordinates mostly when stretching is not an issue but you want to make sure that some texture always uses the whole area (or volume for 3-dimensional textures) of the object.
If you want to use textures on several objects of different sizes but want to make sure the textures are always the same size to each other, use Object coordinates.
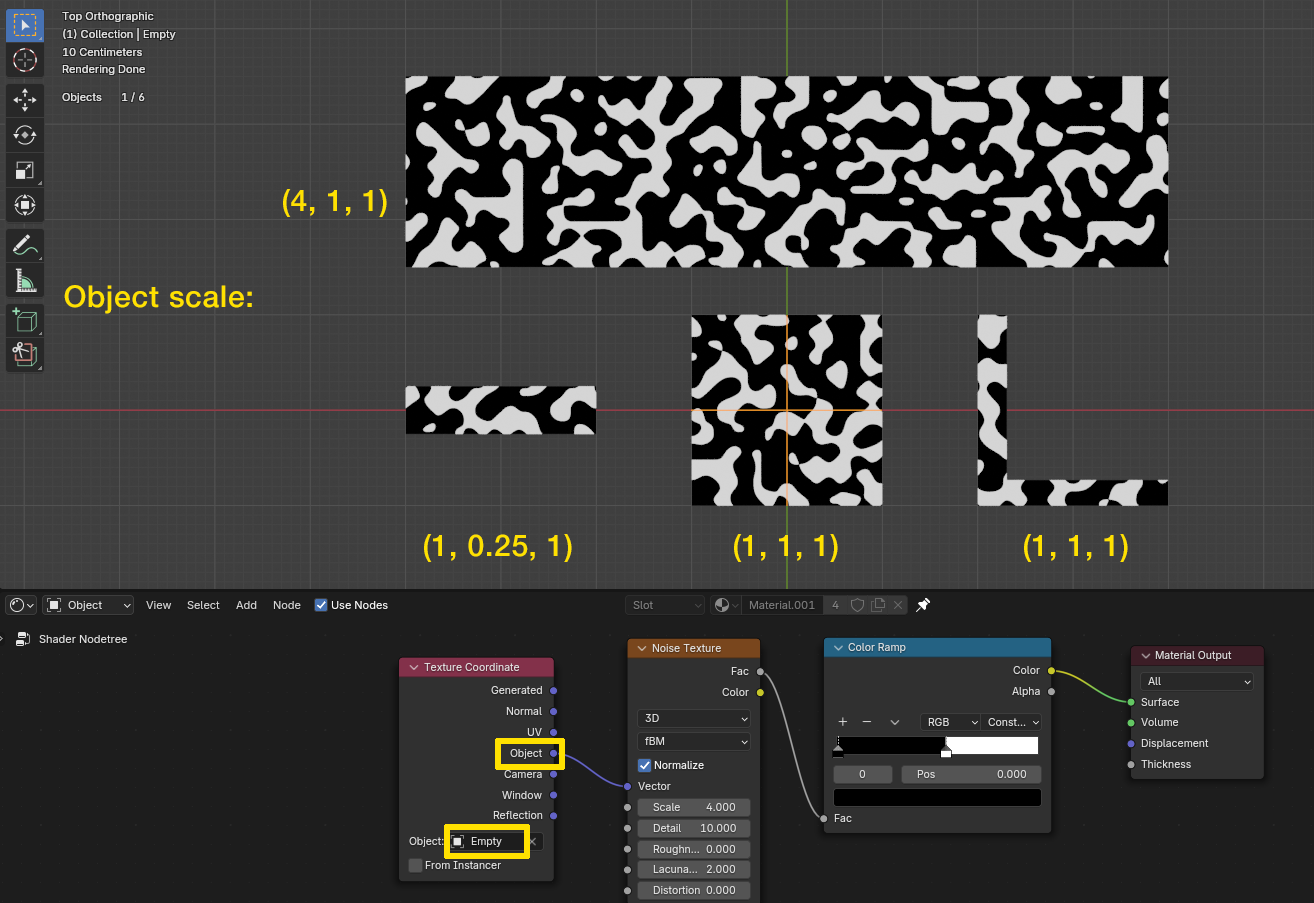
By the way: the Object does not have to be the object which the material is on. If you pick an object, for example an Empty, with the object selection at the bottom of the Texture Coordinate node, then all objects will have their textures based on the selected objects location and scale (even if the objects do not have their scale applied).
Like in this last example, the objects have their unapplied scales again from before. The texture would now be stretched on the large and the small one with Object coordinates. But if you select some other object as frame of reference (here an Empty), all textures will use that scale, in this case the default (1, 1, 1):
The good thing about the method with a reference object is, you can use this object to scale, rotate and move the texture for all other objects using this material. For example if you want all objects to have the earlier stretched version of the texture from the large object, you could just scale the Empty by 4 on X and this would stretch the texture on all objects evenly.
Instead of an independent object like the Empty, you could also simply use one of the existing objects as reference in the material. This way it would become the "master" object where you decide how the texture should look like and all other objects are based on that. Especially when you do not know how many more objects you will create but know for sure that the one you already have should stay as it is.
Of course this method with a reference method works best with 3D textures and 1:1 aspect ratios, or objects aligned in the same orientation, since each object oriented differently might cause the texture to be incorrect, in this case it is better to leave the reference object selection free and just have the scales applied so the objects use the same coordinate spacing.
But I do not want to make a complete texturing tutorial out of this, this was just a glimpse of what texturing can do.

