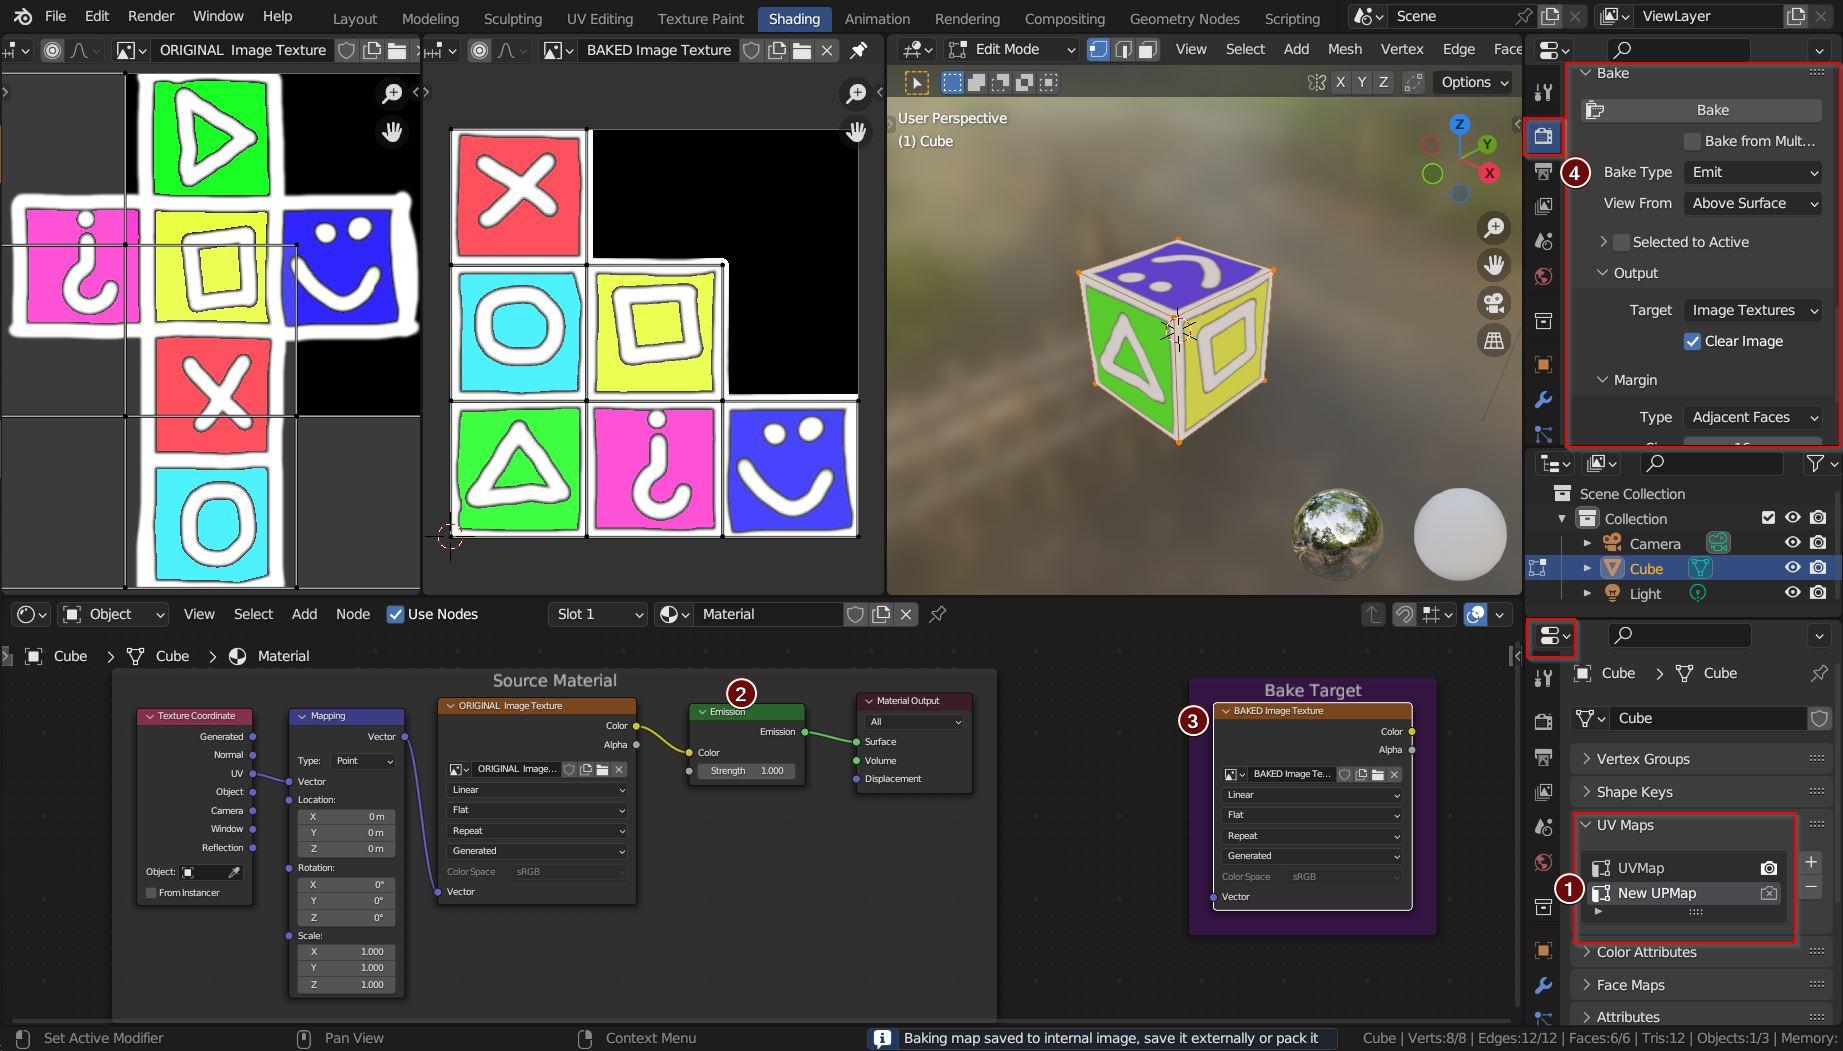
If you want to remap an image texture you can bake it using 2 different UV maps.

(1) In the UV Maps list, make sure the source UV map ("UVMap") has the "camera" icon activated. This one is used for rendering. The other one ("New UVMap") is selected. It's the active UV map and is used for baking.
(2) In the Shader Editor, connect the Image Texture node to an Emission node and this one to the Material Output node. (You can omit the Emission node, then Blender will use one internally.).
(3) Add a new Image Texture node, and create an image for it with the little button in it. Make sure the Image Texture node is selected (white border) to tell Blender that this is the bake target.
(4) In the Render Properties tab switch the render engine to Cycles. Adjust the number of max samples and check the Denoise option if you like. (Since version 3.0, Blender can now denoise baked images). Select the Emit bake type. Hit the Bake button and check the result in the Image Editor.
(5) Important: Don't forget to save the image if you're happy with the result. There is a hint in the status bar. Images must be saved individually because they won't get saved if you save the blend file, close Blender, or when Blender crashes. Possible data loss!


