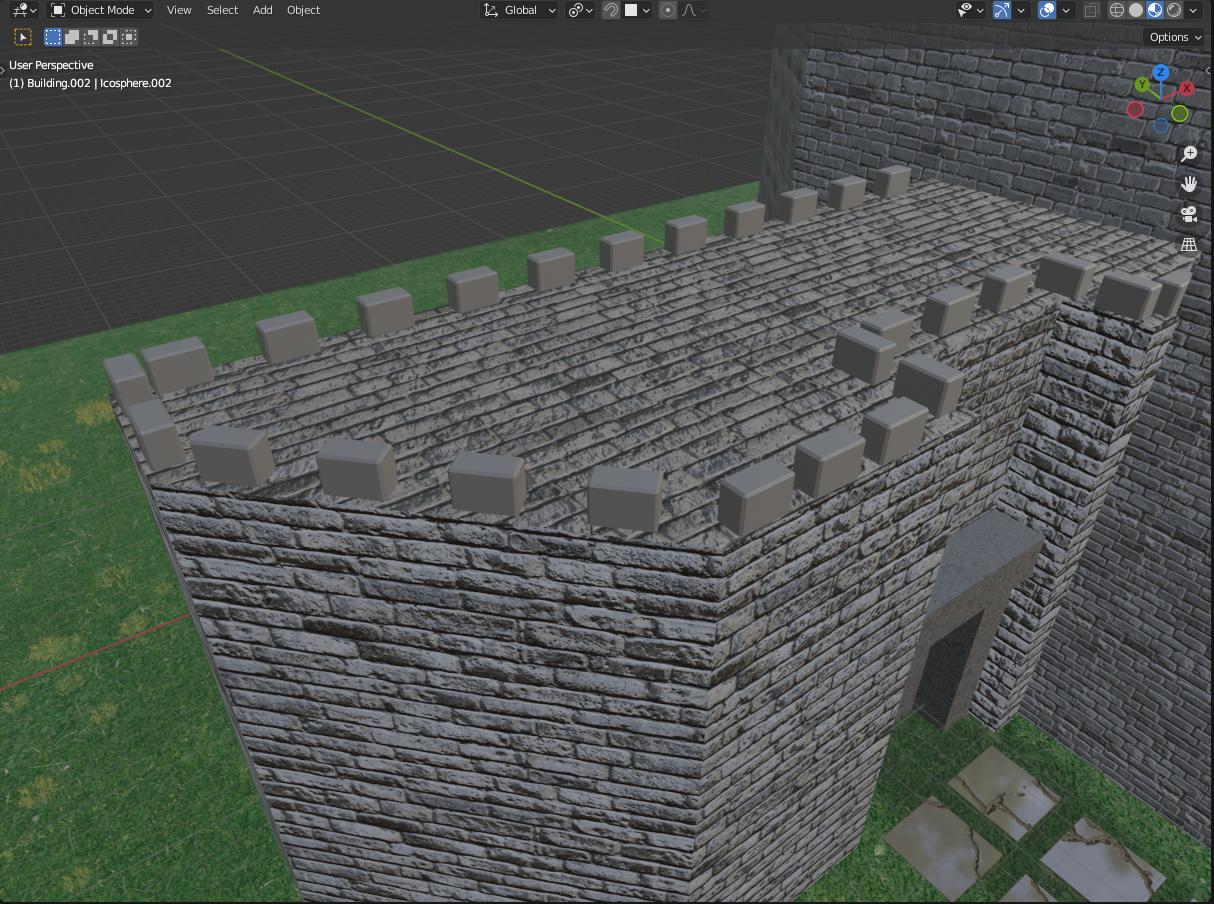
Good day. I want to attach "teeth" (sorry, I don't know the right term in english) to my building in certain places - on the top and in outer side so it will looks like that:
 For now i did it with some arrays and duplicates but it work only with primitive shapes - for complicated forms I'll need too much duplicates (there are 8 duplicates on the picture). I thought about the ways how to did this and I suppose I can use particle system with vertex groups or extruding from additional geometry. Maybe geometry nodes but it's too complicated for me. So my question: is there a more native/easy way to achive it? I'm thinking about shrinkwrap modifier but I don't have much experience with it so I don't know how to use it properly. Any advices with direction?
-
$\begingroup$ to be honest: this is a "typical" use case for geometry nodes. I would try to learn it - there are hundreds of free tutorials on yt - and also beginner friendly. I would invest the time to learn it - because it opens new horizons. $\endgroup$– ChrisCommented Aug 21, 2022 at 18:39
-
1$\begingroup$ @Chris I agree with you with your "it opens new horizons", but I think you're underestimate power of basic modifiers... I saw unbelivable things people achive with it. $\endgroup$– СергейCommented Aug 21, 2022 at 19:08
1 Answer
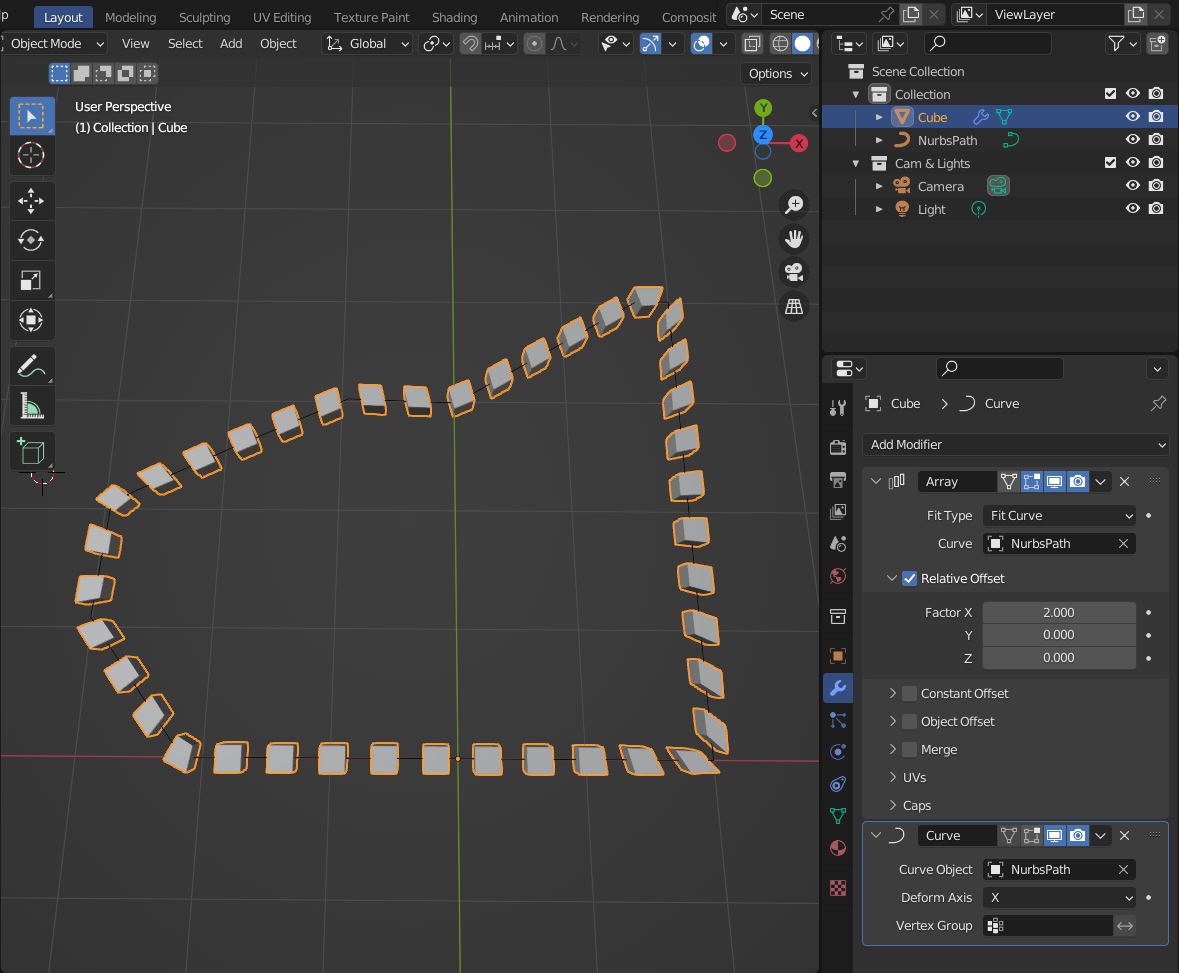
1. One approach is to use a curve together with an Array and a Curve modifier added to a cube.
- add a Path to the scene which creates a Nurbspath object. To get sharp path corners you need to select one control point in Edit mode, and choose the menu entry Curve > Set Spline Type > Poly to get a poly curve.
- on the Object Data Properties tab, in section Active Spline tick the Cyclic U checkbox to obtain a closed path.
- add an Array and a Curve modifier to the cube to create the instances along the curve (screenshot 1).
It's important that All Transformations for the curve and the cube are applied (Strg+A in Object mode). The cube should be modeled at the world origin (0,0,0). Otherwise, you will get messed-up results.
One disadvantage of this approach is that the Curve modifier, unfortunately, deforms the cube instances badly at sharp corners. It is well suited for circles and round corners that Bezier and Nurbs curves have.
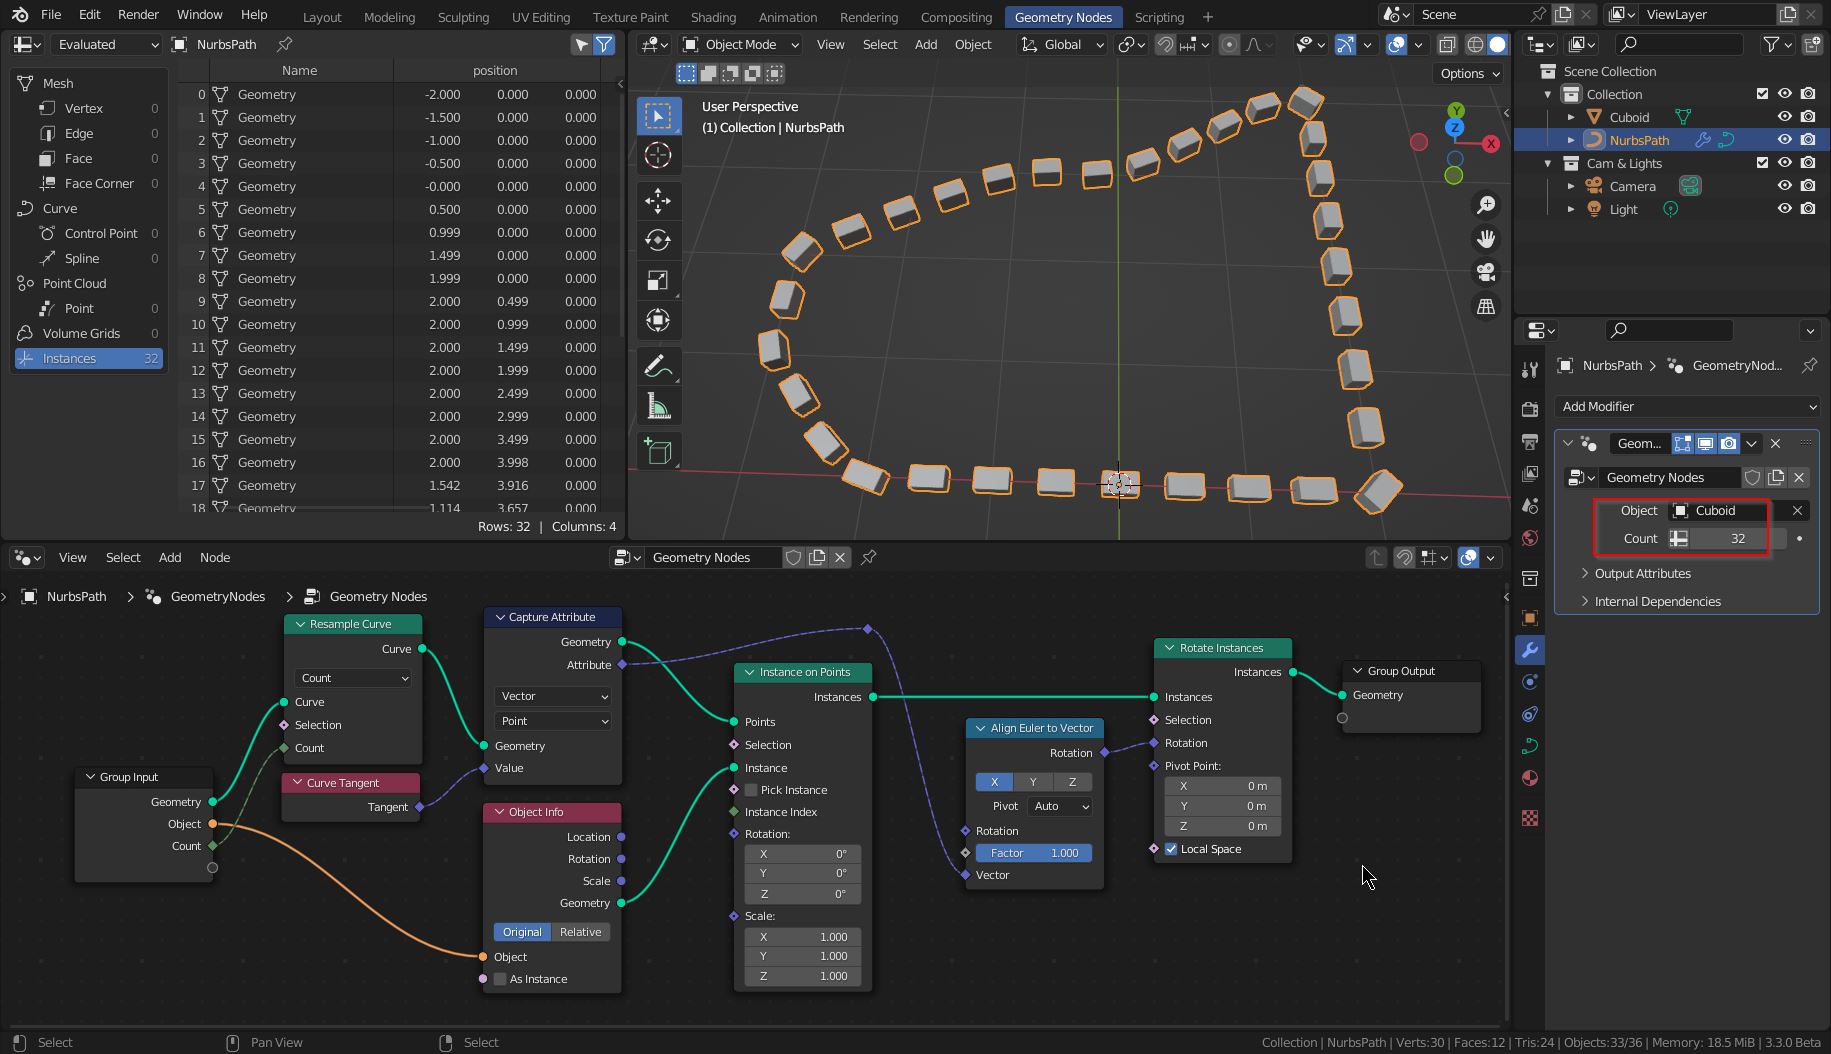
2. Another approach is to use the curve with a Geometry Nodes modifier that instances the cubes.
This method won't deform the cubes. But it requires some extra work for the alignment.
- the Resample Curve node adds (or removes) new control points and distributes them evenly along the curve. The Instance on Points node adds the cubes along the curve.
- the cubes are all aligned in the same direction. If you want to align them along the curve, you need to rotate them. The other four nodes (Curve Tangent, Capture Attribute, Align Euler to Vector, and Rotate Instances) do this by aligning the cubes along the tangent of the curve.
- don't forget to apply All Transformation as noted above.
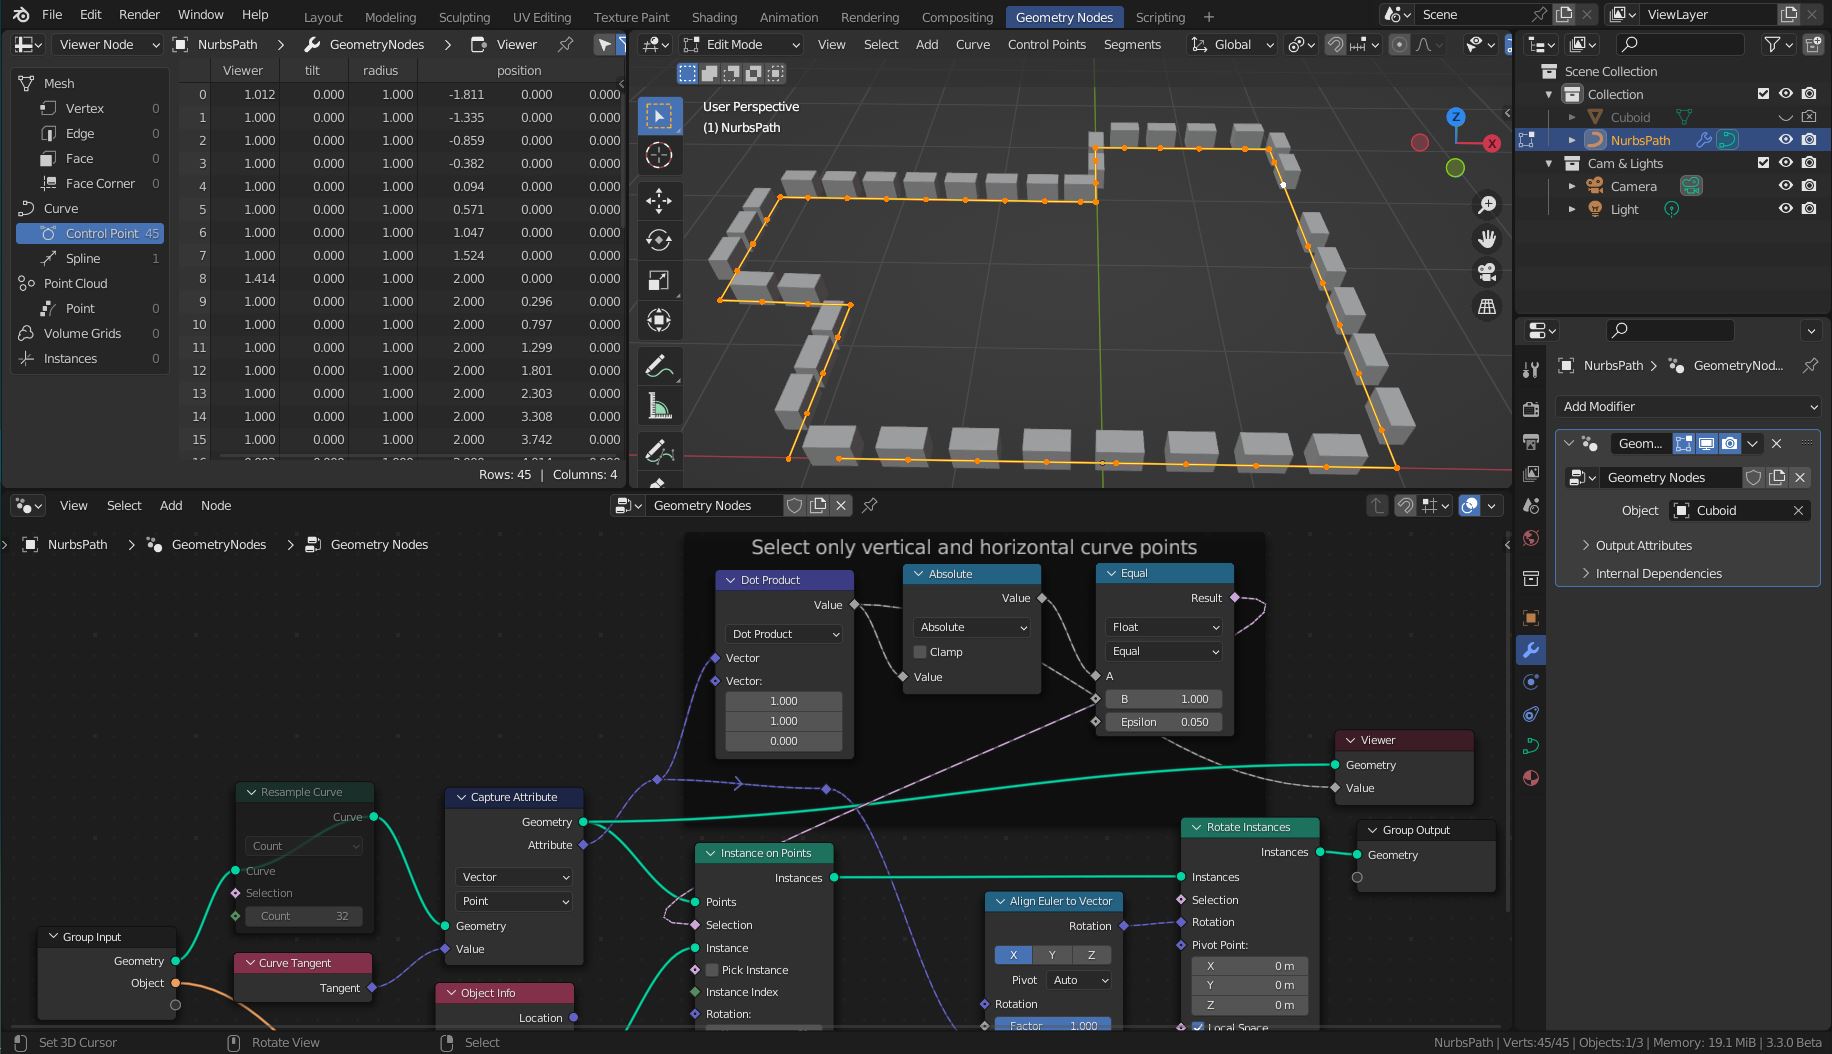
If you don't like the 45° cornerstones for your castle you need to sort them out with three more nodes (Vector Math (Dot Product), and two Math nodes). Also, remove the Resample Curve node and add control points manually (subdivide) to the curve path. With X, Dissolve Vertice you can remove control points and make gaps in your wall. The Resample Curve node smoothes the curve around the corners even if the spline type is set to poly for some reason. I don't know why. And this messes up the walls.
The Viewer node is only used so that you can see the dot product numbers in the spreadsheet.
-
$\begingroup$ Thank you. I thought about curves but didn't know how to make sharp corners. $\endgroup$– СергейCommented Aug 23, 2022 at 20:10


