I am creating a model of a glass and I would like to put a drawing on it (a png picture).
I know how to do it using Blender Render, but not with Cycles Render. Help :)
Select the object you want to put the image on
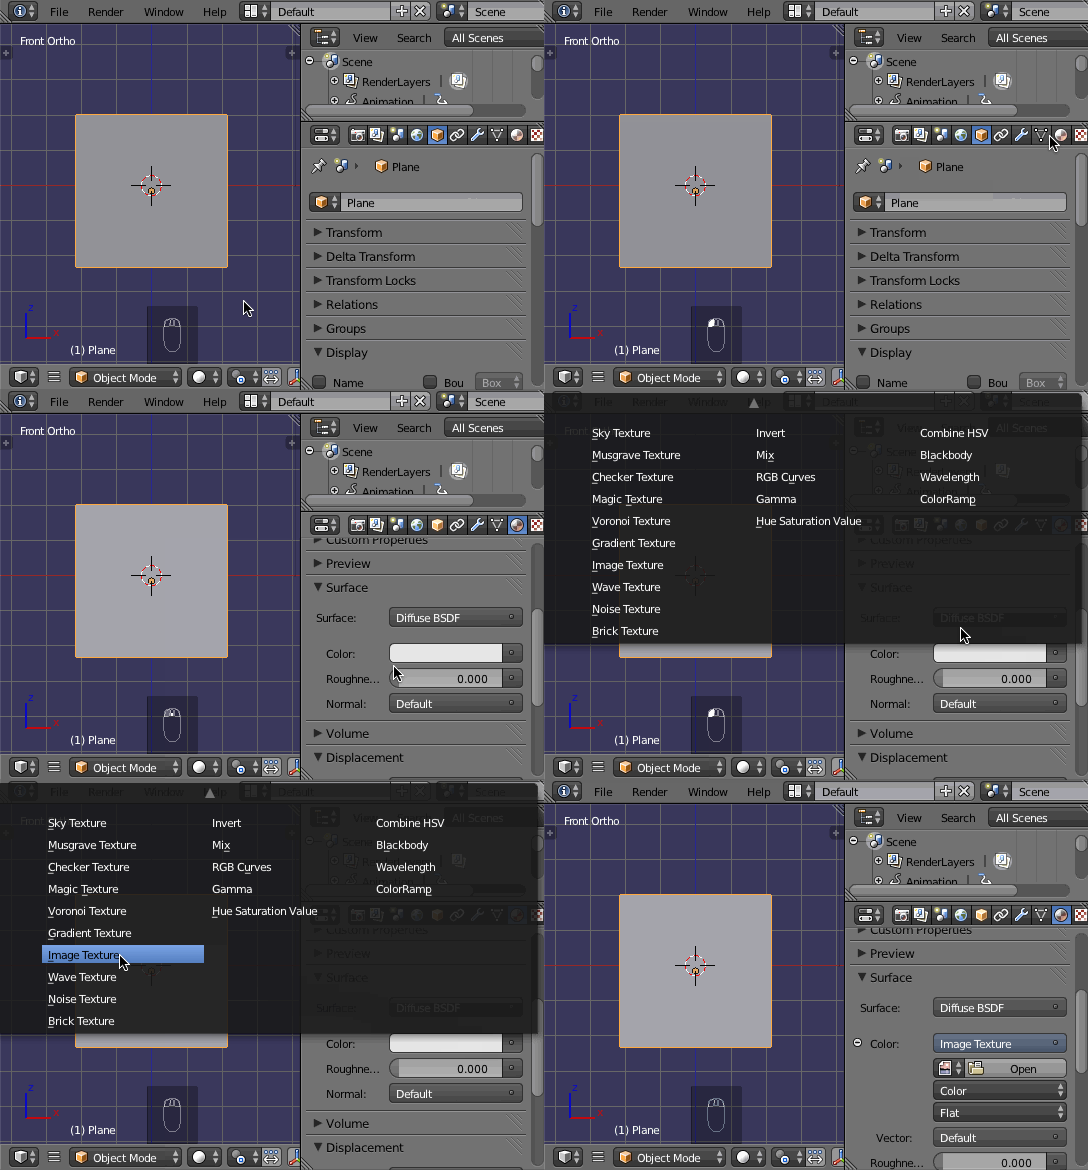
Give it a new material with an Image Texture Shader:
Object Properties window -> Materials tab -> click the New button
For the Color, click on the grey dot icon on the right side (  ) then select "Image Texture":

Select the image you want to use:

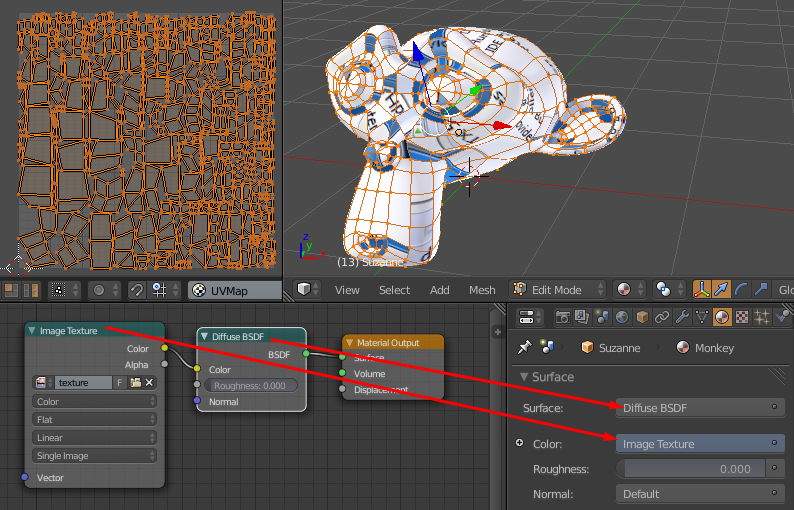
UV Unwrap your object and position the image as you'd like it:
Select your object and enter Edit mode (TAB)
Unwrap mesh (U) -> here, I use Smart UV project

NOTE: UV Unwrapping a mesh and positioning the image properly can be a very complex and involved process. So, I highly recommend you study some UV Mapping tutorials to get all the details; YouTube has quite a lot of excellent video tutorials for beginners on this subject.
You can add a texture to a mesh by plugging in the texture node into the corresponding material attribute. You can do this in the node editor as well as the material's panel.
Make sure the mesh you are trying to apply the texture to has a shader applied to it
UV unwrap your mesh. By default all textures in blender use UV maps. These must be generated by the user.
In the appropriate material attribute select as the input Image Texture and navigate to your image
To see the effect in the viewport you can set the display type to Texutred or Material

If you do not want to use UV you can use other primitive UV projection types.
In the vector input of the image map add a input -> Texture Coordinate
(optional) To further modify the generated UV you can add a Vector -> Mapping input between the texture and the Texture Coordinate nodes

How to apply and scale image textures to objects in Cycles Render
Assuming you have already marked the seem of your object, upload your texture image by clicking MATERIAL
In the surface section, go to Color and click on the little circle on the far right (in the dark gray area).
Select Image Texture, at this point a new item with an image icon will appear. Click on open and upload your image file.
In the UV map view pane, you have the same image icon, click on it and select your image that by now should be listed there.
Your image should be visible like in the example below:
Make sure your mouse is over the 3d view pane. Select the object or the part of the object you want to apply the texture to, then make sure you are in Edit mode.
With the mouse still on the 3d view, press U to unwrap your object; and select unwrap.You have two possibilities, UNWRAP and SMART UNWRAP, when you have marked the seam and for more complicated objects, UNWRAP is the best though you can use SMART UNWRAP for simple objects with little geometry.
Now, you can see your UV map appearing on the top of the image texture. To see immediately how the texture would look like in render mode, Go to the 3d view and change the method to display from EDIT to TEXTURE.
SCALING AND ROTATING IMAGE
Click on the Texture button located on the right of the Material button. Your image texture should already be there in the Node section.
Go down to the Mapping area, Point should be selected by default. Look at Location, Rotation and Scale. In our case, we are only interested in Scaling, however it is often necessary to rotate the image as well so in that case use Rotation.
Scale the image by playing with the X and Y axes. You can see the result of your manipulation immediately in 3d view. In my case, I set the image to X-7 and Y-7.
When you are satisfied with the quality of your image, remember to go back to Material and click Assign. Save your work and have fun!