2
$\begingroup$

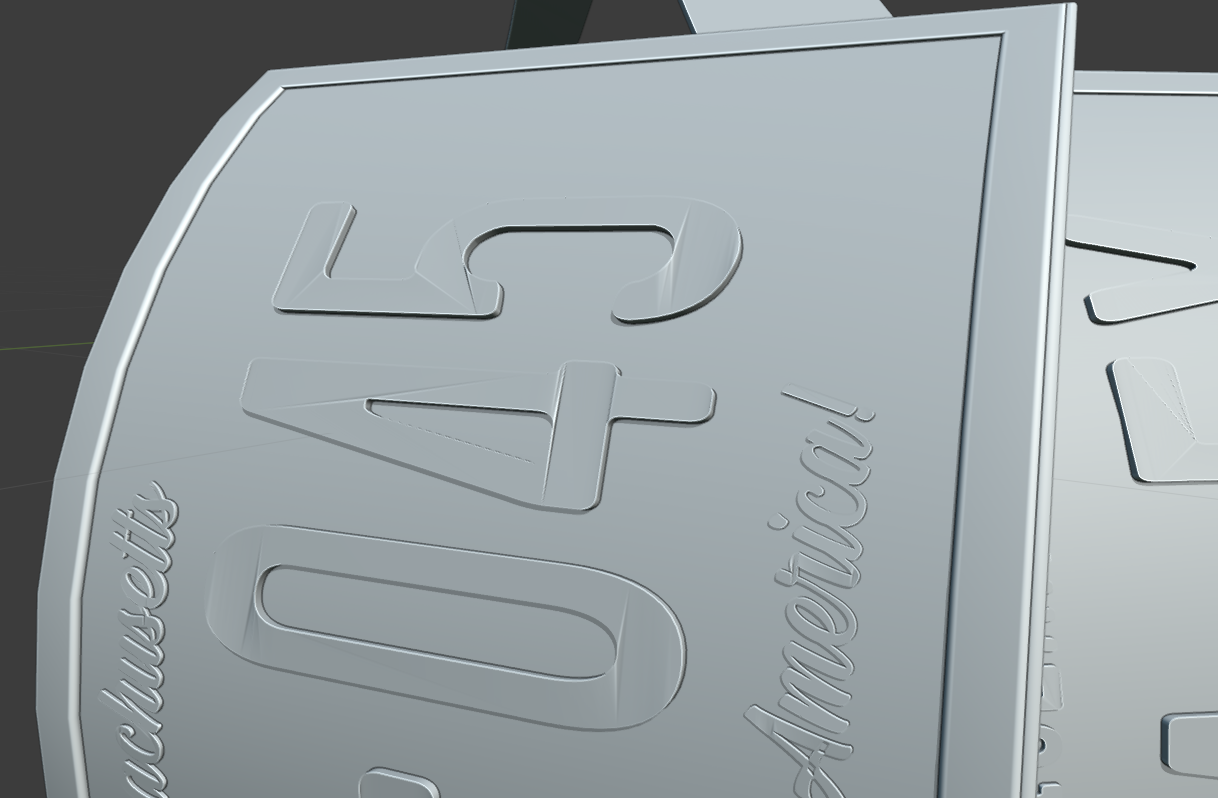
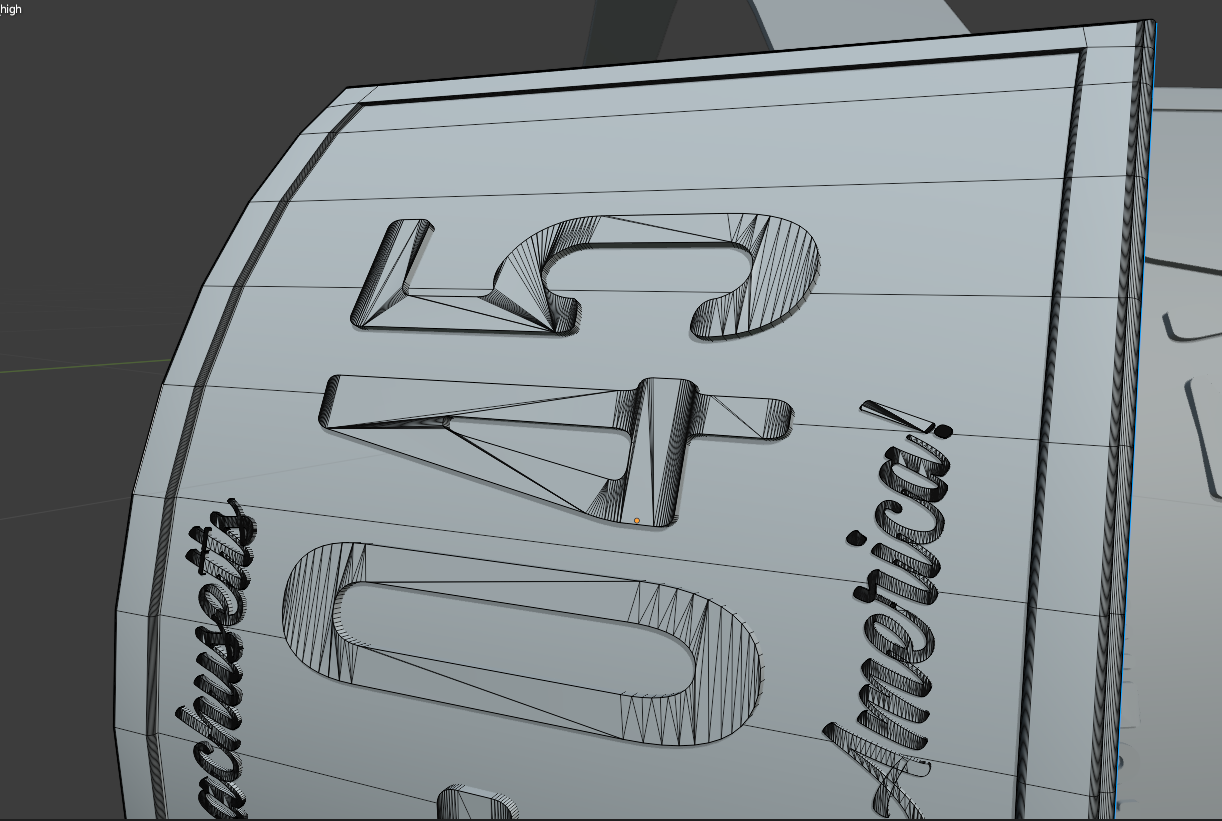
So I'm trying to make a license plate and have it bend around a shoulder like armor. Not sure if it's the best method, but I got the text on there by typing it out, bending both it and the backplate it would go on around a bezier curve so they both curved at the same angle and lined up, then converting text into a mesh and solidifying it. It worked pretty perfectly except for the fact that the topology on the text after applying the solidify modifier became super complex and created all these weird sharp angles all over it.

Like this: enter image description hereenter image description here

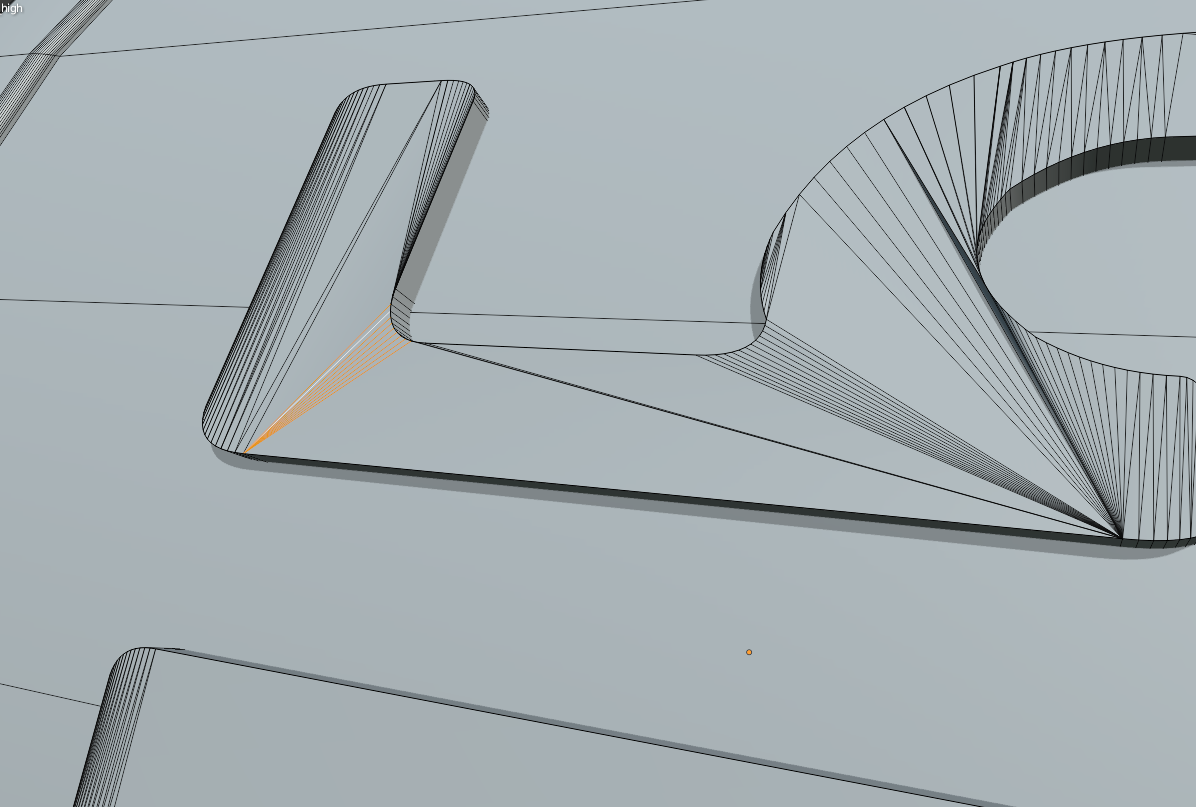
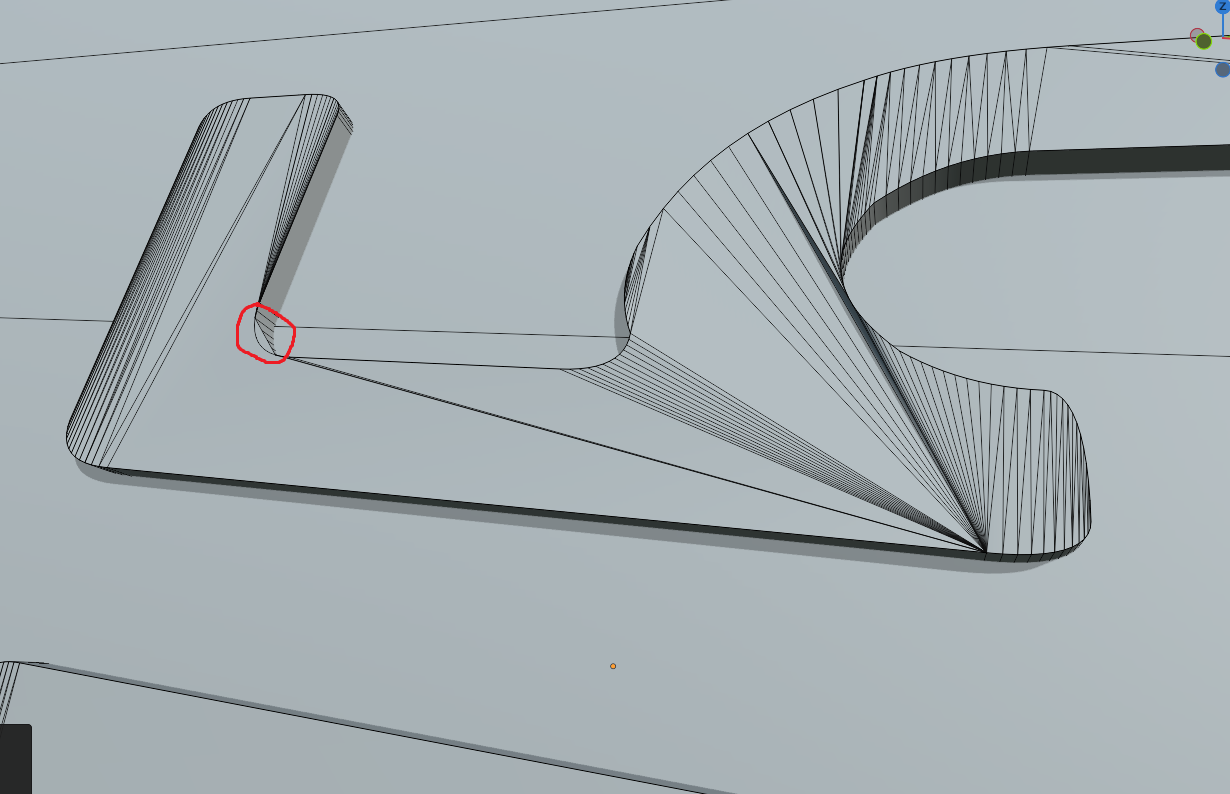
Pretty new to Blender, so I don't know where to start with fixing something like this, so I tried going in a getting rid of some of the top edges, hoping the shape would sorta smooth out. Probably pretty far from the best method though, so no surprises that gave a weird result too, put a weird floating face that did a kind of overhang that covered up the curve of the text underneath.

Here's a picture of that: enter image description hereenter image description here

It's not a huge deal, if there's nothing I can do or if the solution isn't worth the effort I'll probably just leave it. It's part of a high poly for a game asset, the low poly is just a smooth surface, so no topology issues with the one I actually need to unwrap and stuff. It does show up a bit on the normal map after baking, but it's less noticeable, only really see it if the light hits at just the right angle and you're looking for it. But I would also like to clean it up as much as possible, so any help is greatly appreciated.

Thanks.

$\endgroup$
2
  • $\begingroup$ If the desired end result is low-poly anyway - why not use the text as bump or displacement map in the first place? $\endgroup$ Commented Sep 3, 2021 at 7:39
  • $\begingroup$ Like I said, I'm very new to Blender and this is how I've always done it so far. I could learn how to do bump maps and stuff, I suppose, just never saw a reason to yet cause this method has worked well and given me really good results so far. I like doing all the modelling in Blender and baking the normals in Marmoset, fell like it would complicate things to start messing with normals and bumps in blender too. This way is currently a lot faster and simpler for my workflow, I guess is what I'm trying to say. $\endgroup$
    – MVP_Teku
    Commented Sep 3, 2021 at 9:08

2 Answers 2

3
$\begingroup$

As Haarigertroll says you could use a map instead (Bump or Normal)

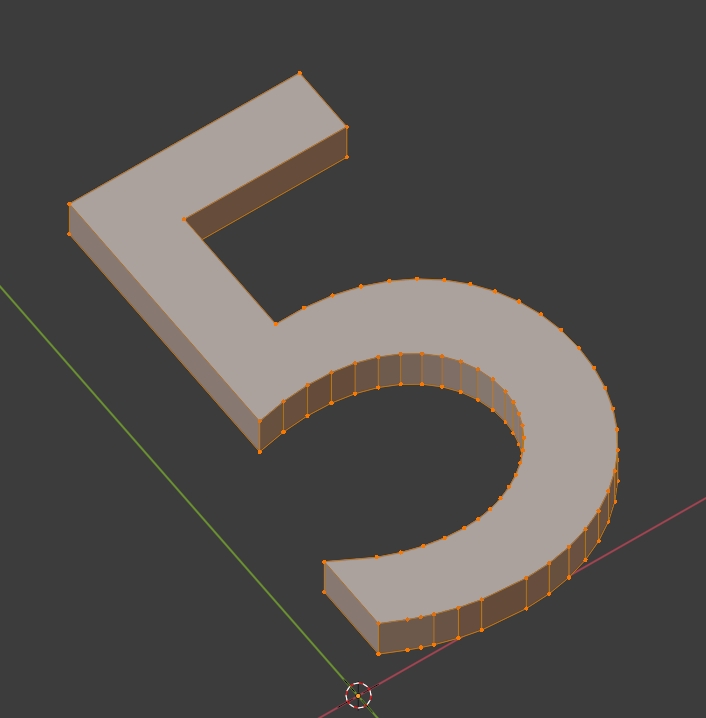
But if you want real 3D, as explained somewhere by Robin Betts, you can first delete the topology with X > Limited Dissolve:

enter image description here

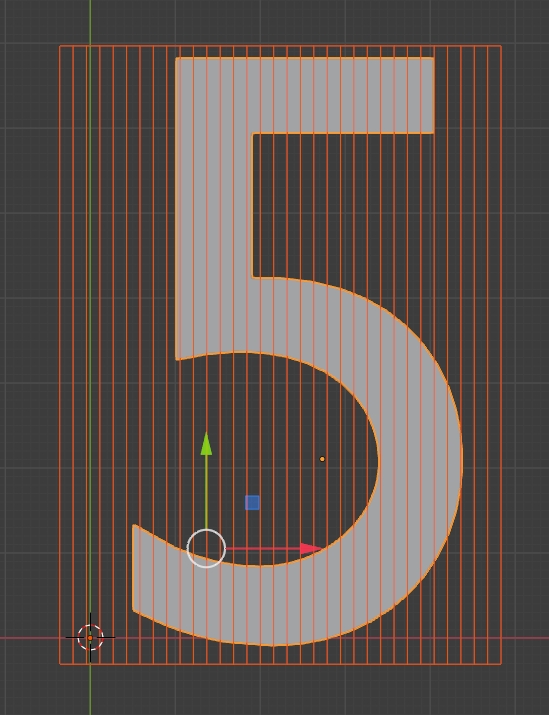
Then create a grid, delete only faces, put it in front of the object, choose the orthographic view, select the grid, shift select the object, go in Edit mode, in the header menu, choose Mesh > Knife Project, in the Operator box enable Cut Through:

enter image description here

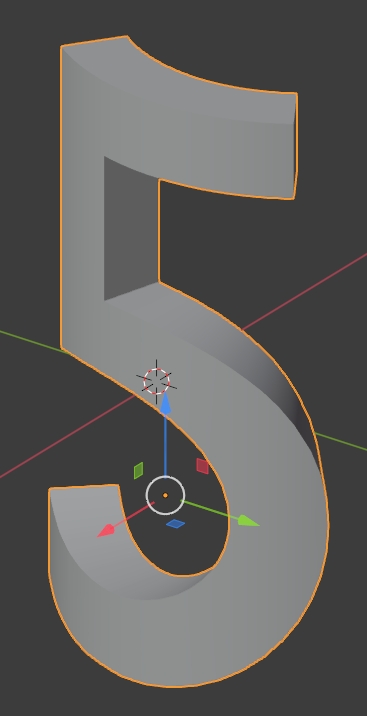
You end up with a vertical topology that allows you to bend the object. Give it Shade Smooth and Auto Smooth if you want a smoother result. If it still has bad shading you'll need to dissolve some old edges:

enter image description here

$\endgroup$
5
  • $\begingroup$ So this worked almost perfectly, most of the letters now have solid face on the top of the shape. The only issue is with two of the numbers at the end, a 0 and a 4, that still have just 2 or 3 lines still on top of them that I can't get rid of without messing up the entire shape. Not sure why just those numbers are doing that when all other numbers/letters worked fine? So close to having it perfect now, just need to figure out why these lines aren't going away. Hoping you have some idea. Could it just be the font I'm using? Just seems weird cause the C and 0 are basically identical shapes... $\endgroup$
    – MVP_Teku
    Commented Sep 3, 2021 at 9:05
  • $\begingroup$ please share these 2 objects here (copy paste the link it will give you): pasteall.org/blend $\endgroup$
    – moonboots
    Commented Sep 3, 2021 at 9:07
  • $\begingroup$ Ok, here you go: pasteall.org/blend/05da5dcfb8424b29b3dedf228dba6972 . $\endgroup$
    – MVP_Teku
    Commented Sep 3, 2021 at 9:11
  • $\begingroup$ it works fine for me, please share the file after you've done the knife project operation so that I can see what's the problem with your topology. See my try: zupimages.net/up/21/35/9b17.jpg $\endgroup$
    – moonboots
    Commented Sep 3, 2021 at 9:19
  • $\begingroup$ Nevermind, got ahead of myself, assumed the lines would be an issue but they weren't at all. Thanks heaps. $\endgroup$
    – MVP_Teku
    Commented Sep 3, 2021 at 11:15
0
$\begingroup$

Yes there is but I am not sure if it will work on already bent and extruded text (I use it before solidify/extrude)

You can create your text, shrinkwarp it around your object and then before extruding go to:

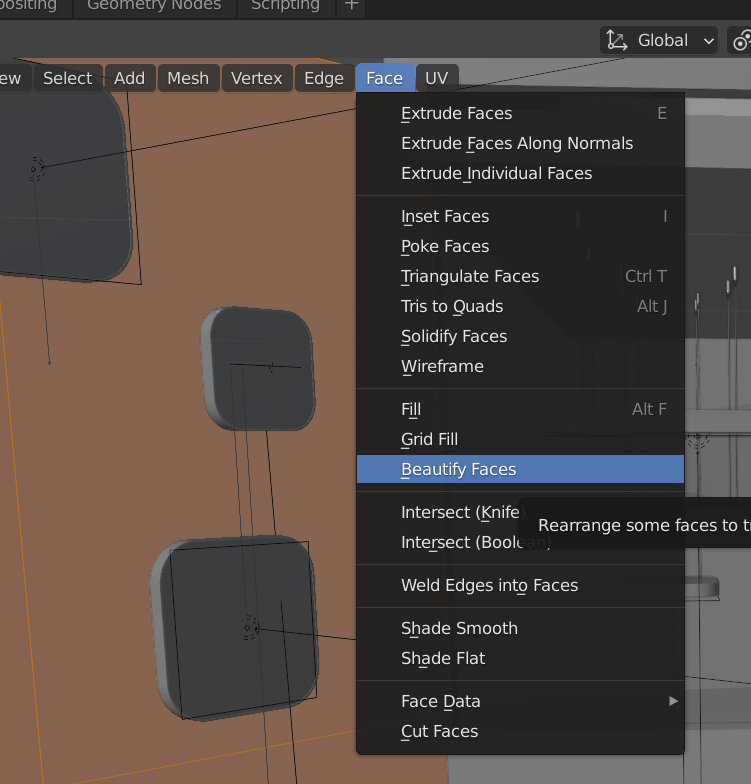
Select all your faces of the text and use: enter image description here

It will recalculate your faces in much better way, It always work for me when I have to make text or numbers.

But as I have said, I never use it on already extruded text, so try it and if it won't work... hopefully you will find another easier solution rather than making it again

$\endgroup$
1
  • $\begingroup$ Tried it with the mesh I already made, no big shock that it didn't work. Also tried it with a brand new mesh and I was still getting those same issues, beautifying just seemed to shift the lines to different places, but the whole thing was still a mess. Maybe there's a specific order I'm supposed to do it all in? I tried shrink-wrapping the text to the already curved backplate, didn't solve it and seemed to cut off small parts of the text too, then tried shrinkwrapping while it was flat, then beautifying, then extruding, all looked fine, until you bend it. Then all the lines come back. $\endgroup$
    – MVP_Teku
    Commented Sep 3, 2021 at 7:26

You must log in to answer this question.

Not the answer you're looking for? Browse other questions tagged .