1
$\begingroup$

I'd like to generate simple rectangular geometry based on a heightmap such that all corners of the resulting mesh have an angle of 90 degrees and the overall mesh topology is "clean".

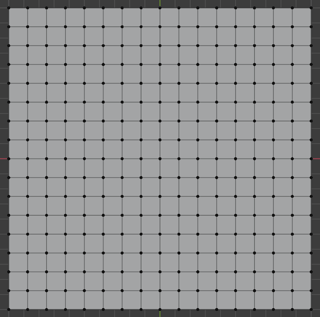
For example, given this 16x16 heightmap (enlarged for clarity):

Heightmap (enlarged)

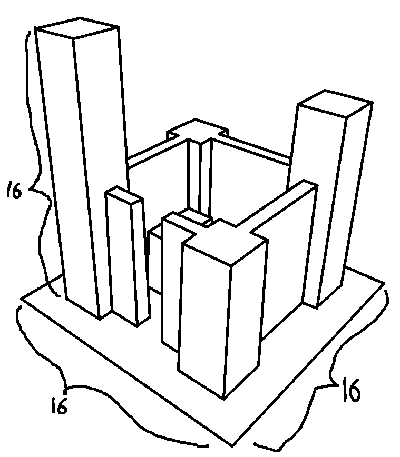
I'd like to generate a mesh that looks like this:

Desired mesh

Here's what I've tried:

  • Create a grid with 100 subdivisions along both the X and Y axes and a side length of 16 units
  • Add a Displace modifier to it
    • Set Coordinates to UV
    • Set Strength to 16.0
    • Set Midlevel to 0.0
  • Set the texture of the Displace modifier to the 16x16 heightmap image
    • In the texture settings, under Sampling, uncheck Interpolation
  • Apply the Displace modifier
  • Enter edit mode
  • Perform a Limited Dissolve using a small angle (e.g., 1 degree; must be greater than 0 or no edges are dissolved)

That process yields this result:

Resulting mesh

This is close to what I want, but the topology is poor; in particular, the long, thin, triangular faces at corners and intersections are undesirable. I've tried merging vertices by distance and performing some of the clean-up operations, but doing so only degraded the topology further.

Is there a better approach that would obtain the desired result? Any suggestions would be appreciated, including plugins.

Here's the actual 16x16 heightmap for reference:

16x16 heightmap

$\endgroup$

1 Answer 1

4
$\begingroup$

Here’s one way to do it mostly non-destructively:

  1. Start with a plane.

  2. In edit mode, use CtrlESubdivide to subdivide the plane into a 16×16 grid.

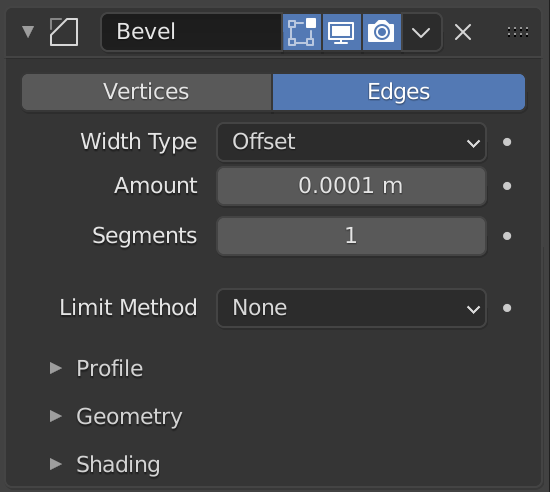
  3. Add a Bevel modifier with Limit MethodNone, Amount ▸ 0.0001 m, and Segments ▸ 1. This creates some additional geometry so displacements are sharp.

  4. Add a Displace modifier using your height map texture. Under the texture options, make sure to disable the SamplingInterpolation option, so the boundaries of the height map will be sharp. This produces a nice, sharp result:

  5. To clean up the geometry, add a Weld modifier followed by a Decimate modifier set to the Planar mode. This will delete most of the redundant edges, leaving a clean, low-poly mesh:

$\endgroup$
3
  • $\begingroup$ wow............+1 $\endgroup$
    – Chris
    Commented Apr 25, 2021 at 7:48
  • $\begingroup$ Excellent, thanks! $\endgroup$ Commented Apr 25, 2021 at 14:23
  • $\begingroup$ One additional point: I increased the Angle Limit of the Decimate modifier to a value that's relatively high but less than 90 degrees (e.g., 89) to remove the zero-area triangular faces at the intersections (visible as extra vertical edges in the last image above). $\endgroup$ Commented Apr 25, 2021 at 14:41

You must log in to answer this question.

Not the answer you're looking for? Browse other questions tagged .