5
$\begingroup$

I am building a vault for a project for work. I finished and was ready to render, but, when I looked at the first frame of the render I realized that the anisotropic shader no longer had radial blur. That is the part of the material that makes it look the most metallic, which is what I need.

When I create new objects, my material works as expected. How can I get my anisotropic material to go back to the way it was before?

This is what I want:
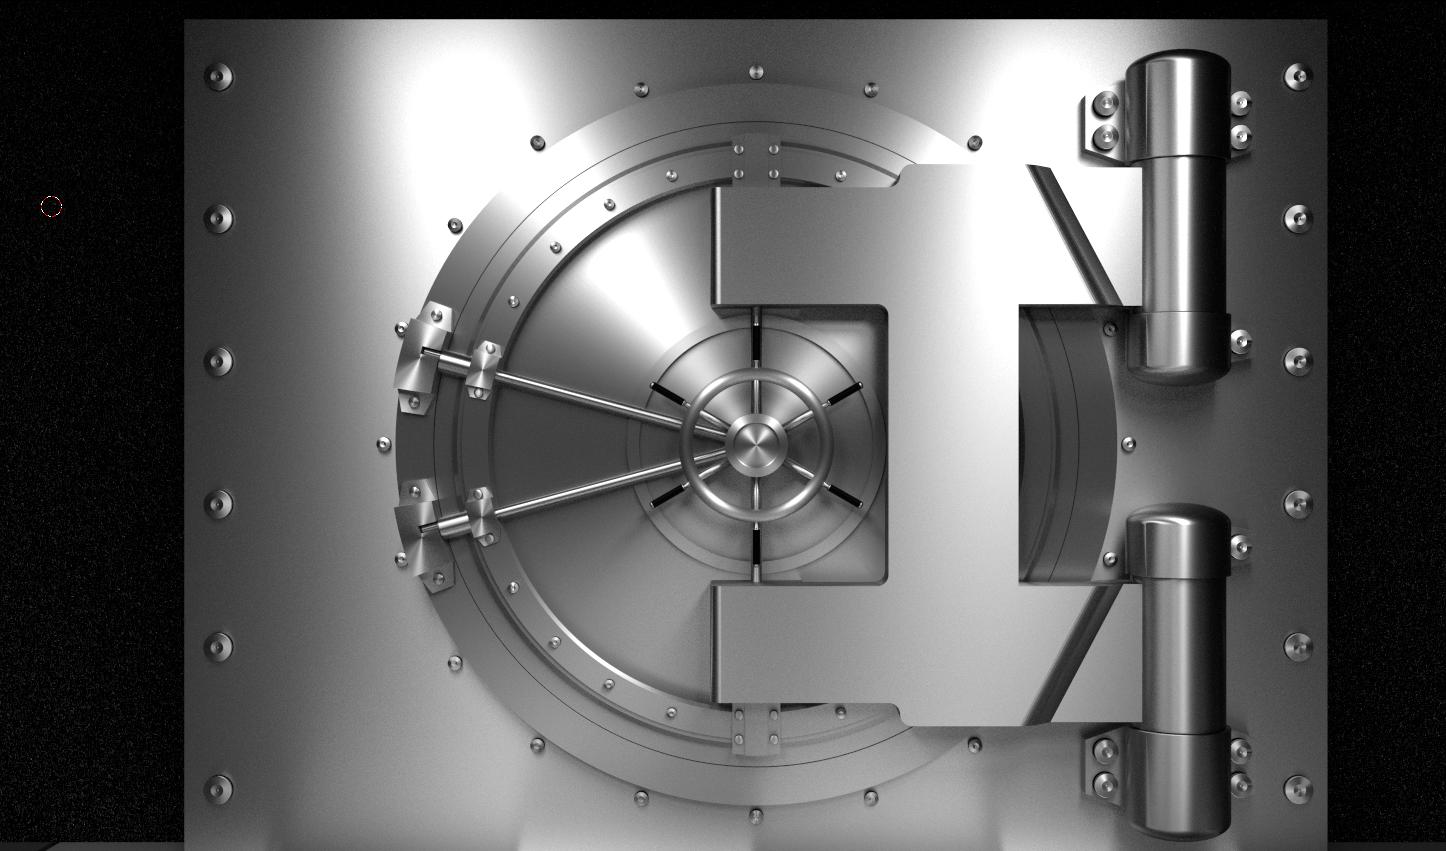
enter image description here

This is what it looks like now (which is NOT what I want):

enter image description here

  • I have removed the material and reapplied it.
  • I detached the node, and created a new one, in many different ways.
  • I have created a new object, added a new anisotropic material, and used the boolean operator to make the new object into the one I created. This helped, but the material still did not work properly (i.e. the center of the radial blur was off centered.

Anyway. I am trying to get the radial blur back, and get it centered.

UPDATE: Here is a .blend with a part of the vault, which exhibits the problem I have described.

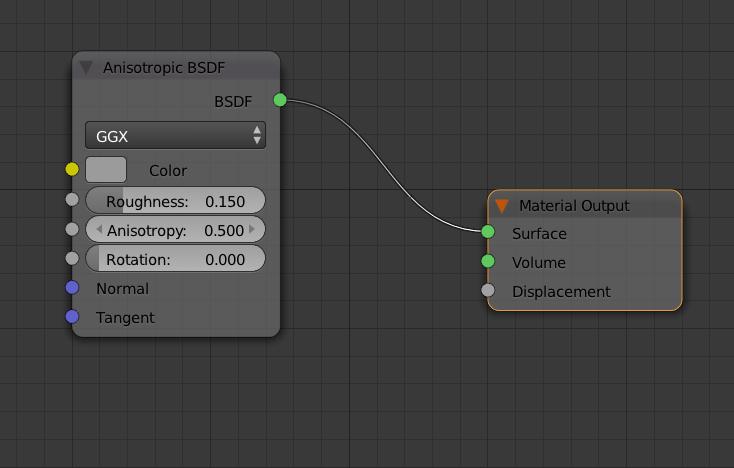
Here is a screen shot of the material node: enter image description here

$\endgroup$
2
  • 1
    $\begingroup$ I've tried reproducing the issue you are having by adding various modifiers and by moving the pivot to different places and also by rotating and scaling the model in Object mode both using Apply Location, Rotation, and Scale and without. Nothing I tried breaks the shader like what you show. Maybe you could post a .blend using PasteAll.org that only has 1 component of the model which demonstrates the problem so people can poke around with settings. I think the large flat panel of the door should be good for this. $\endgroup$ Commented Oct 28, 2014 at 4:46
  • $\begingroup$ At least a screenshot of the material nodes would be helpful.. Though if you can upload a file, IMO the center of the handle shows the problem much more effectively than the door. $\endgroup$
    – gandalf3
    Commented Oct 28, 2014 at 6:18

1 Answer 1

5
$\begingroup$

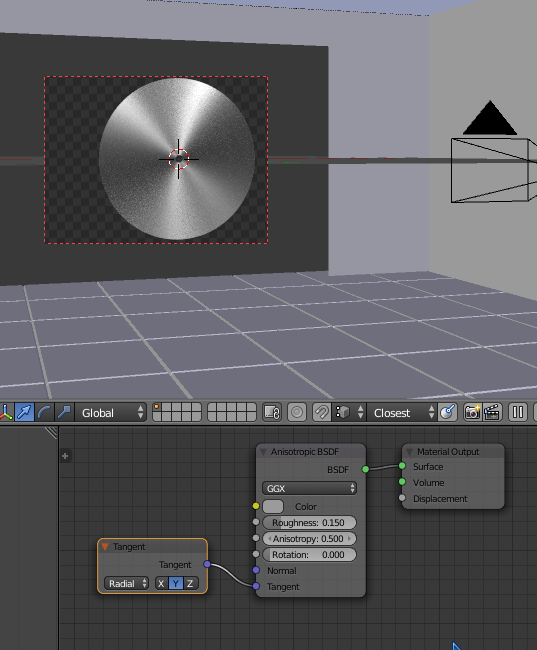
Try defining an axis for the tangent input with a tangent node:

enter image description here

In other words, for the effect in your first screenshot, it should be the axis perpendicular with the flat front of the object.

Note that the tangent node uses local coordinates.


It probably was working fine until you applied the scale to the objects. By default the tangent uses the object's local Z axis. When the scale is applied, the object's local Z was aligned with the global Z (which is not perpendicular to the "front" of your object).

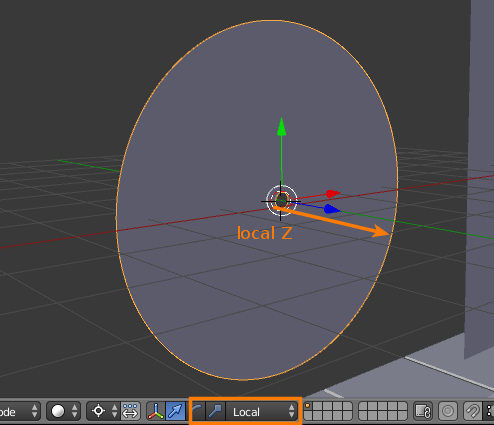
For example, if you rotate the object -90° in edit mode then rotate it back 90° in object mode so that the object's local Z points out from the center of the disk:

enter image description here

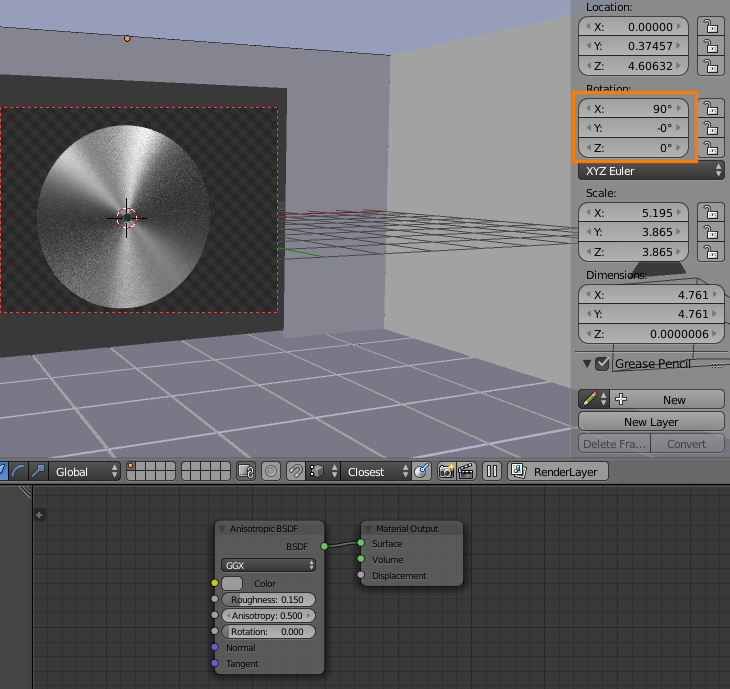
Then it will work with the default tangent:

enter image description here

$\endgroup$
0

You must log in to answer this question.

Not the answer you're looking for? Browse other questions tagged .