How do you make eyelids react with a character's eye movements? For example, if the character looks up, the upper eyelid rotates up, but if the eye looks down, the upper eyelid doesn't rotate down past the center point of the eye. I'm guessing with drivers or with copy rotation if I use eyelid bones, but if I want the character to also have the ability to blink, how'd I combine all of these systems? Sorry for the confusing question and let me know if you want more info.
1 Answer
Everyone seems to do eye rigs slightly different, it depends on how detailed you want/need to be, what kind of animations you're going to do, etc. I've made several in the past, and I'll walk you through how I approach creating a rig for something.
The first thing to do is to list what the rig needs to do. You've done that already, but I'm going to add a few more things too.
- Have the rig control the eye so that we can make a character look at things.
- Have the rig control the eyelids so that they can move up and down. In reality, there is a tiny amount of side to side movement, and you can see the eye moving when the eye is closed, but I'm not going to go into that much detail. If you want me to, ask another question on that and I'd be more than happy to go into even more detail.
- Have the eyelids follow the eye as it looks around. Again, I'm going to ignore the tiny amount of side to side movement, so the eyelids need to follow the eye vertically.
- Make the eye be able to blink.
- When the eye is closed or blinks, make sure the point the eyelids meet can move up and down. When your eyes are closed, it is possible to move your eyelids up and down a little bit, for example when you raise or lower your eyebrows, so we'll try and do that too.
- Have the eyelids be manually moveable as well, so we can make different expressions.
- Finally, make the rig easy to use, with a few controls as possible. Also make sure things make sense, and it's easy to select the proper bones.
This may seem like a lot, but it's actually not too bad. So let's think about what bones we're going to need that will actually deform stuff.
We'll need a bone to rotate the eyeball, a bone to control the upper eyelid, a bone for the lower eyelid, and that's it. If you want to have a really detailed eyelid you can use multiple bones per lid, animate them closing, and use a single bone with an action constraint to drive them. I'm going to set this up with a single bone for each eyelid, but can go into more detail if you like (If you can't tell already, I really enjoy rigging, so if you want more info I'm happy to help).
Aside from the deforming bones, I can think of two other bones we'll need. A common thing to use for eye rigs is a look target. That is, instead of rotating the eye directly, have a target that you can move around that the eyes look at. It makes it much easier to animate looking at things. So we'll need a bone for the eye to look at. I also want to have a single bone that controls blinking, so I'll add one for that too.
So let's actually get started. I'm just making the rig, and don't have it applied to a model, but it should be pretty clear.
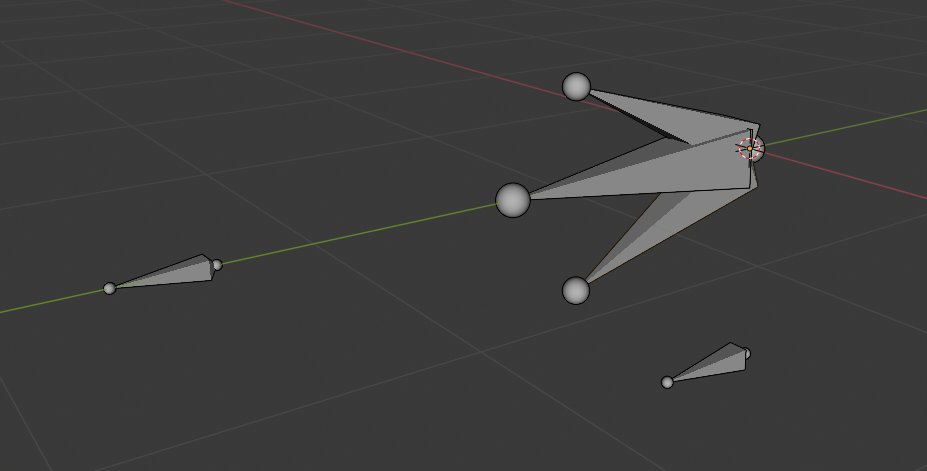
Here's the bone setup I'm going to use. Note that this is the rest pose. The bones were moved in Edit Mode, not Pose Mode.
The world origin would be at the center of the eye. The bone on the far left is the Look Target, and the bone on the right is the Blink Control bone. This is pulled off to the side a bit, and sits slightly lower than the center of the eye. This is because when you blink, your eyelids meet slightly below the center of your eye, with the upper lid moving more.
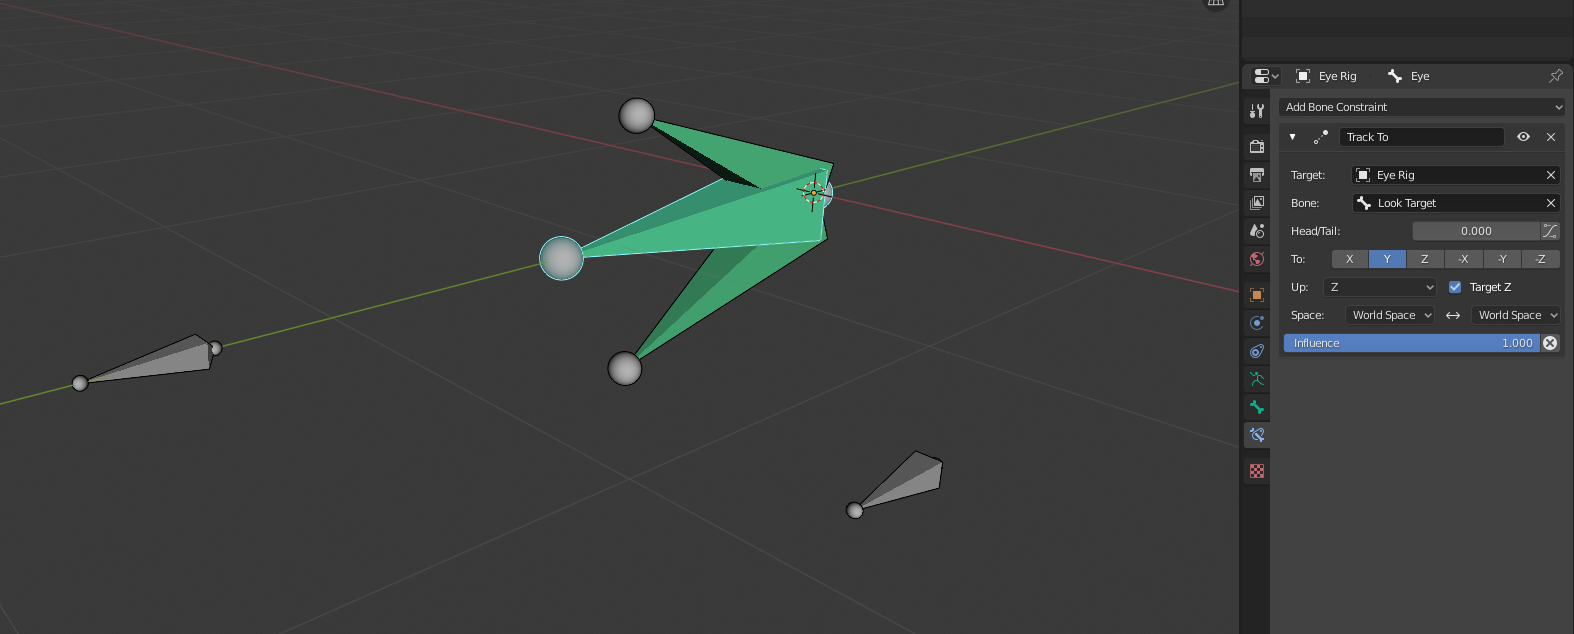
Next, I add a Track To constraint to the Eye bone, using the Look Target as the target.
Now when we move the look target, the eye will look at it.
Next, the upper eyelid. We need it to do two things here. First, follow the eye, but not completely. Second, be able to blink. We'll do this by having it look at the blink bone, and controlling the influence with a driver. It'll make more sense shortly.
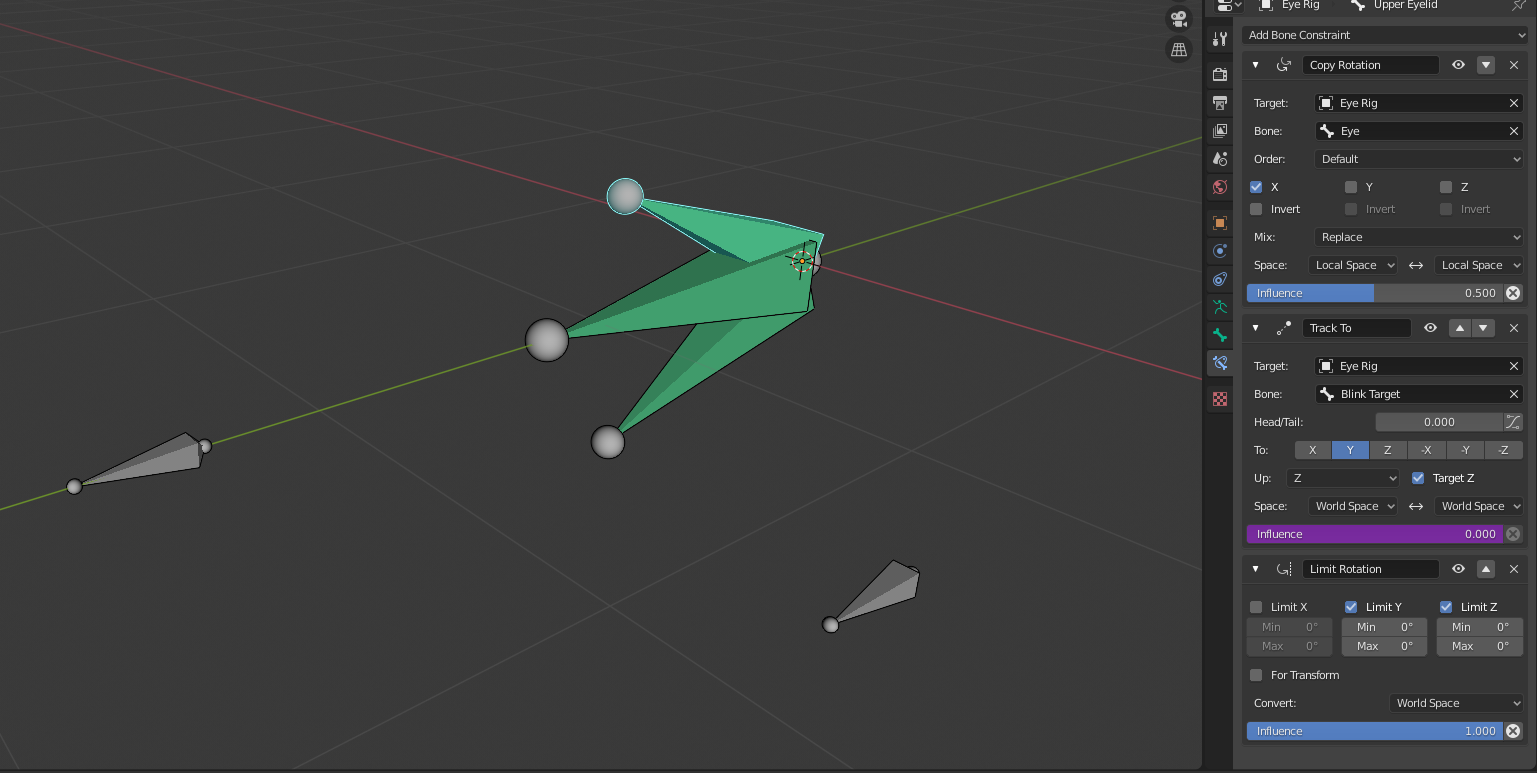
We need three constraints. The first is a Copy Rotation, set to something less than 1, with the eye as the target. Now it follows the eye a bit as it moves. I used .5, but use whatever you need. Next we need another Track To, using the blink target bone as the target. We'll use a driver to control the influence, which is how we can make it blink. Finally, I added a limit rotation constraint, so that the target for the track to constraint can be off to the side without rotating the eyelids sideways. This will help make things less cluttered at the end.
The final constraint setup looks like this:
Next we do the same for the lower lid. I did the exact same setup, just used an influence of .1 instead of .5, since the lower eyelid moves less.
Onto the drivers. My goal here is to have it setup so that we can scale the Blink Target bone and have that open and close the eye.
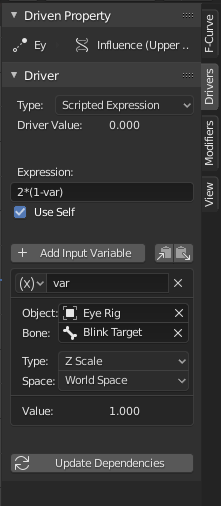
So I added a driver, selected the rig, then the blink target bone, and chose Z scale.
The expression gets a bit trickier. The scale of the blink target bone is 1 initially, and decreases as we scale it down. We want the influence to be 0 by default, and increase as we scale the bone down. However, it's not ideal if we have to scale the bone to 0 to close the eye completely. Scaling the bone by half would work fine.
The expression works out to be this: 2*(1-var) where the var is the name Blender gives the Z scale that we chose above. Now when we scale the Blink Target bone, the eye closes, becoming fully closed when the target bone is scaled by half.
This is the final driver setup, which is identical for both eyelids:
I also added a Limit Scale constraint to the Blink Target. I chose Z, with a minimum of .5 and a maximum of 1, so that the bone never gets stretched beyond what it needs to be.
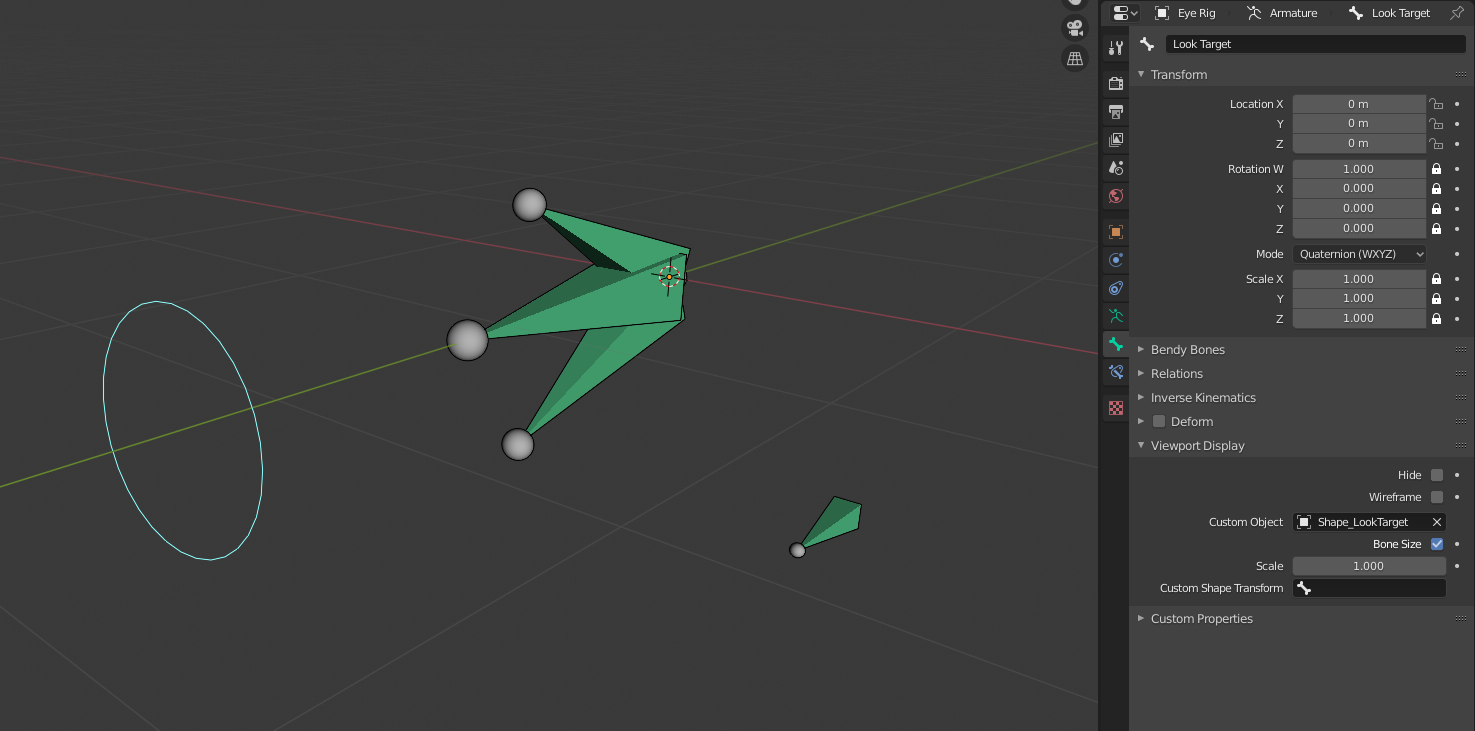
Next, I added some custom shapes. I find them really useful on rigs, as they make things a lot cleaner, easier to work with, and the give a visual idea of what each bone does with having to look for names.
If you've never used custom shapes, basically you make a shape out of just edges, and choose it under the Viewport Display heading in the Bone Properties tab.
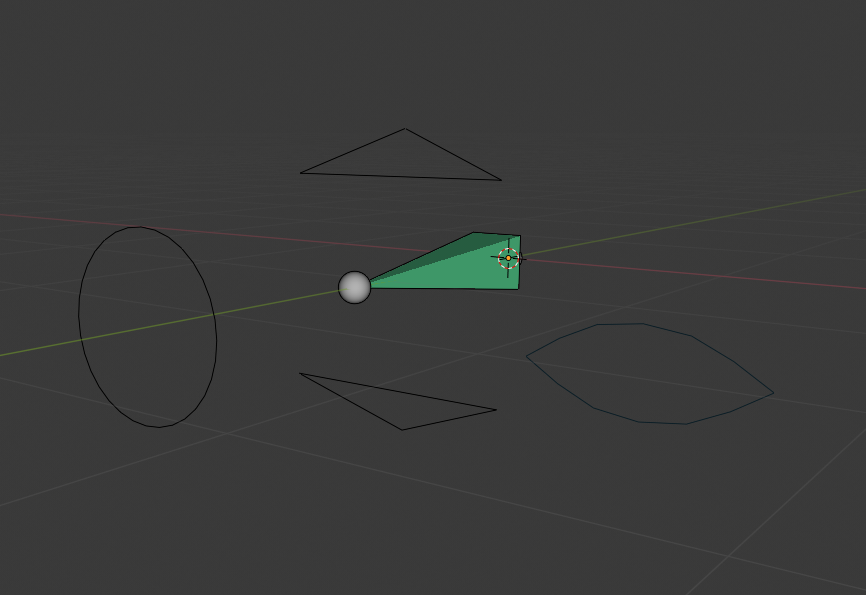
Circles work great for the look target, the eyelids can be curves or triangles, and I used an eye shape for the blink control bone. Since we never actually use the eye bone itself, I just hid it.
The final setup looks like this (I didn't hide the eye bone here so you can see what it looks like):
The final step is to disable and transforms that we won't need. For example, we won;t need to scale the eyelids, or scale the blink control on any axis but the Z.
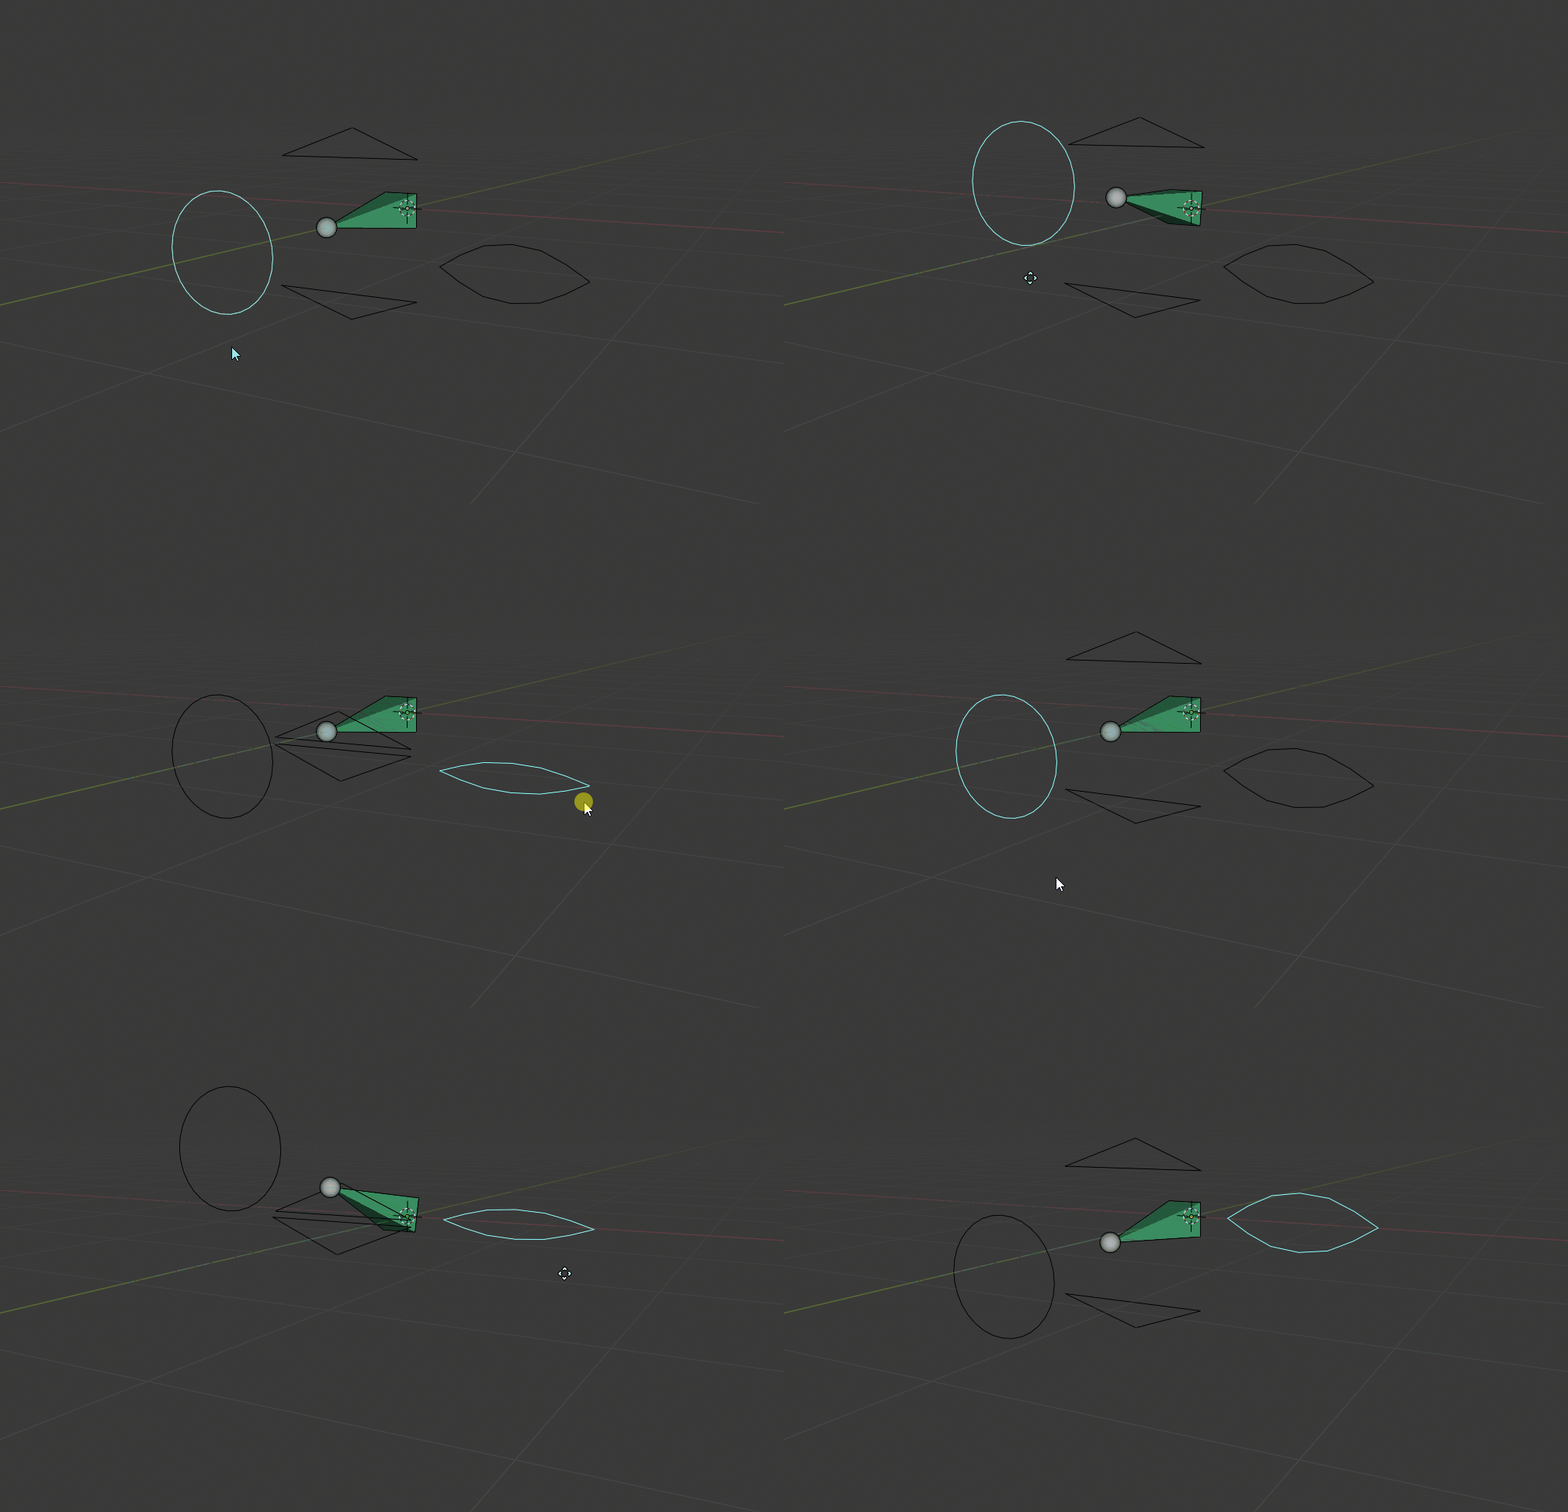
The final result:
Here's the .blend file if you want to look at the setup. Feel free to use it if you like. 
-
$\begingroup$ This is an amazingly detailed explanation on how to do it. Thank you very much! I'll set it up and come back if I'm having trouble with anything. $\endgroup$ Commented May 18, 2020 at 2:36

