0
$\begingroup$

Really hoping someone can help me out, I'm trying to build a model of a car, and I think I've maintained pretty good topology but I am quite new to to 3D-modeling.

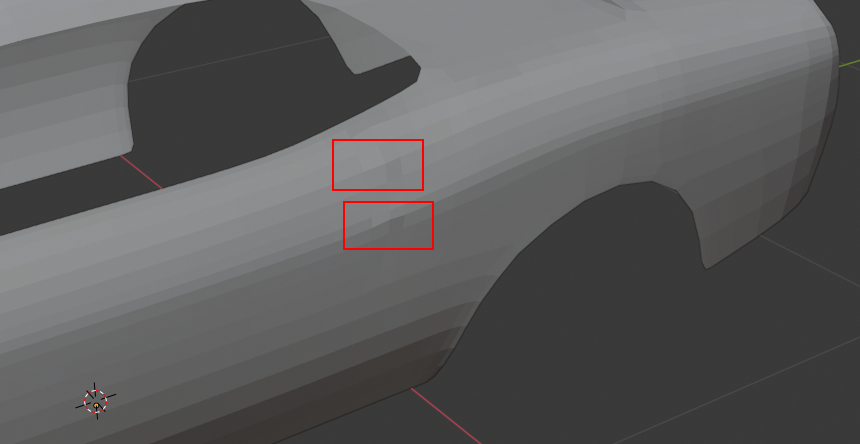
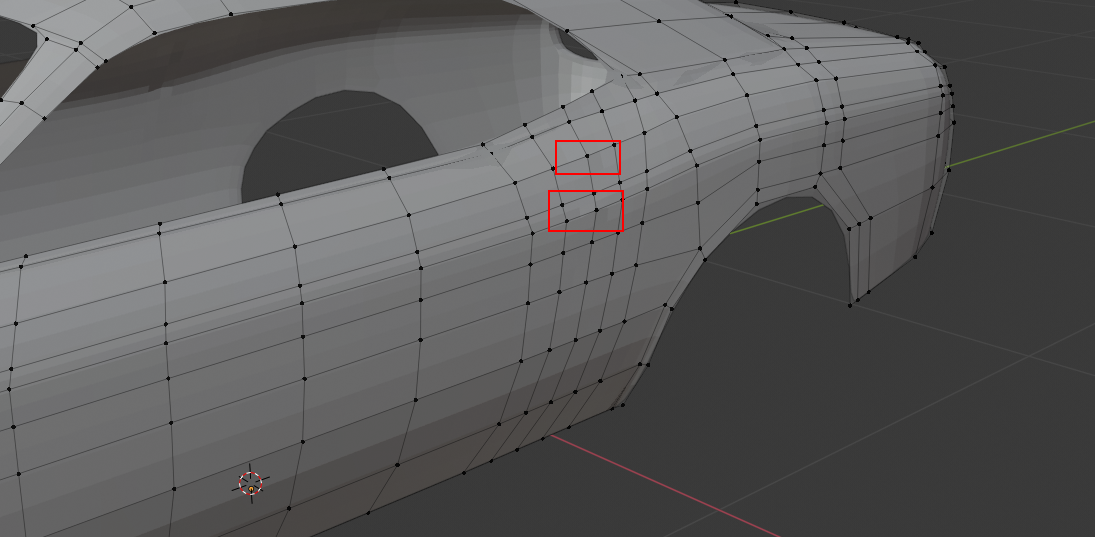
As soon as I apply the subdivision, it the majority of my car is smooth but there is a point that appears in the rear quarter panel. Not sure how I can get rid of this! I've spend 30 minutes already moving vertices in an out and I just can't get rid of it! Is there something in particular I am doing wrong? I've attached a few screenshots of what it looks like.

Any help would be greatly appreciated.

Thanks! Tudor

The points in my model: enter image description here

With vertices visible: enter image description here

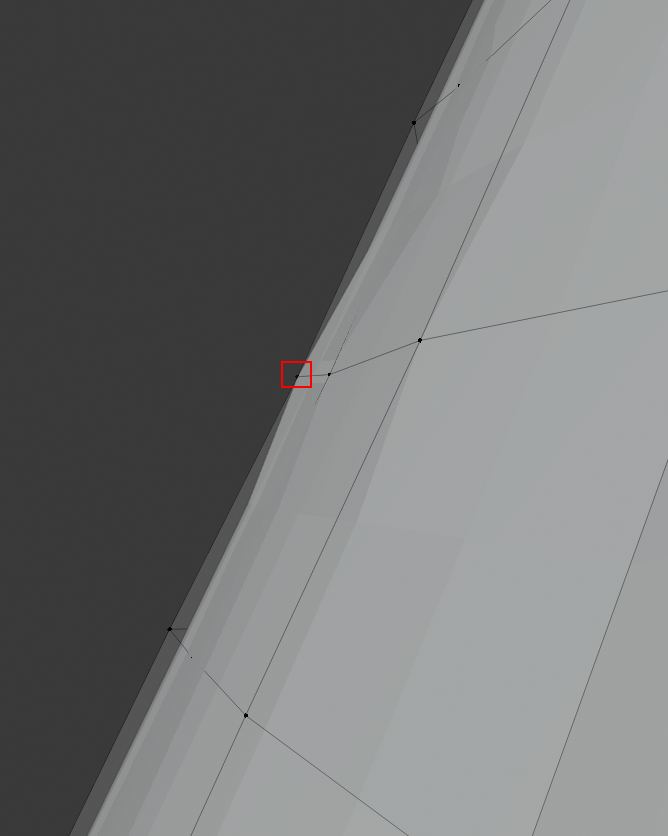
What it looks like from the top looking down to the vertex where the point is, without subdivisions it aligns nicely with the rest of the door. enter image description here

$\endgroup$
4
  • $\begingroup$ Hey there and welcome, did you by chance try activating the "Face Orientation" and see if by some way the normals might have gotten flipped? Another thing to check would be duplicated vertices, pressing "Alt+M" (or in the latest 2.83 version just "M") and then "Merge By Distance". $\endgroup$
    – Xylvier
    Commented Apr 5, 2020 at 20:49
  • $\begingroup$ @Xylvier thanks for the welcome and the help! It doesn't look like there are any duplicated vertices and face orientation is active :(. Any other ideas? Seems like on that particular vertex the subdivision is right up next to it while it has a bit of a space for the other ones. $\endgroup$
    – Tudor H
    Commented Apr 5, 2020 at 21:21
  • $\begingroup$ If you don't mind, i could take a look at the scene and may find what's wrong. Save the file under a different name and you also should remove all not involved parts, then share the file using Blend-Exchange. Copy the address of the question, as you will need it for the sharing-system. $\endgroup$
    – Xylvier
    Commented Apr 5, 2020 at 21:53
  • $\begingroup$ @Xylvier sure, I really appreciate the help. I've uploaded my file: blend-exchange.giantcowfilms.com/b/q2BGjPgW $\endgroup$
    – Tudor H
    Commented Apr 5, 2020 at 22:12

1 Answer 1

0
$\begingroup$

Since you said you activated the "Face Orientation", i believe my suggestion was most likely not explanatory enough, sorry.

Here what i found:
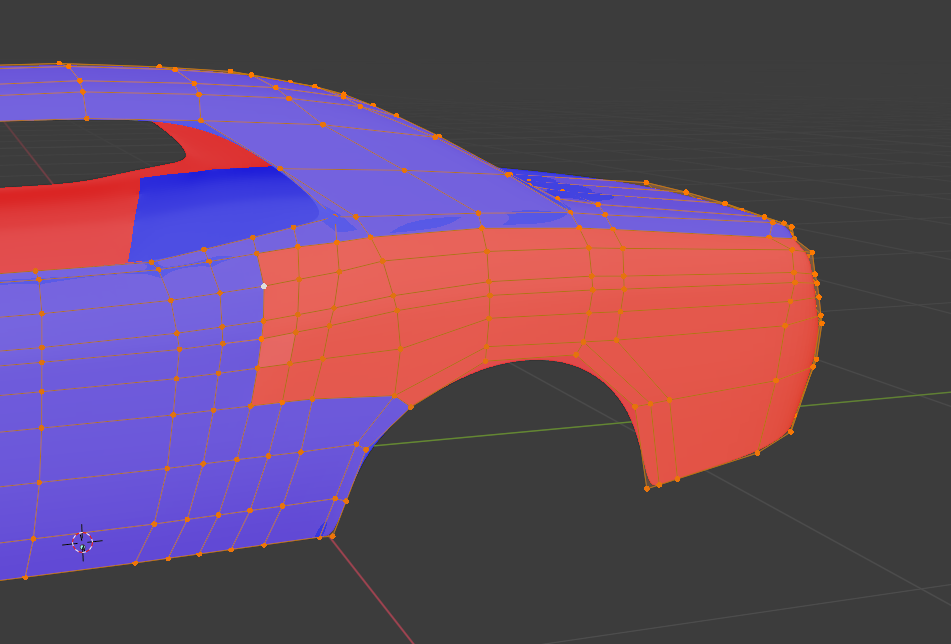
enter image description here

So regarding the "Face Orientation", switched on here:
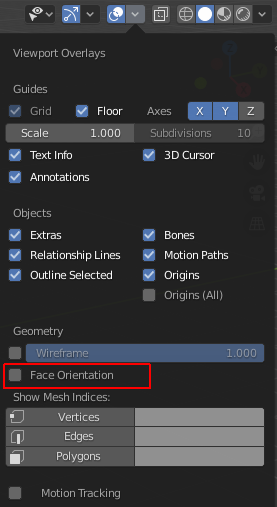
enter image description here
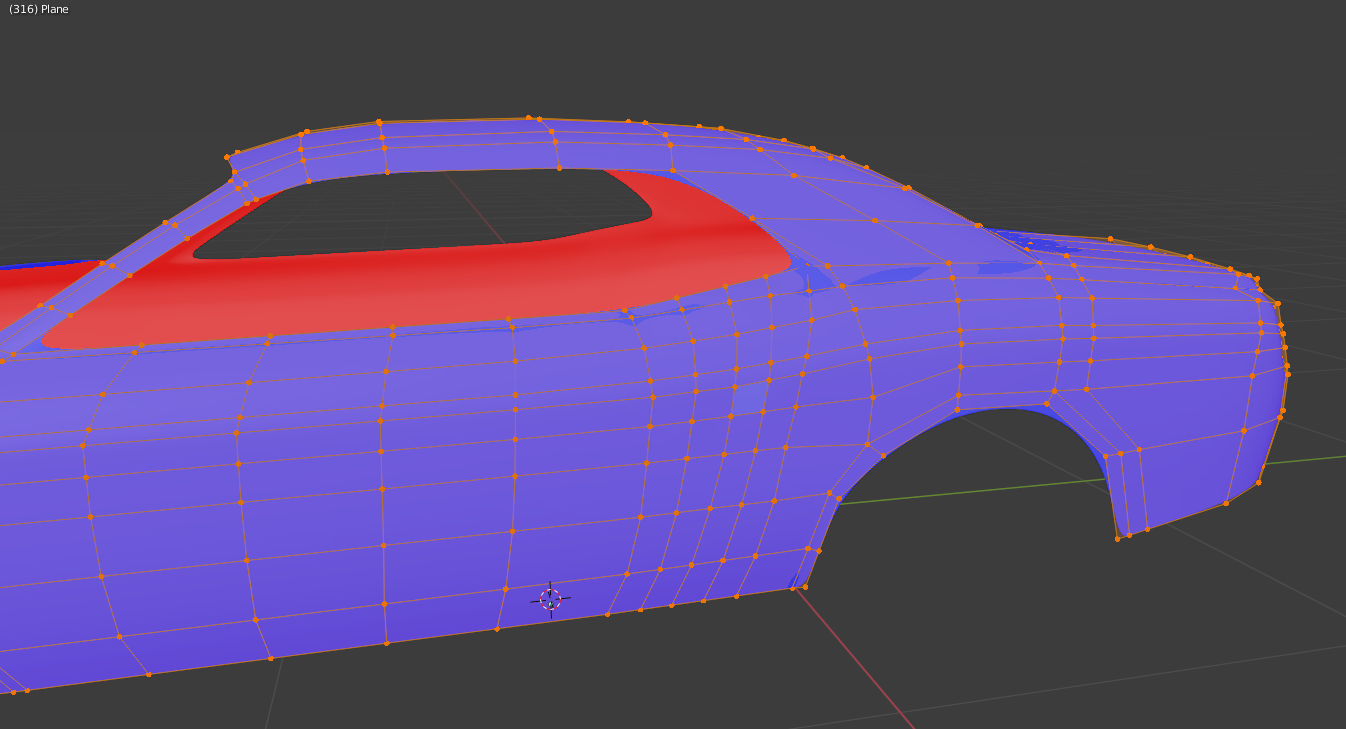
Blue is the outside side of a face, while red is the inside side of the face. That said, when we look at objects with the "Face Orientation" option on, normally all faces should be blue, except those parts where there is a hole and you can look into the object, where it should be all red.

Now your problem most likely came to be when you worked on the model and pressed some key-combinations while trying to use others. Blender has many key-mappings that are similar and it can therefor accidentally happen, while not in this mode you would not see a change instantly either.

So now to the solution:

  1. Select the object, then go in edit mode pressing Tab
  2. Press A to select all elements, it does not matter which mode you are in, be it vertices, edges or faces
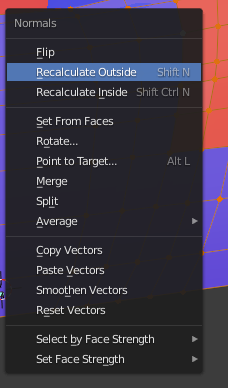
  3. Either press Alt+N to open the "Normals" menu and select "Recalculate Outside" or use the direct shortcut Shift+N
    enter image description here

The result should look like this now:
enter image description here
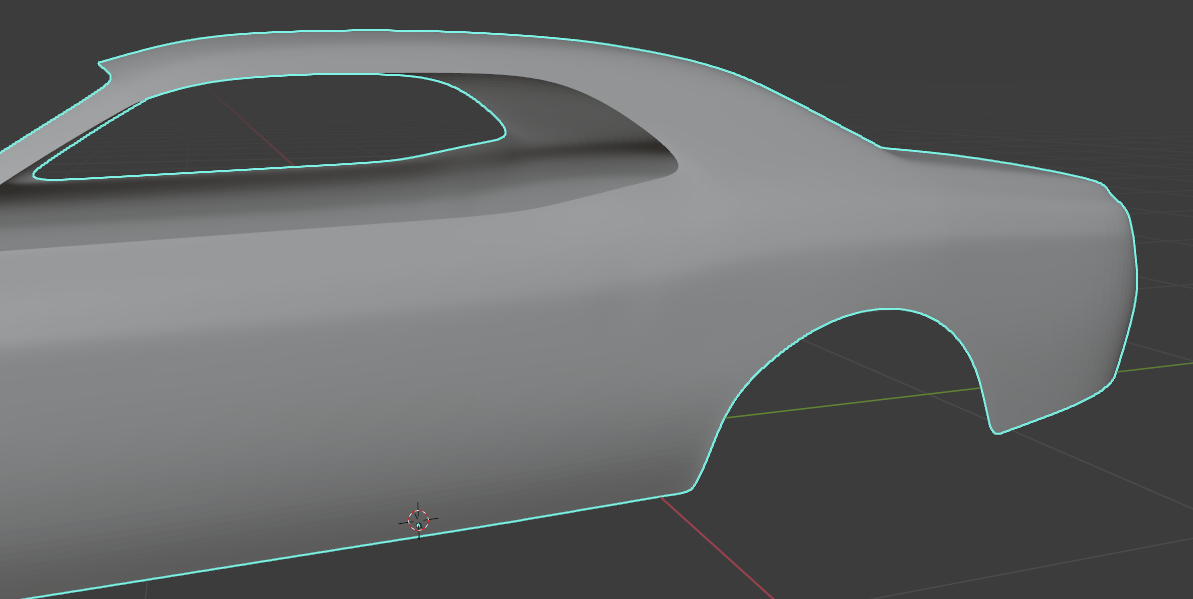
Now we can deactivate the "Face Orientation" mode to see this:
enter image description here
You may need to iron out those vertices if you moved them to find the problem.

Should you have some faces that just don't want to turn the right way with this method, you can always select the corresponding face(s) and then press Alt+N to select "Flip".

From here on out i wish you a good time Blending.
$\endgroup$
2
  • $\begingroup$ Wow, thank you so much! I was about to scrap the whole thing and start from scratch but that is an easy fix! I must have hit some shortcuts earlier to make that happen. One question, when I use Shift+N mine does not highlight in blue/red like your screenshot, is this an additional setting? $\endgroup$
    – Tudor H
    Commented Apr 5, 2020 at 23:14
  • $\begingroup$ No, the "Face Orientation" mode is switched on, else the blue/red colors are not displayed. And "Shift+N" as all other operations concerning normals only affect selected faces (may they be selected as faces or 4 vertices framing one). $\endgroup$
    – Xylvier
    Commented Apr 5, 2020 at 23:21

You must log in to answer this question.

Not the answer you're looking for? Browse other questions tagged .