2
$\begingroup$

For over half a year, this problem has kept me from progressing by any means. I just found out why weight painting wouldn't affect certain parts of my model. I would keep acting as if certain parts are all read with no gradient. It is this black section that is apparently called zero something. It's the black streak and in order to remove it's affects, you need to reduce the limit to zero. I did, and it was still there.

Limit is on the bottom left.

enter image description here

This is the result of the black streak.

enter image description here

So I decided to paint over the black streak.
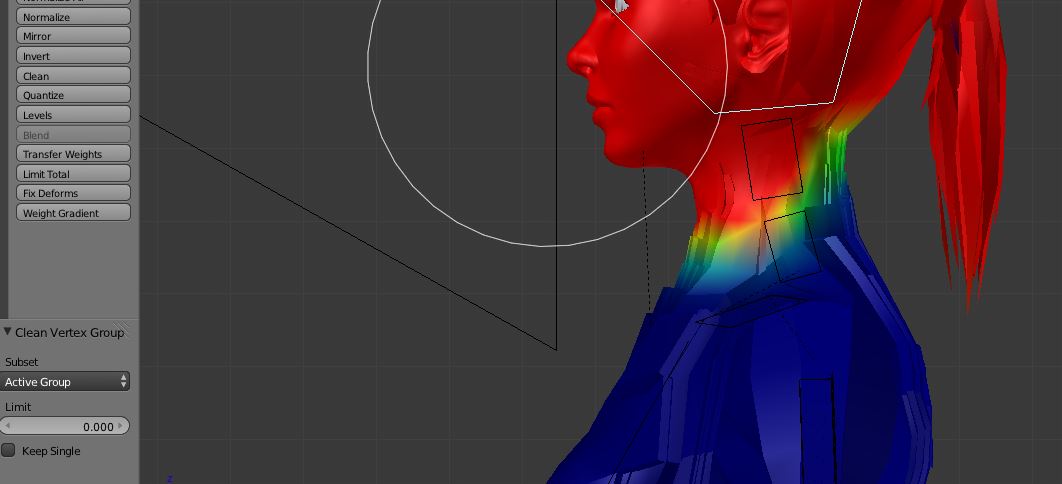
enter image description here

Didn't fix anything. If not made it worse.
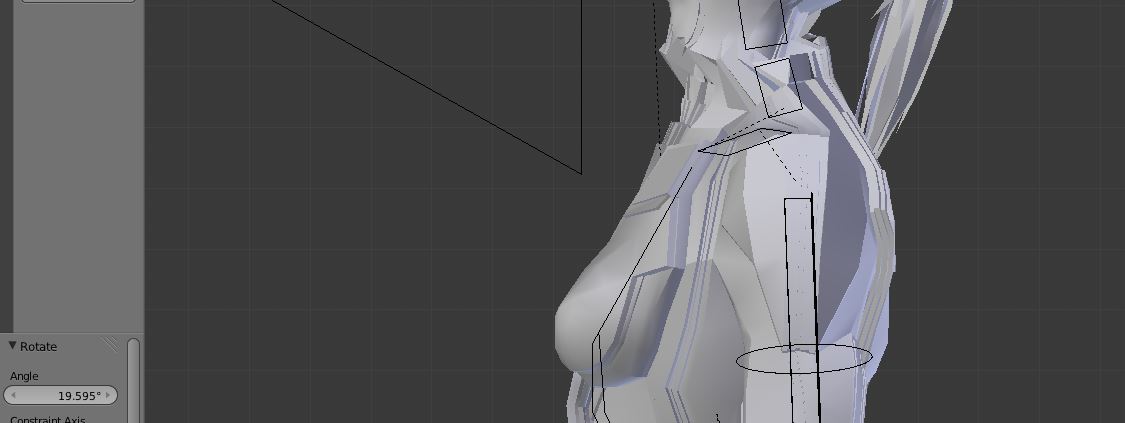
enter image description here

I can't do anything with my models. They all suffer from this problem, and no matter how many times I re-rig, this never goes away. Same problem happens with rigify.

does ANYONE have a solution?

Using 2.7

To download the .blend. Let me know if it doesn't work. http://www.megafileupload.com/en/file/558769/RiggingProblem-blend.html

Three things about the .blend.

1: Deleted most of the model, except for the problem area.

2: I saved it so that once it opens, all you need to do is press R to rotate the selected head in order to see the issue.

3: The download button on the link makes you wait 15 seconds before being able to click it.

Thank You!

$\endgroup$
2
  • $\begingroup$ Could you please post your .blend file. It really helps other find the cause of you problem. $\endgroup$ Commented Aug 18, 2014 at 2:49
  • $\begingroup$ Just added a link to download the .blend. Thank you for wanting to help! $\endgroup$
    – Laina
    Commented Aug 18, 2014 at 4:38

5 Answers 5

2
$\begingroup$

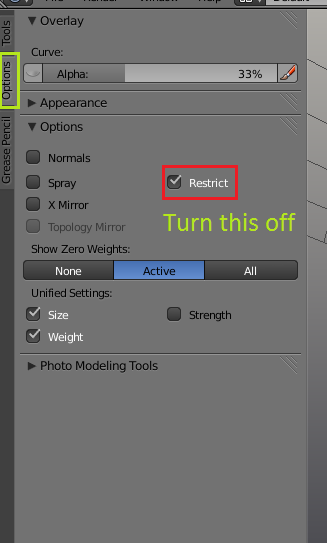
You have Restrict enabled in the options tab(not 100% sure on this since I don't have a .blend). Restrict disables weight painting on vertices that are not in the current vertex group. To fix this, simply un-check restrict.

enter image description here

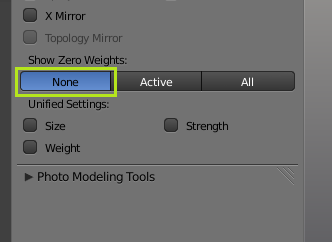
The black is a display of the non weighted vertices. to disable this, set Show Zero Weights to None.

enter image description here

$\endgroup$
2
  • $\begingroup$ I checked and unchecked the restrict button, but got the same result. And oddly enough, I came across this being the problem by by clacking all, to see what happens. I keep it on now, just to see where everything is. $\endgroup$
    – Laina
    Commented Aug 18, 2014 at 4:50
  • $\begingroup$ After turning restrict off, The problem seemed to be fixed.... $\endgroup$ Commented Aug 18, 2014 at 15:01
0
$\begingroup$

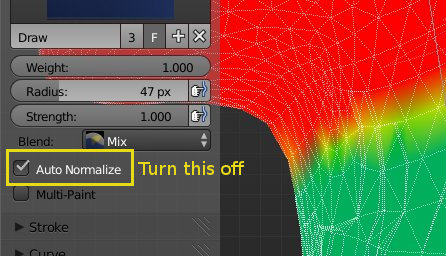
Your problem seems to come from the "Auto Normalize" option.

This makes the current vertex weight adjust the other group's vertex weight in order to have a maximum weight value of 1.0 when totalizing all group weights for the vertex. (I hope it's understandable...)

Try without this option :

enter image description here

Then, I recommend you to hit Z and disable the "Limit selection to visible" option (bottom toolbar of 3D view), in order to paint your weight through the mesh.

I also saw that the topology needs some improvements to have nicer deformations, and the pivot points of the bones should be better placed...

$\endgroup$
1
  • $\begingroup$ Still nothing. I've tried every variation of what I have been told so far, and the problem still persists. Went into another model of mine that I rigged, and come to find out, Auto Normalize is off, Restrict is off, plugged up the holes in the topography, and I still have these problems. For both models. Should I uninstall and re-install blender, and see if that helps? $\endgroup$
    – Laina
    Commented Aug 18, 2014 at 17:31
0
$\begingroup$

Try checking the "Keep Single" option.

EDIT: It appears in your screenshot, under the "Clean" tab, in the "Tools" docker while in "Weight Paint" mode. It will ensure no vertex ends up without being in a vertex group by your edits, i.e.: in black.

$\endgroup$
4
  • 3
    $\begingroup$ Please add some details to your answer, such where this option is and how it will help the user. $\endgroup$ Commented May 17, 2016 at 14:46
  • $\begingroup$ I was thinking about it, but I did realize that the option "Keep Single" appears in his screenshot. And about how it would help the user, well, it may just solve it. I think a short and concise answer is more valuable than a long and elaborated compendium of obviousness. I'm a IT engineer, I tend to mean the more saying the least. $\endgroup$
    – Tanatarca
    Commented May 18, 2016 at 10:53
  • $\begingroup$ Thank you for your edit. While the OP may have known where 'Keep Single' was, other people who found this question via searching probably wouldn't have spent the time looking through the original screenshots for the option. As for the "how it will help the user", I meant more "explain what this option is and why it is necessary", which you explained in the second sentence of the edit. $\endgroup$ Commented May 18, 2016 at 12:21
  • $\begingroup$ Ok, it has sense, really. Thank you. I'm pretty a noob in stack exchange. $\endgroup$
    – Tanatarca
    Commented May 19, 2016 at 7:21
0
$\begingroup$

I just fixed mine. The problem was that that part of my mesh had a different material. I don't know why that would matter but it did in my case.

$\endgroup$
-1
$\begingroup$

I get your frustration. A year is a long time to be stuck on a problem that the UI might not even offer a resolution for. For what it's worth I have been successful with using other approaches to rigging meshes, weight painting has rarely given me much traction.

I see one issue right off that will cause some of this. Have a look at your normals. When I turned them on they were all rendering so long that you could not see much, but shorten them up and you will see that they are pretty random inside and out. That will affect the way they are attaching weight depending on the angle you are painting from.

"neck rig 1" works pretty good (for weight painting), notice neck rig 2 is trying to solve for a lot of steep faces.

Since the mesh in your sample file is all triangles, would I be correct in concluding that this model is for output to dirX. If that is the case getting blenders weight system working correctly inside of blender will be a cakewalk compared to exporting it.

Can you use a solution that is not weight painting?

Nice meshes around the mouth and nose btw

$\endgroup$
1
  • $\begingroup$ First off, Thank you! And secondly, shes going to be just blender. With rendering, I have some materials I'm going to use in the blender render instead of cycles. With rigging, the rig works perfectly with the rest of the mesh, and this section of neck is literally the last thing that doesn't want to budge because of those, how you put, sleep faces. I would love to hear other solutions that aren't weight painting. They just might be the solution I need! This problem also persists with a video game model that I ripped then rigged in blender. But that's another story. Just focusing on this one. $\endgroup$
    – Laina
    Commented Aug 21, 2014 at 20:55

You must log in to answer this question.

Not the answer you're looking for? Browse other questions tagged .