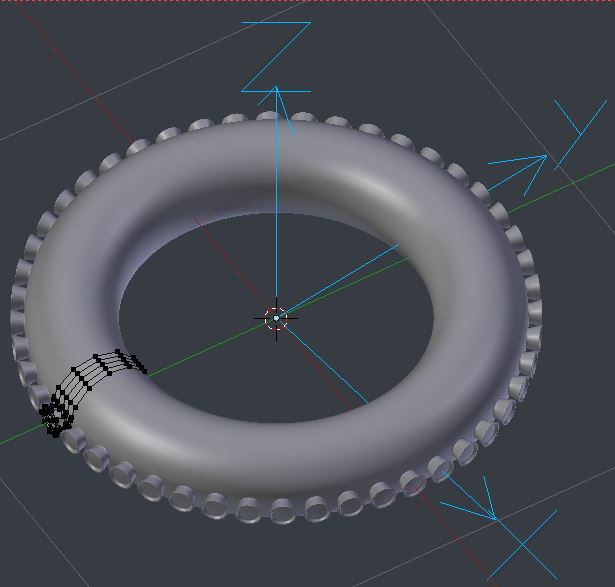
I'm working on a spaceship. its basic form is a Sphere, with an additional torus around it´s middle. The ship has 48 engine nozzles (is that the correct english term?) around the torus. (Using the mirror modifier I still have to work on 24 of them.) Is there a way to position objects- like the engine nozzles) with equal distance around the Sphere? They should all have a 15 degree "distance" along the same (z) axis, but so far i didn't find a simple way to do this. and with movements around the 3 axis its trial and - mostly error - and takes forever. I hope the description of my problem is more or less helpful. I'm no nativ speaker so that makes it a bit harder to find what I'm looking for.
-
$\begingroup$ Welcome to BSE @Rolf please provide screenshots in your question or/and upload the .blend file and include the link in your question. $\endgroup$– Georges DCommented Apr 8, 2019 at 15:23
-
$\begingroup$ you can upload the .blend file here blend-exchange.giantcowfilms.com then copy the link, edit your question and add the link. $\endgroup$– Georges DCommented Apr 28, 2019 at 16:19
3 Answers
Instead of working under a Mirror modifier, on 24 nozzles, you could be working under an Array modifier, on 1.
- Cut out 1/48 of your spaceship. (If necessary, P temporarily split off the part of your spaceship you don't want to be duplicated in rotation)
- Set up a rotational array: Object offset only, targeted on an empty at the spaceship origin, rotated through 360/48 degrees, 'Merge' and 'First and Last' checked
- Get to work on the nozzle(s)
It can help to keep a copy of the torus before cutting the piece out, to Shrinkwrap to. In the cut-out section, create a Vertex Group of the vertices you want to remain on the surface of the original torus. Assign a Shrinkwrap modifier to the section, target the intact torus,affecting only that Vertex Group.
If I understand well you could use array and screw modifier, add your mesh with origin in your ship(?) them use array modifier to create some copies of your mesh and them use screw modifier to make them surround your mesh
Not an expert but my first try would be this.
(In Edit Mode) Create a new sphere at center with cursor to center (Shift + S and click 'Cursor to Center').
Use the Alt + R method and slice it into the equal parts you need (Alt + R while hovering over your new sphere, a pink/purple dividing line should appear, now scroll your middle mouse wheel to create the amount of cuts you need, now right click to place.)
(Alternatively you could create a cylinder turned on its side, and simply type in the amount of edges you would need).
Then again the opposite way but only once down the center.
Now you have sphere (or cylinder) with equally spaced edges, all divided by a center edge, creating perfectly centered vertexes around at each intersection. Now you can attach copies of your nozzle to each of these vertexes (do this part in Object Mode) by snapping the center point of their geometry to each vertex.
Next just delete the spheres geometry and center and scale them over you original ship.

