7
$\begingroup$

I can use 3D cursor as reference point, when painting with the clone brush in the 3D viewport. But how can I use the clone brush in the image editor?

I guess I will have to use the 2D cursor as the reference point. The problem is that the 2D cursor is available in the UV editor but not in the image editor (paint mode).

Does anyone know a solution to this?

$\endgroup$
1
  • $\begingroup$ I'm not sure you can, I don't know why though $\endgroup$
    – moonboots
    Commented Apr 4, 2019 at 9:56

2 Answers 2

5
$\begingroup$

Clone Brush in the Image Editor (2D) doesn't work at all the same -you cannot use the cursor as a reference - you instead use a transfer or clone image that is the same size as the target image, and then move it about with rmb to position it and then paint through to clone. This is a VERY limited functionality, and there is no rotation of the image. For this reason, I prefer to use Stencil Brush Texture instead since we can rotate/scale/move and even set the UV to be upside down/repeating etc. Honestly, that is why it is sometimes better to just work on a 2d image plane in the 3d viewport than to waste time with the image editor for anything other than fast paint dabs or Fill tool control.

$\endgroup$
3
$\begingroup$

tl;dr: The clone brush in the UV/image editor works different than the clone brush in the 3D viewport.

Cloning in 3D Viewport

In the 3D viewport you use Ctrl+LMB on a textured part of your model to clone that area onto a different part of the model.

Cloning in 2D UV/Image Editor

In the UV/image editor you have to set up an additional texture as clone source and you would then be able to "clone-draw" this clone source onto the material texture.

Set up your material as usual with a texture (blue markings in screenshot below). Then, open a second texture as the clone source (yellow markings in screenshot below) and make sure that your material texture is the the active one.
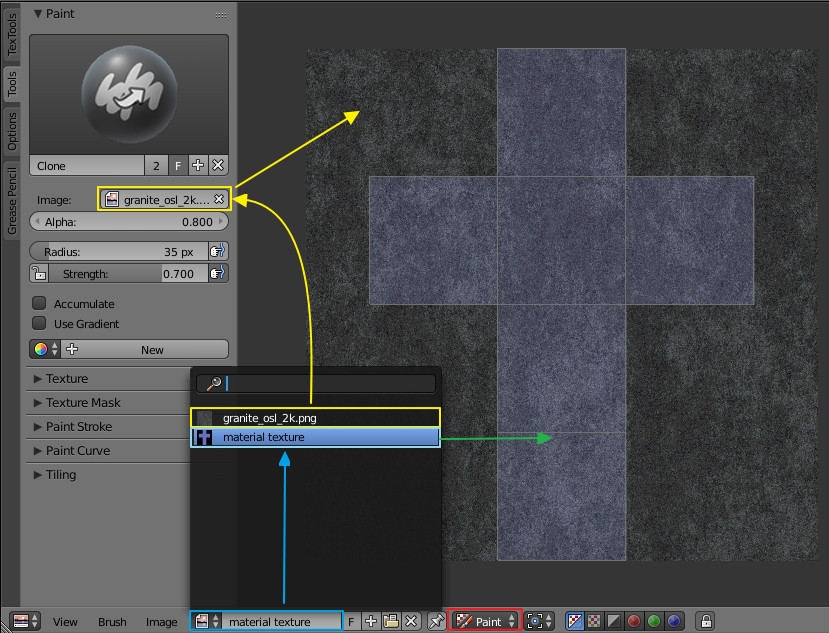
clone setup 2D

Enter paint mode (red marking in screenshot above), switch to "Clone Brush" and select the second texture as the clone source.
The Alpha value determines the opacity of your clone source overlay, the strength determines the transparency/opacity of your draw strokes onto the material texture.

Now you are able to clone the source to your material texture by simply drawing with LMB.
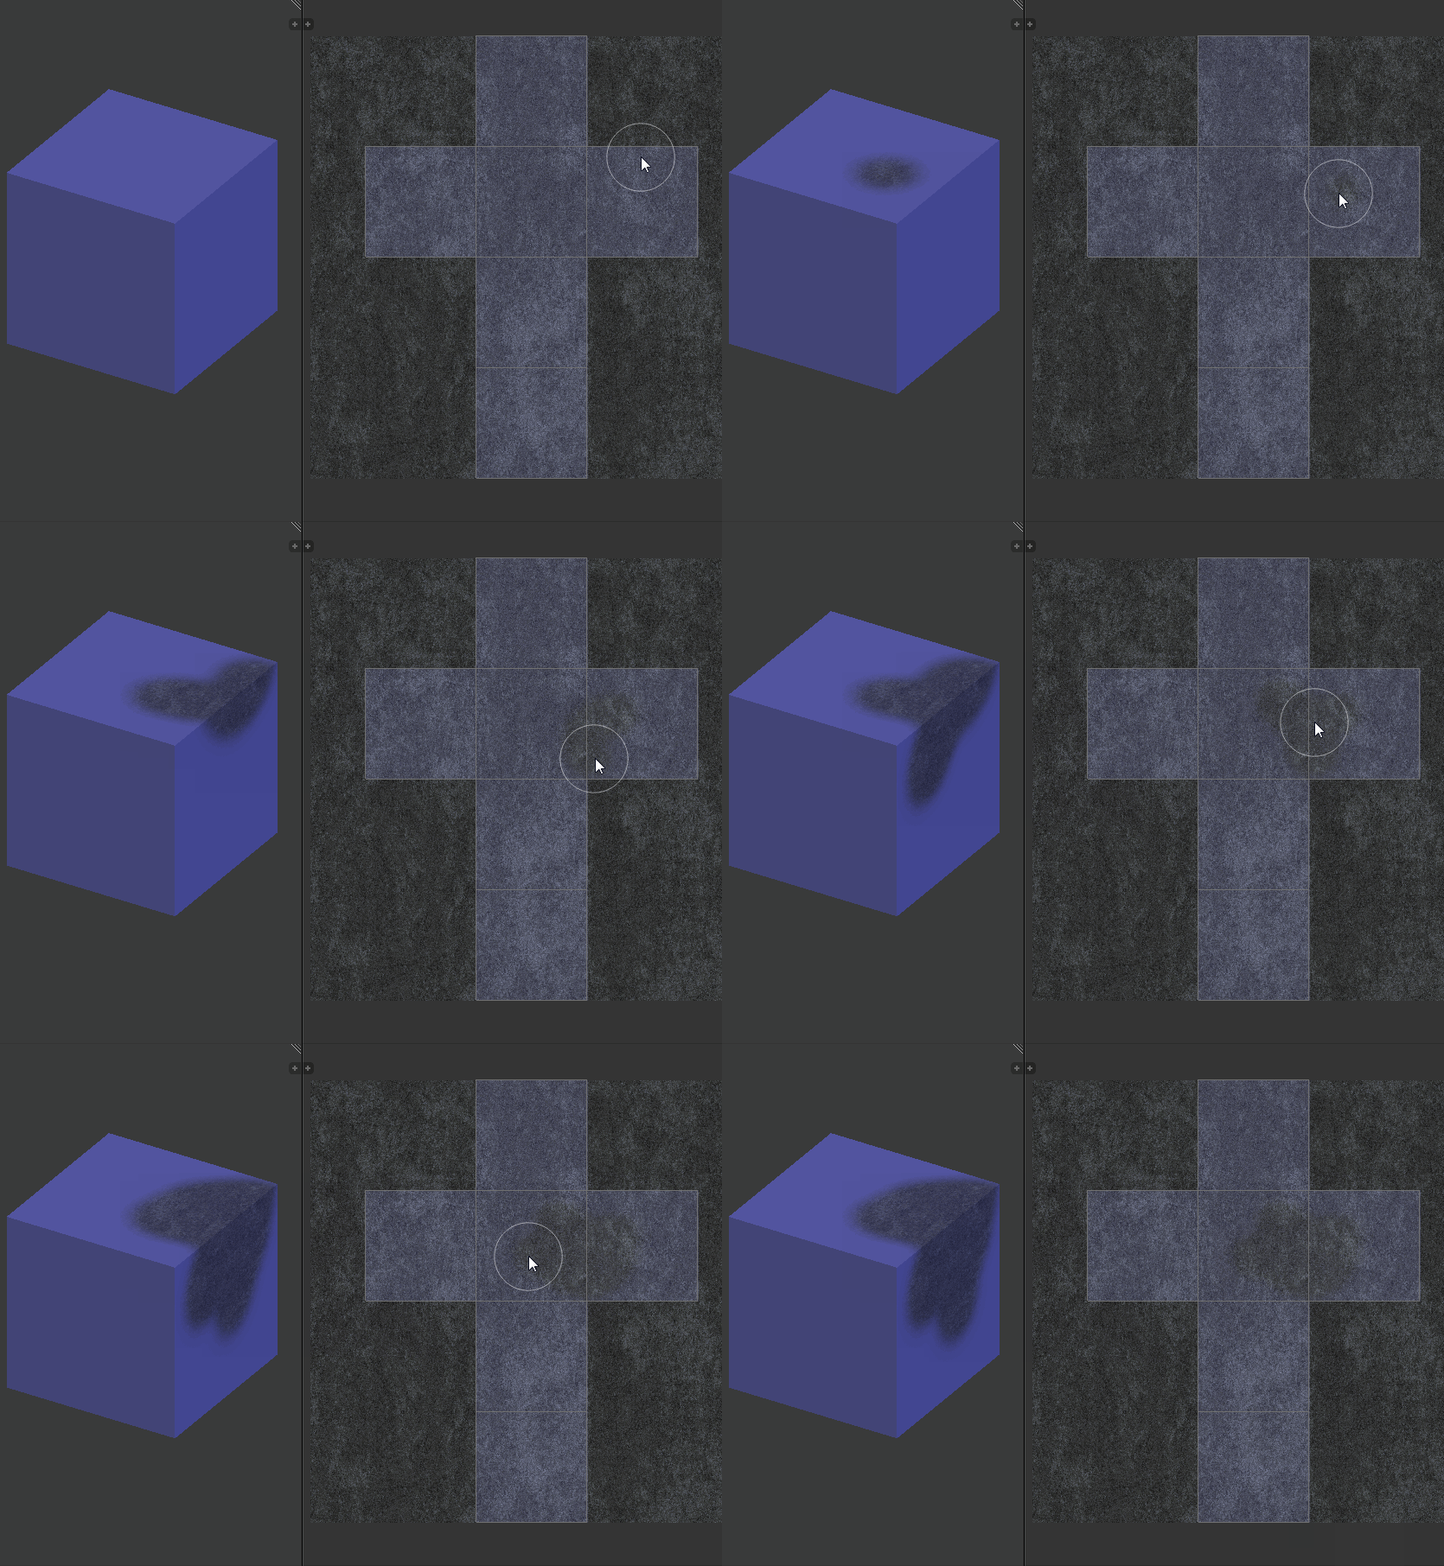
clone process

$\endgroup$
3
  • 1
    $\begingroup$ Ok , it i'm just start getting confused now. So that clone brush is really just like a 'cutdown' version of the Texture stencil ? $\endgroup$
    – andio
    Commented Apr 4, 2019 at 13:55
  • $\begingroup$ Depends on what you want to do. The stencil method in the 3D viewport is sometimes quite inaccurate. Plus you can load a bunch of textures and switch between them way faster in 2D UV/Image editor. Both methods are useful but both still lack some features. $\endgroup$ Commented Apr 4, 2019 at 17:13
  • $\begingroup$ The Clone tool in the 2d Editor is a legacy behavior from way back - I can remember when it was a big deal to have gotten it. GSOC brought us a lot of paint tools, including the Stencil brush settings and all the other cool stuff. $\endgroup$ Commented Apr 5, 2019 at 2:34

You must log in to answer this question.

Not the answer you're looking for? Browse other questions tagged .