Firstly I would suggest looking for a different image if this is your first time using fspy, as it doesn't show an obvious vanishing point. I suspect this is a crop of a larger image therefore the vanishing point may even be off canvas to the left.
Here's how I have used it:
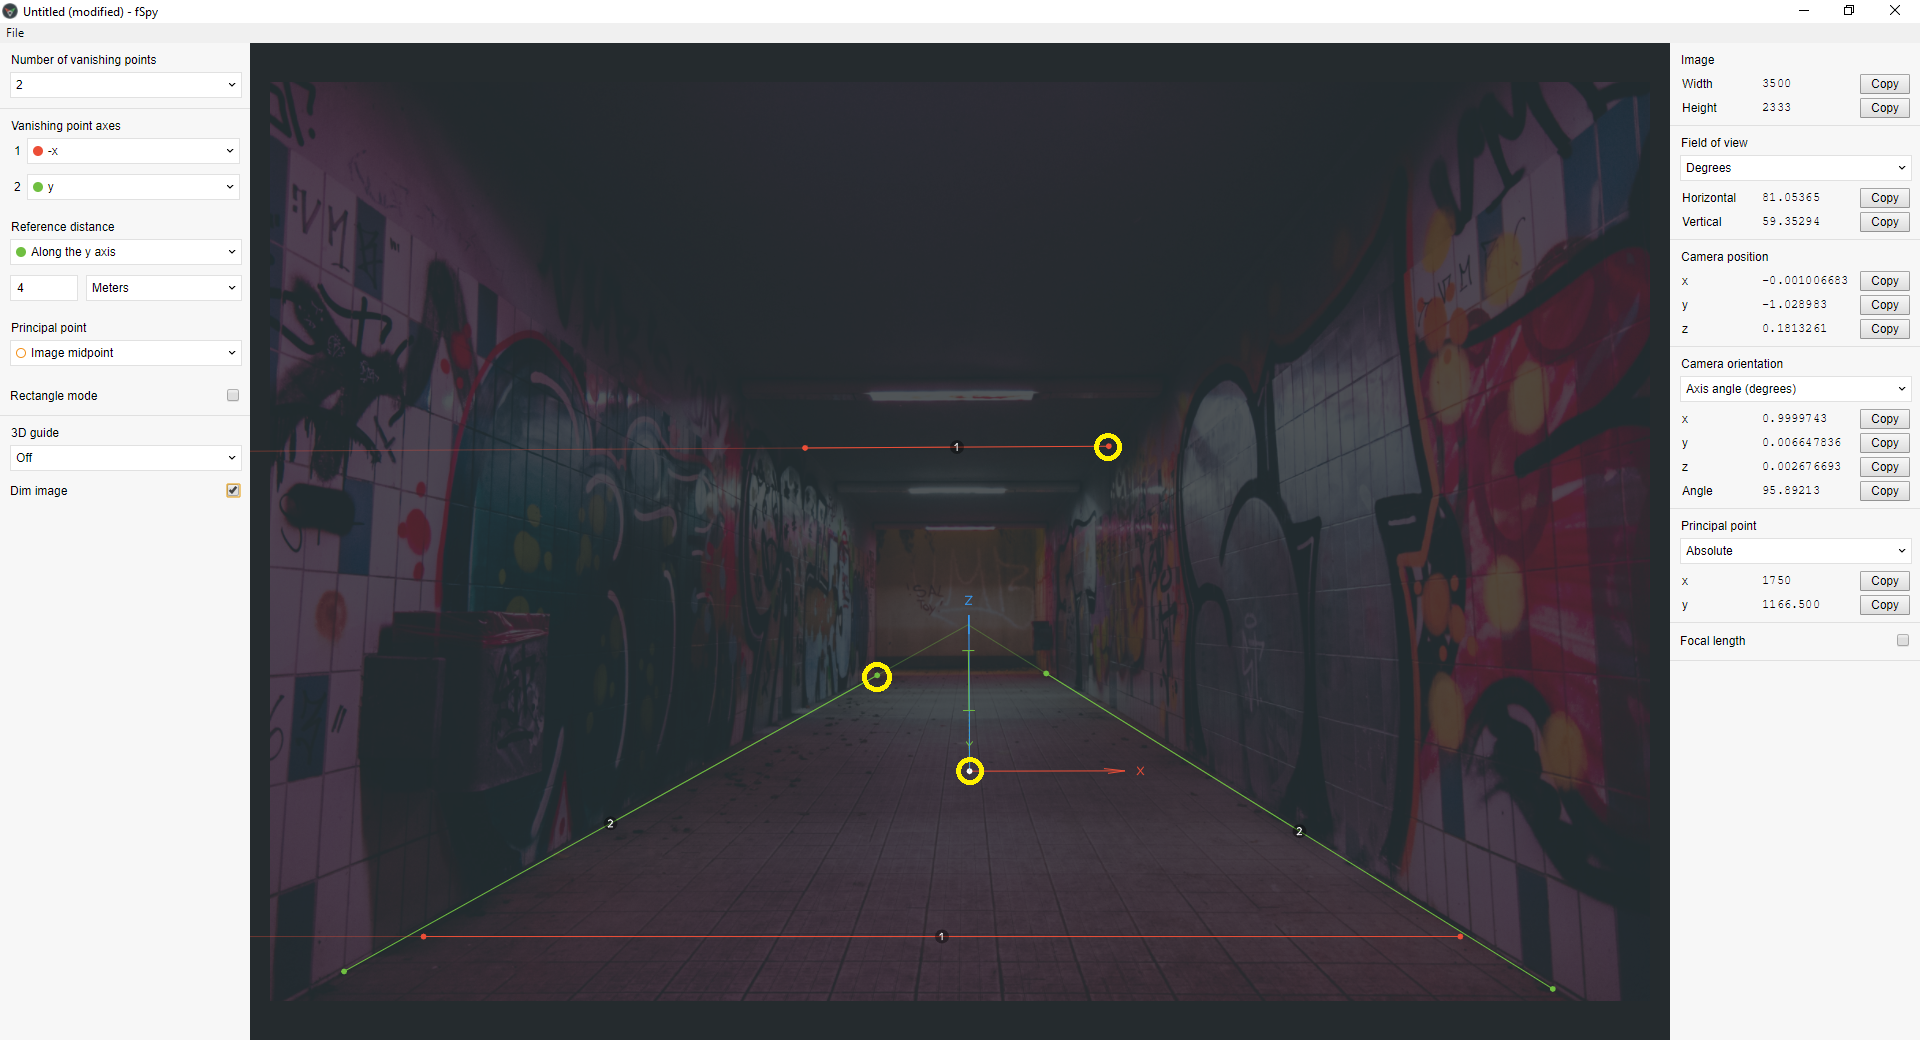
Drag an image into fspy when it first opens, by default you'll be presented with two two vanishing point axis and a orientation gizmo.
You need to click on the small circles at the end of each of those axis lines (highlighted by me with yellow circles), and attempt to line those up with similar axis on your photo.
As you can see from my example I have aligned the X and Y vanishing point lines with lines on the photo. As you modify the position of these lines you will witness the gizmo updating to show you how it is calculating the orientation of the scene it.
Using Shift and dragging you get a really nice zoomed in view of the point you are moving which will help to position it with greater accuracy.
Once you are happy with your positions, you should adjust the green I shape on the gizmo which will relate to the reference distance in the menu, I think it currently defaults to 4, which could be 4 blender units. You may change this as necessary.
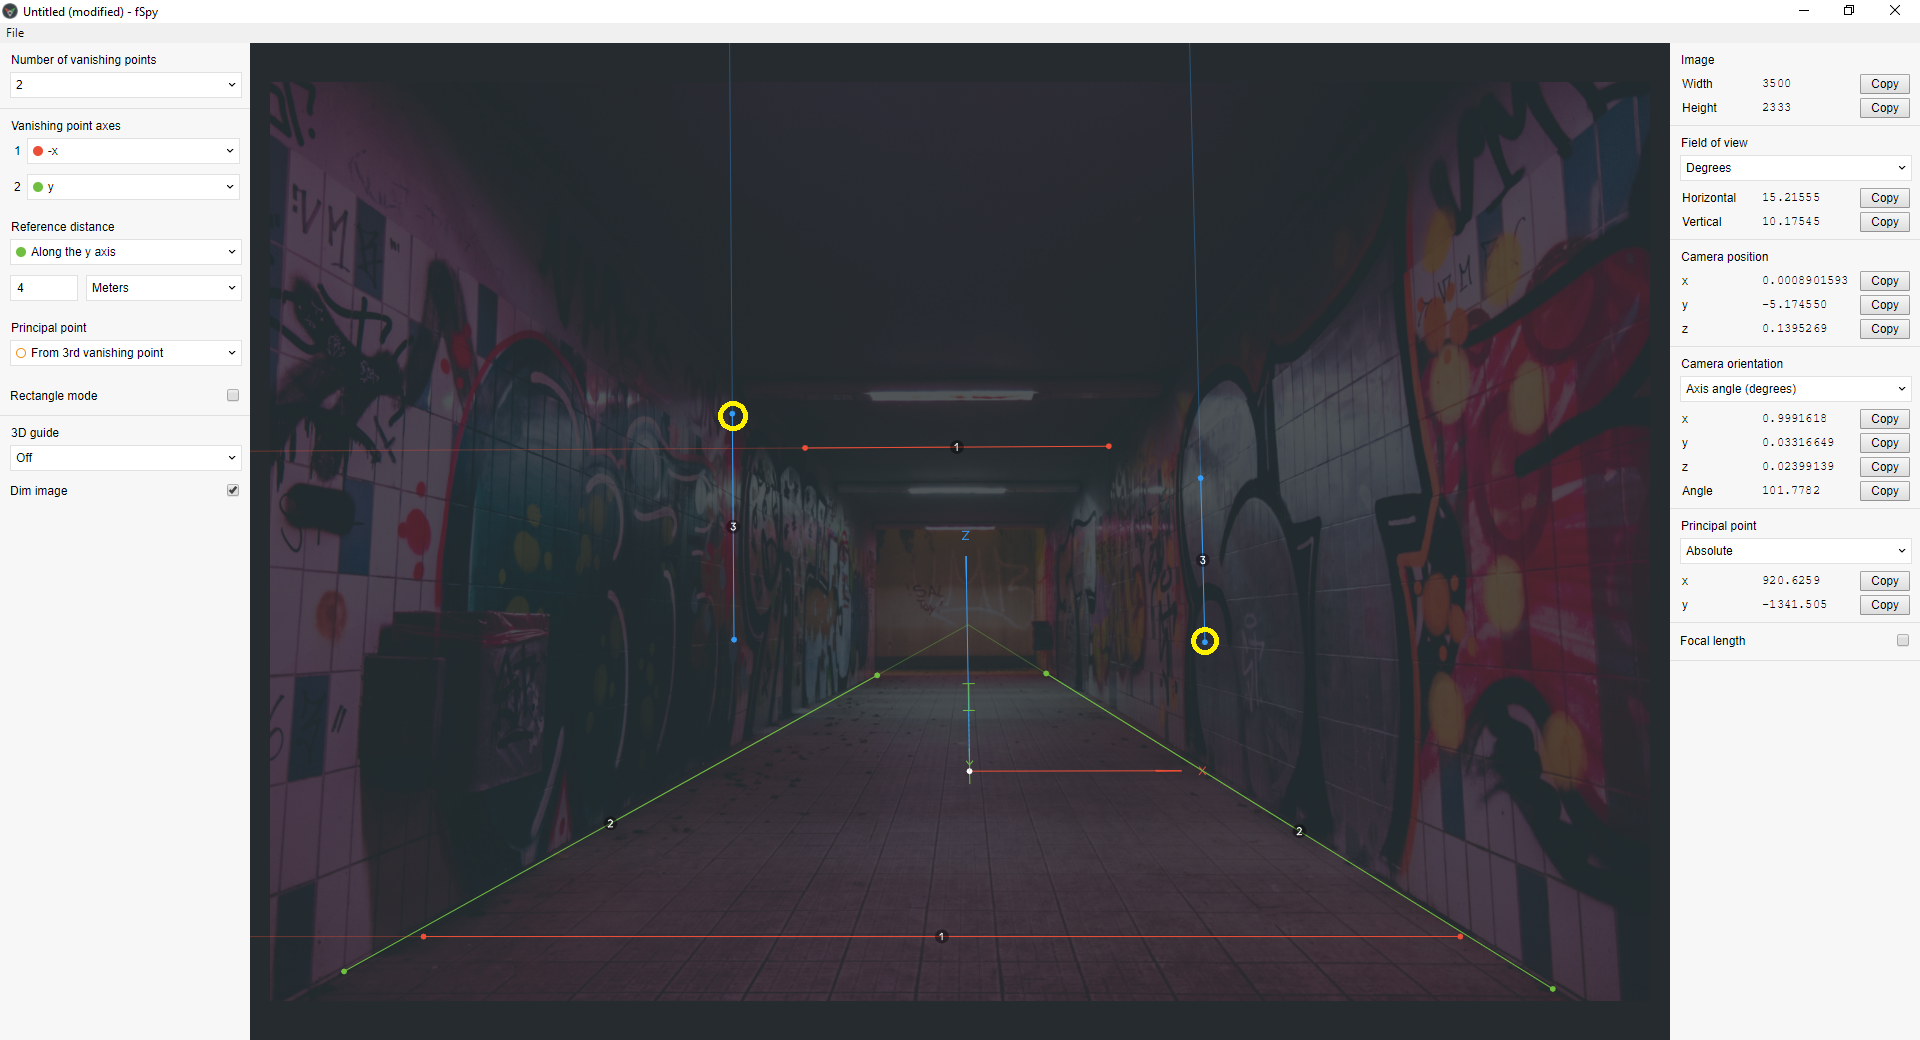
If you find that the Z axis on your gizmo is pointing down then the scene imported into Blender will also be upside down. To correct this, change one of the axis in the vanishing point axis menu from + to - or vice versa to flip the gizmo to Z up.

I cannot really offer much in way of how to use the Principal point, I just leave it on image midpoint for this example, if you need to ensure this is calculated exact then choose From 3rd vanishing point and you get the option to utilize the Z axis lines.
Use the dim image check box as necessary to see your image while aligning these various lines.

Once you have completed your setup, you need to save this as a .fspy file by choosing save as option not export.
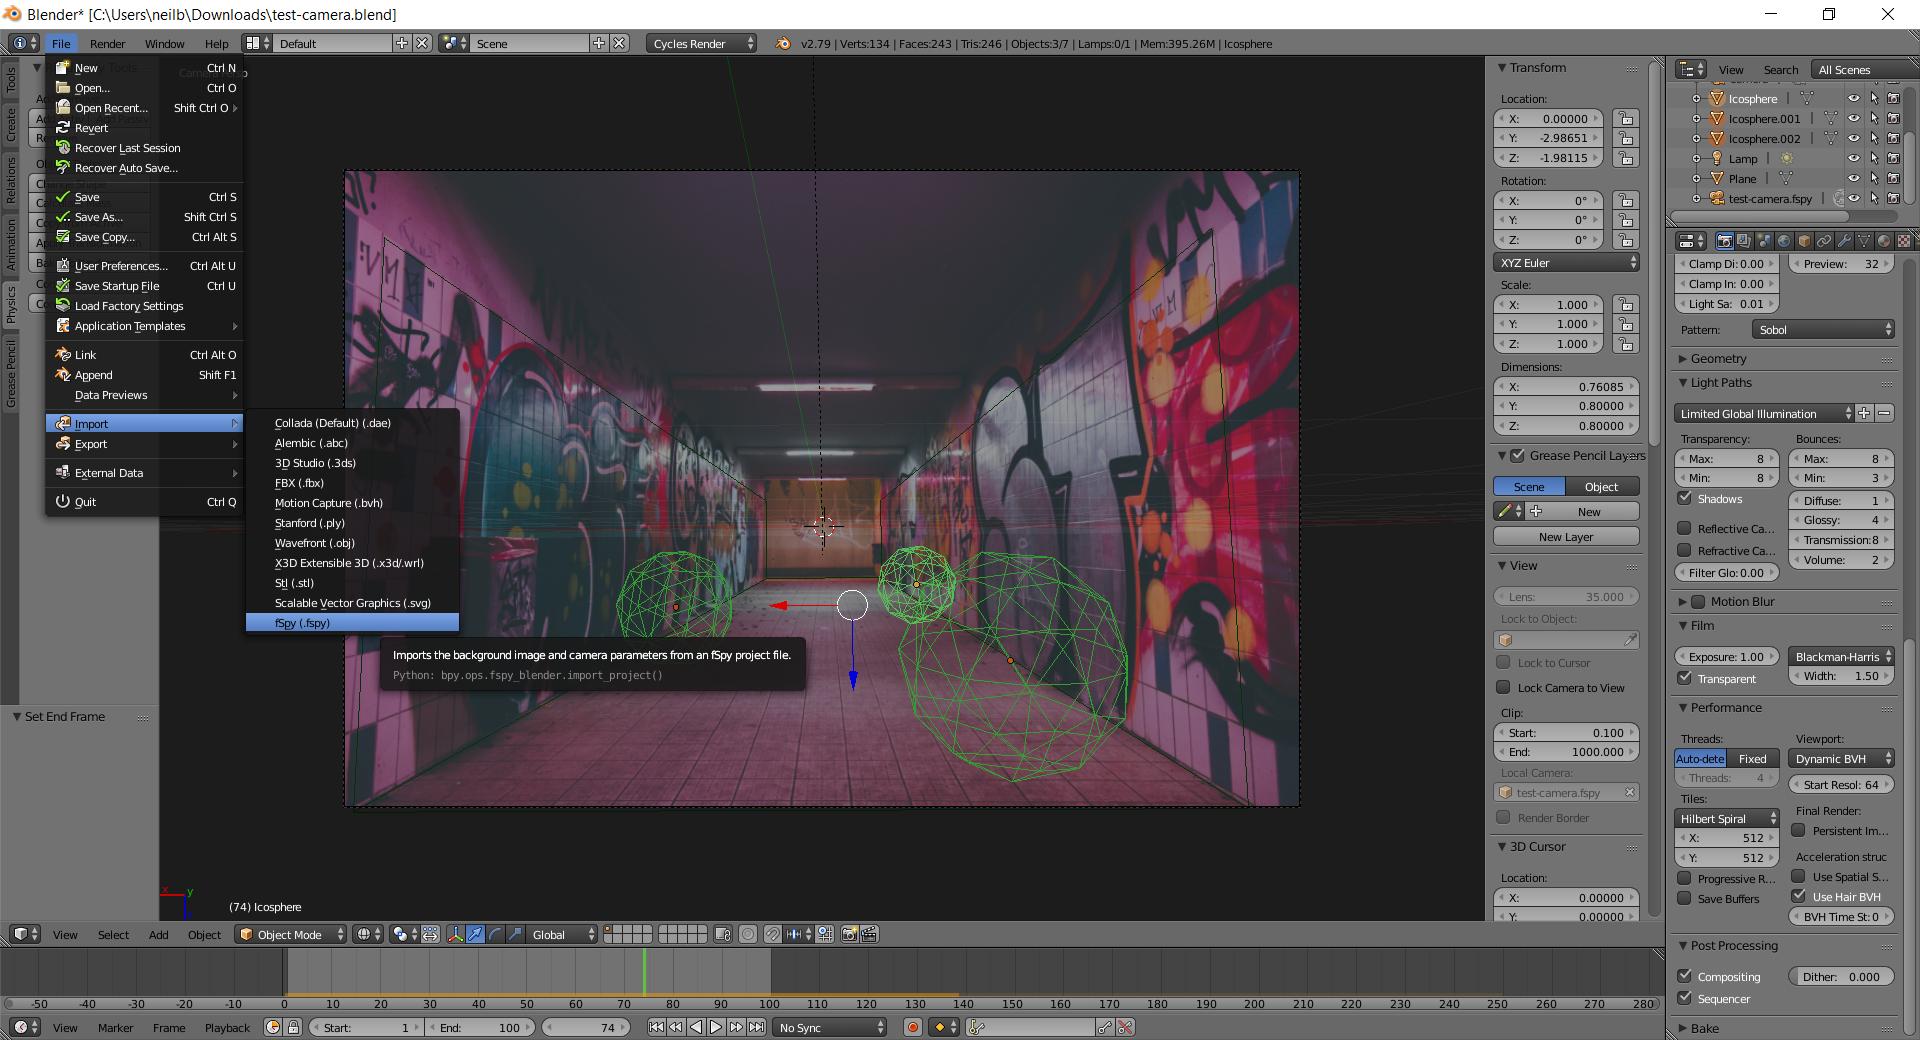
Finally you will use the Blender plugin to import this saved .fspy file to setup your scene.

You should now have a correctly oriented scene based on your settings derived from the original photo.
To aid with you compositing of objects, what you need to do next is go to front view and orthographic so that you can add a background image, this should be the same image you used in fspy. Now you can add objects that should match the perspective of the view.
If you want to have the image in the scene then you can add this in the compositor afterwards, you will need to render your objects with transparent from render panel and turn on any shadow catchers you need.
Use a color mix or alpha over node in compositor to add your rendered objects above the original image which you can add in the compositor and plug also into the mix or alpha over node.
I hope this helps you.
