4
$\begingroup$

I have seen the tutorials involving the use of the compositor to produce an atmosphere, but I wanted to be more authentic.

Since Cycles now has volumetrics support, I have tried using the sphere gradient texture connected to a color ramp (knowing that black is 0 density and white is 1) to get an accurate density falloff (a factor of 10 every 10 kilometers), but the volume density still reaches the outer edges of the mesh.

Any way of doing this?

$\endgroup$
2

4 Answers 4

5
$\begingroup$

I don't really know how the gradient texture node works so I usually make my own gradient texture using the generated coordinates and a Seperate XYZ node.

Here is what I have come up with for a homemade 3-dimensional linear falloff spherical gradient texture (plugged into a volumetric emission shader to visualize).

enter image description here
The object this material is applied to is actually a cube.

Here is the node setup:
enter image description here
Click to enlarge

It works by calculating the distance from every point to the point (0.5, 0.5, 0.5) in the object's bounding box (using generated coordinates). This creates a gradient from 0 to 0.5 (going out from the center of the bounding box), but a gradient from 1 to 0 would be much more useful so this value gets multiplied by 2 and inverted by subtracting from 1. (Ignore the math node labeled "clamp to [0,1]", it's accidentally left over from an earlier version.)

You can then plug this value into an RGB curves node (or through a few math nodes if you want to be more precise) to create whatever kind of falloff you want.

Here is the .blend so you don't have to manually copy all those math nodes!

$\endgroup$
5
$\begingroup$

I may have an answer to your question. I love space and I use Blender. So I know how to do a planet atmosphere shader in Cycles Render.

Here, I've three spheres : The planet surface, the clouds, and the atmosphere planet

But if we go closer to the surface, we can see some differences.closer look

Of course, it's based on a volumetric node materialeven closer

So here I have the atmosphere node material.material

----

So I added two volume scatter nodes. The first is the color of the atmosphere, and the second is for the sun's reflection. The first math node is the sun's reflection density factor. The second is for the atmosphere density. This one depend of two color ramp parameters.

the first color ramp node is for the atmosphere falloff factor at ground level. The second is for the ground level's start radius, in function of the atmosphere's mesh size. The limit of the atmosphere is the size of the atmosphere's sphere.

That might take a little bit of time to render a good picture, but the density factor must be higher than ten to get a blue sky.

$\endgroup$
1
  • $\begingroup$ Wow... I'm loving the result you've shared! Definitely gonna use this! $\endgroup$ Commented Jun 2, 2022 at 19:29
0
$\begingroup$

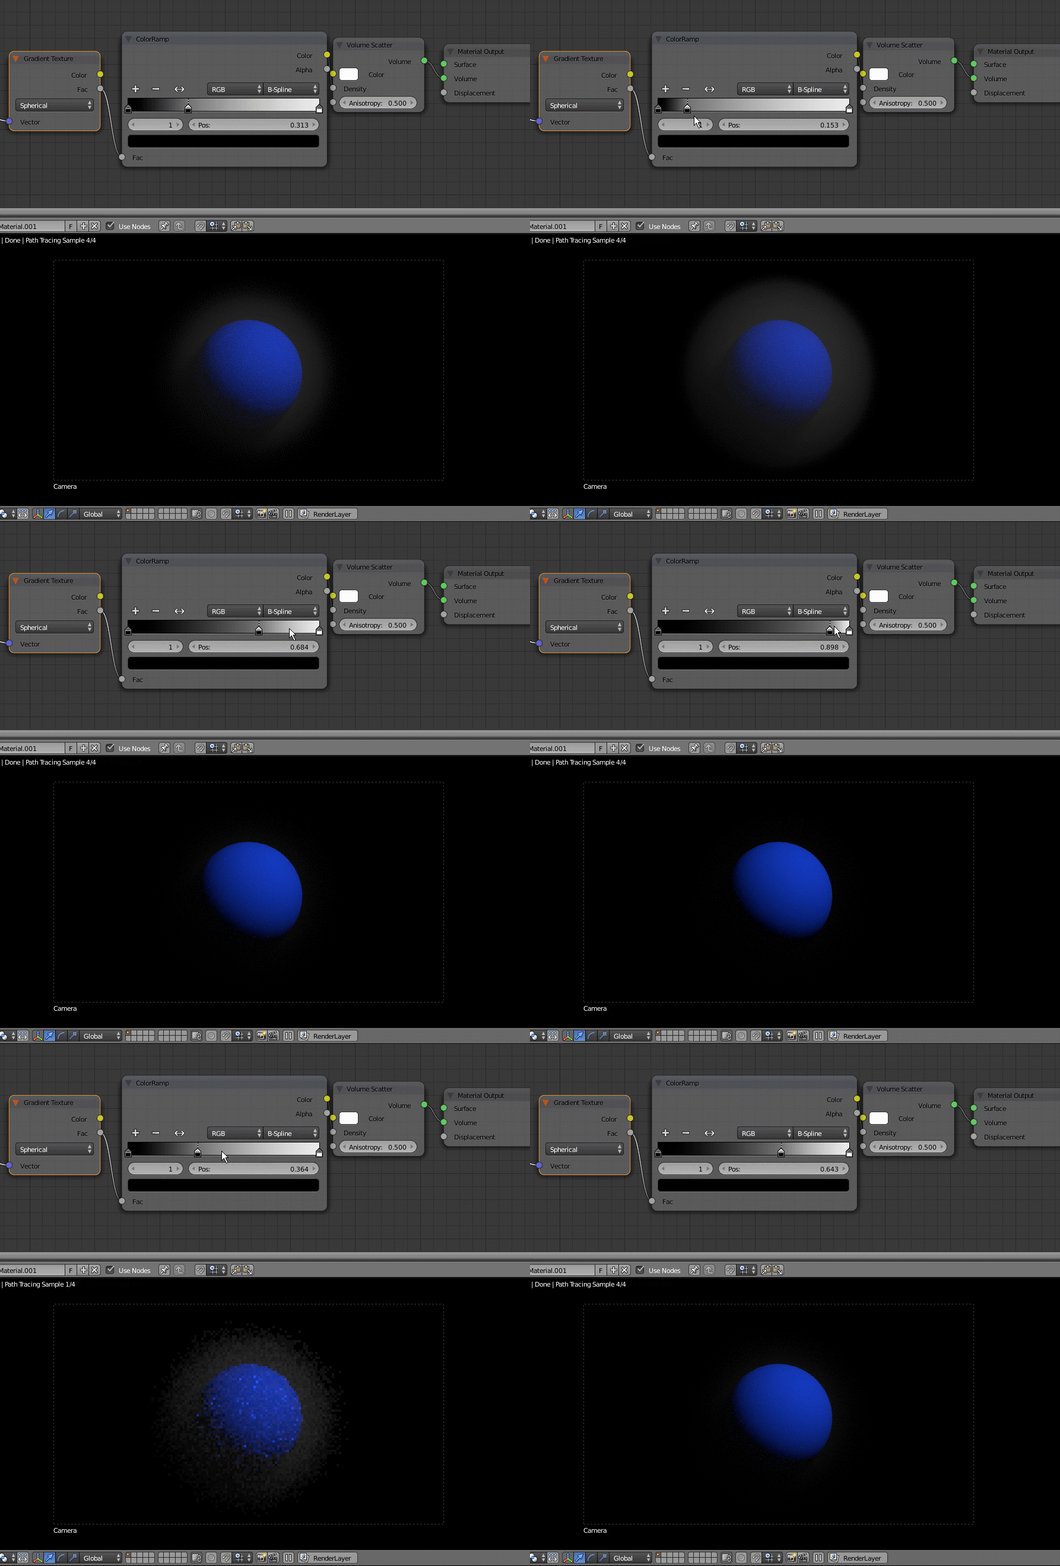
On a setup like this:

enter image description here

You should be able to control the density by adjusting the values on the color ramp.

enter image description here

$\endgroup$
0
$\begingroup$

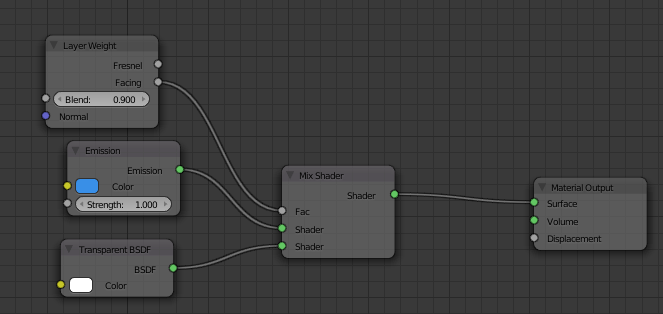
I'm a bit of a noob at volumetric effects, but what I do is by using the Layer Weight node. Here's an example - enter image description here Here's the node setup - enter image description here

You can render your sphere and then a mask so that you can overlay your sphere on top of the glow in the Compositor. Very good for animation since it is authentic in the 3d space

$\endgroup$

You must log in to answer this question.

Not the answer you're looking for? Browse other questions tagged .