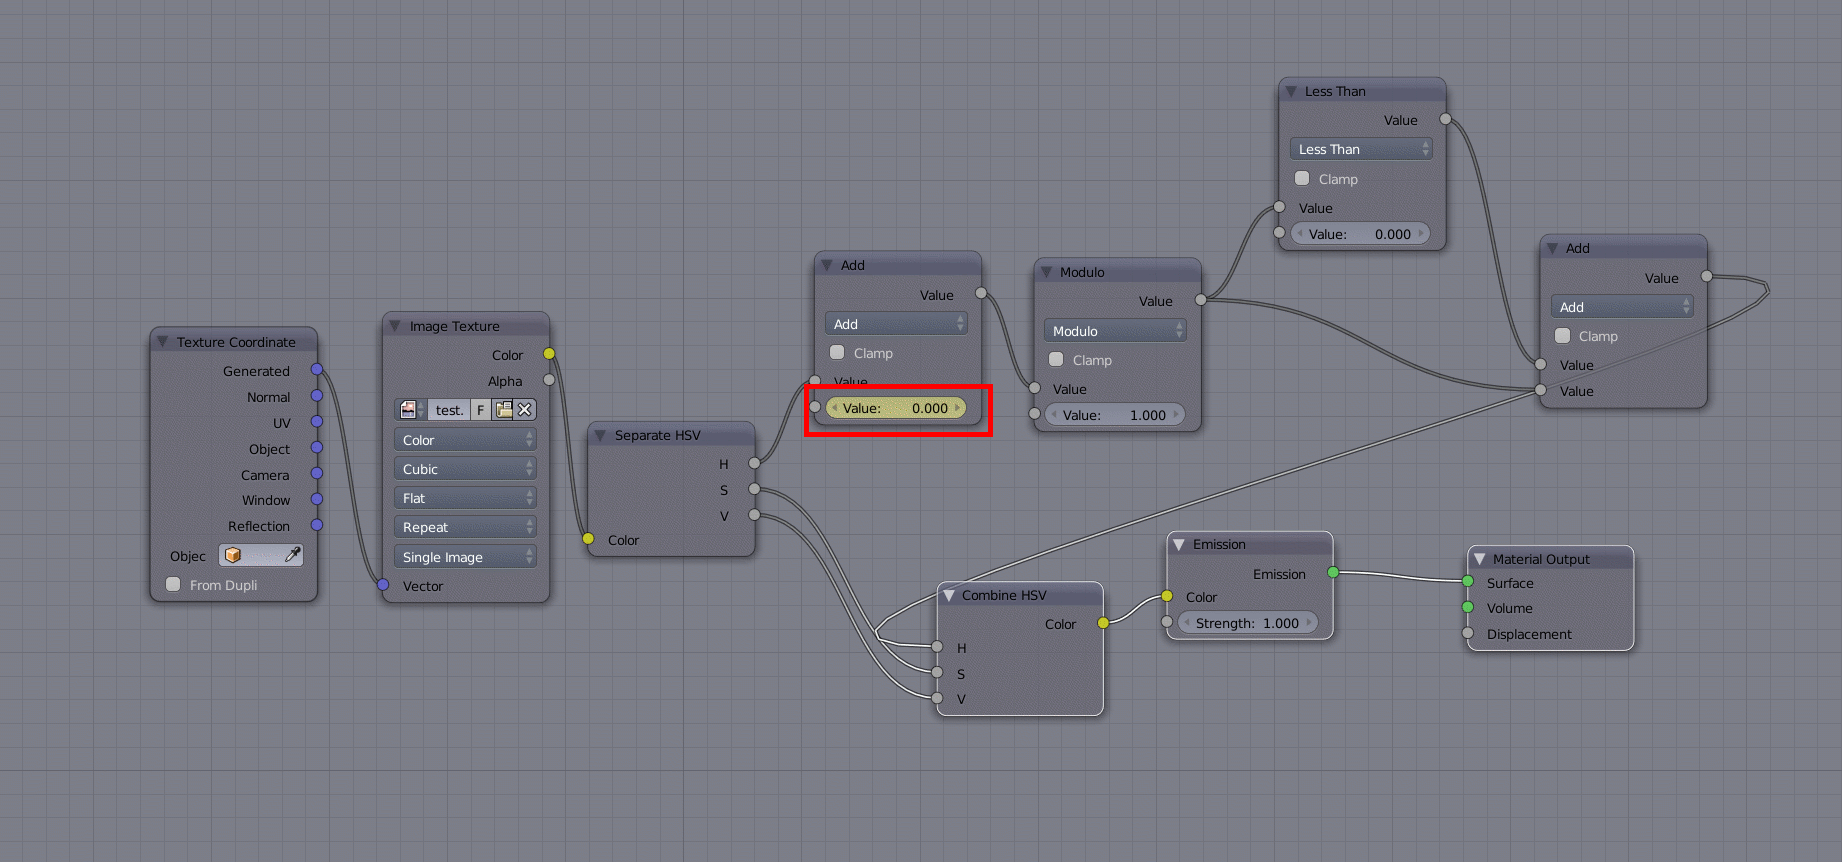
You can animate the hue. Here's a setup I used some time ago. The hue is cyclic, and often represented by 0° to 360° on a circle, but in Blender it is represented by a value between 0 and 1. Greyscale values, including black and white, will not change by this, because they are completely desaturated.
Further explanations of HSL and HSV on Wikipedia

The Separate HSV and Combine HSV nodes separates a colour into Hue, Saturation and Value and combines Hue, Saturation and Value into a colour. They are located under Converter in the Add menu.
Modulo makes sure the hue never goes above 1. It's a Math node, also located under Converter. However, it doesn't prevent values from becoming negative (specifically, it keeps the value between -1 and 1). The Less Than node (also a Math node) followed by the Add node take care of that, by adding 1 if the value gets below 0. The reason I do not simply select Clamp in the first Add node, is that that would make the cycling stop at 0 if the value became negative and at 1 if the value became greater than one.
Now, animate the value marked with a red rectangle.

Here's a .blend, but I stripped it of the texture I used for the gif above.

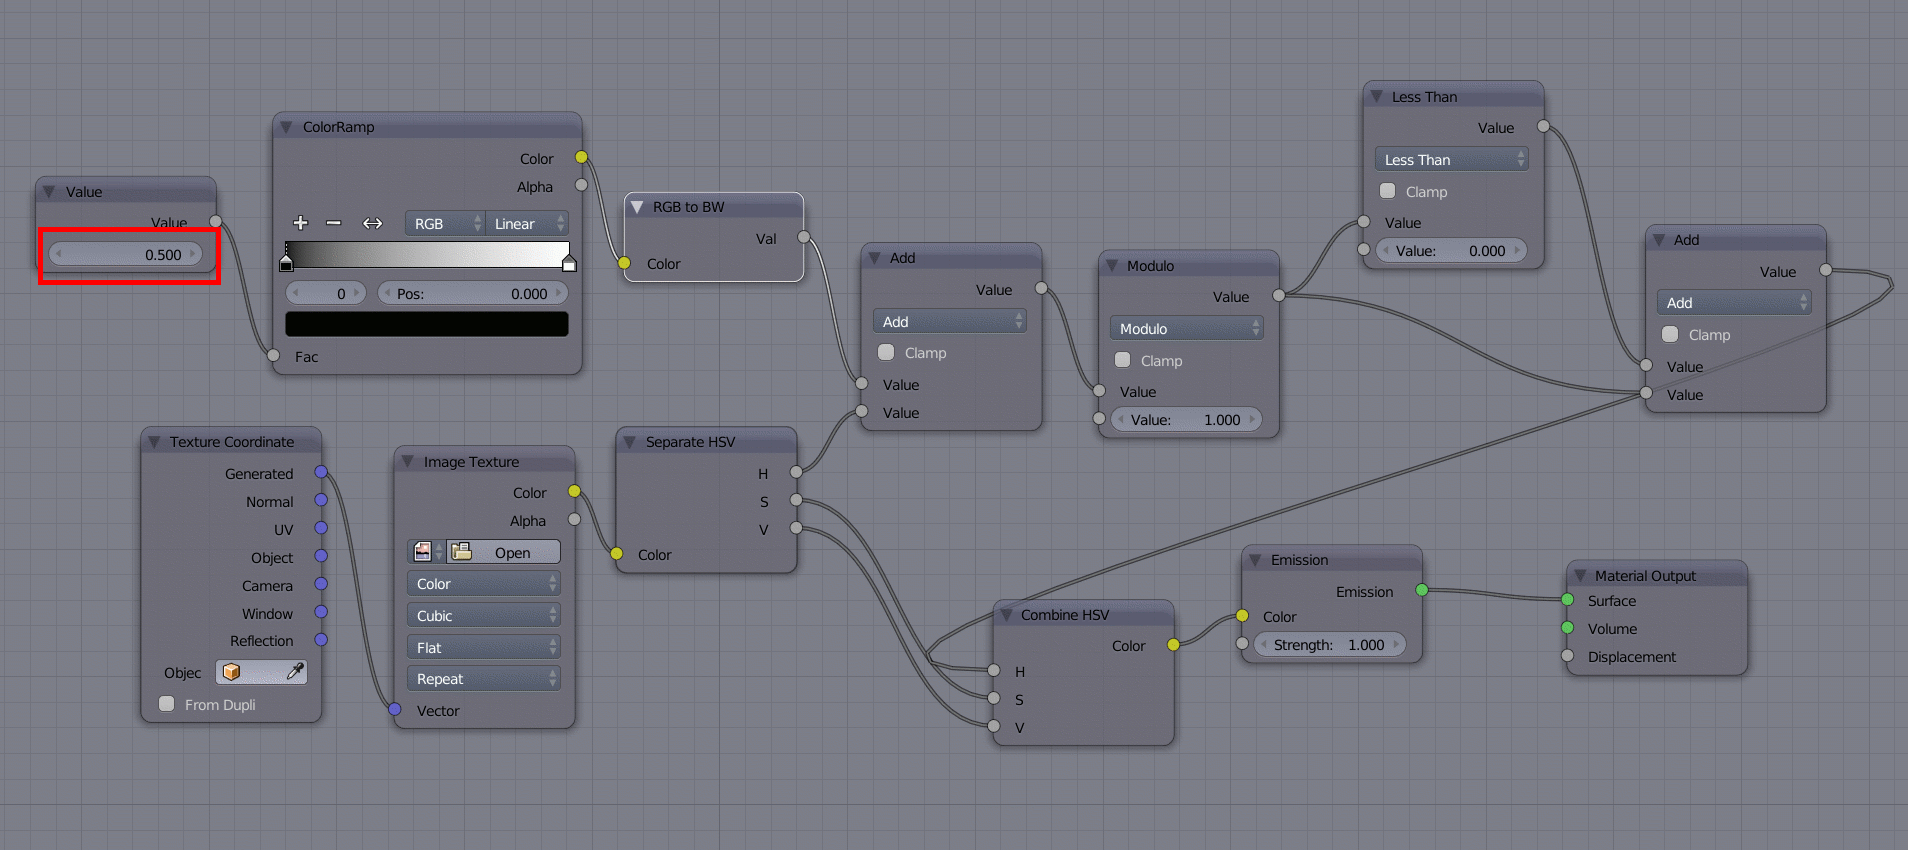
UPDATE: The above will make the cycling linear in the positive direction on the hue circle. To make it go the other way, change the first Add node to Subtract. And below is a setup to get more control, for example to make the cycling go back and forth or non-linearly.

The Value node is the one to animate in this case. It's available under Input in the Add menu. The RGB to BW node (available under Converter) isn't strictly necessary; I just added it for clarity, though plugging an RGB into a single value socket, does this conversion automatically.
The output from the ColorRamp node is what gets added to or subtracted from the hue, so by tweaking it, you can make the cycling happen virtually any way you please.
Updated .blend


